
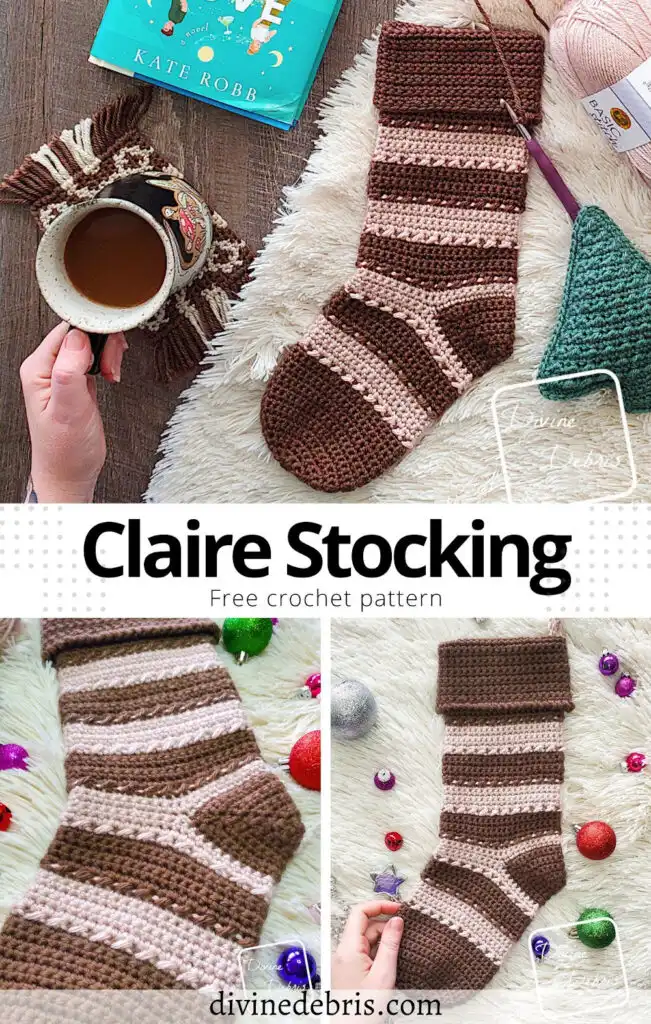
![[Image description] A 3 photo collage of the Claire Stocking crochet pattern by Divine Debris.](https://d3gel9wqxksnxm.cloudfront.net/wp-content/uploads/2023/12/Claire-Stocking.jpg)
Hi everyone! Can you believe that it’s December? In just a few short weeks we will be saying “goodbye” to 2023. It’s wild. I could have sworn it was just October and I was making spooky season designs. Then again, I’m still designing a scarf with skulls and coffee cups right now for a release in a couple of weeks so… I guess I’m still making spooky season designs. But not this week! Because this week I’ve got the Claire Stocking crochet pattern for ya.
Starting back in 2019 from with the Pretty in Gingham Stocking, I have been making an annual stocking design. You want to know something really fun? Each year I’ve made a stocking it’s been from a line that came about that year. So it’s like that each year’s stocking is a ode to the designs of that year. I just looked it up and it’s super true. That’s so cool.
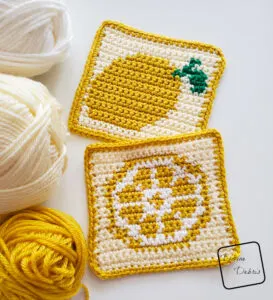
Anyway… Now onto this year’s brand new stocking – the Claire Stocking. This design is a variation of June’s Claire Basket. I just love how clean and simple, but striped(!) the basket turned out that I knew I needed to make something else in that pattern. Sadly I’ve been really busy most of this year with patterns that I wasn’t able to return to the Claire line until now. But I knew as soon as I sat down to make a stocking this texture would be perfect.
Like my previous stockings, this pattern is worked in the round from the Toe to the Cuff, except for the Heel. I suggest you pick some really fun and high-contrast colors for this design. This way the even moss stitch that separates the 2 colors can really pop. And if you’d like to make this pattern taller, feel free to add more repeats to the Ankle section. TBH I think this would look fantastic in bulk yarn as well.
So, yeah, I hope you like this week’s new release. I had a lot of fun designing this pattern and picking the colors. It’s all about keeping it simple but fun, ya know?
Have a great rest of your week and be kind, to yourself and others. Thank you so much for visiting my website here.
Please note: I was provided the yarn for this pattern by Lion Brand Yarn for the purposes of designing the Claire Stocking crochet pattern, without compensation. I wasn’t provided the yarn with the expectations of positive or negative reviews but I really like this yarn. I used it often for a variety of designs, it’s one of my favorite worsted weight yarns. This post features affiliate links, so if you purchase using one of them I may be compensated.
Copyright @ Divine Debris 2023. No part of this document may be reproduced or transmitted in any form by any means, electronic, mechanical, photocopying, or otherwise, without prior written permission from the author. Sales of finished products are permitted, but the designer requests that you link back to the pattern and credit Divine Debris with the original design under the Creative Commons Attribution-Share Alike license. If you have any questions, comments or concerns please contact info@divinedebris.com.
(this post contains affiliate links, if you make a purchase I may earn a commission)

If you appreciate my weekly patterns I hope you’d consider purchasing an ad-free pdf of this pattern in my Ravelry shop and Lovecrafts shop!
Thank you Ellen for becoming my newest patron on Patreon!
Where to purchase the Claire Stocking crochet pattern


![[Image description] A top down view of the Claire Stocking laying on a fluffy white blanket on a wood grain background, with a book in the top left and a white woman's hand holding a cup of coffee in the bottom left.](https://d3gel9wqxksnxm.cloudfront.net/wp-content/uploads/2023/12/ClaireStocking-1000x887-1.jpg)
Level
Easy
Materials
- US H (5.00 mm) crochet hook
- Size #4 worsted weight yarn
- 2 colors
- A: 2.75 oz / 145 yds| B: 1.25 oz/ 66 yds
- I used Basic Stitch Anti-Pilling by Lion Brand Yarn
- Color A is Mahogany and color B is Blush Heather
- Notions: scissors, measuring tape, yarn needle
Gauge
- 16 sc x 12 rows = 4”
Terms/ Stitches used
- St: Stitch
- Ch: Chain
- Rnd: Round
- Magic Circle
- RS: Right side
- Sc: Single crochet
- Sc2tog: Sc 2 sts together
- Hdc: Half double crochet
- Join: Join the round with a slip st
- Fsc: Forward crab stitch (explained below)
Notes
- Forward crab stitch (Fcs): Insert your hook into the stitch, pull up a loop, turn your hook counterclockwise once so you twist the stitch, yarn over, pull through the 2 loops on your hook. Also called a Twisted Single Crochet. This stitch is like a crab stitch, only you work it forward.
- This pattern is mostly worked in the round (Rnd) with a slip st into the first st of the rnd.
- The ch 1 at the beginning of the row does not count as a stitch.
- This stocking is worked from the Toe up in sections (but still one piece): first the Toe, the Arch, the Heel (which is not worked in the rnd), the Ankle, and the Cuff.
- The colors in the photos: color A is brown (Basic Stitch in Mahogany) and color B is off white (Basic Stitch in Blush Heather).
Approx Finished Product Details for the Claire Stocking crochet pattern
| Height: 14.5” (Toe to folded over Cuff) | Width: 5” (at widest) |
Claire Stocking Crochet Pattern
![[image description] a top down view of the Claire Stocking laying on a white fuzzy blanket, surrounded by Christmas ornaments, with a white woman's hands holding the stocking by the heel and toe.](https://d3gel9wqxksnxm.cloudfront.net/wp-content/uploads/2023/12/ClaireStocking-838x1000-1.jpg)
![[image description] a top down view of the Claire Stocking laying on a white fuzzy blanket, surrounded by Christmas ornaments, with a white woman's hands holding the stocking by the heel and toe.](https://d3gel9wqxksnxm.cloudfront.net/wp-content/uploads/2023/12/ClaireStocking-838x1000-1.jpg.webp)
Toe
(RS) Rnd 1: A: Create a magic circle, ch 1, sc 6 times into the circle, join — 6 sc
Rnd 2: Ch 1, turn, sc twice into the same st as join, *sc twice into the next st,* repeat from * to * 4 more times, join — 12 sc
Rnd 3: Ch 1, turn, sc twice into the first st, sc into the next st, *sc twice into the next st, sc into the next st,* repeat from * to * 4 more times, join — 18 sc
Rnd 4: Ch 1, turn, sc twice into the first st, sc into the next 2 sts, *sc twice into the next st, sc into the next 2 sts,* repeat from * to * 4 more times, join — 24 sc
Rnd 5: Ch 1, turn, sc twice into the first st, sc into the next 3 sts, *sc twice into the next st, sc into the next 3 sts,* repeat from * to * 4 more times, join — 30 sc
Rnd 6: Ch 1, turn, sc twice into the first st, sc into the next 4 sts, *sc twice into the next st, sc into the next 4 sts,* repeat from * to * 4 more times, join — 36 sc
Rnd 7: Ch 1, turn, sc twice into the first st, sc into the next 5 sts, *sc twice into the next st, sc into the next 5 sts,* repeat from * to * 4 more times, join — 42 sc
Rnds 8 – 17: Ch 1, turn, sc around, join — 42 sc
Do not fasten off color A, switch to color B.
Arch
Rnd 18: B: Ch 1, turn, slip st into the first st, hdc into the next st, *slip st into the next st, hdc into the next st,* repeat from * to * around, join — 21 slip s, 21 hdc
Rnds 19 – 23: Ch 1, turn, sc around, join — 42 sc
Drop color B, switch to color A.
Rnd 24: A: Ch 1, turn, slip st into the first st, hdc into the next st, *slip st into the next st, hdc into the next st,* repeat from * to * around, join — 21 slip s, 21 hdc
Rnds 25 – 29: Ch 1, turn, sc around, join — 42 sc
Drop color A, switch to color B.
Rnd 30: B: Ch 1, turn, slip st into the first st, hdc into the next st, *slip st into the next st, hdc into the next st,* repeat from * to * around, join — 21 slip s, 21 hdc
Rnds 31 – 32: Ch 1, turn, sc around, join — 42 sc
Drop color B, switch to color A for the Heel.
Heel
Note
- The Heel has its own row count.
- This section is worked in one piece and folded in half, with the row ends being secured to create the Heel.
Row 1: A: Ch 1, sc into the next 20 sts – 20 sc
Row 2: Ch 1, turn, sc2tog the first 2 sts, sc into the next 16 sts, sc2tog the last 2 sts – 18 sc
Row 3: Ch 1, turn, sc2tog the first 2 sts, sc into the next 14 sts, sc2tog the last 2 sts – 16 sc
Row 4: Ch 1, turn, sc2tog the first 2 sts, sc into the next 12 sts, sc2tog the last 2 sts – 14 sc
Row 5: Ch 1, turn, sc2tog the first 2 sts, sc into the next 10 sts, sc2tog the last 2 sts – 12 sc
Row 6: Ch 1, turn, sc2tog the first 2 sts, sc into the next 8 sts, sc2tog the last 2 sts – 10 sc
Row 7: Ch 1, turn, sc2tog the first 2 sts, sc into the next 6 sts, sc2tog the last 2 sts – 8 sc
Row 8: Ch 1, turn, sc2tog the first 2 sts, sc into the next 4 sts, sc2tog the last 2 sts – 6 sc
Row 9: Ch 1, turn, sc2tog the first 2 sts, sc into the next 2 sts, sc2tog the last 2 sts – 4 sc
Row 10: Ch 1, turn, sc2tog the first 2 sts, sc2tog the last 2 sts – 2 sc
Row 11: Ch 1, turn, sc twice into the first st, sc twice into the last st – 4 sc
Row 12: Ch 1, turn, sc twice into the first st, sc into the next 2 sts, sc twice into the last st – 6 sc
Row 13: Ch 1, turn, sc twice into the first st, sc into the next 4 sts, sc twice into the last st – 8 sc
Row 14: Ch 1, turn, sc twice into the first st, sc into the next 6 sts, sc twice into the last st – 10 sc
Row 15: Ch 1, turn, sc twice into the first st, sc into the next 8 sts, sc twice into the last st – 12 sc
Row 16: Ch 1, turn, sc twice into the first st, sc into the next 10 sts, sc twice into the last st – 14 sc
Row 17: Ch 1, turn, sc twice into the first st, sc into the next 12 sts, sc twice into the last st – 16 sc
Row 18: Ch 1, turn, sc twice into the first st, sc into the next 14 sts, sc twice into the last st – 18 sc
Row 19: Ch 1, turn, sc twice into the first st, sc into the next 16 sts, sc twice into the last st – 20 sc
Fasten off.
![[Image description]](https://d3gel9wqxksnxm.cloudfront.net/wp-content/uploads/2023/12/ClaireStocking-1000x956-1.jpg)
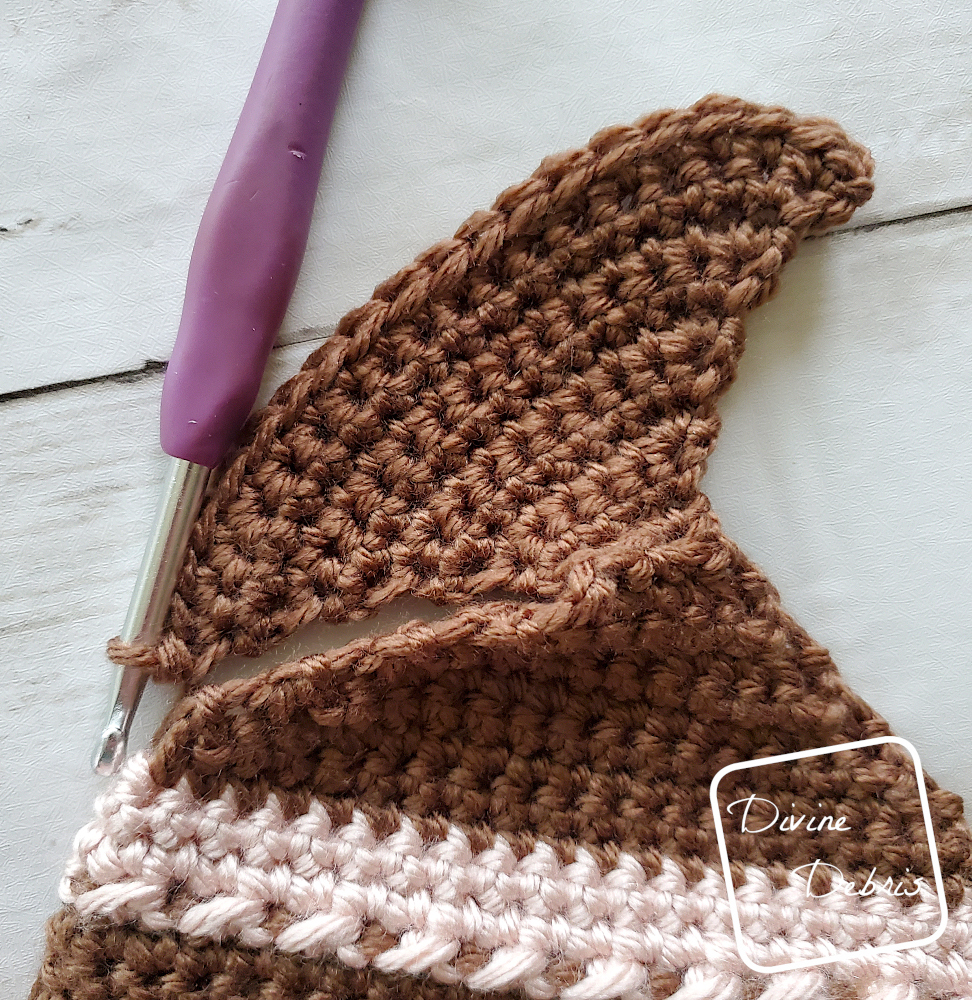
Heel Seaming
Fold your Heel in half along Row 10, lining up Rows 1 – 9 with Rows 11 – 19 (9 rows) and seam the row ends together in your preferred method of seaming. Repeat on the other side of the Heel.
Fasten off, weave in your ends.
Ankle
Pick up color B where you dropped it on the Arch. For Rnd 33 you will be working into the 20 sts of the Heel and Rnd 32 of the Arch (in that order).
Rnd 33: B: Ch 1, turn, sc around, join — 42 sc
Rnd 34 – 35: Ch 1, turn, sc around, join — 42 sc
Drop color B, switch to color A.
Rnd 36: A: Ch 1, turn, slip st into the first st, hdc into the next st, *slip st into the next st, hdc into the next st,* repeat from * to * around, join — 21 slip s, 21 hdc
Rnds 37 – 41: Ch 1, turn, sc around, join — 42 sc
Drop color A, switch to color B.
Rnd 42: B: Ch 1, turn, slip st into the first st, hdc into the next st, *slip st into the next st, hdc into the next st,* repeat from * to * around, join — 21 slip s, 21 hdc
Rnds 43 – 47: Ch 1, turn, sc around, join — 42 sc
Drop color B, switch to color A.
Rnd 48: A: Ch 1, turn, slip st into the first st, hdc into the next st, *slip st into the next st, hdc into the next st,* repeat from * to * around, join — 21 slip s, 21 hdc
Rnds 49 – 53: Ch 1, turn, sc around, join — 42 sc
Drop color A, switch to color B.
Rnd 54: B: Ch 1, turn, slip st into the first st, hdc into the next st, *slip st into the next st, hdc into the next st,* repeat from * to * around, join — 21 slip s, 21 hdc
Rnds 55 – 59: Ch 1, turn, sc around, join — 42 sc
Fasten off color B, switch to color A. Move onto the Cuff.
![[Image description] top down view of an unfinished Claire Stocking on a white fuzzy blanket, with 2 skeins of yarn along the top of the photo and a white woman's hand holding the toe.](https://d3gel9wqxksnxm.cloudfront.net/wp-content/uploads/2023/12/ClaireStocking-722x1000-1.jpg)
Cuff
Rnds 60 – 88: A: Ch 1, turn, sc around, join — 42 sc
Rnd 89: Ch, turn, fcs around, join – 42 fcs
Fasten off, weave in your ends.
Loop
Row 1: With color A ch 21, sc into the second ch from the hook and into the next 19 sts.
Row 2: Ch 1, turn, sc across – 20 sc
Fasten off, leaving good sized tails on either end. With the right side facing you, fold the Cuff portion so it’s doubled over. Secure the Loop on the inside of the Cuff so it can be hung. You can also do a foundation single crochet or add rows to strengthen the loop.
![[image description] a top down view of the Claire Stocking laying on a white fuzzy blanket, surrounded by Christmas ornaments.](https://d3gel9wqxksnxm.cloudfront.net/wp-content/uploads/2023/12/ClaireStocking-750x1000-1.jpg)
You can pick up the Claire Stocking Crochet Pattern in my Ravelry shop.


Jolene
Tuesday 21st of October 2025
What is the diameter of the toe?
Divine Debris
Sunday 26th of October 2025
The diameter of the toe is the same as the diameter of the rest of the stocking - 5"
Jolene
Friday 17th of October 2025
I’ve read this pattern and don’t see where the crab stitch is included
Jolene
Sunday 19th of October 2025
@Divine Debris, on the picture it looks like the crab stitch is throughout the stocking at the color change.
Divine Debris
Saturday 18th of October 2025
The forward crab stitch or fcs is used on the final round of the Cuff.