
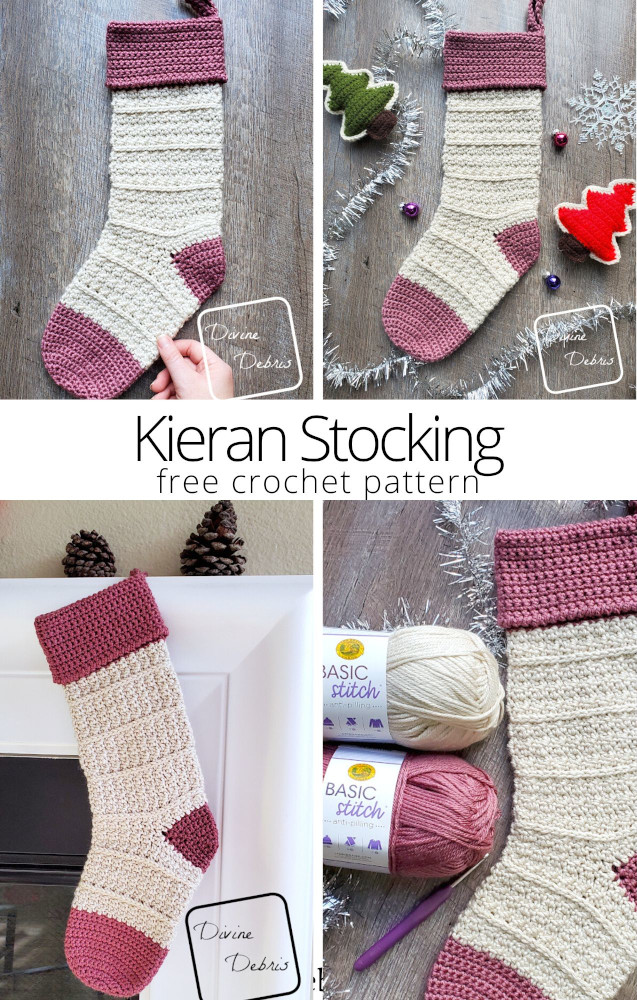
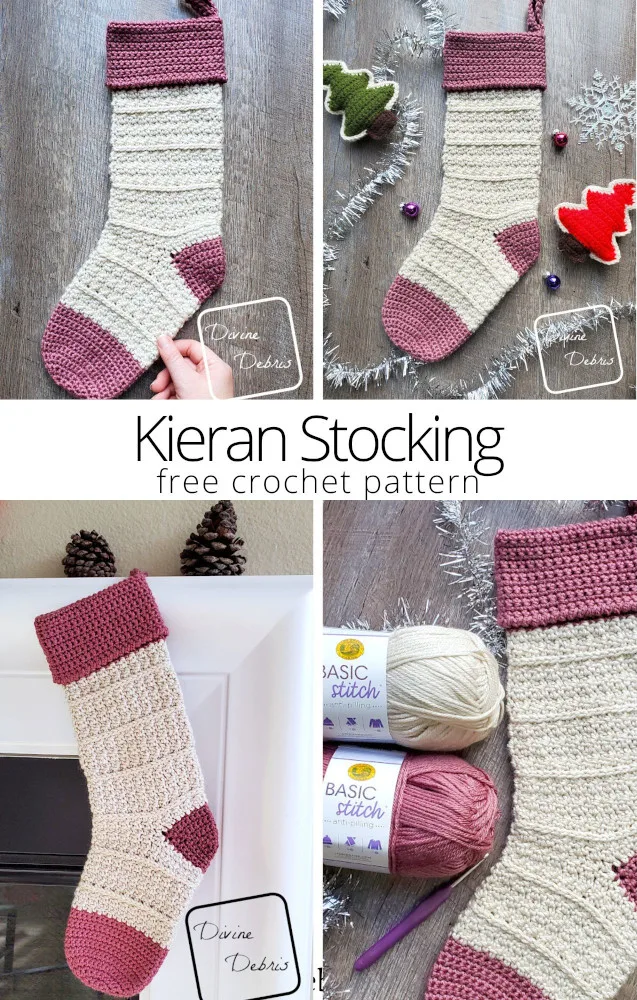
![[Image description] Top down flat lay of the Kieran Stocking laying on a wood grain background, surrounded with tinsel and crochet Christmas trees.](https://d3gel9wqxksnxm.cloudfront.net/wp-content/uploads/2022/11/Kieran-Stocking-738x1000-1.jpg)
Hi everyone! How’s your pie season going? When it’s about this time of year, all I want to do is bake and eat pie… it’s my favorite dessert. There’s just something about when the temps start to get low that flaky crust and hot fruit just sound good. It’s basically a tradition with me. Speaking of traditions… I also have another I’m celebrating this year, the annual Christmas Stocking. And this years? It’s a cutie, so say hello to the Kieran Stocking crochet pattern.
Like pumpkins, I have been adding Christmas stockings to my list of annual tradition makes. Last year was the Alix Stocking from my Alix line, the year before was the Kelsey Stocking from the Kelsey line. I’m sure you get what I’m talking about. And I wasn’t about to break the tradition only 4 years in, so I set about making a new stocking. And to be honest with you, it was a no brainer on what was going to be the new design, I’ve been really feeling the Kieran line this year and with the response the Kieran Basket I knew that was going to be the inspiration for this year’s stocking.
The reason I choose the Kieran line for this is because of the way the dc/sc combo really undulates through the pattern and the back third loop hdc just really breaks up the sections with a pop. The hardest choice I had to make with this pattern was if I wanted to do the toe, the heel, and the cuff in a contrasting color. For a little while there I was thinking of doing the whole pattern in the Beige Heather color of Basic Stitch. It’s such a soft but not boring neutral, the stocking would have looked gorgeous in just all that. But you know me, I love to add color and contrast whenever possible. Honestly, you’re lucky I didn’t add fringe to this somewhere. Wait, that gives me an idea for next year’s design.
Any way I’ve chatted your ear off about this design long enough. I really hope you like it and try it out. It’s a really easy mostly in the round design, worked from the toe up. I bet it’ll look great in one or a variety of colors. Ooh, a variegated yarn would be so fun! I really hope you also tag me in your photos on social media if you take any. I love to see them.
And don’t forget to be kind to yourself and others, wash and wear your masks, and stop to look at plants as often as possible. Have a happy final weeks of November.
Please note: I was provided the yarn for this pattern by Lion Brand Yarn for the purposes of designing the Kieran Stocking crochet pattern, without compensation. I wasn’t provided the yarn with the expectations of positive or negative reviews but I really like this yarn. I used it often for a variety of designs, it’s one of my favorite worsted weight yarns.
Copyright @ Divine Debris 2022. No part of this document may be reproduced or transmitted in any form by any means, electronic, mechanical, photocopying, or otherwise, without prior written permission from the author. Sales of finished products are permitted, but the designer requests that you link back to the pattern and credit Divine Debris with the original design under the Creative Commons Attribution-Share Alike license. If you have any questions, comments or concerns please contact info@divinedebris.com.
(this post contains affiliate links, if you make a purchase I may earn a commission)
If you appreciate my weekly patterns I hope you’d consider purchasing an ad-free pdf of this pattern in my Ravelry shop and Lovecrafts shop!
Thank you Ellen for becoming my newest patron on Patreon!
Where to purchase the Kieran Stocking crochet pattern


![[Image description] The Kieran Stocking hangs on a white fireplace mantel.](https://d3gel9wqxksnxm.cloudfront.net/wp-content/uploads/2022/11/Kieran-Stocking-587x1000-1.jpg)
Level
Easy
Materials
- US H (5.00 mm) crochet hook
- Size #4 worsted weight yarn
- 2 colors
- A: 2.1 oz / 111 yds| B: 2.75 oz/ 145 yds
- I used Basic Stitch Anti-Pilling by Lion Brand Yarn
- Color A is Decor Rose and color B is Beige Heather
- Notions: scissors, measuring tape, yarn needle
Gauge
- 16 sc/dc x 12 rows = 4”
Terms/ Stitches used
- St: Stitch
- Ch: Chain
- Rnd: Round
- Magic Circle
- RS: Right side
- Sc: Single crochet
- Sc2tog: Sc 2 sts together
- Hdc: Half double crochet
- Join: Join the round with a slip st
- BTLO: Back third loop only (explained below)
- Fsc: Forward crab stitch (explained below)
Notes
- For gauge: Chain an even amount of chs that will give you an over 4” swatch (your row st count needs to be odd), sc into the 2nd ch from the hook, *dc into the next st, sc into the next st,* repeat from * to * across. Row 2: Ch 1, turn, sc into the first sc, *dc into the next dc, sc into the next sc,* repeat from * to * across. Repeat row 2 as many times as you need to get more than 4” swatch then measure a blocked section.
- Back third loop only (BTLO): When looking at the stitch you will have the 2 loops on top of the hdc (the V on top), lean the stitch towards you and will see the third loop that runs along the back of the stitch. This is the loop you will work into. This stitch is also known as the Camel Stitch. Please note that when you work this stitch you will be looking at the back of the previous row’s hdc, so the third loop will be facing you.
- Forward crab stitch (Fcs): Insert your hook into the stitch, pull up a loop, turn your hook counterclockwise once so you twist the stitch, yarn over, pull through the 2 loops on your hook. Also called a Twisted Single Crochet. This stitch is like a crab stitch, only you work it forward.
- This pattern is mostly worked in the round (Rnd) with a slip st into the first st of the rnd.
- The ch 1 at the beginning of the row does not count as a stitch.
- This stocking is worked from the Toe up in sections (but still one piece): first the Toe, the Arch, the Heel (which is not worked in the rnd), the Ankle, and the Cuff.
- The colors in the photos: color A is dark pink (Basic Stitch in Decor Rose) and color B is off white (Basic Stitch in Beige Heather).
Approx Finished Product Details for the Kieran Stocking crochet pattern
| Height: 18” – 18.25” (Toe to folded over Cuff) | Width: 5.5” (at widest) |
Kieran Stocking Crochet Pattern
![[Image description] Top down flat lay of the Kieran Stocking laying on a wood grain background, with a white woman's hand holding the bottom right side of the arch.](https://d3gel9wqxksnxm.cloudfront.net/wp-content/uploads/2022/11/Kieran-Stocking-685x1000-1.jpg)
Toe
(RS) Rnd 1: A: Create a magic circle, ch 1, sc 6 times into the circle, join — 6 sc
Rnd 2: Ch 1, turn, sc twice into the same st as join, *sc twice into the next st,* repeat from * to * 4 more times, join — 12 sc
Rnd 3: Ch 1, turn, sc twice into the first st, sc into the next st, *sc twice into the next st, sc into the next st,* repeat from * to * 4 more times, join — 18 sc
Rnd 4: Ch 1, turn, sc twice into the first st, sc into the next 2 sts, *sc twice into the next st, sc into the next 2 sts,* repeat from * to * 4 more times, join — 24 sc
Rnd 5: Ch 1, turn, sc twice into the first st, sc into the next 3 sts, *sc twice into the next st, sc into the next 3 sts,* repeat from * to * 4 more times, join — 30 sc
Rnd 6: Ch 1, turn, sc twice into the first st, sc into the next 4 sts, *sc twice into the next st, sc into the next 4 sts,* repeat from * to * 4 more times, join — 36 sc
Rnd 7: Ch 1, turn, sc twice into the first st, sc into the next 5 sts, *sc twice into the next st, sc into the next 5 sts,* repeat from * to * 4 more times, join — 42 sc
Rnds 8 – 17: Ch 1, turn, sc around, join — 42 sc
Do not fasten off color A, switch to color B.
Arch
Rnd 18: B: Ch 1, turn, sc into the first st, dc into the next st, *sc into the next st, dc into the next st,* repeat from * to * the rest of the way around, join — 21 sc, 21 dc
Rnd 19: Ch 3 (counts as a dc here and throughout), turn, sc into the next sc, *dc into the next dc, sc into the next sc,* repeat from * to * the rest of the way around, join — 21 sc, 21 dc
Rnd 20: Ch 1, turn, sc into the first sc, dc into the next dc, *sc into the next sc, dc into the next dc,* repeat from * to * the rest of the way around, join — 21 sc, 21 dc
Rnd 21: Ch 1, turn, hdc around, join – 42 hdc
Rnd 22: Ch 1, turn, sc BTLO into the first st, dc BTLO into the next st, *sc BTLO into the next st, dc BTLO into the next st,* repeat from * to * the rest of the way around, join — 21 sc, 21 dc
Rnds 23 – 26: Repeat Rnds 19 – 20, twice more.
Rnds 27 – 28: Repeat Rnds 21 – 22, once more.
Rnds 29 – 30: Repeat Rnds 19 – 20, once more.
Drop color B, switch to color A for the Heel.
Heel
Note
- The Heel has its own row count.
- This section is worked in one piece and folded in half, with the row ends being secured to create the Heel.
Row 1: A: Ch 1, sc into the next 20 sts – 20 sc
Row 2: Ch 1, turn, sc2tog the first 2 sts, sc into the next 16 sts, sc2tog the last 2 sts – 18 sc
Row 3: Ch 1, turn, sc2tog the first 2 sts, sc into the next 14 sts, sc2tog the last 2 sts – 16 sc
Row 4: Ch 1, turn, sc2tog the first 2 sts, sc into the next 12 sts, sc2tog the last 2 sts – 14 sc
Row 5: Ch 1, turn, sc2tog the first 2 sts, sc into the next 10 sts, sc2tog the last 2 sts – 12 sc
Row 6: Ch 1, turn, sc2tog the first 2 sts, sc into the next 8 sts, sc2tog the last 2 sts – 10 sc
Row 7: Ch 1, turn, sc2tog the first 2 sts, sc into the next 6 sts, sc2tog the last 2 sts – 8 sc
Row 8: Ch 1, turn, sc2tog the first 2 sts, sc into the next 4 sts, sc2tog the last 2 sts – 6 sc
Row 9: Ch 1, turn, sc2tog the first 2 sts, sc into the next 2 sts, sc2tog the last 2 sts – 4 sc
Row 10: Ch 1, turn, sc2tog the first 2 sts, sc2tog the last 2 sts – 2 sc
Row 11: Ch 1, turn, sc twice into the first st, sc twice into the last st – 4 sc
Row 12: Ch 1, turn, sc twice into the first st, sc into the next 2 sts, sc twice into the last st – 6 sc
Row 13: Ch 1, turn, sc twice into the first st, sc into the next 4 sts, sc twice into the last st – 8 sc
Row 14: Ch 1, turn, sc twice into the first st, sc into the next 6 sts, sc twice into the last st – 10 sc
Row 15: Ch 1, turn, sc twice into the first st, sc into the next 8 sts, sc twice into the last st – 12 sc
Row 16: Ch 1, turn, sc twice into the first st, sc into the next 10 sts, sc twice into the last st – 14 sc
Row 17: Ch 1, turn, sc twice into the first st, sc into the next 12 sts, sc twice into the last st – 16 sc
Row 18: Ch 1, turn, sc twice into the first st, sc into the next 14 sts, sc twice into the last st – 18 sc
Row 19: Ch 1, turn, sc twice into the first st, sc into the next 16 sts, sc twice into the last st – 20 sc
Fasten off.
![[Image description] Photo 1 of 2 showing how to seam the Heel portion of the Kieran Stocking crochet pattern by Divine Debris. This photos shows the hourglass shape.](https://d3gel9wqxksnxm.cloudfront.net/wp-content/uploads/2022/11/Kieran-Stocking-1000x972-1.jpg)
![[Image description] Photo 1 of 2 showing how to seam the Heel portion of the Kieran Stocking crochet pattern by Divine Debris.](https://d3gel9wqxksnxm.cloudfront.net/wp-content/uploads/2022/11/Kieran-Stocking-956x1000-1.jpg)
Heel Seaming
Fold your Heel in half along Row 10, lining up Rows 1 – 9 with Rows 11 – 19 (9 rows) and seam the row ends together in your preferred method of seaming. Repeat on the other side of the Heel.
Fasten off, weave in your ends.
Ankle
Pick up color B where you dropped it on the Arch. For Rnd 31 you will be working into the 20 sts of the Heel and Rnd 30 of the Arch (in that order).
Rnd 31: B: Ch 3, turn, sc into the next st, *dc into the next st, sc into the next st,* repeat from * to * the rest of the way around, join — 21 sc, 21 dc
Rnd 32: Ch 1, turn, sc into the first sc, dc into the next dc, *sc into the next sc, dc into the next dc,* repeat from * to * the rest of the way around, join — 21 sc, 21 dc
Rnd 33: Ch 1, turn, hdc around, join – 42 hdc
Rnd 34: Ch 1, turn, sc BTLO into the first st, dc BTLO into the next st, *sc BTLO into the next st, dc BLO into the next st,* repeat from * to * the rest of the way around, join — 21 sc, 21 dc
Rnd 35: Ch 3, turn, sc into the next sc, *dc into the next dc, sc into the next sc,* repeat from * to * the rest of the way around, join — 21 sc, 21 dc
Rnd 36: Ch 1, turn, sc into the first sc, dc into the next dc, *sc into the next sc, dc into the next dc,* repeat from * to * the rest of the way around, join — 21 sc, 21 dc
Rnds 37 – 38: Repeat Rnds 35 – 36, once more.
Rnd 39 – 50: Repeat Rnds 33 – 38, twice more.
Rnds 51 – 54: Repeat Rnds 33 – 36, once more.
Fasten off color B, switch to color A. Move onto the Cuff.
![[Image description] Top down flat lay of an unfinished Kieran Stocking laying on a wood grain background.](https://d3gel9wqxksnxm.cloudfront.net/wp-content/uploads/2022/11/Kieran-Stocking-803x1000-1.jpg)
Cuff
Rnds 55 – 83: A: Ch 1, turn, sc around, join — 42 sc
Rnd 84: Ch, turn, fcs around, join – 42 fcs
Fasten off, weave in your ends.
Loop
Row 1: With color A ch 21, sc into the second ch from the hook and into the next 19 sts.
Row 2: Ch 1, turn, sc across – 20 sc
Fasten off, leaving good sized tails on either end. With the right side facing you, fold the Cuff portion so it’s doubled over. Secure the Loop on the inside of the Cuff so it can be hung. You can also do a foundation single crochet or add rows to strengthen the loop.
![[Image description] Top down flat lay of the Kieran Stocking laying on a wood grain background, 2 skeins of yarn sit on the left, and Christmas decorations surround it.](https://d3gel9wqxksnxm.cloudfront.net/wp-content/uploads/2022/11/Kieran-Stocking-779x1000-1.jpg)
![[Image description] Top down flat lay of the Kieran Stocking laying on a wood grain background, 2 skeins of yarn sit on the left, and Christmas decorations surround it.](https://d3gel9wqxksnxm.cloudfront.net/wp-content/uploads/2022/11/Kieran-Stocking-779x1000-1.jpg.webp)
You can pick up the Kieran Stocking Crochet Pattern in my Ravelry shop.
Lisa
Monday 8th of December 2025
I’m having trouble with the btlo. If you work the 3rd lop from the front it is being pushed towards the inside of the stocking. Can you please clarify. I’m obviously doing it wrong but can’t figure it out. Thanks
Divine Debris
Monday 8th of December 2025
Hi there, When you're working the BTLO the you're working it so that the third loop is facing you (because it's on the back of the previous rnd's hdc), not "working it from the front." For example, Rnd 21 is the RS and when you work into the BTLO of that round for Rnd 22, you are looking at the back of the hdcs of Rnd 21. You shouldn't be pushing anything towards the inside of the stocking. I hope that helps.
Kim
Sunday 20th of April 2025
Thank you for the pattern. Some of the stockings I find are all the same but I really like the pattern. Thank you again.
Mariah
Thursday 17th of October 2024
I’m just confused about row 22. So we single crochet and double crochet into the back THIRD loops of the first 2 stitches. But then for the rest of the pattern, we work the double crochets in the back loop (not the third back loop). And is it the second loop relative to the current row, or the previous row, since we are turning?
Divine Debris
Thursday 17th of October 2024
You work into the BTLO of the whole rnd, it was just a typo. It's fixed now. I hope that helps
Moriah
Monday 23rd of September 2024
Is there a video? I have trouble with reading patterns but do well visually. If not would you be willing to make one? :)
Divine Debris
Tuesday 24th of September 2024
Hi there! I don't make videos for patterns, this is only available in written form.
Take care, Amber
Lisa
Tuesday 31st of October 2023
Love this pattern! Well written and easy to follow! I have used "turning" on each row on several other patterns in my 49 years of crocheting and love it! Thanks for a great pattern!