
I had so much fun working with bulky yarn in my last post, I went out and bought me some more from Michael’s. Of course, I just wanted some fun yarn and didn’t really have an end game or a pattern in mind for it. Who let’s that stop them from buying yarn though? :p
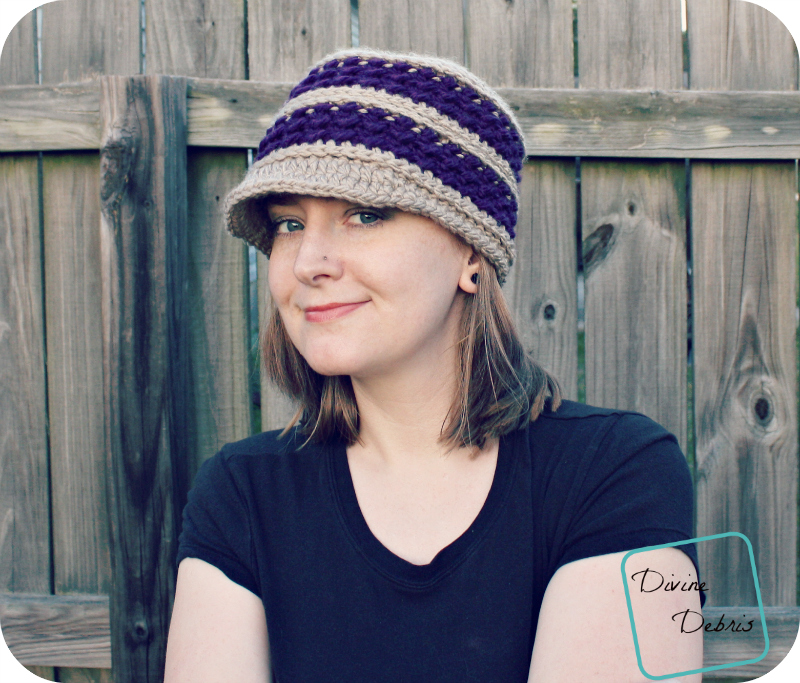
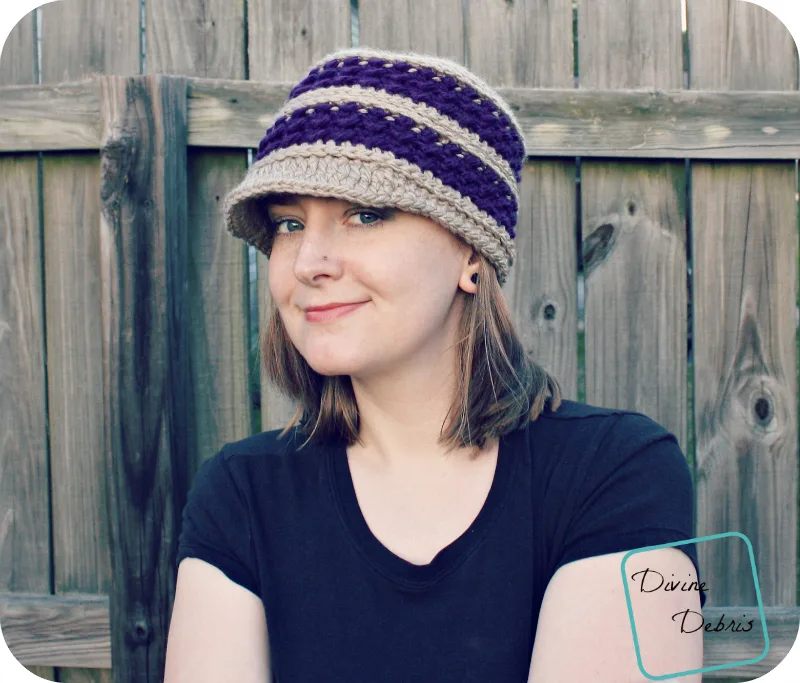
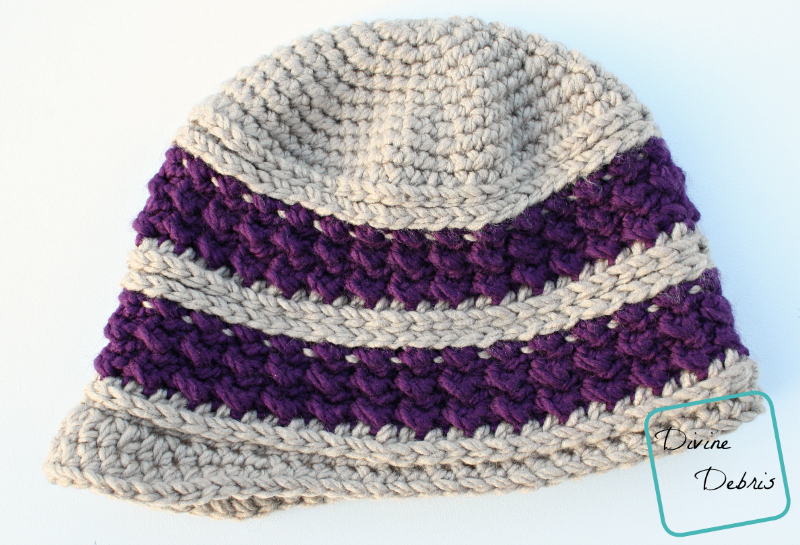
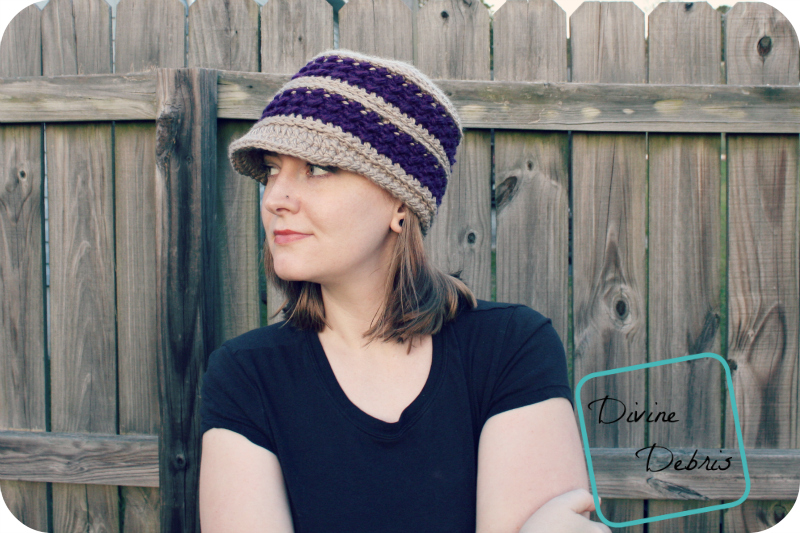
So, with a couple of lovely colors I decided to do a pattern that I’ve been wanting to for a while, a newsboy hat. Better yet, the lovely Diana Line was going to show off how great bulky yarn can be. I don’t even know why I was so intimidated by it for so long. Perhaps I’ll buy some super bulky yarn next and let inspiration show up.
Please be sure to sign up for e-mails below

Thank you to all my Patreon supporters.

Materials:
- US K (6.50 mm) Crochet Hook
- 3.5 – 3.8 oz/ 110 – 117 yards bulky/ size 5 yarn
- I used Loops and Threads’ Charisma in Dark Purple and Taupe
- Needle to weave your ends in
Gauge:
- 12 dcs x 6 rows = 4.25″
Terms/ stitches:
- Rnd
- Magic circle
- Ch: Chain
- St: Stitch
- Slip St: Slip St
- Sc: Single Crochet
- Hdc: Half Double Crochet
Notes:
- You will have to know how to work into the back third loop of a hdc for this pattern.
- This hat is worked in 2 parts: the Body and the Brim. The Body is worked from the top down in the round with a slip st at the end of the rnd into the first stitch of that same rnd, the Brim is worked back and forth in rows.
- There are turns on only SOME rnds.
- The ch 1 at the beginning of the rnds does not count as a stitch.
- For the adult size, work this pattern as written.
- For the child size, work rnds 1 – 8, skip rnd 9 and the work rnds 10 – 26.
- In the photos: color A is taupe and color B is the dark purple (both Loops and Threads Charisma).
- This hat wears big and cozy. If you feel like you’d like a tighter hat, remove an increase or follow a chart to know when to stop increasing based on your needs.
![]()
![]()
Finished dimensions:
- Adult:
- Height: 8″
- Diameter: 11″
- Child:
- Height: 7.5″
- Diameter: 10″ – 10.5″
Pattern Instructions
Sizing as follows: child (adult)
Rnd 1: A: Create a magic circle, sc 12 times into the circle, slip st into the first st – 12 scs
Rnd 2: Ch 1, sc twice into the same st as join, sc once into the next st, *sc twice into the next st, sc once into the next st, * repeat from * to * 4 more times, slip st into the first st – 18 scs
Rnd 3: Ch 1, sc twice into the same st as join, sc once into the next 2 sts, *sc twice into the next st, sc once into the next 2 sts, * repeat from * to * 4 more times, slip st into the first st – 24 scs
Rnd 4: Ch 1, sc twice into the same st as join, sc once into the next 3 sts, *sc twice into the next st, sc once into the next 3 sts, * repeat from * to * 4 more times, slip st into the first st – 30 scs
Rnd 5: Ch 1, sc twice into the same st as join, sc once into the next 4 sts, *sc twice into the next st, sc once into the next 4 sts, * repeat from * to * 4 more times, slip st into the first st – 36 scs
Rnd 6: Ch 1, sc twice into the same st as join, sc once into the next 5 sts, *sc twice into the next st, sc once into the next 5 sts, * repeat from * to * 4 more times, slip st into the first st – 42 scs
Rnd 7: Ch 1, sc twice into the same st as join, sc once into the next 6 sts, *sc twice into the next st, sc once into the next 6 sts, * repeat from * to * 4 more times, slip st into the first st – 48 scs
Rnd 8: Ch 1, sc twice into the same st as join, sc once into the next 7 sts, *sc twice into the next st, sc once into the next 7 sts, * repeat from * to * 4 more times, slip st into the first st – 54 scs
For child size of this do not do rnd 9, just move on to rnd 10.
Rnd 9: Ch 1, sc twice into the same st as join, sc once into the next 8 sts, *sc twice into the next st, sc once into the next 8 sts, * repeat from * to * 4 more times, slip st into the first st – 60 scs
Rnd 10: Ch 1, sc once into the same st as join and into the next 53 (59) sts, slip st into the first st – 54 (60) scs
Rnd 11: Ch 1, hdc once into the same st as join and into the next 53 (59) sts, slip st into the first st – 54 (60) hdcs
Rnd 12: Ch 1, hdc into the back third loop of the same st as join and into the back third loop of the next 53 (59) hdcs, slip st into the first st – 54 (60) hdcs
Rnd 13: B: Ch 1, turn, slip st into the back third loop of the first st, hdc into the back third loop of the next st, *slip st into the back third loop of the next st, hdc into the back third loop of the next st,* repeat from * to * 25 (28) more times, slip st into the first st – 27 (30) hdcs
Rnds 14 – 17: Ch 1, turn, slip st into the first st, hdc into the next st, *slip st into the next st, hdc into the next st,* repeat from * to * 25 (28) more times, slip st into the first st – 27 (30) hdcs
Rnds 18 – 19: A: Repeat rnds 11 – 12
Rnds 20 – 24: B: repeat rnds 13 – 17
Rnd 25: A: Ch 1, hdc into the same st as join and into the next 53 (59) sts, slip st into the first st – 54 (60) hdcs
Rnd 26: Ch 1, sc into the back third loop of the same st as join and into the back third loop of the next 53 (59) hdcs, slip st into the first st t- 54 (60) scs
Fasten off both colors, weave in all your ends.
Brim:
Row 1: A: Skip 17 (20) sts from the seam, attach your yarn into the next st, sc into the same st, sc into the next 2 sts, *hdc into the next st, hdc twice into the next st,* repeat from * to * 6 more times, sc into the next 3 sts – 21 hdcs, 6 scs
Fasten off, weave in your ends.
Row 2: Attach yarn back where you fastened off following row 26, sc into the next 17 (20) sts, sc into the next 3 scs of the first row of the brim, hdc into the next 21 hdcs, sc into the next 3 scs of the brim, sc into the next 17 (20) scs from row 26, slip st into the first st to secure – 40 (46) scs, 21 hdcs
Fasten off.
Tada! So what do you think of my new Diana Newsboy Hat? I Hope you love it as much as I do!
This post is linked to Hookin’ on Hump Day #106, Oombawka Design’s Link and Share Wednesday #117, Linky Ladies’ Community Link Party #24, Yarn Fanatic Party #53, Lunamon Design’s Two Day Link Party #45, Rebeckah’s Treasures Saturday Link Party #20, & Fiber Tuesdays.
Rebecca Mahon
Sunday 10th of April 2022
On rows 13-17 I end with a HDC and slip stitch to the First HDC. But I started with a slip stitch in round 13, does the slip stitch count as a stitch? Also should I end the rouns with a slip stitch? I'm a little confused. Thanks so much.
Kristi
Saturday 17th of November 2018
Hi, I'm starting row 13 on this hat. The "B" is confusing. Is there a row 13 "A"?
Divine Debris
Saturday 17th of November 2018
The A and B designations refer to the colors (the notes say which colors are A and B in the photos). You begin with color A on Rnd 1 and change to color B on Rnd 13. Hope that makes sense <3 <3
Yarn Fanatic Party #54 – Week 1 – Happily Hooked Magazine & Haven for Hands Giveaway!
Friday 4th of May 2018
[…] are equally beautiful and eye catching. It’s already on my list, and pinned a few times. Diana Newsboy Hat from Divine Debris – Free Crochet Pattern. Both Child and Adult sizes are included in […]
Erika Heintz-Dickhaus
Sunday 19th of November 2017
Thank you SO MUCH for this pattern! I desperately needed a warm hat with a brim. Part of my job includes monitoring recess for the kiddos, and it's difficult if the sun is glaring in your eyes the whole time! Now I stay warm, and keep my vision. This is my new favorite hat, hands down :)
Divine Debris
Monday 20th of November 2017
Oh, I'm so glad! I love this hat, it's cozy and warm, 2 of my favorite things to have on my head in the Winter.
Connie
Friday 9th of September 2016
I really like the unique twist on the newsboy you have designed. And the purple is another plus. :)