Happy Winter, everyone! I’m already living in blankets and cozy socks myself. I’ve only been in California for a few months but I’m already feeling chilly at 40F, which is ridiculous in so many ways because I grew up in Utah and cold is kinda what it does for so many months of the year.
It just so happens, this “cold” weather that inspired this week’s design. I love bulky/ squishy yarn and I’ve got a design I’m working on for Stitch Together where I’m also using size #5 yarn – so between the coldish weather and bulky yarn my brain got so many ideas. Lucky for me I also had a bunch of Charisma Tweed in my stash because I bought a bunch last year and I didn’t have any plans for what to do with it (sometimes I just buy yarn hoping inspiration will strike). Yay, inspiration struck!
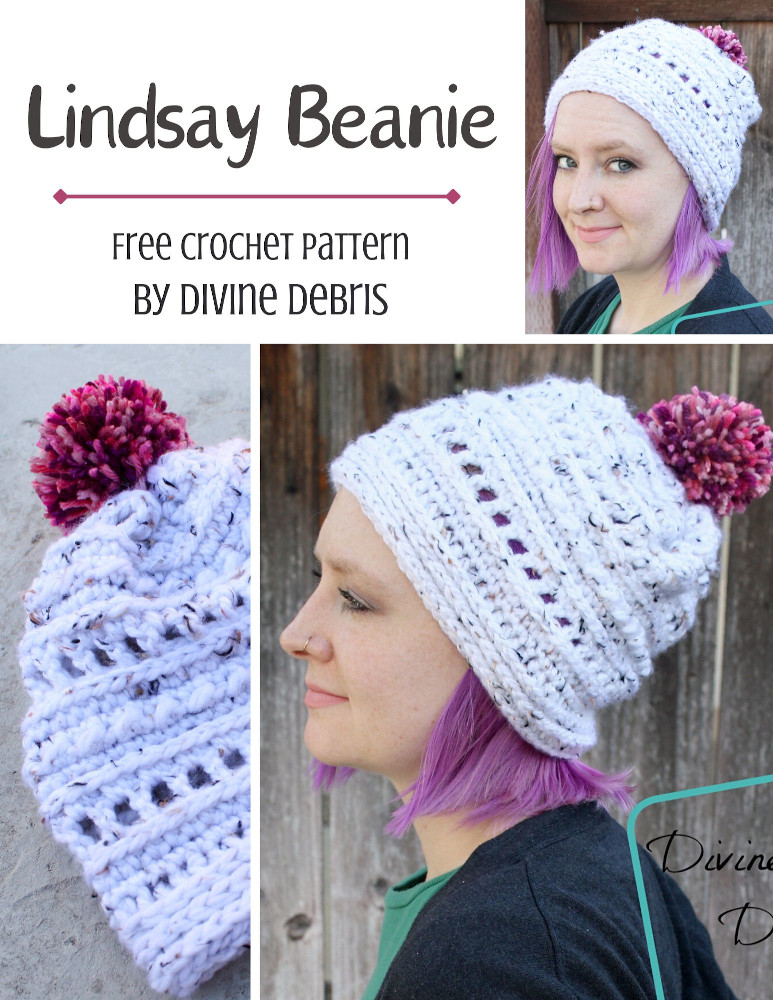
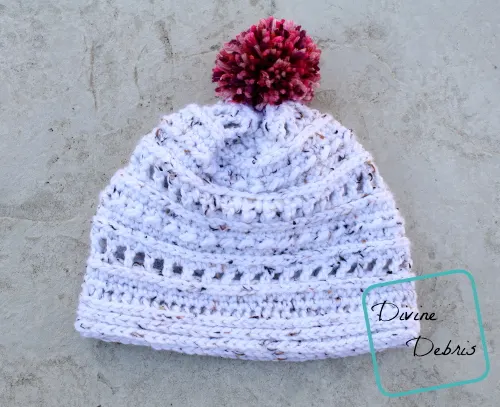
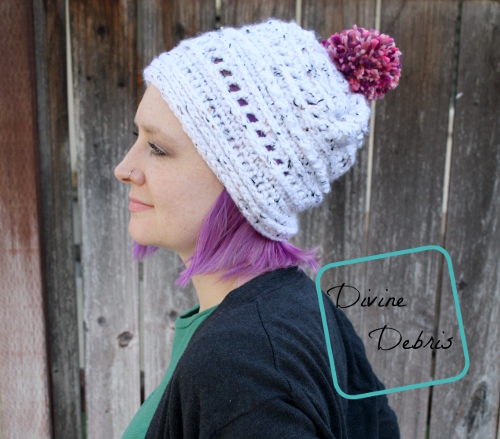
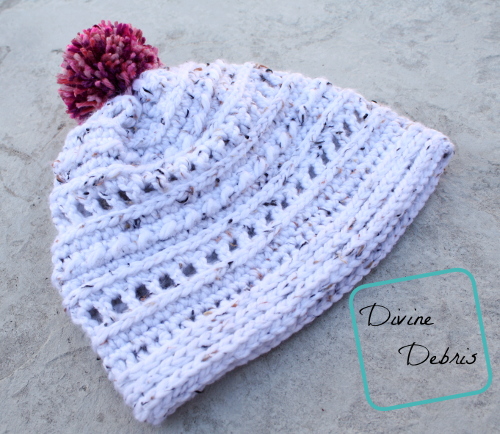
So, for this design I went with a California Winter style – it’s a big squishy hat with bulky yarn… and holes 😀 The rnds of dc/ ch 1 give the design an open quality that works well for where I am and I hope it does for where you are too. I really like this pattern too – it’s got great texture but it’s not complicated at all, you might see it again in some other form later on. It’s kinda my favorite thing, looks complicated but really is a piece of delicious cake 😀
As always, if you have any questions or comments, please post them below and I will try to get to them. I hope you’re having a great finish to your November, I’m doing pretty good myself but feeling very busy all the time.
I’ll see you next week for the first post of December 2018!

(This post may contain affiliate links)

If you appreciate my weekly patterns I hope you’d consider purchasing an ad-free pdf of this pattern in my Ravelry shop.

Thank you to Carol S for becoming my newest patron on Patreon!
Materials
- US K (6.50 mm) crochet hook
- Size #5/ bulky weight yarn
- 4.5 – 5 oz/ yds


- 1-2 colors
- I used Charisma Tweed
- 4.5 – 5 oz/ yds
- Yarn needle
- Pom-pom maker (optional)
Gauge
- 11 rows x 15 hdc = 4″
Terms/stitches used
- RS: Right side
- Rnd: round
- St: stitch
- Ch: chain
- Slip st: slip st
- Sc: single crochet
- BTLO: Back Third Loop Only
- Hdc: half double crochet
- Dc: double crochet
Notes
- This pattern is work in 2 parts: the Body and the Band. The Body is worked in the round with a slip st into the first st of the rnd, then one end is closed while the Band is worked along the other side of the original chain rnd.
- You will need to know how to work into the back third loop of a hdc.
- You will need to know how create a slipknot on your hook.
- Some rnds feature a turn while some rnds do not.
- The ch-1 and ch-2 at the beginning of rnds do not count as stitches.
- In the photos the hat is size 22” and made with Charisma Tweed in White.
Finished product dimensions (approx)
| 20” Height: 7.75″ – 8″Diameter: 9.5″ – 10″Yarn: 4.5 oz/140 yds | 22” Height: 9″ – 9.5″Diameter: 10.5″ – 11″ Yarn: 5 oz/155 yds |
Lindsay Beanie Crochet Pattern Instructions
-Body-
Sizing as follows: 20” (22”)
Rnd 1: Ch 64 (70), slip st to for a ring *DO NOT TWIST THIS RING*
(RS) Rnd 2: Ch 1, sc into the same st as join and into the next 63 (69) sts, slip st into the first st – 64 (70) sc
Rnd 3: Ch 1, hdc into the same st as join and into the next 63 (69) sts, slip st into the first st – 64 (70) hdc
Note: keep your slip sts even and not super tight.
Rnd 4: Ch 1, slip st into the BTLO of the same st as join and into the BTLO of the next 63 (69) sts, slip st into the first st – 64 (70) slip sts
Note: you will be working into the slip sts for the next rnd.
Rnd 5: Ch 4 (counts as a dc and ch 1 here throughout), turn, skip the next st, *dc into the next st, ch 1, skip the next st,* repeat from * to * 31 (33) more times, slip st into the top of the ch-3 – 32 (35) dc, 32 (35) ch-1 spaces
Note: you will be working into both the ch and dcs for the next rnd.
Rnd 6: Ch 1, turn, hdc into the next 64 (70) sts, slip st into the first st – 64 (70) hdc
Rnd 7: Ch 1, sc into the BTLO of the same st as join and into the BTLO of the next 63 (69) sts, slip st into the first st – 64 (70) sc
Rnd 8: Ch 1, sc into the same st as join and into the next 63 (69) sts, slip st into the first st – 64 (70) sc
Rnd 9: Ch 1, turn, slip st into the first st, hdc into the next st, *slip st into the next st, hdc into the next st,* repeat from * to * 30 (33) more times, slip st into the top of the ch-3 – 32 (35) slip st, 32 (35) hdc
Rnd 10: Ch 1, turn, sc into the same st as join and into the next 63 (69) sts, slip st into the first st – 64 (70) sc
Rnd 11: Ch 1, hdc into the same st as join and into the next 63 (69) sts, slip st into the first st – 64 (70) hdc
Rnds 12 – 19: repeat rnds 4 – 11, once (if you want to make your hat longer, repeat these rnds more before fastening off)
For size 20″:
Rnd 20: Ch 1, sc into the BTLO of the same st as join and into the BTLO of the next 63 sts, slip st into the first st – 64 sc
Rnd 21: Ch 1, sc into the same st as join and into the next 63 sts, slip st into the first st – 64 sc
Fasten off leaving a long tail, which you will then use to close your hat.
For size 22″:
Rnds 20 – 23: repeat rnds 4 – 7, once
Rnd 24: Ch 1, sc into the same st as join and into the next 69 sts, slip st into the first st – 70 sc
Fasten off leaving a long tail, which you will then use to close your hat.
– Closing –
Flip your hat inside out so that the wrong side is facing you and with your needle, weave your tail back and forth through every other stitch on rnd 21 (24) until you go all the way around the rnd. Pull your yarn tight until the hole in the center is as closed as it can be. You may need to sew the hole closed further.
Fasten off, weave in your ends. Optional: flip your hat right side out and add a pom-pom to this end.
– Band –
Note: you can go down a hook size if you’d like a tighter band.
(RS) Rnd 1: Flip your hat around so that you’re working along the other side of the original chain row. Create a slipknot on your hook and hdc into each st around, slip st into the first st – 64 (70) hdc
Rnds 2 – 3: Ch 1, hdc into the BTLO into of the same st as join and into the next 63 (69) sts, slip st into the first st – 64 (70) hdc
If you’d like a longer band, add more rows into the BTLO before moving onto the next row.
Rnd 4: Ch 1, slip st into the BTLO of the same st as join and into the BTLO of the next 63 (69) sts, slip st into the first st – 64 (70) slip sts