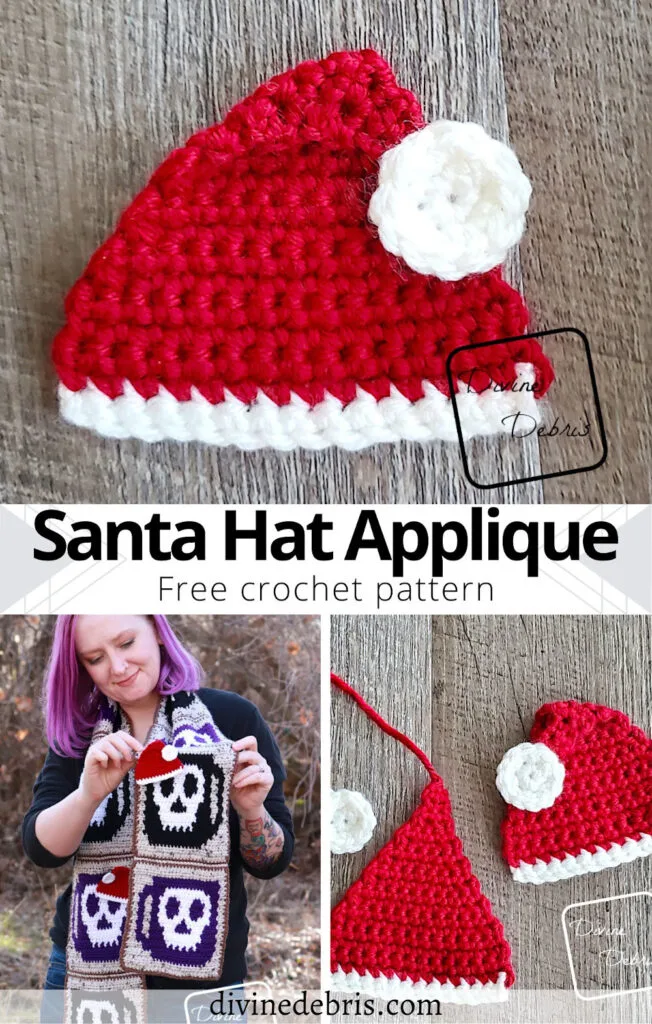
Won’t you look at that! It’s the last couple of weeks of December and I’m releasing late Christmas patterns. Ha! I always try to plan, I swear, to make designs earlier in the month but I tend to get overwhelmed with all the ideas I have and then the time gets away from me. And when I got the idea for my Wake the Dead Scarf I knew I wanted to make it… but you know how I am, I had to make it festive. 😀 With the Santa Hat Applique crochet pattern.
Originally I was going to make design this a little subsection of my Wake the Dead Scarf but I thought it’d be easier for other people to find if I make it it’s own post. And it’s just a cute little pattern that would make any pattern nice and festive (like my Gertrude Ghost Pullover) or a fun way to dress up a holiday sweater.
Like I said above, this pattern is super easy. It’s worked from the bottom up (the white band) to the point in back and forth rows. Toward the top of the hat you will begin to decrease to create the stocking look. And once the Hat is complete, you fold over the tip and sew it to the body. Then the Pom Pom, which is made separately and in the round, is only 2 rows so it’ll work up fast. And once the Pom Pom is done, you will sew or glue to the Hat where you folded down the tip.
So, yeah, I hope you like this fun and festive little pattern. It works up pretty fast and would make a cute little ornament for a tree (make 2 hats and sew them together for a 3D look). And of course, it elevates your Wake the Dead Scarf if you make one of those 😀
Please note: I was provided the Basic Stitch yarn by Lion Brand Yarn for the purposes of designing other patterns, with compensation. I had this yarn left over so I decided to make this pattern with the yarn. This post features affiliate links, if you click on any of the links and purchase I may make money from that.
Copyright @ Divine Debris 2023. No part of this document may be reproduced or transmitted in any form by any means, electronic, mechanical, photocopying, or otherwise, without prior written permission from the author. Sales of finished products are permitted, but the designer requests that you link back to the pattern and credit Divine Debris with the original design under the Creative Commons Attribution-Share Alike license. If you have any questions, comments or concerns please contact info@divinedebris.com.
(this post contains affiliate links)
If you appreciate my patterns I hope you’d consider purchasing an ad-free pdf of this pattern in my Ravelry shop and Lovecrafts shop!
Where to purchase the
Santa Hat Applique Crochet Pattern
Level
Easy
Materials
- US G (4.00 mm) crochet hook
- Worsted/ medium/ size #4 weight yarn
- < 1 oz/ 52 yds
- 2 colors
- Color A is red and color B is white
- I used Basic Stitch by Lion Brand Yarn
- Notions: scissors, measuring tape, yarn needle
Gauge
- 18 sc x 20 rows = 4”
Terms/ Stitches used
- St: Stitch
- Ch: Chain
- Rnd: Round
- Magic Circle
- Slip st: Slip st
- RS: Right side
- Sc: Single crochet
- Join: Join with a slip st
- Sc2tog: single crochet 2 stitches together
Notes
- You can purchase and ad-free version of this pattern in my Ravelry shop.
- This pattern is worked in 2 pieces – the Hat and the Pom Pom. The Hat is worked from the bottom up in rows, with later in the pattern you decrease every other row to create the stocking look to the hat. The Pom Pom worked in the round, with a join with a slip st at the end of the round. When the Hat is completed, you fold the tip down and sew (or glue) the Pom Pom to the tip of the Hat.
- The ch-1 at the beginning of the rows does not count as a stitch.
- Color A is red and color B is white in the photos. I used Basic Stitch by Lion Brand Yarn for this pattern.
Santa Hat Applique Crochet Pattern Finished Product Details (approx)
| Height | Width |
| 2.75” | 3.25” |
![[Image description] Top down look at a finished Santa Hat Applique in red and white laying on a fake wood background.](https://d3gel9wqxksnxm.cloudfront.net/wp-content/uploads/2023/12/Santa-Hat-Applique-1000x863-1.jpg.webp)
Santa Hat Applique Crochet Pattern Instructions
Hat
(WS) Row 1: A: Ch 15, sc into the 2nd ch from the hook and across – 14 sc
Fasten off color A, switch to color B.
(RS) Row 2: B: Ch 1, turn, sc across – 14 sc
Rows 3 – 5: Ch 1, turn, sc across – 14 sc
Row 6: Ch 1, turn, sc2tog the first 2 sts, sc across until 2 sts remain, sc2tog the last 2 sts – 12 sc
Row 7: Ch 1, turn, sc across – 12 sc
Rows 8 – 15: Repeat Rows 6 – 7, a total of 4 more times.
Row 16: Ch 1, turn, sc2tog the first 2 sts, sc2tog the last 2 sts – 2 sc
Rows 17 – 19: Ch 1, turn, sc across – 2 sc
Fasten off leaving a long tail (you’ll use this to secure the top of the Hat to the body).
Pom Pom
(RS) Rnd 1: Create a magic circle, ch 1, sc 6 times into the circle, join – 6 sc
Rnd 2: Ch 1, sc twice into the first st, sc twice into the next 5 sts, join – 12 sc
Fasten off, weave in your ends. You can leave the ends long enough to sew them to your Hat or can glue the Pom Pom to the Hat. Please note: you won’t sew the Pom Pom to the Hat until you fold the top down so that the RS of the Pom Pom is facing up.
Assembly
Fold the Hat along Row 13, leaning Row 19 to the right or the left (it’s up to you) and, using the end you left when you fastened off, sew the Row 19 to the body of the Hat. Glue or sew, using the ends you left, Pom Pom to the end of Row 19/ the body of the Hat.


![[Image description] Top down look at 2 Santa Hat Appliques on a fake wood background, with one not finished being assembled.](https://d3gel9wqxksnxm.cloudfront.net/wp-content/uploads/2023/12/Santa-Hat-Applique-1000x824-1.jpg.webp)
![[Image description] Top down look at a unfinished Santa Hat Applique in red and a white pom pom laying on a fake wood background.](https://d3gel9wqxksnxm.cloudfront.net/wp-content/uploads/2023/12/Santa-Hat-Applique.jpg.webp)
![[Image description] Top down look at a unfinished red Santa Hat Applique laying on a fake wood background.](https://d3gel9wqxksnxm.cloudfront.net/wp-content/uploads/2023/12/Santa-Hat-Applique-1000x868-1.jpg.webp)

![[Image description] A white woman with purple hair stands in front of trees holding a scarf up to the camera, with the Santa Hat Applique over the skull in the scarf design.](https://d3gel9wqxksnxm.cloudfront.net/wp-content/uploads/2023/12/Wake-the-Dead-Scarf-813x1000-1.jpg.webp)