
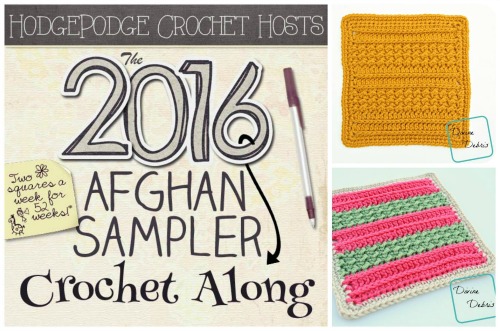
Hello and welcome to week twenty of the HodgePodge Crochet hosted 2016 Afghan Sampler CAL! This is my second square of this CAL and I do hope you like it, you can find the first one here. It’s another item in my ever-expanding Diana Line. If you have any questions, let me know here, in the comments, or in the CAL Facebook group. There is a downloadable pdf at the bottom of this post if you’d like to download the pdf.
Materials:
- Worsted Weight/ size #4/ medium weight yarn
- 1.1 oz/ 65 yards
- US J (6.00 mm) crochet hook
- Tapestry/ yarn needle
- 4 stitch markers or scraps of yarn


Gauge:
- 5” x 5” = 8 rows x 17 DCs (my gauge)
- or whatever hook gets you to the gauge 25 sc = 7
Terms/stitches used:
- Ch: chain
- St: stitch
- Slip st: slip st
- Sc: single crochet
- Hdc: half double crochet
Notes:
- The ch 1 does not count as a stitch.
- You will need to know how to work into the back third loop of a half double crochet for this pattern.
- The ch 1 for the hdc rows is accurate, as the hdcs are smaller when worked into the third loop.
- This pattern is worked back and forth in rows, with a turn to begin the next row, until you get to the edging, which is worked in the round.
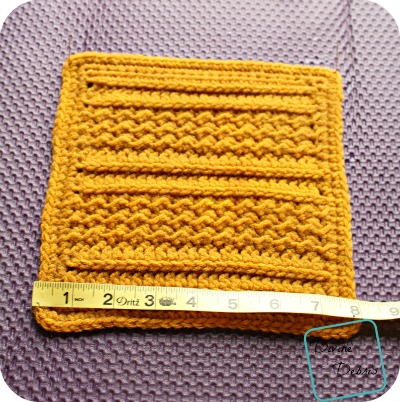
- This pattern kinda turns out a bit rectangular when first worked. To get it to a square shape some blocking is required. You can wet block or steam block it, your choice, but wet blocking is what was used in the final version you see within this pattern.

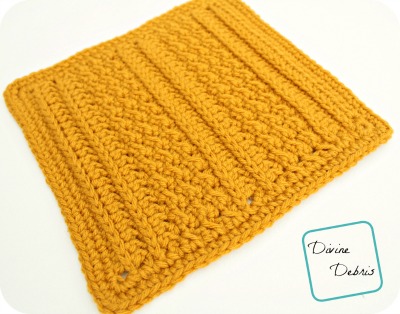
Diana Afghan Square crochet pattern by DivineDebris.com
Finished product dimensions (with edging):
- Height: 8”
- Width: 8”
Pattern Instructions:
Row 1: (RS) Ch 26, hdc into the third st from the hook (skipped sts count as a hdc) and into the next 23 sts – 25 hdcs
Rows 2 – 4: Ch 1, turn, hdc into the third loop of each hdc across – 25 hdcs
Row 5: Ch 1, turn, slip st into the third loop of the first st, *hdc into the third loop of the next st, slip st into the third loop of the next st,* repeat from * to * 11 more times – 13 slip sts, 12 hdcs
Row 6: Ch 1, turn, hdc into the first st, *slip st into the next st, hdc into the next st, * repeat from * to * 11 more times – 13 hdcs, 12 slip sts
Row 7: Ch 1, turn, slip st into the first st, *hdc into the next st, slip st into the next st,* repeat from * to * 11 more times – 13 slip sts, 12 hdcs
Row 8: repeat row 6
Row 9: repeat row 7
Row 10: repeat row 6
Row 11: Ch 1, hdc into each st across – 25 hdcs
Rows 12 – 14: repeat rows 2 – 4
Rows 15 – 24: repeat rows 5 – 14
Diana Afghan Square crochet pattern by DivineDebris.com
Edging:
Round 1: Turn, ch 1, sc 4 times (mark the second one with a stitch marker or scrap of yarn) into the first st, sc into the next 23 sts, sc 4 times into the last st (mark the 3rd one with a st marker), rotate piece, sc once into each of the next 12 row ends, sc twice into the next row end, sc once into each of the next 11 row ends, rotate piece, sc 4 times into the next corner (mark the second with a st marker), 23 into the next 23 sts, sc 4 times into the corner (mark the 3rd with a st marker), rotate piece, sc once into each of the next 12 row ends, sc twice into the next row end, sc once into each of the next 11 row ends, rotate piece, slip st into first st to secure – 112 scs
*You can fasten off following this row or slip st into the corner you marked with your stitch marker closest to you.
Round 2: This round will be done using whatever color that is being used to join squares together. Join yarn with sl st in center of any corner 3sc group (the stitch marked with your st marker), ch 1 (does not count), *3 sc in corner (marked with st marker), sc in next 27 sc, rep from * three times, join with a sl st to beginning sc – 120 scs
Fasten off, weave in you tails.
Diana Afghan Square crochet pattern by DivineDebris.com
Blocking:
You will almost definitely need to block this square. For me and my testers, this square came out more rectangular than square. I used wet blocking to get it to the right shape. Wet the whole square and then stretch to the size you want, the pin it in place and allow it to dry completely (as see in photo above).