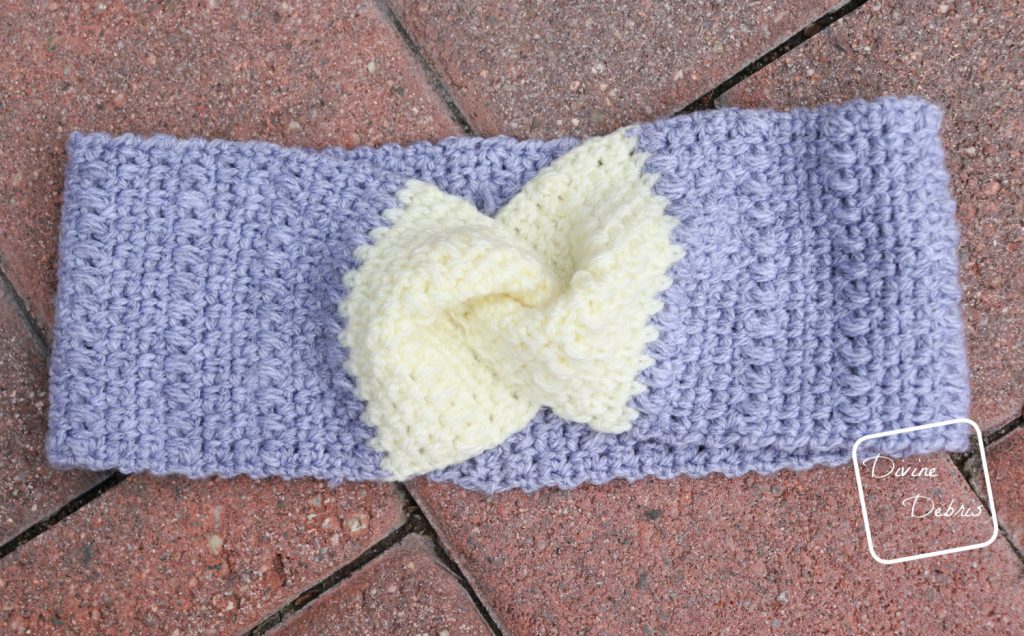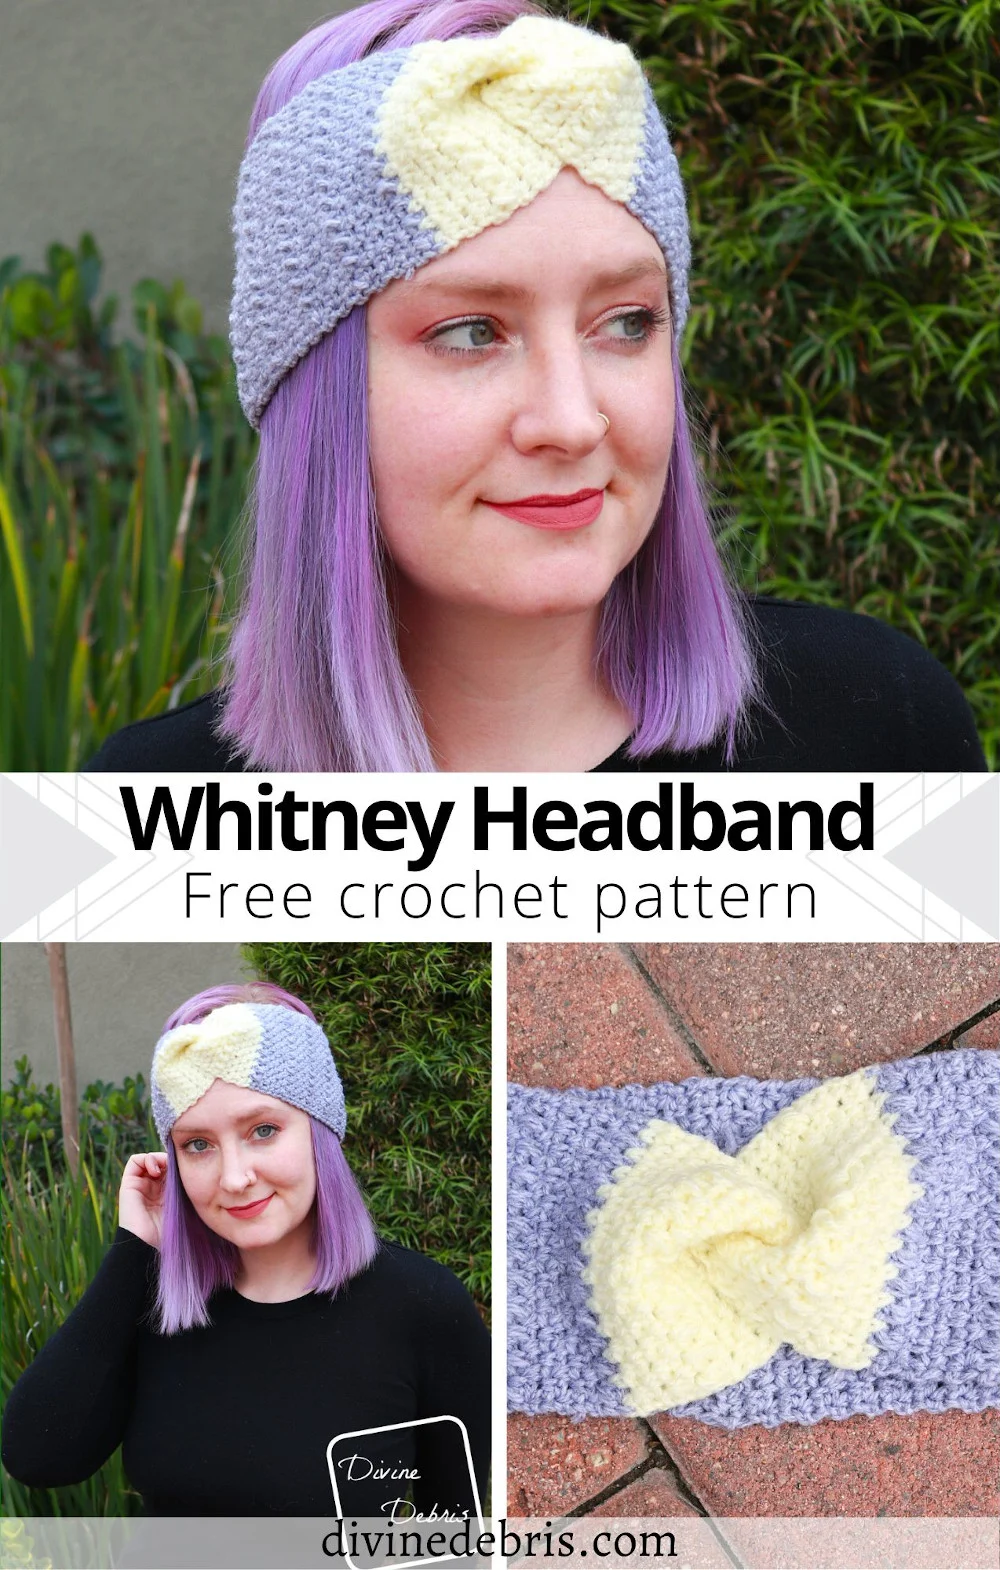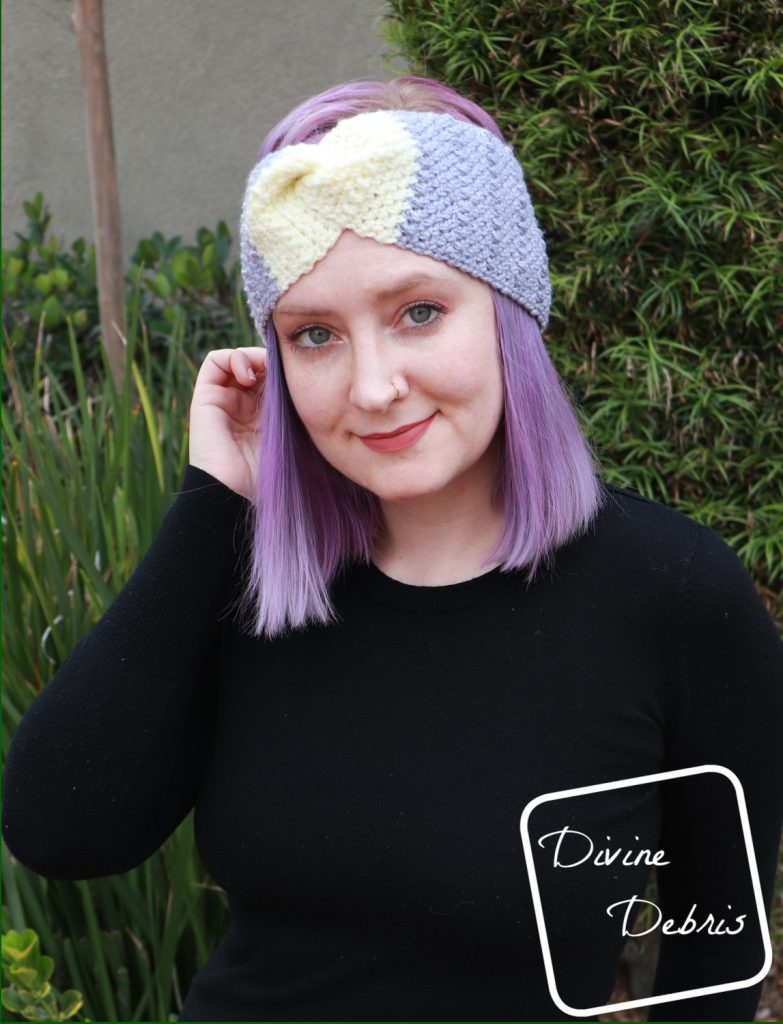

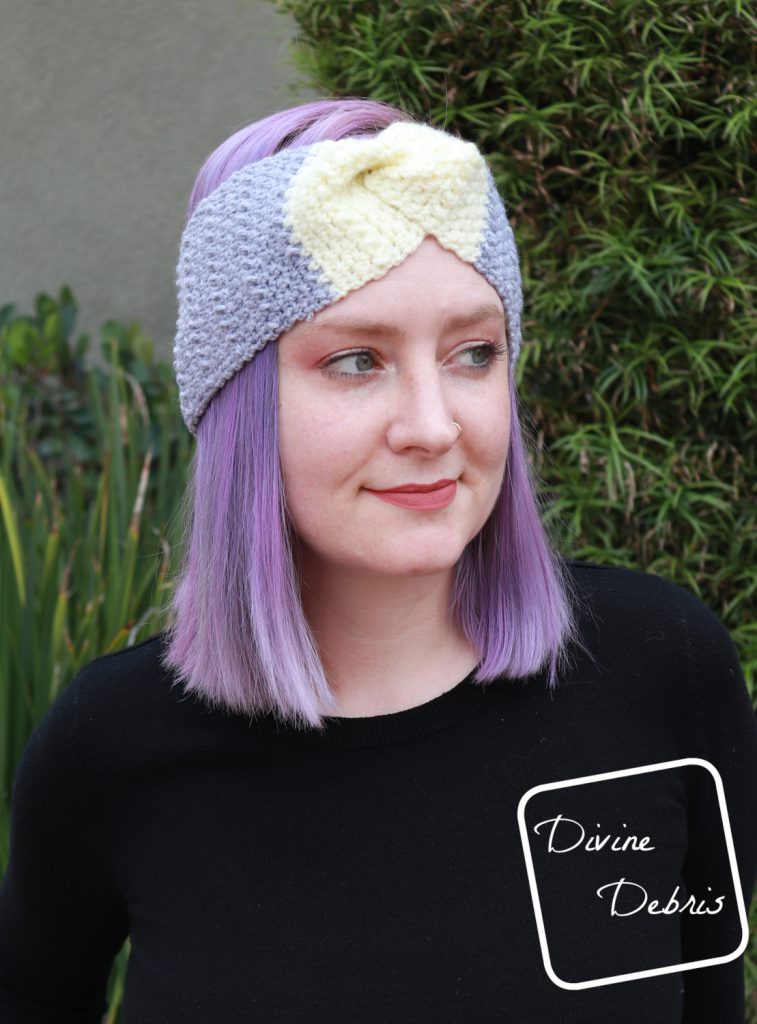
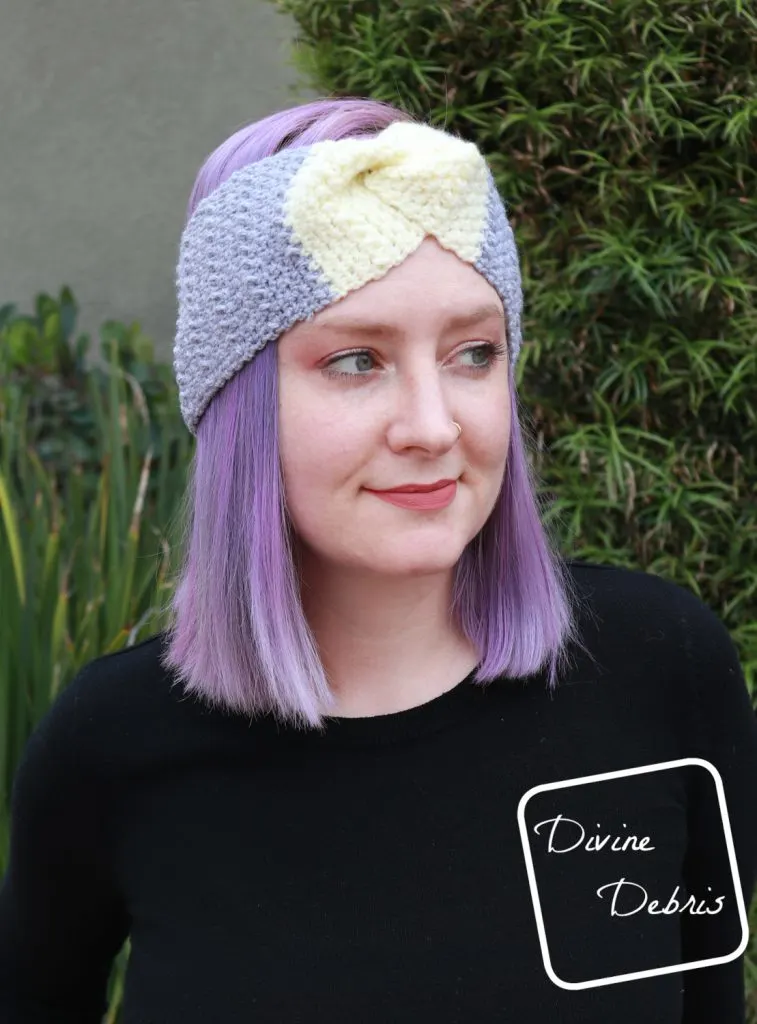
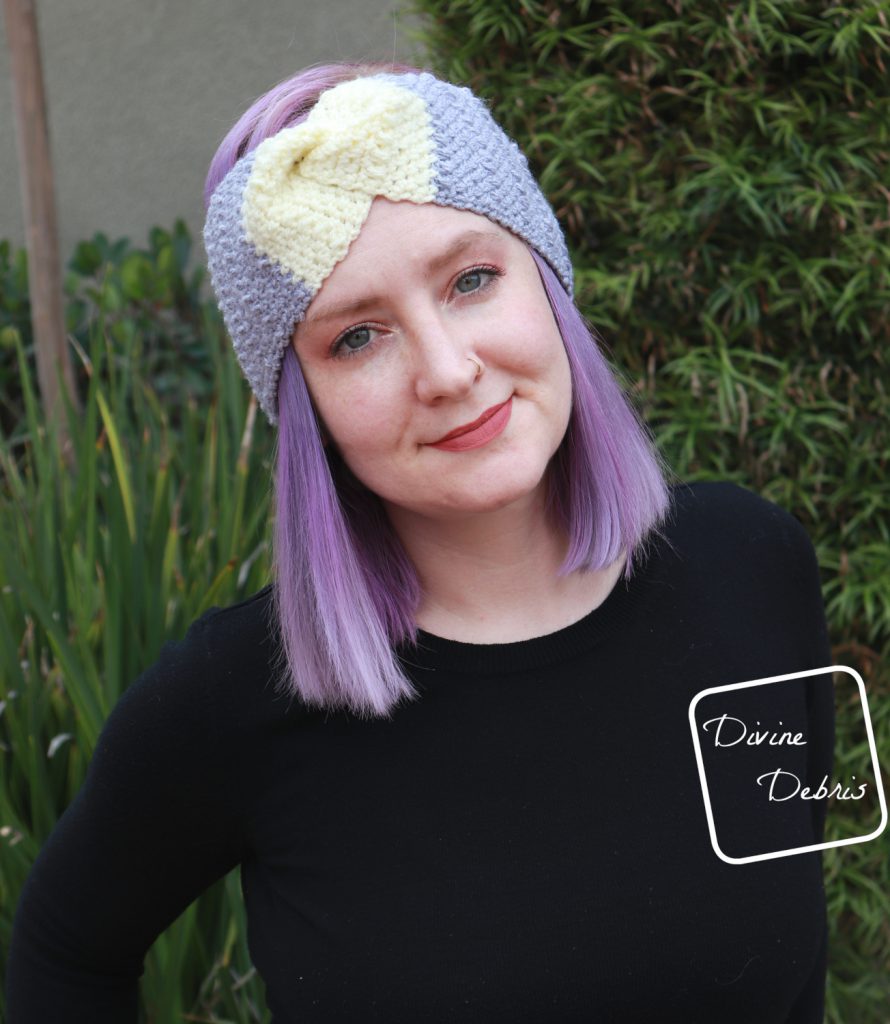
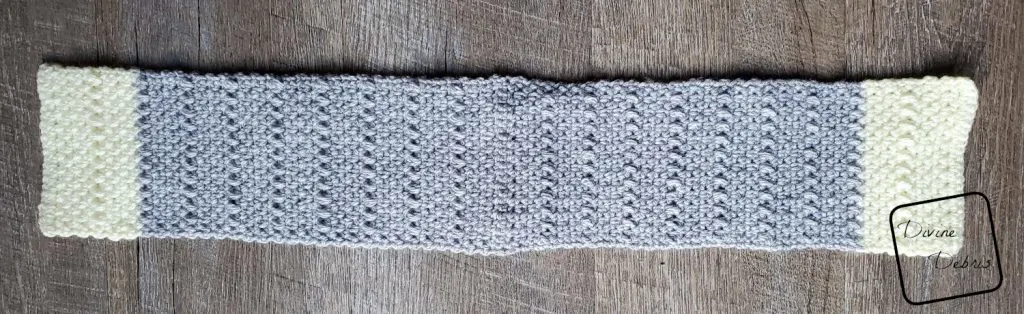
Happy Tuesday again everyone! Who’s excited for a new free headband crochet pattern this week? I’ve got for you a new design that I love to pieces, I’m even making more items in the line so you can have lots of fun matching items, the Whitney Headband!
This pattern is a lot like my previous twisted headbands, the Artemis and the Simple Twist, but it’s slightly different in construction of the twist. I know that it made sense to me but alas, some people did have issues with the way that I twisted the headband so I wanted to get creative and figure out how to make it easier to make for everyone.
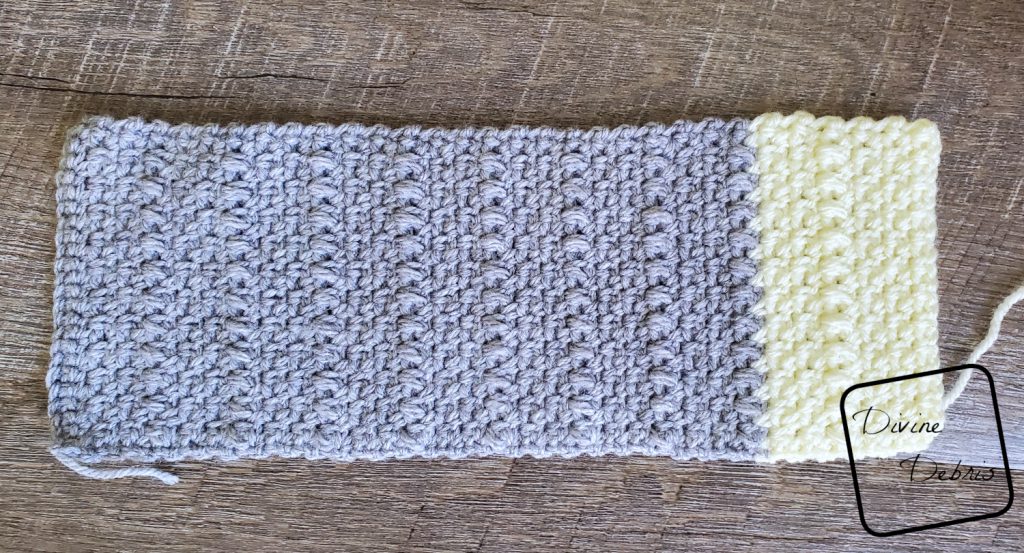
This design is a simple construction of the linen stitch, which means you can easily make it larger or smaller by adding or subtracting stitches in your first row by multiples of 2. Or you can make it tighter or looser in diameter by adding or subtracting rows. This part is pretty handy because I made this design using Lion Brand Basic Stitch Premium, which is a pretty thin worsted weight yarn, it’s maybe just a little over thick dk. So when I had people test it, there was a few hiccups for those who had thicker worsted weight yarns.
So remember check your gauge going into this design, every 6 rows (this is noted in the notes below) is just over 1″, and feel free to add or subtract rows to make it work. Remember that patterns are fantastic but if you need to adjust something to make you happy, do it. Also, adjust this headband evenly on both sides 🙂
I hope you like this headband pattern and give it a try. It’s super easy and very fun to customize! or check out more headband patterns here if this one doesn’t do it for ya.
(this post may contain affiliate links)


If you appreciate my weekly patterns I hope you’d consider purchasing an ad-free pdf of this pattern in my Ravelry shop.
Thank you Melissa for becoming my newest patron on Patreon!
Materials
- US G (4.00 mm) crochet hook
- Aran/ medium/ size #4 weight yarn
- 2 colors
- I used Basic Stitch Premium by Lion Brand Yarn in Slate and Cream (1.5 oz | 440 yds)
- Notions: scissors, measuring tape, needle
Gauge
- 22 rows × 22 sc + ch1 across 4″ (Linen stitch)


Terms/ Stitches used
- RS: right side
- Ch: chain
- St: stitch
- Sc: single crochet
- Hdcc: half double crochet cluster (explained below)
Notes
- Hdcc (half double crochet cluster): yarn over, insert hook into specified stitch, yarn over, pull up a loop, yarn over, insert hook into the same stitch, yarn over, pull up a loop, yarn over, pull through all 5 loops on your hook. This is basically a hdc2tog done in one stitch.
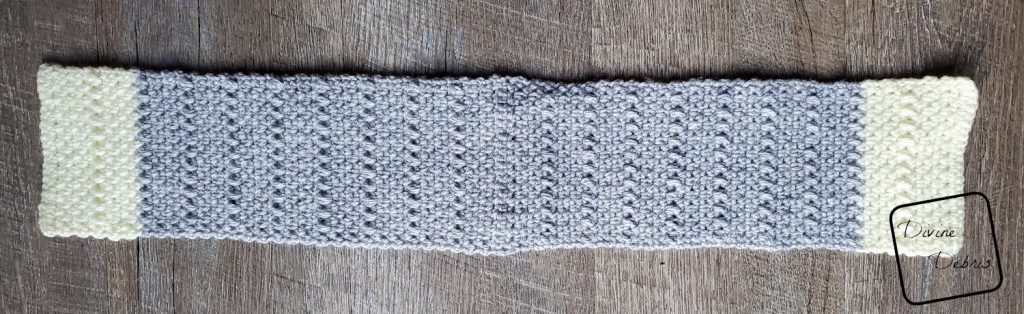
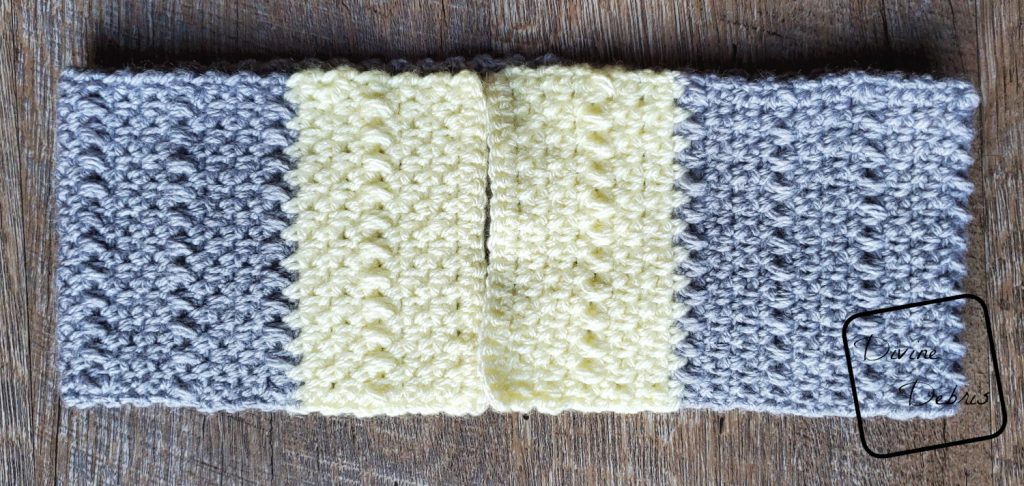
- This pattern is worked from the center-back out, in 1 piece but 2 sections: the right section is worked then you flip your whole project around and work the left section starting from the other side of Row 1 of the right section. When both sections are complete, you seam the last row together to create the folded look on the front.
- The yarn used in this sample is very thin for a worsted weight, closer to a dk. Make sure you do a gauge swatch and check your headband as you work the pattern to ensure the best results.
- 5 rows of the Linen Stitch and 1 Hdcc row = just over 1″ in height.
- The ch-1 at the beginning does not count as a stitch.
- You can make this pattern taller or smaller by adding or subtracting ch-s from the first row in multiples of 2.
- In the photos: color A is gray (Basic Stitch Premium in Slate|1 oz/ 62.5 yds), and color B is cream (Basic Stitch Premium in cream| .6 oz/ 37 yds).
Finished product dimensions (measurements may vary by gauge and yarn used)
| 20″ | 22″ |
| Height: 4.3” – 4.5” Diameter: 10” Yarn: A: .9 oz/ 25 yds, B: .4/ 56 yds | Height: 4.3” – 4.5” Diameter: 11” Yarn: A: 1 oz/ 62.5 yds B: .6 oz/ 37 yds |

Whitney Headband Crochet Pattern Instructions
Right Section

Row 1: A: Ch 25, sc into the second ch from the hook and into the next 23 sts — 24 sc
(RS) Row 2: Ch 1, turn, sc into the first st, *ch 1, skip the next st, sc into the next st,* repeat from * to * 10 more times, sc into the last st — 13 sc, 11 ch-1 spaces
Rows 3 – 6: Ch 1, turn, sc into the first st, *ch 1, skip the next st, sc into the next ch space,* repeat from * to * 10 more times, sc into the last st — 13 sc, 11 ch-1 spaces
Row 7: Ch 1, turn, sc into the first st, *ch 1, skip the next st, hdcc into the next st,* repeat from * to * 10 more times, sc into the last st — 2 sc, 11 hdcc, 11 ch-1 spaces
Rows 8 – 12: Ch 1, turn, sc into the first st, *ch 1, skip the next st, sc into the next ch space,* repeat from * to * 10 more times, sc into the last st — 13 sc, 11 ch-1 spaces
Row 13: Ch 1, turn, sc into the first st, *ch 1, skip the next st, hdcc into the next st,* repeat from * to * 10 more times, sc into the last st — 2 sc, 11 hdcc, 11 ch-1 spaces
Size 20″:
Rows 14 – 43: repeat rows 8 – 13, 5 times
Fasten off color A.
Rows 44 – 49: B: repeat rows 8 – 13, once
Rows 50 – 54: repeat rows 8 – 12, once
Row 55: Ch 1, turn, sc into the next 24 sts — 24 sc
Fasten off color B, weave in all your ends.
Size 22″:
Rows 14 – 49: repeat rows 8 – 13, 6 times
Fasten off color A.
Rows 50 – 55: B: repeat rows 8 – 13, once
Rows 56 – 60: repeat rows 8 – 12, once
Row 61: Ch 1, turn, sc into the next 24 sts — 24 sc
Fasten off color B, weave in all your ends.
Left Section
Flip your entire project around and, with the RS facing you, create a slipknot on your hook with color A.
Row 1: Ch 1, turn, sc into the first st, *ch 1, skip the next st, sc into the next st,* repeat from * to * 10 more times, sc into the last st — 13 sc, 11 ch-1 spaces
Rows 2 – 5: Ch 1, turn, sc into the first st, *ch 1, skip the next st, sc into the next ch space,* repeat from * to * 10 more times, sc into the last st — 13 sc, 11 ch-1 spaces
Row 6: Ch 1, turn, sc into the first st, *ch 1, skip the next st, hdcc into the next st,* repeat from * to * 10 more times, sc into the last st — 2 sc, 11 hdcc, 11 ch-1 spaces
Rows 7 – 11: Ch 1, turn, sc into the first st, *ch 1, skip the next st, sc into the next ch space,* repeat from * to * 10 more times, sc into the last st — 13 sc, 11 ch-1 spaces
Row 12: Ch 1, turn, sc into the first st, *ch 1, skip the next st, hdcc into the next st,* repeat from * to * 10 more times, sc into the last st — 2 sc, 11 hdcc, 11 ch-1 spaces
Size 20″:
Rows 13 – 42: repeat rows 7 – 12, 5 times
Fasten off color A.
Rows 43 – 48: B: repeat rows 7 – 12, once
Rows 49 – 53: repeat rows 7 – 11, once
Row 54: Ch 1, turn, sc into the next 24 sts — 24 sc
Fasten off color B, weave in all your ends.
Size 22″:
Rows 13 – 48: repeat rows 7 – 12, 6 times
Fasten off color A.
Rows 49 – 54: B: repeat rows 7 – 12, once
Rows 55 – 59: repeat rows 7 – 11, once
Row 60: Ch 1, turn, sc into the next 24 sts — 24 sc
Fasten off color B, leaving a long tail (which you will use to seam your ends). Weave in all your other ends.

Seaming
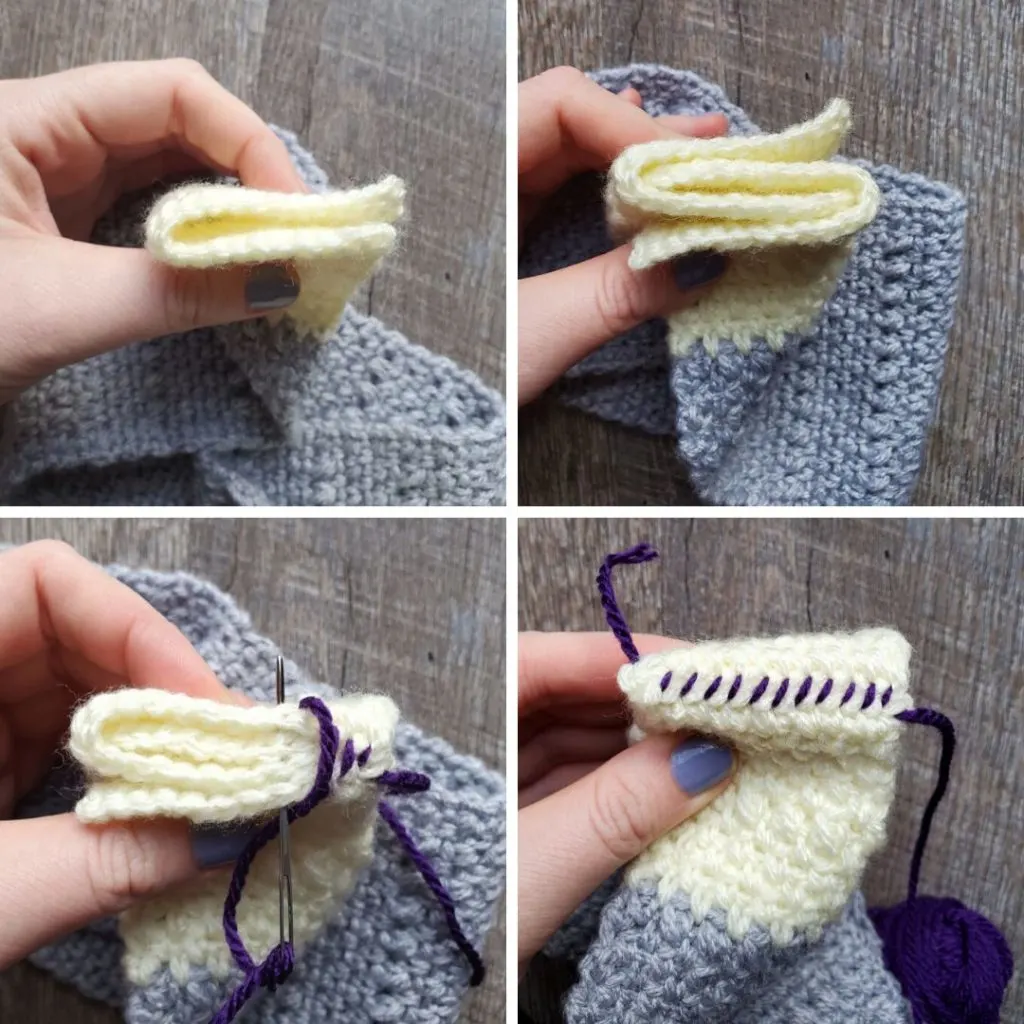
With the wrong side facing you, fold row 55 (61) and 54 (60) in half and put the first st of 54 (60) into the center of the fold of 55 (61) and the fold the rest of 54 (60) around the rest of the 55 (61) row (as shown in the photos below). Squish the two end rows together, use your yarn and needle and go through all four layers you made by folding the ends together. Continue across the row, seaming all four layers in your preferred method of seaming.
Fasten off, weave in your ends.

Now all you have to do is flip the headband around so the RS is facing you and you’re new headband will be all ready to go like the photo below!