

Happy new pattern Tuesday everyone!
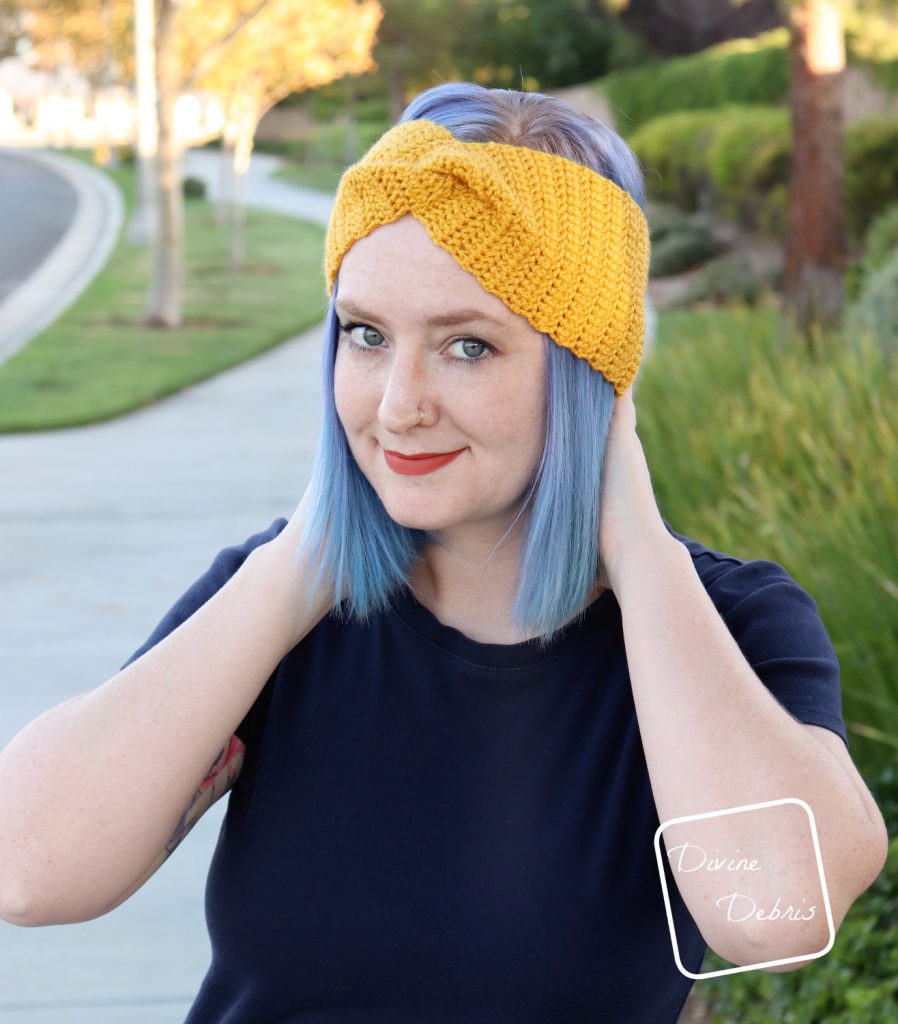
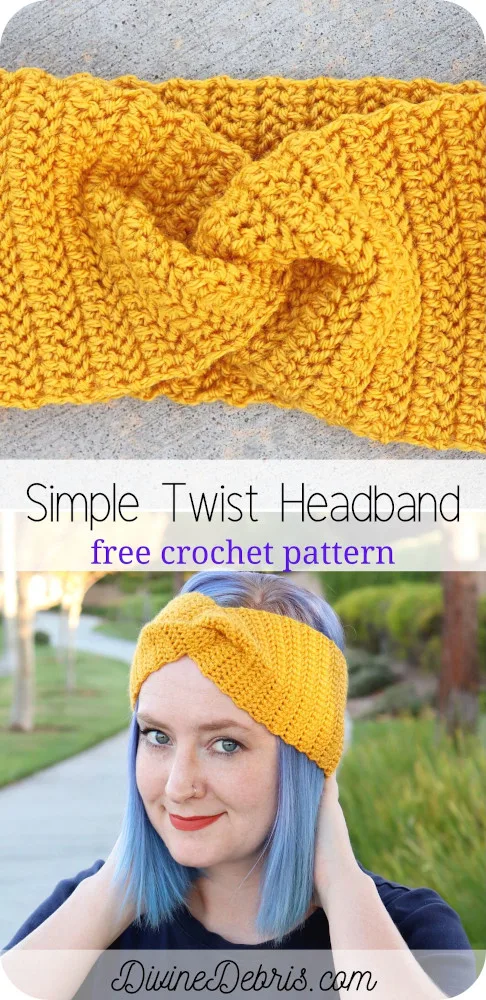
Who needs a fun, simple, and twisty headband pattern? This week that’s what you’re getting.
When I say this design is easy, I really, really mean it.
In the that past I’ve made some fun headbands, some complicated like the Diamonds Earwarm, some simple like the Willow Headband, and then some super full of texture like the Ashley Headband. But for this design I wanted to go easy, like quick gift in one evening easy. And you know a good herringbone half double crochet design. Or maybe you know that. But it’s true, I do.
And because we (here in the US) are finally moving into the cooler months, I wanted to make a new headband to wear for hikes or for runs that will be nice. Not to mention, because this design is so simple you could adapt it to thicker yarn and make it great for even cooler temps.
Overall, I just hope you like this simple design and make a bunch of them to go with all your outfits 😀
This post is linked to Hookin’ on Hump Day #200
(this post may contain affiliate links)
If you appreciate my weekly patterns I hope you’d consider purchasing an ad-free pdf of this pattern in my Ravelry shop.
Thank you Christina for becoming my newest patron on Patreon!
Materials
- US G (4.00 mm) crochet hook
- Size 3/DK weight yarn
- 1.3 – 1.5 oz / 112 – 129 yds
- I used Paintbox Yarns Simply DK
- Yarn needle
Gauge
- 19 HBhdc x 12 rows = 4”


Terms/ Stitches used
- RS: right side
- Ch: chain
- St: stitch
- HBhdc: herringbone half double crochet
Notes
- Herringbone half double crochet: yarn over, insert your hook into the stitch, yarn over and draw through the stitch and the first loop on your hook, yarn over and draw through the last 2 loops on your hook.
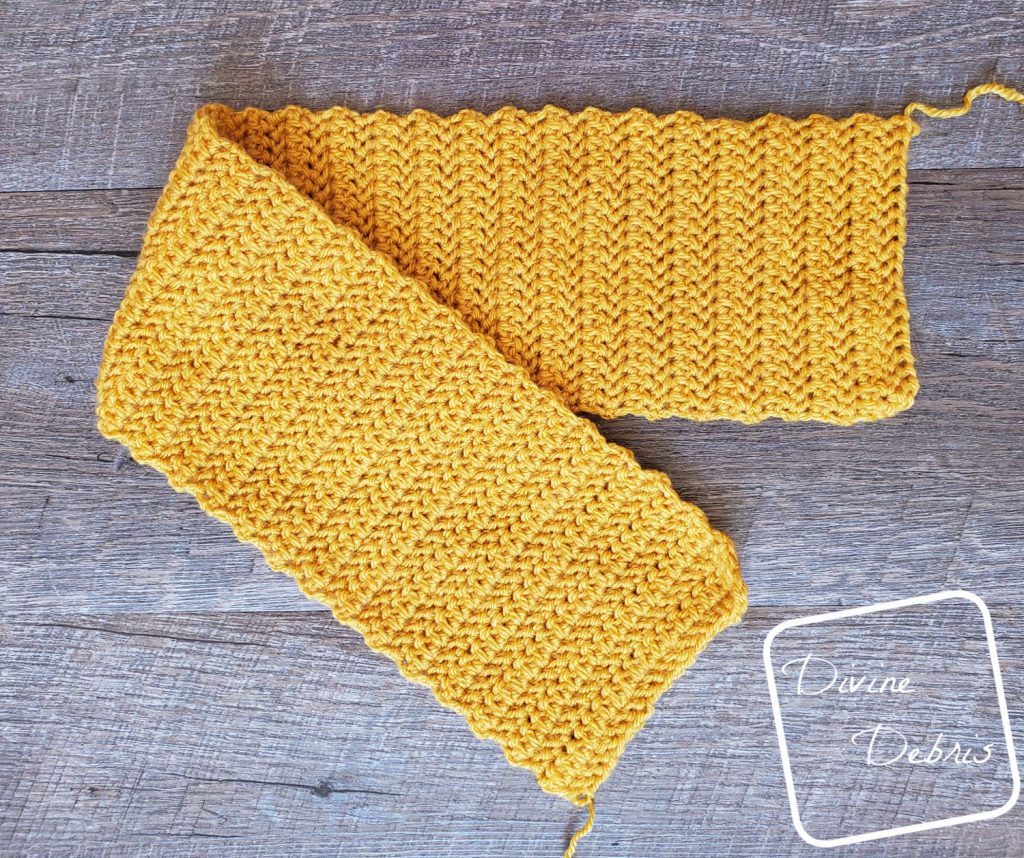
- This pattern is worked in 1 piece, in back and forth rows with a turn at the beginning/end of the row. The ends are then seamed up to create the twist.
- The ch-1 at the beginning of the row does not count as a stitch. The ch-1 is used in place of the traditional ch-2 to eliminate extra space on the beginning of the row. Feel free to use the ch-2 if you prefer.
- Make your ch-1 approx the same high as a hdc.
- This design is very easy to make taller, just chs to the beginning ch row. And to make it bigger or smaller in diameter, just add or subtract rows.
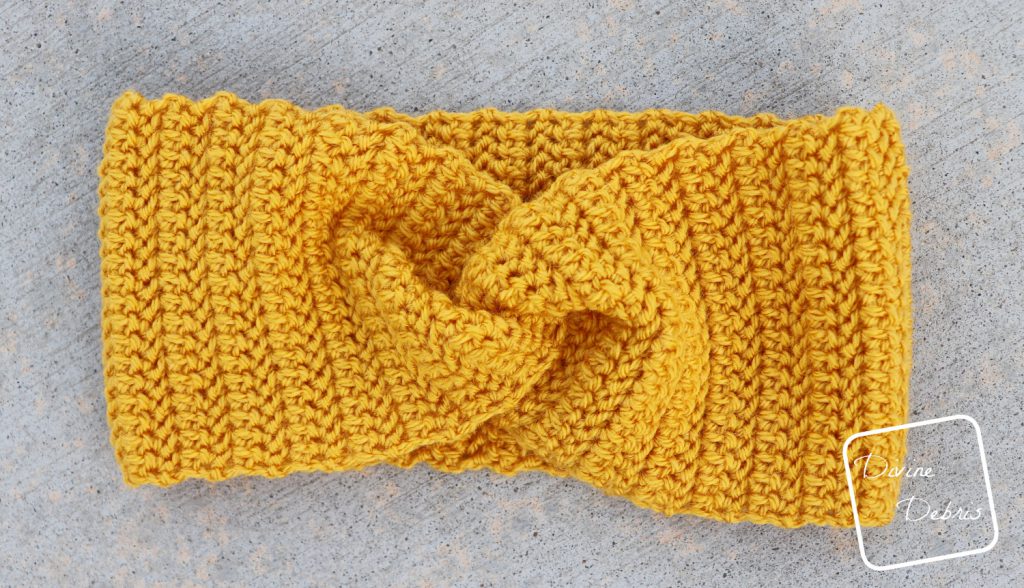
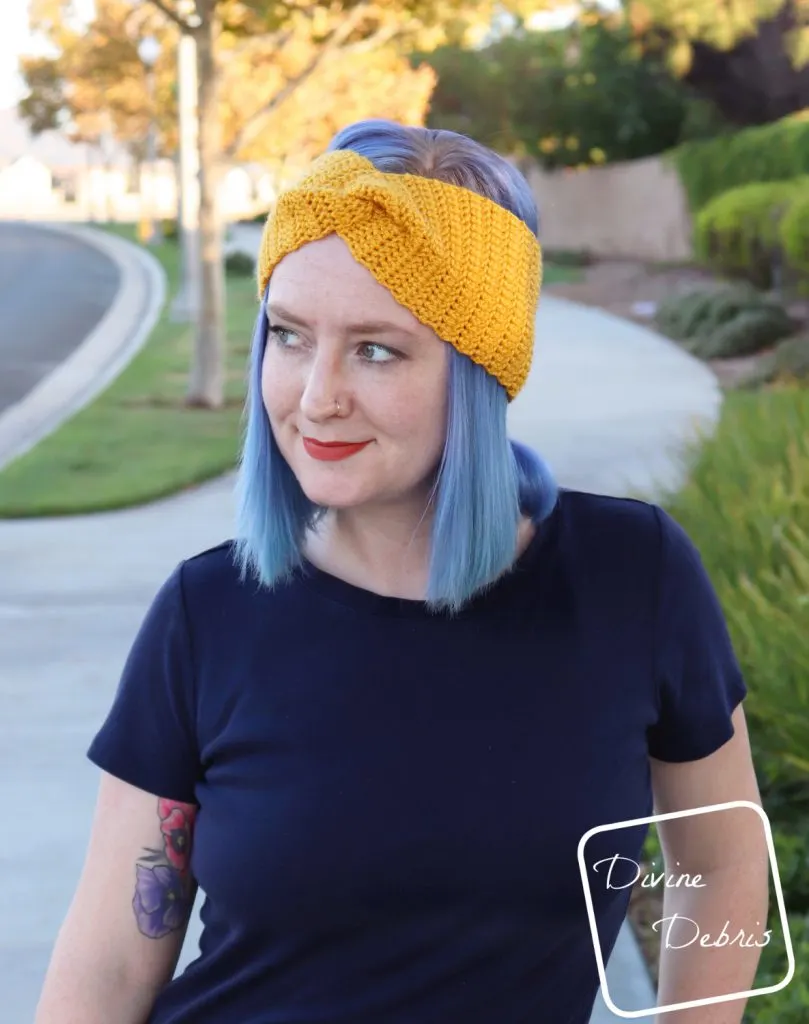
- The size in the photos is 22″ and was made using Paintbox Yarns Simply DK in Mustard.
Finished product dimensions (measurements may vary by gauge and yarn used)
| 20″ | 22″ |
| Yarn: 1.3 oz/112 yds Height: 4″ Diameter: 10″ | Yarn: 1.5 oz/129 yds Height: 4″ Diameter: 11″ |

Simple Twist Crochet Headband Pattern Instructions

Sizing as follows: 20″ (22)”
Row 1: Ch 20, HBhdc into the 3rd ch from the hook (the skipped stitches count as a Hdc), HBhdc into the next 17 sts – 19 HBhdc
Rows 2 – 60 (66): Ch 1, turn, HBhdc into the next 19 sts – 19 HBhdc
Fasten off leaving a long tail.
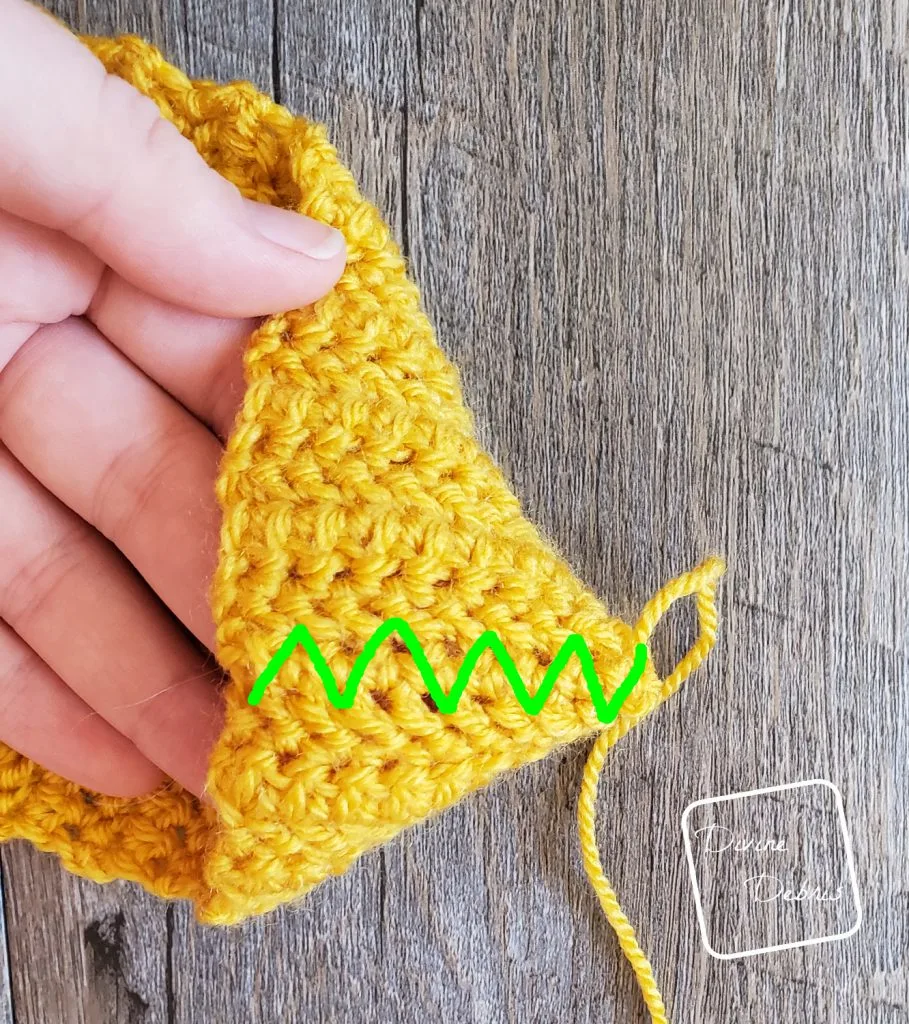
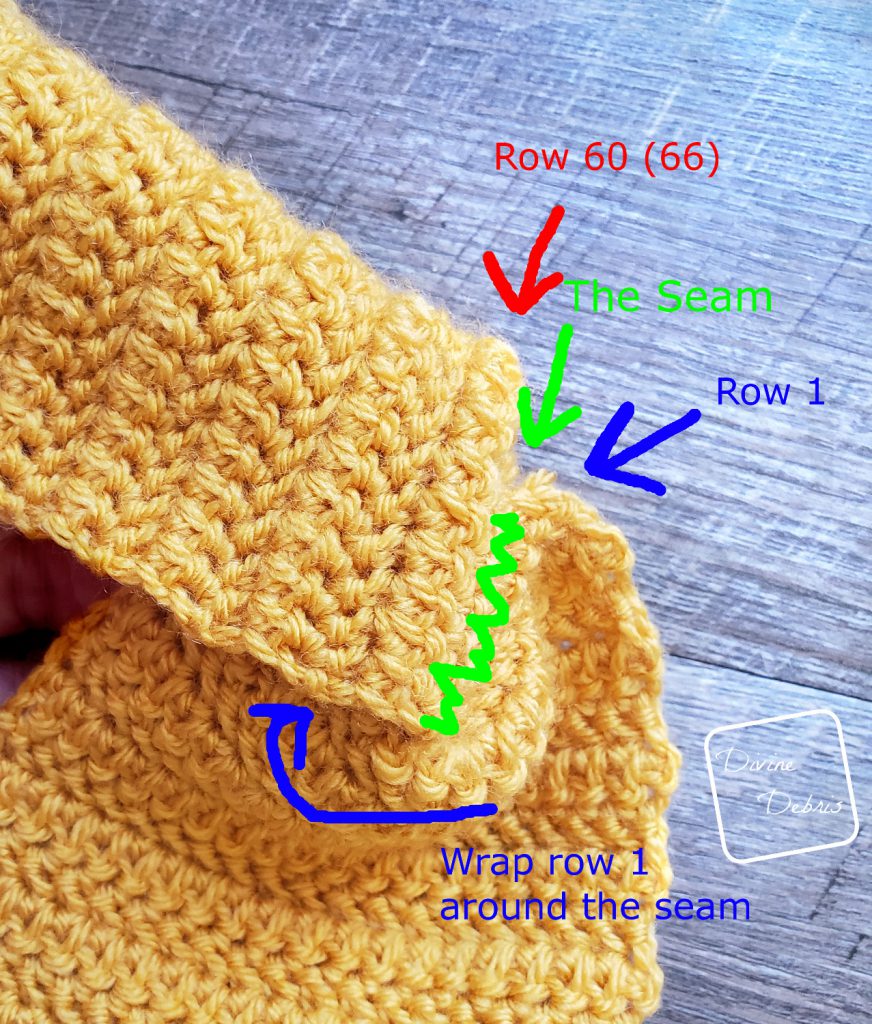
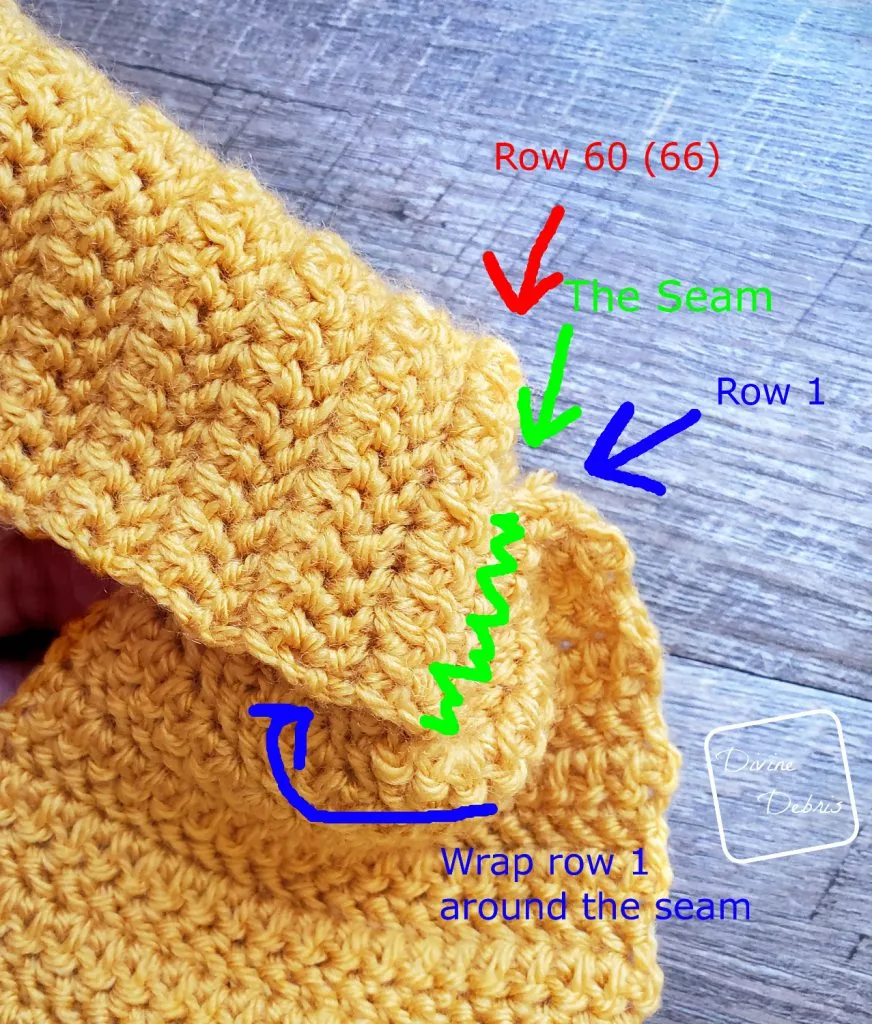
Seaming
Fold row 60 (66) in half and use the tail you left to sew together, in your preferred method of seaming, the first 9 and last 9 sts of the row. Starting at the unseamed stitch on row 60 (66) sew the first 9 sts from row 1 to the seam you just created. Make sure you don’t have a twist in the band at all, the back will remain flat. Continue wrapping row 1 around the seam from row 60 (66) and sew the last 9 sts to the other side of the seam. Weave in all your ends.
Below are some photos to help your seaming. If you’d like an alternate method for seaming, check out the Pretty in Gingham Headband pattern here.


Here’s a video to help seaming
You could find the other pattern, the Artemis Headband, here
Now just adjust your headband so it looks like the ends are swirling a little (if that makes sense) and wear all the time 😀

Amandine
Monday 14th of September 2020
Thank you for this lovely pattern, I'm in the process of trying it right now! I absolutely love the elasticity of this stitch. I was a bit worried my cotton yarn would be too stiff to work on a headband but it's actually perfect so far! Now I'm just hoping I'll get the twist right when I come to it
Jeanne
Saturday 30th of May 2020
I love your twisted headband. Could you please tell me what the pattern count is, I.e multiples of 2 + 1 ? I would like to male a different width. Thank you.
Divine Debris
Monday 15th of June 2020
You can make this with any number of stitches, but the wider the rows the more twist it will have. I like to make it an odd number because then you have 1 on the end for wrapping around :)
Brittany R
Friday 10th of January 2020
Hello, I absolutely love this cute style. Would you happen to have a pattern for that pretty textured brown one in your video? It's beautiful. Thanks so much for all you do.
Divine Debris
Saturday 11th of January 2020
That is the Artemis Headband. There's a link above the video :)
Nicole
Tuesday 17th of December 2019
So cute! Thank you for adding the video, it was very helpful.
KIMBERLY R MURPHY
Wednesday 27th of November 2019
Thank you sooooo much for your beautiful patterns and for showing me how to make twisted headband!!!! ❤❤❤❤❤❤❤❤❤❤❤❤❤❤❤❤❤