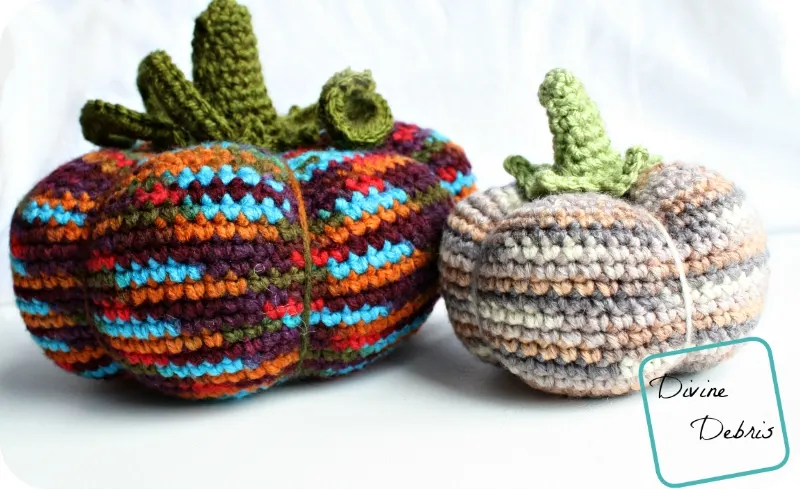
I’m still loving Fall, especially because it’s not even October yet! So, this week I have another Fall themed pattern for you. Are you excited? Sure, sure, it’s kinda your typical Fall decoration, but it’s a standard for a reason.
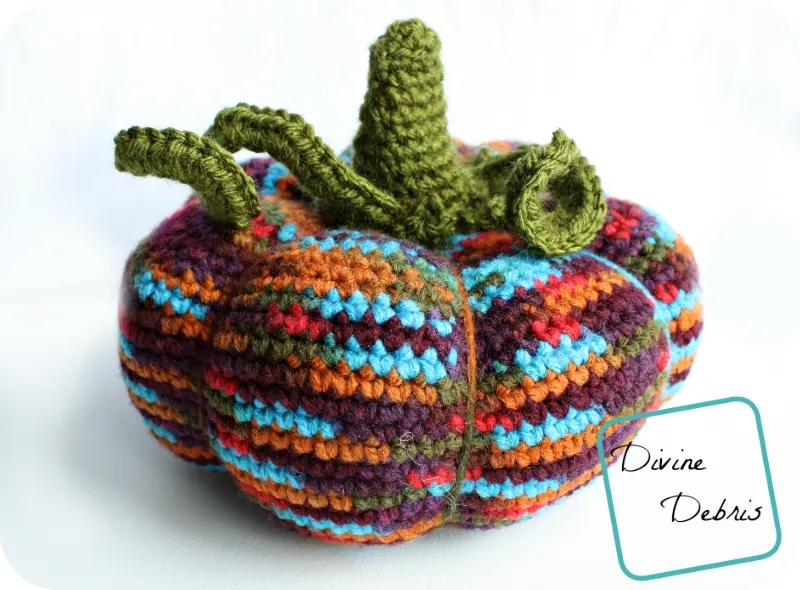
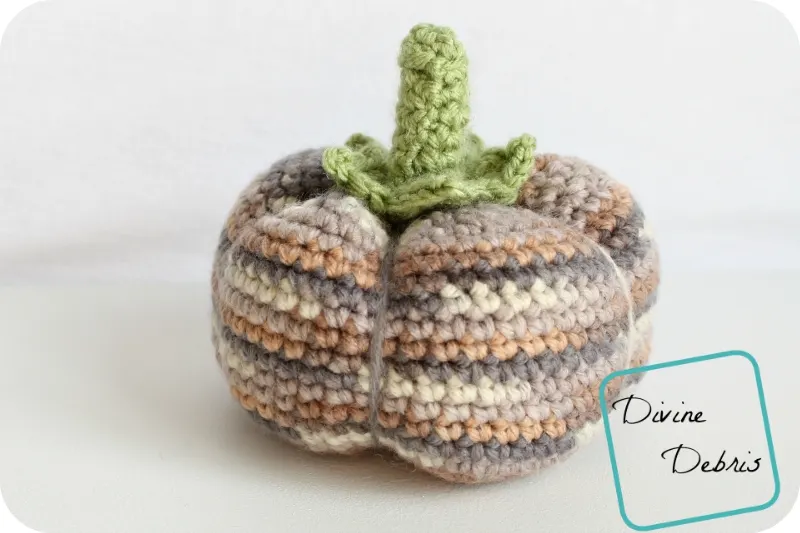
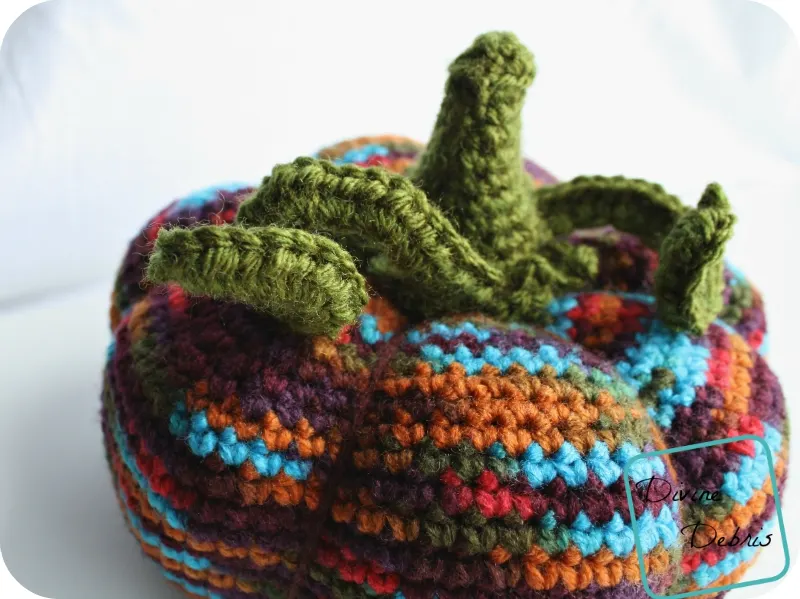
Yep, that’s right, I’m talking about pumpkins! These lovely little things can be easily adjusted to be larger or smaller, if you’re into super tiny crochet, and if you wanted to get crazy, you could even add faces to them!
The idea for this project came to me when I was walking around Michael’s and saw that their Loops and Threads Impeccable was on sale. The colors I used for this pattern are not standard pumpkin or even Fall colors and that’s what turned my head. I was super excited to create this pattern because I love the colors. You could totally make an orange pumpkin but, you know what? Get crazy! Make a purple pumpkin!
You can purchase an ad-free downloadable pdf of this pattern in my Ravelry shop.
Thank you to all my Patreon supporters.
Materials:
- Worsted weight yarn

- 2 – 5 oz/ 119 – 298 yards
- I used Loops and Treads Impeccable 4 (colors)
- US G (4.00 mm) crochet hook
- US H (4.50 mm) crochet hook (optional)
- Ami stuffing (I used Polyfil)
- Tapestry/ yarn needle
Gauge:
- 4.5” x 4.5” = 19 dcs x 9 rows
Terms/ stitches used:
- Magic circle
- Ch: chain
- St: stitch
- Slip st: slip stitch
- Sc: single crochet
- Sc2tog: single crochet 2 together
- Hdc: half double crochet
- Dc: double crochet
- Picot
Notes:
- The ch 1 at the beginning of the rows does not count as a st.
- This pattern is worked in the round, with a slip st into the first st.
- If you want a larger pumpkin, make more increase rows (the ones where you add sts to the row) following the same pattern, increase the side rows (the ones where it’s the same st count row after row) and make sure there are the same amount of decrease rows (where you sc2tog) as the increases.
- Instead of a sc2tog you can do an invisible sc decrease. It is completely invisible in the finished outcome.
- You need to know how to work into the back loop only for this pattern.
Finished dimensions:
- Height:
- Big: 3.5″, with stem: 5.5″ – 6″
- Small: 2.5″, with stem: 4″ – 4.5″
- Diameter:
- Big: 8″
- Small: 4.5″
Ami Pumpkin Crochet Pattern Instructions
Big:
Row 1: Create a magic circle, ch 1, sc 10 times into the circle, slip st into the first st to secure – 10 scs
Row 2: Ch 1, sc into the same st as join, sc twice into the next st, *sc into the next st, sc twice into the next st,* repeat from * to * 3 more times, slip st into the first st to secure – 15 scs
Row 3: Ch 1, sc into the same st as join sc into the next st, sc once into the next st, sc twice into the next st, *sc once into the next 2 sts, sc twice into the next st,* repeat from * to * 3 more times, slip st into the first st to secure – 20 scs
Row 4: Ch 1, sc into the same st as join, sc once into the next 2 sts, sc twice into the next st, *sc once into the next 3 sts, sc twice into the next st,* repeat from * to * 3 more times, slip st into the first st to secure – 25 scs
Note: weave in the tail from your magic circle here.
Row 5: Ch 1, sc into the same st as join, sc once into the next 3 sts, sc twice into the next st, *sc once into the next 4 sts, sc twice into the next st,* repeat from * to * 3 more times, slip st into the first st to secure – 30 scs
Row 6: Ch 1, sc into the same st as join, sc once into the next 4 sts, sc twice into the next st, *sc once into the next 5 sts, sc twice into the next st,* repeat from * to * 3 more times, slip st into the first st to secure – 35 scs
Row 7: Ch 1, sc into the same st as join, sc once into the next 5 sts, sc twice into the next st, *sc once into the next 6 sts, sc twice into the next st,* repeat from * to * 3 more times, slip st into the first st to secure – 40 scs
Row 8: Ch 1, sc into the same st as join, sc once into the next 6 sts, sc twice into the next st, *sc once into the next 7 sts, sc twice into the next st,* repeat from * to * 3 more times, slip st into the first st to secure – 45 scs
Row 9: Ch 1, sc into the same st as join, sc once into the next 7 sts, sc twice into the next st, *sc once into the next 8 sts, sc twice into the next st,* repeat from * to * 3 more times, slip st into the first st to secure – 50 scs
Row 10: Ch 1, sc into the same st as join, sc once into the next 8 sts, sc twice into the next st, *sc once into the next 9 sts, sc twice into the next st,* repeat from * to * 3 more times, slip st into the first st to secure – 55 scs
Row 11: Ch 1, sc into the same st as join, sc once into the next 9 sts, sc twice into the next st, *sc once into the next 10 sts, sc twice into the next st,* repeat from * to * 3 more times, slip st into the first st to secure – 60 scs
Row 12: Ch 1, sc into the same st as join, sc once into the next 10 sts, sc twice into the next st, *sc once into the next 11 sts, sc twice into the next st,* repeat from * to * 3 more times, slip st into the first st to secure – 65 scs
Row 13: Ch 1, sc into the same st as join, sc once into the next 11 sts, sc twice into the next st, *sc once into the next 12 sts, sc twice into the next st,* repeat from * to * 3 more times, slip st into the first st to secure – 70 scs
Row 14: Ch 1, sc into the same st as join, sc once into the next 12 sts, sc twice into the next st, *sc once into the next 13 sts, sc twice into the next st,* repeat from * to * 3 more times, slip st into the first st to secure – 75 scs
Row 15: Ch 1, sc into the same st as join, sc once into the next 13 sts, sc twice into the next st, *sc once into the next 14 sts, sc twice into the next st,* repeat from * to * 3 more times, slip st into the first st to secure – 80 scs
Row 16: Ch 1, sc into the same st as join, sc once into the next 14 sts, sc twice into the next st, *sc once into the next 15 sts, sc twice into the next st,* repeat from * to * 3 more times, slip st into the first st to secure – 85 scs
Rows 17 – 26: Ch 1, sc into the same st as join and into the next 84 sts, slip st into the first st to secure – 85 scs
Row 27: Ch 1, sc into the same st as join, sc once into the next 14 sts, sc2tog, *sc once into the next 15 sts, sc2tog,* repeat from * to * 3 more times, slip st into the first st to secure – 80 scs
Row 28: Ch 1, sc into the same st as join, sc once into the next 13 sts, sc2tog, *sc once into the next 14 sts, sc2tog,* repeat from * to * 3 more times, slip st into the first st to secure – 75 scs
Row 29: Ch 1, sc into the same st as join, sc once into the next 12 sts, sc2tog, *sc once into the next 13 sts, sc2tog,* repeat from * to * 3 more times, slip st into the first st to secure – 70 scs
Row 30: Ch 1, sc into the same st as join, sc once into the next 11 sts, sc2tog, *sc once into the next 12 sts, sc2tog,* repeat from * to * 3 more times, slip st into the first st to secure – 65 scs
Row 31: Ch 1, sc into the same st as join, sc once into the next 10 sts, sc2tog, *sc once into the next 11 sts, sc2tog,* repeat from * to * 3 more times, slip st into the first st to secure – 60 scs
Row 32: Ch 1, sc into the same st as join, sc once into the next 9 sts, sc2tog, *sc once into the next 10 sts, sc2tog,* repeat from * to * 3 more times, slip st into the first st to secure – 55 scs
Row 33: Ch 1, sc into the same st as join, sc once into the next 8 sts, sc2tog, *sc once into the next 9 sts, sc2tog,* repeat from * to * 3 more times, slip st into the first st to secure – 50 scs
Row 34: Ch 1, sc into the same st as join, sc once into the next 7 sts, sc2tog, *sc once into the next 8 sts, sc2tog,* repeat from * to * 3 more times, slip st into the first st to secure – 45 scs
Row 35: Ch 1, sc into the same st as join, sc once into the next 6 sts, sc2tog, *sc once into the next 7 sts, sc2tog,* repeat from * to * 3 more times, slip st into the first st to secure – 40 scs
Row 36: Ch 1, sc into the same st as join, sc once into the next 5 sts, sc2tog, *sc once into the next 6 sts, sc2tog,* repeat from * to * 3 more times, slip st into the first st to secure – 35 scs
Row 37: Ch 1, sc into the same st as join, sc once into the next 4 sts, sc2tog, *sc once into the next 5 sts, sc2tog,* repeat from * to * 3 more times, slip st into the first st to secure – 30 scs
Row 38: Ch 1, sc into the same st as join, sc once into the next 3 sts, sc2tog, *sc once into the next 4 sts, sc2tog,* repeat from * to * 3 more times, slip st into the first st to secure – 25 scs
Row 39: Ch 1, sc into the same st as join, sc once into the next 2 sts, sc2tog, *sc once into the next 3 sts, sc2tog,* repeat from * to * 3 more times, slip st into the first st to secure – 20 scs
Row 40: Ch 1, sc into the same st as join, sc once into the next st, sc2tog, *sc once into the next 2 sts, sc2tog,* repeat from * to * 3 more times, slip st into the first st to secure – 15 scs
Row 41: Ch 1, sc into the same st as join, sc2tog, *sc once into the next st, sc2tog,* repeat from * to * 3 more times, slip st into the first st to secure – 10 scs
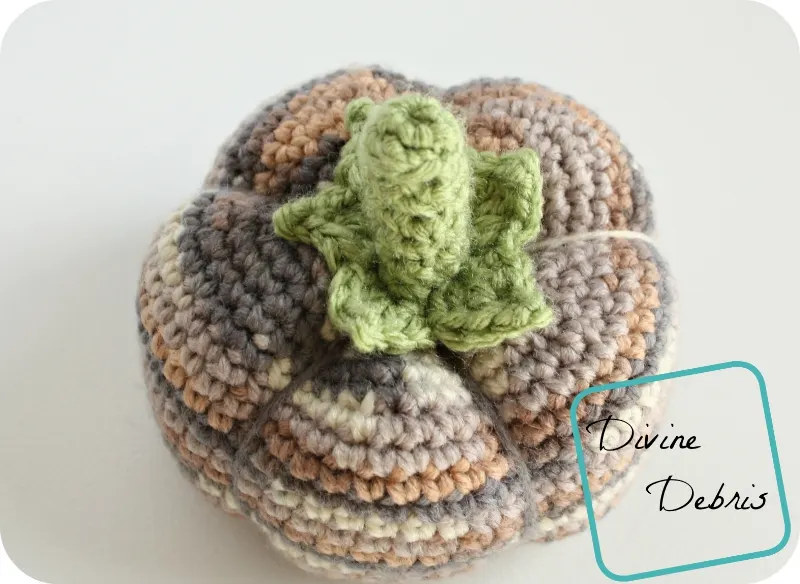
Fasten off. Leave a LONG (like 84″ – 85″) tail and use that to close up the hole on the top and then go through the center of said hole and direct the needle out the bottom (in the middle of the magic circle). Go around the outside of the pumpkin (pull this tight) and go back down through the center of the top, navigating the needle through the middle of the pumpkin and out the bottom. I did this 7 times, you can do this as many times as you want to get the puffy pumpkin sections. Once you did all your sections, weave in your yarn on the bottom of the pumpkin and move onto the stem.
Small
Row 1: Create a magic circle, ch 1, sc 10 times into the circle, slip st into the first st to secure – 10 scs
Row 2: Ch 1, into the same st as join, sc twice into the next st, *sc into the next st, sc twice into the next st,* repeat from * to * 3 more times, slip st into the first st to secure – 15 scs
Row 3: Ch 1, sc into the same st as join sc into the next st, sc once into the next st, sc twice into the next st, *sc once into the next 2 sts, sc twice into the next st,* repeat from * to * 3 more times, slip st into the first st to secure – 20 scs
Row 4: Ch 1, sc into the same st as join, sc once into the next 2 sts, sc twice into the next st, *sc once into the next 3 sts, sc twice into the next st,* repeat from * to * 3 more times, slip st into the first st to secure – 25 scs
Note: weave in the tail from your magic circle here.
Row 5: Ch 1, sc into the same st as join, sc once into the next 3 sts, sc twice into the next st, *sc once into the next 4 sts, sc twice into the next st,* repeat from * to * 3 more times, slip st into the first st to secure – 30 scs
Row 6: Ch 1, sc into the same st as join, sc once into the next 4 sts, sc twice into the next st, *sc once into the next 5 sts, sc twice into the next st,* repeat from * to * 3 more times, slip st into the first st to secure – 35 scs
Row 7: Ch 1, sc into the same st as join, sc once into the next 5 sts, sc twice into the next st, *sc once into the next 6 sts, sc twice into the next st,* repeat from * to * 3 more times, slip st into the first st to secure – 40 scs
Row 8: Ch 1, sc into the same st as join, sc once into the next 6 sts, sc twice into the next st, *sc once into the next 7 sts, sc twice into the next st,* repeat from * to * 3 more times, slip st into the first st to secure – 45 scs
Row 9: Ch 1, sc into the same st as join, sc once into the next 7 sts, sc twice into the next st, *sc once into the next 8 sts, sc twice into the next st,* repeat from * to * 3 more times, slip st into the first st to secure – 50 scs
Rows 10 – 21: Ch 1, sc into the same st as join and into the next 49 sts, slip st into the first st to secure – 50 scs
Row 22: Ch 1, sc into the same st as join, sc once into the next 7 sts, sc2tog, *sc once into the next 8 sts, sc2tog,* repeat from * to * 3 more times, slip st into the first st to secure – 45 scs
Row 23: Ch 1, sc into the same st as join, sc once into the next 6 sts, sc2tog, *sc once into the next 7 sts, sc2tog,* repeat from * to * 3 more times, slip st into the first st to secure – 40 scs
Row 24: Ch 1, sc into the same st as join, sc once into the next 5 sts, sc2tog, *sc once into the next 6 sts, sc2tog,* repeat from * to * 3 more times, slip st into the first st to secure – 35 scs
Row 25: Ch 1, sc into the same st as join, sc once into the next 4 sts, sc2tog, *sc once into the next 5 sts, sc2tog,* repeat from * to * 3 more times, slip st into the first st to secure – 30 scs
Row 26: Ch 1, sc into the same st as join, sc once into the next 3 sts, sc2tog, *sc once into the next 4 sts, sc2tog,* repeat from * to * 3 more times, slip st into the first st to secure – 25 scs
Row 27: Ch 1, sc into the same st as join, sc once into the next 2 sts, sc2tog, *sc once into the next 3 sts, sc2tog,* repeat from * to * 3 more times, slip st into the first st to secure – 20 scs
Row 28: Ch 1, sc into the same st as join, sc once into the next st, sc2tog, *sc once into the next 2 sts, sc2tog,* repeat from * to * 3 more times, slip st into the first st to secure – 15 scs
Row 29: Ch 1, sc into the same st as join, sc2tog, *sc once into the next st, sc2tog,* repeat from * to * 3 more times, slip st into the first st to secure – 10 scs
Fasten off. Leave a LONG (like 35″ – 36″) tail and use that to close up the hole on the top and then go through the center of said hole and direct the needle out the bottom (in the middle of the magic circle). Go around the outside of the pumpkin (pull this tight) and go back down through the center of the top, navigating the needle through the middle of the pumpkin and out the bottom. I did this 7 times, you can do this as many times as you want to get the puffy pumpkin sections. Once you did all your sections, weave in your yarn on the bottom of the pumpkin and move onto the stem.
Stems
Large:
Row 1: Create a magic circle, ch 1, sc 6 times into the circle, slip st into the firs st to secure – 6 scs
Row 2: Ch 1, sc into the same st as join, sc twice into the next st, *sc into the next st, sc twice into the next st,* repeat from * to * once more, slip st into the first st to secure – 9 scs
Row 3: Ch 1, sc into the back loop only of the first st, sc into the back loop only in the next 8 sts, slip st into the first st to secure – 9 scs
Row 4: Ch 1, sc into the same st as join, sc into the next 8 sts, slip st into the first st to secure – 9 scs
Row 5: Ch 1, sc into the same st as join, sc once into the next st, sc twice into the next st, *sc once into the next 2 sts, sc twice into the next st, * repeat from * to * once more, slip st into the first st to secure – 12 scs
Rows 6 – 7: Ch 1, sc into the same st as join and into the next 11 sts, slip st into the first st to secure – 12 scs
Row 8: Ch 1, sc into the same st as join, sc once into the next 2 sts, sc twice into the next st, *sc once into the next 3 sts, sc twice into the next st,* repeat from * to * once more, slip st into the first st to secure – 15 scs
Rows 9 – 10: Ch 1, sc into the same st as join, sc into the next 14 sts, slip st into the first st to secure – 15 scs
Row 11: Ch 1, sc into the same st as join, sc once into the next 3 sts, sc twice into the next st, * sc once into the next 4 sts, sc twice into the next st,* repeat from * to * once more, slip st into the first st to secure – 18 scs
Row 12: Ch 1, sc into the same st as join, sc once into the next 17 sts, slip st into the first st to secure – 18 scs
Note: This next row is worked into the back loop only.
Row 13: Ch 1, sc into the same st as join, [2 dc, picot, 2 dc] into the next st, *sc into the next 2 sts, [2 dc, picot, 2 dc] into the next st,* repeat from * to * 4 more times, sc into the next st, slip st into the first st to secure – 12 scs, 24 dcs
Fasten off leaving a tail that’s at least the 6″, use this tail to secure the stem to the top of the pumpkin. Trim all your ends.
Small:
Row 1: Ch 2, sc 4 times into the second ch from the hook, slip st into the first st to secure – 4 scs
Row 2: Ch 1, sc into the same st as join, sc twice into the next st, sc once into the next st, sc twice into the next st, slip st into the first st to secure – 6 scs
Row 3: Ch 1, sc into the back loop only as the same st as join, sc into the back loop only of the next 5 sts, slip st into the first st to secure – 6 scs
Row 4: Ch 1, sc into the same st as join, sc once into the next st, sc twice into the next st, sc once into the next 2 sts, sc twice into the next st, slip st into the first st to secure- 8 scs
Rows 5 – 6: Ch 1, sc into the same st as join, sc once into the next 7 sts, slip st into the first st to secure – 8 scs
Row 7: Ch 1, sc once into the same st as join, sc once into the next 2 sts, sc twice into the next st, sc once into the next 3 sts, sc twice into the next st, slip st into the first st to secure – 10 scs
Row 8: Ch 1, sc once into the same st as join, sc once into the next 9 sts, slip st into the first st to secure – 10 scs
Note: This next row is worked into the back loop only.
Row 9: Ch 1, sc into the same st as join, [2 dc, picot, 2 dc] into the next st, *sc into the next st, [2 dc, picot, 2 dc] into the next st,* repeat from * to * 3 more times, slip st into the first st to secure – 5 scs, 20 dcs
Fasten off leaving a tail that’s at least the 4″, use this tail to secure the stem to the top of the pumpkin. Trim all your ends.
Tendrils:
You can use the tendril pattern I posted for my Pumpkin Wall Decoration or you can use the one I designed specifically for this pattern:
Row 1: Use H (4.50 mm) hook to ch 15, switch to G (4.00 mm) hook to ch 3, create a picot with the final ch 3, and *hdc 3 times into the next st, hdc twice into the next st*, repeat from * to * the rest of the way across – 38 scs
Leave a long tail, use that to secure the tendril to the pumpkin stem.
This tendril is easy to adjust and make larger or smaller, it’s really up to you.
I can’t wait to see all the lovely pumpkins! Make all of the pumpkins and share some photos with me!
Have a good week.
This post is linked to Oombawka Design’s Link and Share #112, Rebeckah’s Treasures Saturday Link Party #15, Hookin’ on Hump Day #104, and Linky Ladies’ Community Link Party #19.

Linae Bouche
Friday 4th of October 2019
It works up very cute and I'm getting lots of compliments. This was my first of this type of project as I'm still fairly new to crochet and use it more as a hobby and distraction. I was please at the ease of it.
I did notice: In row 2, after "Ch 1", you are missing "sc" when stating into the same stitch as the chain and you never mention when to stuff the pumpkin. Also, as a newbie, I had to look up how to do a picot.
Valarie Medina
Thursday 21st of September 2017
What green colors and brand of yarn did you use????
Divine Debris
Thursday 21st of September 2017
For the smaller one, it's Loops and Threads and the larger I think is Caron United but it was just a little ball leftover from a previous project.
Elizabeth Dunbar
Friday 23rd of October 2015
Thank you so much for sharing your adorable pumpkin patterns!
Cynthia Banessa
Thursday 8th of October 2015
These are the cutest pumpkins have seen!!!...and believe me I've seen plenty of pumpkins!
Divine Debris
Thursday 8th of October 2015
Thank you!