
It finally happened. I thought I felt it coming-on on Sunday, Monday I felt icky and went to bed with some NyQuil and today I woke up with it. Yup, I’m sick. I felt like there was a chance I was going to be sick a couple of weeks ago but I wasn’t sure and it didn’t get worse than feelin’ icky. Today, though, my head feels foggy and I’m very irritable, also my throat doesn’t work for talking or eating other than hot beverages (yay coffee!). So I’m sitting here, inattention plaguing me and I don’t know what to talk about. Previously I was going to praise that, at least in stores, Fall was beginning. I was able to buy pumpkin bread the other day and made french toast, it was delicious. Perhaps I was too excited for Fall start. I brought this crappy cold into my life because I was excited for the Fall and Winter to begin. Nah.
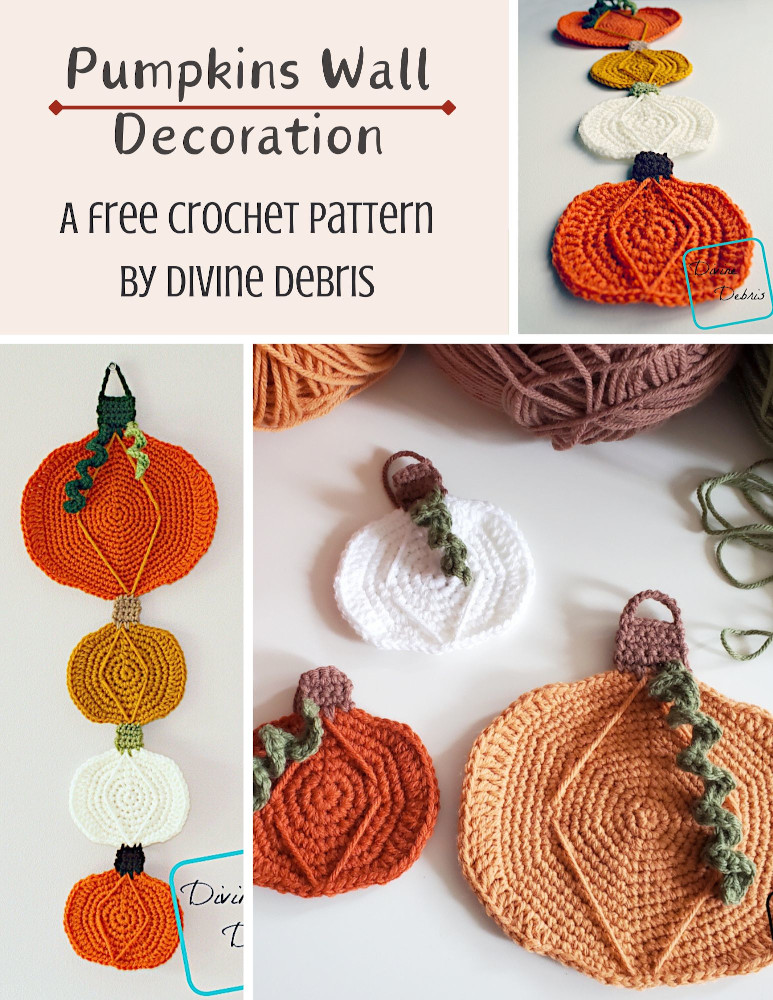
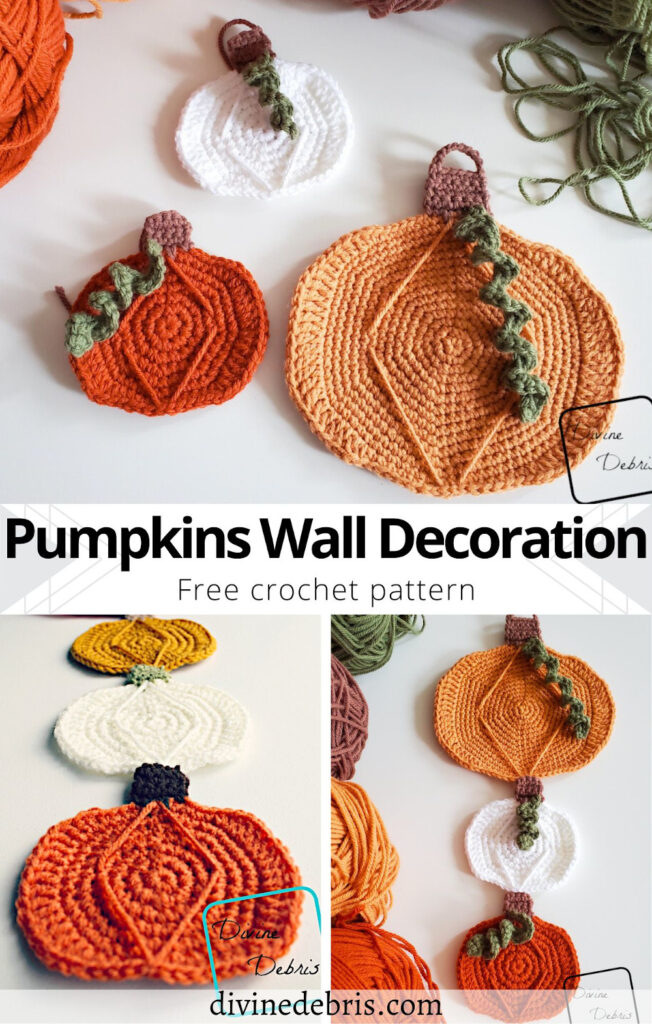
So, for this week I have something Fall themed for you. Like I said last week, you were going to either get pumpkin earrings or the Katie Cowl and the Katie Cowl won. Instead of earrings, I’m posting an applique that you can turn, as I did, into a fun wall decoration. It’s really easy and you should be able to do all sorts of fun things with the design.
Oh, and get buy one get one free in my Ravelry shop, no code needed, through next week!
Materials:
- US I ( 5.50 mm) crochet hook
- Worsted weight/ size #4 yarn
- amount will depend on how many pumpkins you make
- at least 2 oz for the design as shown (7 colors were used)
- Tapestry needle
Gauge:
- 4” x 4” = 14 dcs x 7 rows
Terms/ stitches used:
- St: stitch
- Ch: chain
- Slip st:
- Sc: single crochet
- Spike sc: spike single crochet
- Hdc: half double crochet
- Dc: double crochet
- Tr: treble crochet
- Magic circle


Notes:
- The pumpkins are worked in the round, with a slip st into the first st to secure it.
- The ch 1 does not count as a stitch.
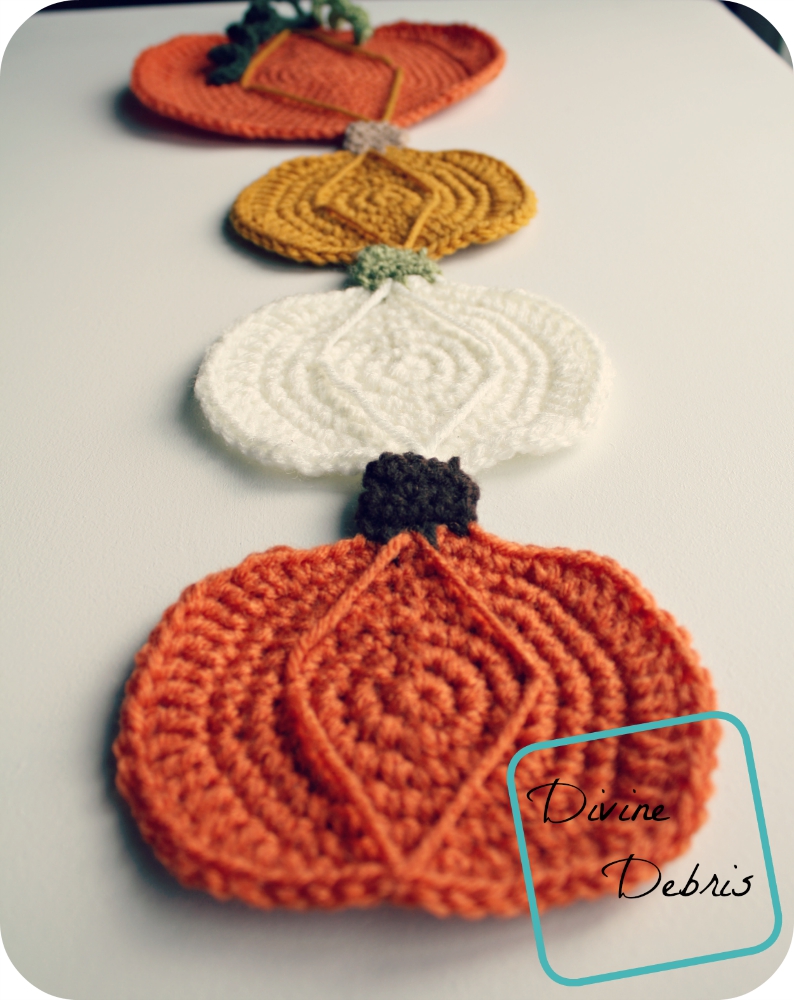
- I only made 3 little pumpkins, but you can make as many as you would like. 😀
Finished measurements:
- Little pumpkin: height: 5″, width: 4.5″
- Big Pumpkin: height: 7.75″, width: 8″
- Altogether height: 23″

Pumpkin Wall Hanging Crochet Pattern Instructions
Small pumpkin
Row 1: Create a magic circle, ch 1 and sc 8 times into the circle, slip st into the first st to secure – 8 scs
Row 2: Ch 1, sc twice into each row, slip st into the first st to secure – 16 scs
Row 3: Ch 1, sc once into the same st as join, sc twice into the next st, *sc once into the next st, sc twice into the next st,* repeat from * to * 6 more times, slip st into the first st to secure – 24 scs
Row 4: Ch 1, sc once into the same st as join, sc once inPto the next st, sc twice into the next st, *sc once into the next 2 sts, sc twice into the next st,* repeat from * to * 6 more times, slip st into the first st to secure – 32 scs
Row 5: Ch 1, sc once into the same st as join, sc once into the next 2 sts, sc twice into the next st, *sc once into the next 3 sts, sc twice into the next st,* repeat from * to * 6 more times, slip st into the first st to secure – 40 scs
Row 6: Ch 1, sc once into the same st as join, sc once into the next 3 sts, sc twice into the next st, *sc once into the next 4 sts, sc twice into the next st,* repeat from * to * 6 more times, slip st into the first st to secure – 48 scs
Row 7: Ch 1, sc into the next 5 sts, hdc twice into the next st, dc into the next 7 sts, dc twice into the next st, dc into the next 4 sts, hdc twice into the next st, sc into the next 10 sts, hdc twice into the next st, dc into the next 4 sts, dc twice into the next st, dc into the next 7 sts, hdc twice into the next st, sc into the remaining 5 sts, slip st into the first st to secure – 20 scs, 8 hdcs, 26 dcs
Fasten off, weave in all your ends.
Stem
With the seam still going up toward the top, move back 2 sts from where you secured row 7 and join another color in the 2nd st.
Color B: Row 1: Ch 1, sc into the first st, spike sc the st before the seam and spike sc into the first st following the seam, sc into the next st – 2 scs, 2 spike scs
Rows 2 – 4: Turn, ch 1, sc across – 4 scs
*Note: leave a long tail on the stem and you can use this to attach it to the next pumpkin.
Larger pumpkin
Row 1: Create a magic circle, ch 1 and sc 6 times into the circle, slip st into the first st to secure – 6 scs
Row 2: Ch 1, sc twice into each row, slip st into the first st to secure – 12 scs
Row 3: Ch 1, sc once into the same st as join, sc twice into the next st, *sc once into the next st, sc twice into the next st,* repeat from * to * 4 more times, slip st into the first st to secure – 18 scs
Row 4: Ch 1, sc once into the same st as join, sc once into the next st, sc twice into the next st, *sc once into the next 2 sts, sc twice into the next st,* repeat from * to * 4 more times, slip st into the first st to secure – 24 scs
Row 5: Ch 1, sc once into the same st as join, sc once into the next 2 sts, sc twice into the next st, *sc once into the next 3 sts, sc twice into the next st,* repeat from * to * 4 more times, slip st into the first st to secure – 30 scs
Row 6: Ch 1, sc once into the same st as join, sc once into the next 3 sts, sc twice into the next st, *sc once into the next 4 sts, sc twice into the next st,* repeat from * to * 4 more times, slip st into the first st to secure – 36 scs
Row 7: Ch 1, sc once into the same st as join, sc once into the next 4 sts, sc twice into the next st, *sc once into the next 5 sts, sc twice into the next st,* repeat from * to * 4 more times, slip st into the first st to secure – 42 scs
Row 8: Ch 1, sc once into the same st as join, sc once into the next 5 sts, sc twice into the next st, *sc once into the next 6 sts, sc twice into the next st,* repeat from * to * 4 more times, slip st into the first st to secure – 48 scs
Row 9: Ch 1, sc once into the same st as join, sc once into the next 6 sts, sc twice into the next st, *sc once into the next 7 sts, sc twice into the next st,* repeat from * to * 4 more times, slip st into the first st to secure – 54 scs
Row 10: Ch 1, sc once into the same st as join, sc once into the next 7 sts, sc twice into the next st, *sc once into the next 8 sts, sc twice into the next st,* repeat from * to * 4 more times, slip st into the first st to secure – 60 scs
Row 11: Ch 1, sc once into the same st as join, sc once into the next 8 sts, sc twice into the next st, *sc once into the next 9 sts, sc twice into the next st,* repeat from * to * 4 more times, slip st into the first st to secure – 66 scs
Row 12: Ch 1, sc once into the same st as join, sc once into the next 9 sts, sc twice into the next st, *sc once into the next 10 sts, sc twice into the next st,* repeat from * to * 4 more times, slip st into the first st to secure – 72 scs
Row 13: Ch 1, sc once into the same st as join, sc once into the next 10 sts, sc twice into the next st, *sc once into the next 11 sts, sc twice into the next st,* repeat from * to * 4 more times, slip st into the first st to secure – 78 scs
Row 14: Ch 1, sc once each st around, slip st into the first st to secure – 78 scs
Row 15: Ch 1, sc into the next 8 sts, hdc twice into the next st, dc into the next 5 sts, tr into the next 5 sts, tr twice into the next st, tr into the next 5 sts, dc into the next 5 sts, hdc twice into the next st, sc into the next 6 sts, slip st into the next 4 sts, sc into the next 6 sts, hdc twice into the next st, dc into the next 5 sts, tr into the next 5 sts, tr twice into the next st, tr into the next 5 sts, dc into the next 5 sts, hdc twice into the next st, sc into the next 8 sts, slip st into the first st to secure – 28 scs, 8 hdcs, 20 dcs, 24 trs, 4 slip sts
Stem
With the seam still going up toward the top, move back 3 sts from where you secured row 15 and join your yarn in the 3rd st.
Color B: Row 1: Ch 1, sc into the next 2 sts, spike sc into the next st before the seam, spike sc into the first st following the seam, sc into the next 2 sts – 4 scs, 2 spike scs
Rows 2 – 5: Turn, ch 1, sc across – 6 scs
Row 6: Turn, slip st into the first st, ch 10, skip 5 sts, slip st into the last st.
Fasten off.
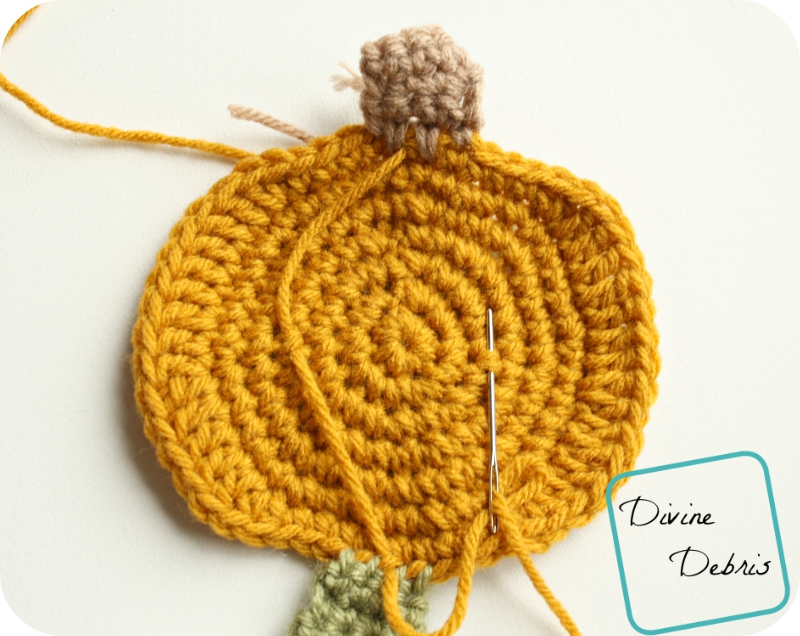
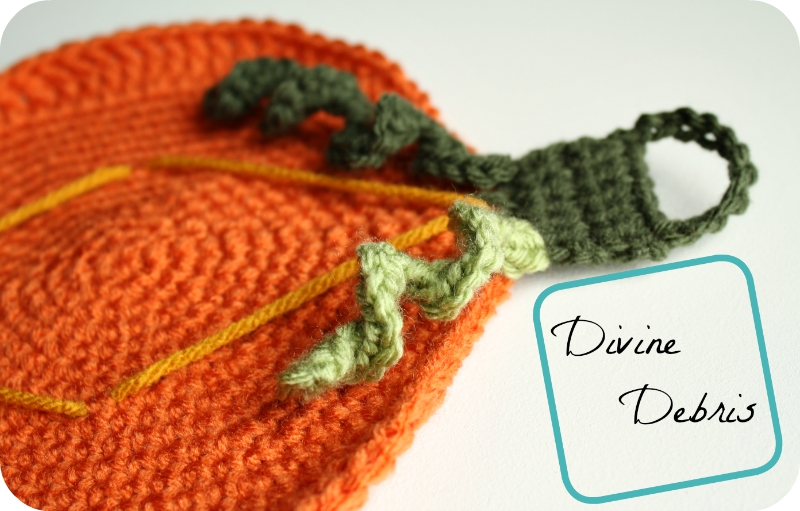
Details
Tendrils – just ch as many chs as you would like and sc 3 times into each of them. The row will naturally curl and you can just attach it to the stem.
Diamond – for the diamond-y thing on the front of the pumpkins, just use your tapestry/ yarn needle and draw the yarn through the center of the two spike scs in the stem’s first row, slide it under a st a couple of rows from the center, then down though any st on the bottom and then again a couple of rows on the center, opposite the other side and back through the top again.
So this was a cute little idea I had and I hope you enjoy it. I may add more tendrils to the little pumpkins, I haven’t decided. I do know that I’m going to go drink a good amount of coffee, then switch to tea and relax until I have to go to work this evening. I hope you have a week of good health and a great start to your Fall. Ooh, I have pie in the fridge. Swallowing pie, given my throat’s current condition, is a yarn of another color.

This post is linked to The Linky Ladies’ Community Link Party #16, Rebeckah’s Treasures Saturday Link Party #12, AnneMarie’s Haakblog Link Up, and Oombawka Design Link and Share Wednesday #109.
Over 200 Pumpkin Shaped Crochet Patterns - The Knit Wit by Shair
Monday 16th of October 2017
[…] Pumpkin Wall Decoration […]
Linky Ladies ~ Community Link Party #17 | Crystalized Designs Blog
Tuesday 15th of September 2015
[…] #1 Pumpkin Wall Decoration by Divine Debris #2 Miss Downtown Abby I by Northern Girl Stamper #3 Isabella Dress by The Country Willow #4 Rainbow Zebra Hood by Carolina Guzman #5 Criss Cross Applesauce Girls Sweater by Gramma Beans […]
The Linky Ladies Community Link Party #17 - The Hooked Haberdasher
Tuesday 15th of September 2015
[…] #1Pumpkin Wall Decoration by DivineDebris (PIN IT) […]
The Linky Ladies – Community Link Party #17 | The Purple Poncho
Tuesday 15th of September 2015
[…] Pumpkin Wall Decoration by DivineDebris (PIN […]
The Linky Ladies Community Link Party #17 | Pattern Paradise
Tuesday 15th of September 2015
[…] #1 Pumpkin Wall Decoration by DivineDebris (PIN IT) […]