![[Image description] the two sizes of the Kieran Pumpkin, the large one made in blue yarn sits in back and the small one made in brown yarn sits in front, on a platform in front of green bushes and sunlight](https://d3gel9wqxksnxm.cloudfront.net/wp-content/uploads/2022/10/KieranPumpkin-1000x878-1.jpg)
The pumpkin season is upon us friends! Can you feel it? The increased presence of cinnamon, nutmeg, and cloves in the air? The slight vibe that people are being jerky because people are reveling in “pumpkin spice everything”? Well if you’re not quite there, allow this week’s new Kieran Pumpkin crochet pattern to help you along in your pumpkin season journey.
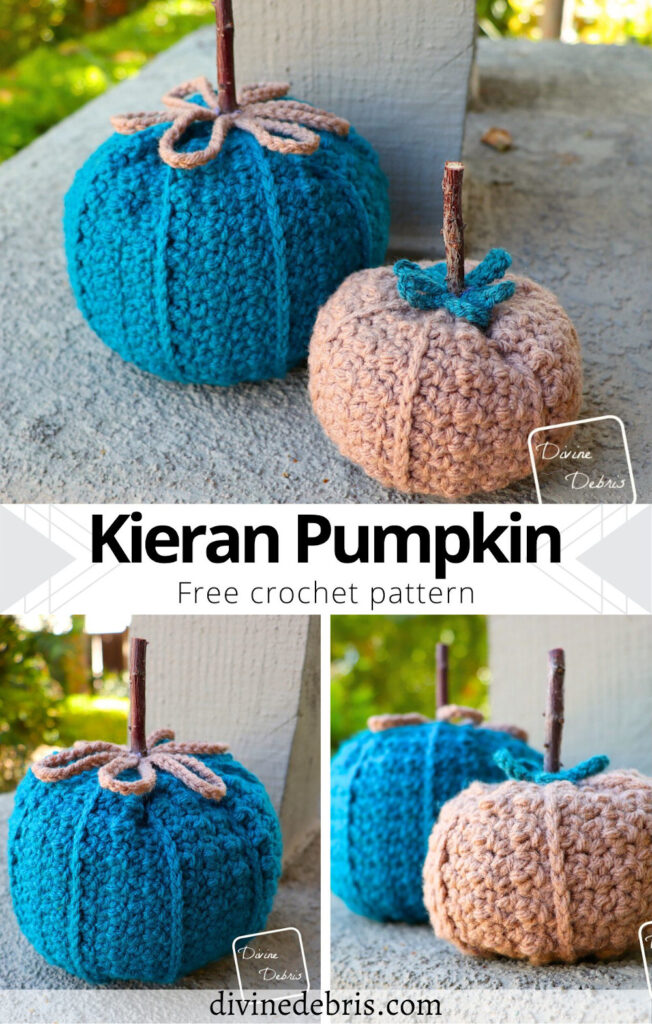
Long-time followers will know that Halloween season is my favorite time of year and that pumpkins are a must for me. I like to try to make a new one each year, that way my home and yours can just become overflowing with new squishy pumpkiny goodness. And with me in a huge “I love the Kieran line” moment right now I decided to combine pumpkins with the fun textures of the Kieran line. And I think the results speak for themselves (that they rock and are super cute, that’s what I hope they’re saying to you :D).
I love how this pattern turned out and how easy it is. I made both of these basically in one afternoon and I almost made a third size (that’s why they’re small and large, I was gonna have another in there) but I made myself stop because I needed to finish a sweater. There’s always a sweater to finish, isn’t there? But you don’t have to make the pumpkins in either of the sizes shown here, you can make it in any size you’d like – the pattern is super customizable. Add stitches to make it taller, the large is 31 sts and the small is 21, just make sure you add them in multiples of 2 and finish with an odd stitch count. And you can keep repeating rows 6 – 11 until you’re happy with the size your pumpkin is. Honestly, you could make this design as big as the Big Ol’ Pumpkin pattern with just a few adjustments (and lots of time working).
Anyway, I hope you like this pattern and give it a try. And have fun with the design! Crochet is meant to be fun and with a design like this, where it’s simple and easy, you can go a little wild with it.
Don’t forget to wash and wear your masks and be kind. Have a happy Halloween season.
This post is linked to Loop Scoop 47.
Copyright @ Divine Debris 2022. No part of this document may be reproduced or transmitted in any form by any means, electronic, mechanical, photocopying, or otherwise, without prior written permission from the author. Sales of finished products are permitted, but the designer requests that you link back to the pattern and credit Divine Debris with the original design under the Creative Commons Attribution-Share Alike license. If you have any questions, comments or concerns please contact info@divinedebris.com.
(this post contains affiliate links, if you make a purchase I may earn a commission)

If you appreciate my weekly patterns I hope you’d consider purchasing an ad-free pdf of this pattern in my Ravelry shop and Lovecrafts shop!
Thank you to all my patrons on Patreon!
Where to purchase the Kieran Pumpkin crochet pattern


![[Image description] the two sizes of the Kieran Pumpkin, the large one made in blue yarn sits in back and the small one made in brown yarn sits in front, on a platform in front of green bushes and sunlight](https://d3gel9wqxksnxm.cloudfront.net/wp-content/uploads/2022/10/KieranPumpkin-1000x781-1.jpg)
![[Image description] the two sizes of the Kieran Pumpkin, the large one made in blue yarn sits in back and the small one made in brown yarn sits in front, on a platform in front of green bushes and sunlight](https://d3gel9wqxksnxm.cloudfront.net/wp-content/uploads/2022/10/KieranPumpkin-1000x781-1.jpg.webp)
Level
Easy
Materials
- US G/ 4.00 mm crochet hook
- Worsted weight/ size #4 yarn
- 1.5 – 2 oz/ 95 – 127 yds
- 2 colors (optional)
- I used some yarn from my stash, I think it was Impeccable from Michael’s Stores
- Notions: scissors, measuring tape, yarn needle
- Poly-Fil/ Stuffing (amount differs)
- Hot Glue and Glue Gun (optional)
- Stick (for stem)
Gauge
- 17 sc/dc x 13 rows = 4″ (see notes)
Terms/ Stitches used
- St: Stitch
- Ch: Chain
- RS: Right side
- Sc: Single crochet
- Slip st: Slip Stitch
- Dc: Double crochet
- Hdc: Half double crochet
- BTLO: Back third loop only (explained below)
Notes
- For gauge: Chain an even amount of chs that will give you an over 4” swatch (your row st count needs to be odd), sc into the 2nd ch from the hook, *dc into the next st, sc into the next st,* repeat from * to * across. Row 2: Ch 1, turn, sc into the first sc, *dc into the next dc, sc into the next sc,* repeat from * to * across. Repeat row 2 as many times as you need to get more than 4” swatch then measure a blocked section. Please note that gauge is not super critical for this design but to keep your stuffing from falling out of your pumpkin, make sure your stitches are tight.
- Back third loop only (BTLO): When looking at the front of the st you will have the 2 loops on top of the hdc (the V on top), lean the st towards you and will see the third loop that runs along the back of the st. This is the loop you will work into. This st is also known as the Camel Stitch. Please note on the rnds where you work this st you will be looking at the back of the previous row’s hdc, so the third loop will be facing you.
- This pattern is worked flat in back and forth rows with a ch 1 at the beginning of the rows. When you’ve made your rectangle piece you will seam up the first row to the last row, creating a cylindrical shape, and then you’ll close the open ends to make the pumpkin.
- The ch 1 at the beginning of the rows does not count as a stitch.
- This pattern is very easy to make larger or smaller as you’d like. To make it taller add stitches to the design in multiples of 2 as long as your final stitch count is odd. To make it wider, add more repeats of the rows design.
- In the photos: Color A is the pumpkin (brown for Small and blue for Large) and color B is the Topper (blue for Small and brown for Large).
Approx Finished Product Details for the Kieran Pumpkin crochet pattern
| Small | Large |
| Yarn: 1.5 oz/ 95 yds Height: 6” (from top around and to the bottom) Width: 6.5” (folded in half flat, before seaming) | Yarn: 2 oz/ 127 yds Height: 8” (from top around and to the bottom) Width: 9” (folded in half flat, before seaming) |
Kieran Pumpkin Crochet Pattern
![[Image description] the small Kieran Pumpkin made in brown yarn sits on a platform in front of green bushes and sunlight](https://d3gel9wqxksnxm.cloudfront.net/wp-content/uploads/2022/10/KieranPumpkin-767x1000-1.jpg)
Pumpkin
Sizing as follows: Small (Large)
Row 1: Ch 22 (32), sc into the 2nd st from the hook and into the next st, dc into the next st, *sc into the next st, dc into the next st,* repeat from * to * until 2 sts remain, sc into the last 2 sts – 12 (17) sc, 9 (14) dc
(RS) Row 2: Ch 1, turn, slip st into the first 2 sts, dc into the next dc, *sc into the next sc, dc into the next dc,* repeat from * to * until 2 sts remain, slip st into the last 2 sts – 8 (13) sc, 9 (14) dc
Row 3: Ch 1, turn, sc into the first 2 sts, dc into the next dc, *sc into the next sc, dc into the next dc,* repeat from * to * until 2 sts remain, sc into the last 2 sts – 12 (17) sc, 9 (14) dc
Rows 4 – 5: Repeat Rows 2 – 3, once more.
Row 6: Ch 1, turn, slip st into the first 2 sts, hdc across until 2 sts remain, slip st into the last 2 sts – 4 (4) sc, 17 (27) hdc
Row 7: Ch 1, turn, sc into the first 2 sts, dc BTLO into the next st, *sc BTLO into the next st, dc BTLO into the next st,* repeat from * to * until 2 sts remain, sc into the last 2 sts – 12 (17) sc, 9 (14) dc
Row 8: Ch 1, turn, slip st into the first 2 sts, dc into the next dc, *sc into the next sc, dc into the next dc,* repeat from * to * until 2 sts remain, slip st into the last 2 sts – 8 (13) sc, 9 (14) dc
Row 9: Ch 1, turn, sc into the first 2 sts, dc into the next dc, *sc into the next sc, dc into the next dc,* repeat from * to * until 2 sts remain, sc into the last 2 sts – 12 (17) sc, 9 (14) dc
Rows 10 – 11: Repeat Rows 8 – 9, once more.
For small
Rows 12 – 41: Repeat Rows 6 – 11, a total of 5 more times.
Row 42: Repeat Row 6, once more.
For large
Rows 12 – 53: Repeat Rows 6 – 11, a total of 7 more times.
Row 54: Repeat Row 6, once more.
Fasten off. Weave in all your ends.
![[Image description] an example of the large Kieran Pumpkin being completed to the "pumpkin" instructions only, not seamed yet, laid flat on a white fake fur background.](https://d3gel9wqxksnxm.cloudfront.net/wp-content/uploads/2022/10/KieranPumpkin-1000x582-1.jpg)
Seaming
Sides
Using the BTLO of the hdcs of Row 42 (54), use your preferred method of seaming (I used a whip stitch) seam together Row 1 and Row 42 (54) (this makes your seam nearly invisible). This will create a tunnel shape to your pumpkin, next you will weave around the open ends to close it.
Top/ Bottom
Using your needle and yarn, weave back and forth through the row ends that are single crochet stitches (the odd numbered rows) all the way around until you get back to where you started. Pull your yarn tight until you close the hole. You may need to weave around the opening a couple times or sew it a bit to securely close it (I had to do this, it won’t change the look of your pumpkin). After you’ve done one side, stuff your pumpkin as full as you’d like and close the other open end in the same manner. Optional: Once your pumpkin is completely closed you can run your needle and a piece of yarn down through the closed/ seamed center (or a tail if you have a long one left from seaming) and pull it out the other end. Pull this piece of yarn as tight as you’d like to give the pumpkin a more squat shape.
![[Image description] An example of the Kieran Pumpkin in the large size folded in half and ready for seaming on the sides and top/bottom](https://d3gel9wqxksnxm.cloudfront.net/wp-content/uploads/2022/10/KieranPumpkin-917x1000-1.jpg)
Topper
Ch 5, slip st to form a circle. *Ch 10 (20), slip st into the circle,* repeat from * to * as many times as you’d like to add some fun loops. I did 7 loops for both pumpkins, ch 10 for the Small and ch 20 for the Large.
Fasten off, weave in your ends.
Using your hot glue gun (optional) glue the Topper to the center of the top of your pumpkin and then glue a stick to the center of the Topper.
![[Image description] the two sizes of the Kieran Pumpkin, the large one made in blue yarn sits in back and the small one made in brown yarn sits in front, on a platform in front of green bushes](https://d3gel9wqxksnxm.cloudfront.net/wp-content/uploads/2022/10/KieranPumpkin-895x1000-1.jpg)
You can pick up written instructions for the Kieran Pumpkin Crochet Pattern in my Ravelry shop.