
Here in the US, Christmas season is fully underway. My day(ish) job is at a retail establishment and so for me, it’s been Christmas season since the beginning of November. To be honest with you, I’m actually in quite the Christmas spirit this year. My husband returns from deployment sometime around then, my brother and his girlfriend are coming to visit me and there will be baking! Cookies, pies and more. 😀
So in my Christmas spirit I’ve been working on earrings of the Christmas variety:
owls that remind me of candy canes, stockings, Christmas trees, Christmas cupcakes and candy cane inspired chevron earrings.
I’m also working on a new hat and some boot cuffs for the Willow line.
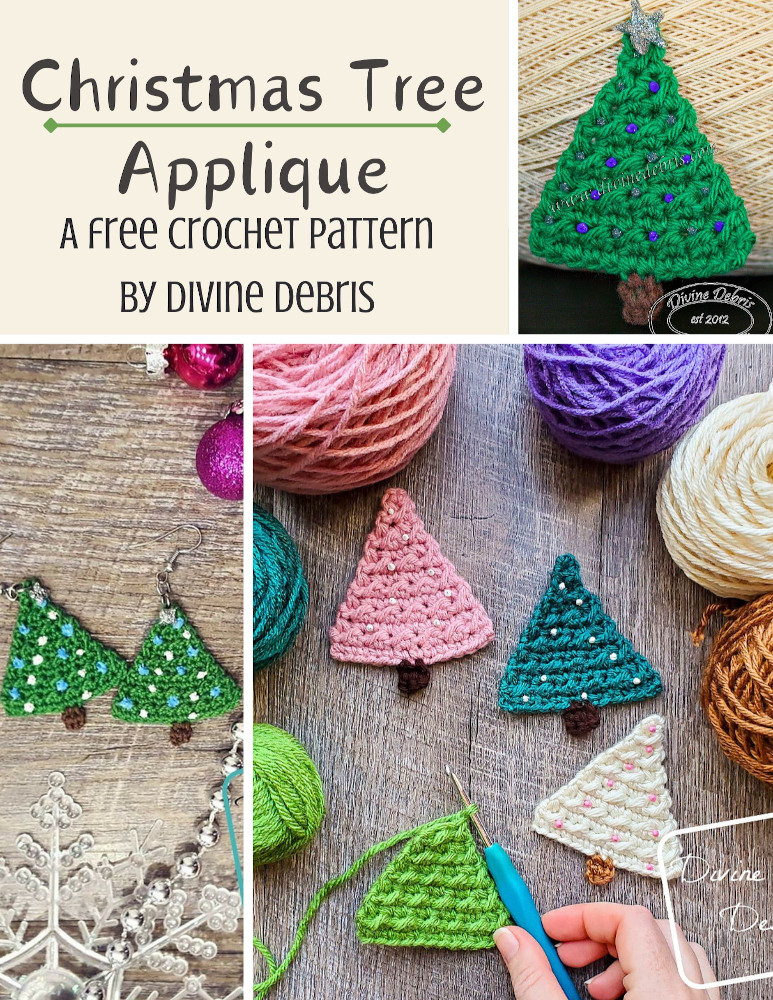
And to spread the cheer, I want to share with you the pattern for the Christmas tree earrings, which I also worked into a applique that I’m going to wear as broach/ button for work. 🙂
Thank you to all my Patreon supporters.


Level
Easy
Materials
- Earrings
- 2.00 mm steel hook
- Size 10 crochet thread (2 colors)
- Metal jump rings and fish hooks
- Needle that will weave in your ends
- Puffy paint
- Pliers
- Fabric Stiffener (optional)
- Applique
- US G (4.00 mm) crochet hook
- Medium/ worsted weight/ size #4 yarn (2 colors)
- Less than 1 oz each
- Puffy paint
- Needle that will weave in your ends
- Scissors
Gauge
- G: 17 sc x 17 rows = 4”
- 2.00 mm: not critical
Terms/ Stitches used
- Ch: Chain
- St: Stitch
- Slip st: Slip st
- RS: Right side
- Sc: Single crochet
- Sc2tog: single crochet 2 stitches together
- Hdc: Half double crochet
Notes
- This pattern is worked from the bottom up on the tree, then you flip the whole thing over and make the trunk.
- The ch-1 at the beginning of the row does not count as a stitch.
- The earrings and the tree are different sizes, the earrings are smaller, but feel free to make them the same if you’re making both.
- Here I used Puffy paint for the decoration but you can use anything you want.
- If you’d like to make the earrings or the applique tree larger, just add more sts to the first row (the chain row) and make sure your final stitch count is odd. Then work the pattern as written (hdc and slip st repeat then decrease and sc row) until you decrease to one st. Add a trunk to the other side of row 1 in the center of the row, as you’d like.
- Color A is green and color B is brown. I used stash yarn for mine.
Finished Product Dimensions (approx, may change by gauge or yarn)
| Earrings Width: 1” (at widest) Height: 1” | Applique Width: 3” (at widest) Height: 3” |


Christmas Tree Earrings Crochet Pattern Instructions
Using 2.00 steel crochet hook and size 10 crochet thread
(RS) Row 1: A: Ch 9, sc into the second ch from the hook and across – 8 sc
Row 2: Ch 1, turn, slip st into first st, hdc into next st, *slip st into next st, hdc into next st,* repeat from * to * the rest of the row – 4 hdc
Row 3: Ch 1, turn, sc2tog first two sts, sc across until 2 sts remain, sc2tog last two sts – 6 sc
Row 4: Ch 1, turn, slip st into first st, hdc into next st, *slip st into next st, hdc into next st,* repeat from * to * the rest of the row – 3 hdc
Row 5: Ch 1, turn, sc2tog, sc across until 2 sts remain, sc2tog the last two sts – 4 sc
Row 6: Ch 1, turn, slip st into first st, hdc into next st, slip st into next st, hdc into next st – 2 hdc
Row 7: Ch 1, turn, sc2tog first two sts, sc2tog last two sts – 2 sc
Row 8: Ch 1, turn, slip st into first st, hdc into next st – 1 hdc
Row 9: Ch 1, turn, sc2tog – 1 sc
Row 10: Ch 1, turn, sc – 1 sc
Fasten off, weave in all your ends.
Earrings Trunk
With the RS facing you, flip your tree so you’re working into the other side of Row 1. Skip 3 sts from the end and pull up a loop in the next st in color B.
Row 1: B: Ch 1, sc into the next 2 sts – 2 sc
Row 2: Ch 1, turn, sc across – 2 sc
Fasten off, weave in all your ends.
Finishing
Like I do with all my earrings, I stiffened these with fabric stiffener. Just wet them down with the stiffener (I dilute it with water) and lay them flat to dry completely. When they’re dry, attach the findings, such as jump rings, and wear. Feel Free to add some dots in puffy paint to customize this design.
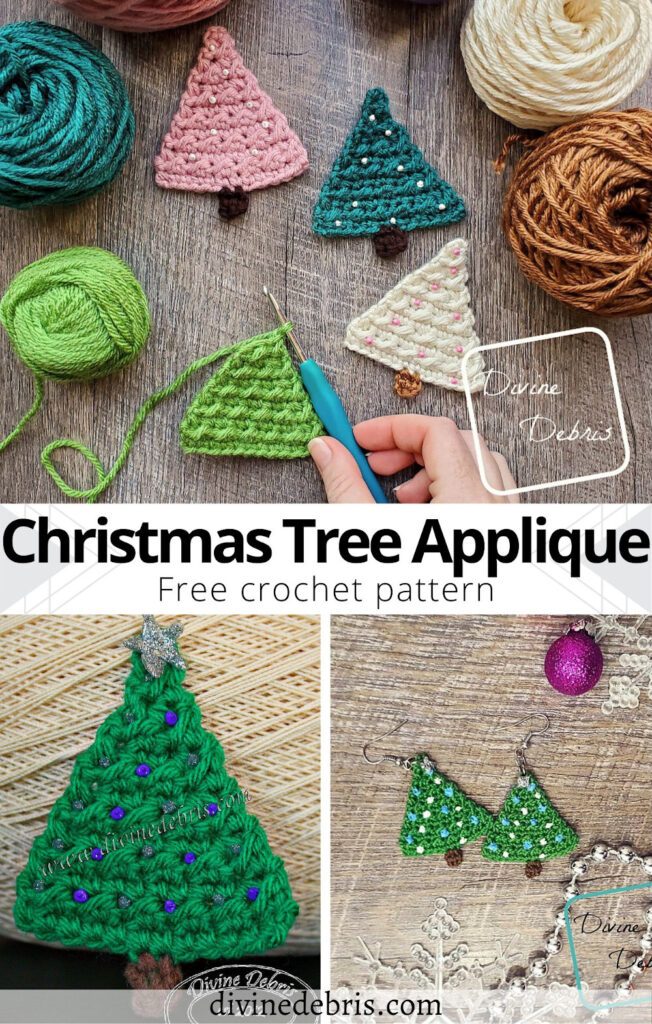
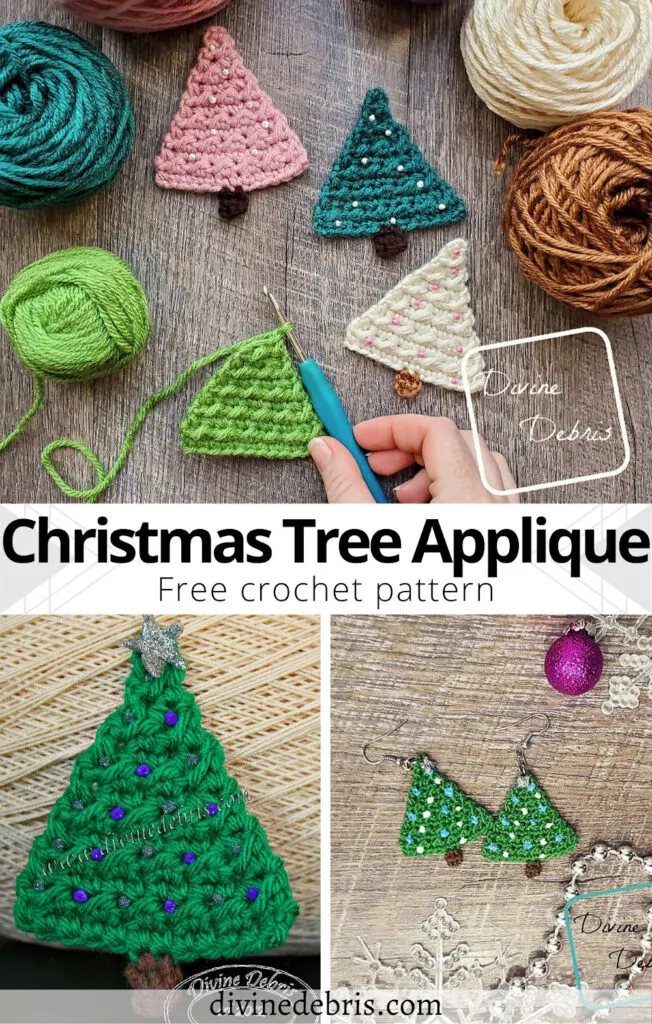
![[Image descritpion] 3 finished Christmas Tree Appliques sit in the center of the photo on a wood grain background, with a white woman's hand holding a unfinished 4th tree at the bottom](https://d3gel9wqxksnxm.cloudfront.net/wp-content/uploads/2022/11/Christmas-Tree-Applique-1000x959-1.jpg)
Christmas Tree Applique Crochet Pattern Instructions
With US/ 4.00 mm crochet hook and your color A worsted weight yarn.
(RS) Row 1: A: Ch 13, sc into the second ch from the hook and across – 12 sc
Row 2: Ch 1, turn, slip st into first st, hdc into next st, *slip st into next st, hdc into next st,* repeat from * to * the rest of the row – 6 hdc
Row 3: Ch 1, turn, sc2tog first two sts, sc across until 2 sts remain, sc2tog last two sts – 10 sc
Row 4: Ch 1, turn, slip st into first st, hdc into next st, *slip st into next st, hdc into next st,* repeat from * to * the rest of the row – 5 hdc
Row 5: Ch 1, turn, sc2tog, sc across until 2 sts remain, sc2tog the last two sts – 8 sc
Row 6: Ch 1, turn, slip st into first st, hdc into next st, *slip st into next st, hdc into next st,* repeat from * to * the rest of the row – 4 hdc
Row 7: Ch 1, turn, sc2tog, sc across until 2 sts remain, sc2tog the last two sts – 6 sc
Row 8: Ch 1, turn, slip st into first st, hdc into next st, *slip st into next st, hdc into next st,* repeat from * to * the rest of the row – 3 hdc
Row 9: Ch 1, turn, sc2tog, sc across until 2 sts remain, sc2tog the last two sts – 4 sc
Row 10: Ch 1, turn, slip st into first st, hdc into next st, slip st into next st, hdc into next st, – 2 hdc
Row 11: Ch 1, turn, sc2tog first two sts, sc2tog last two sts – 2 sc
Row 12: Ch 1, turn, slip st into first st, hdc into next st – 1 hdc
Row 13: Ch 1, turn, sc2tog – 1 sc
Row 14: Ch 1, turn, sc – 1 sc
Fasten off, weave in all your ends.
Christmas Tree Trunk
With the RS facing you, flip your tree so you’re working into the other side of Row 1. Skip 5 sts from the end and pull up a loop in the next st with color B.
Row 1: B: Ch 1, sc into the next 2 sts – 2 sc
Row 2: Ch 1, turn, sc across – 2 sc
Fasten off, weave in all your ends.
Finishing
I used puffy paint to decorate the trees, but you could glue beads on the trees, or whatever you’d like. Have fun with it! To make the goofy lil’ stars at the top I drew a star on parchment paper and let ‘3m dry and then glued it to the top of the trees.
Tada! I hope you love these lil’s just like I do and make some great trees!
You can find this post linked up to Hookin’ on Hump Day by Moogly and Petals to Picots.
Shelly
Sunday 10th of December 2023
Hello! I am making these earrings as a request but I am confused about the earrings and appliqué part. What does Appliqué mean ? I am a beginner I’m sorry!
Divine Debris
Monday 18th of December 2023
The earrings and applique are different sizes and have different starting chs. And per Google, an applique is an ornamental piece of fabric. I hope that helps.
Sheila
Thursday 2nd of November 2023
Can't wait to make earrings and the trees for Christmas decorations ❤️❤️❤️ Thank you 😁
Christmas Trees for All! (Free Earring Crochet Tutorial)
Friday 4th of May 2018
[…] You can access the free tutorial here! […]
Sherry
Wednesday 27th of September 2017
Thank you! They are so cute!!!!!
knitnrun4sanity
Tuesday 25th of November 2014
Loving the earrings...may well be making the trees. Thank you for the pattern.x
Divine Debris
Tuesday 25th of November 2014
Thank you! I hope you do, I would love to see them. Also, it's good to see you back. I hope you're well. :)