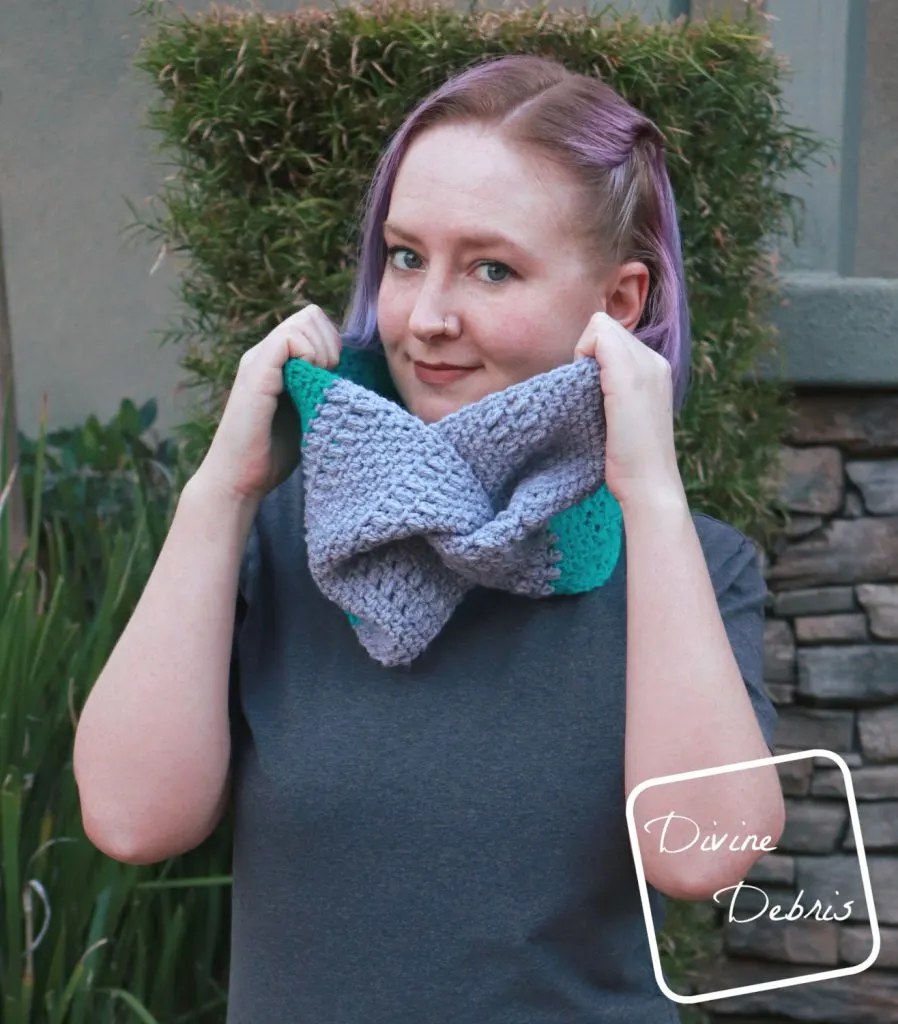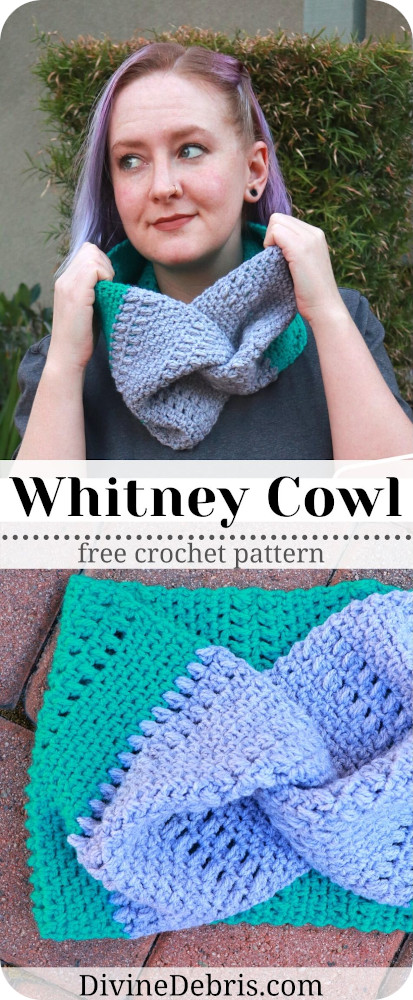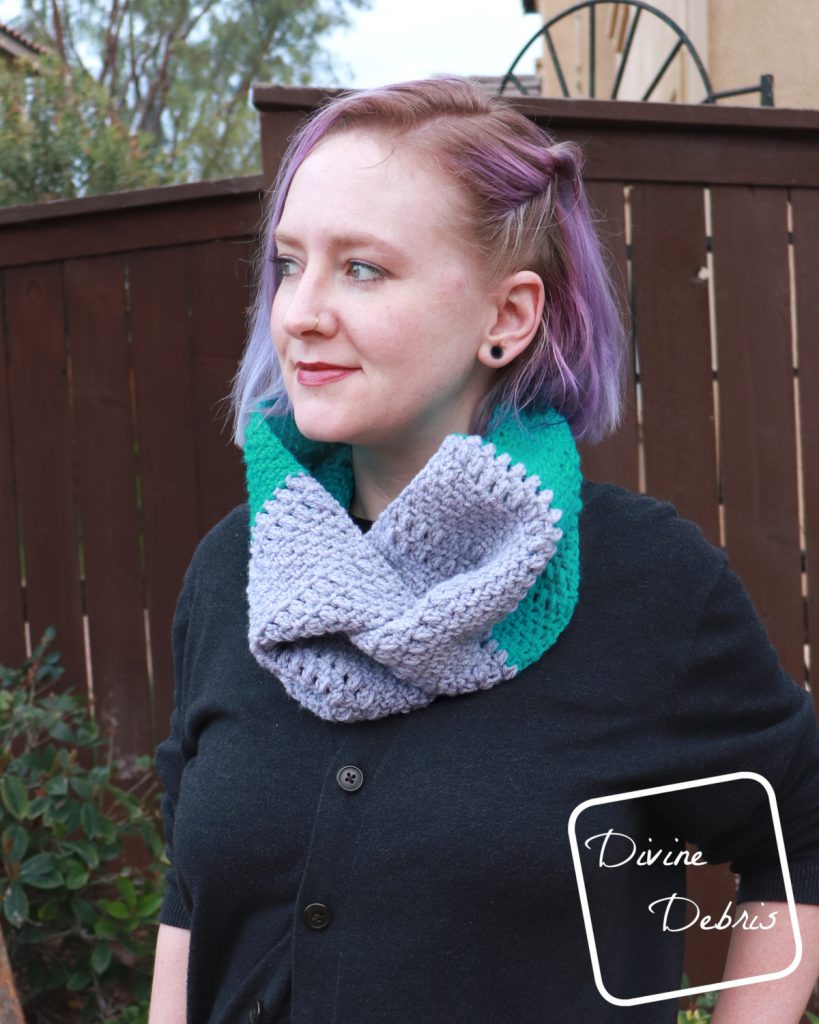
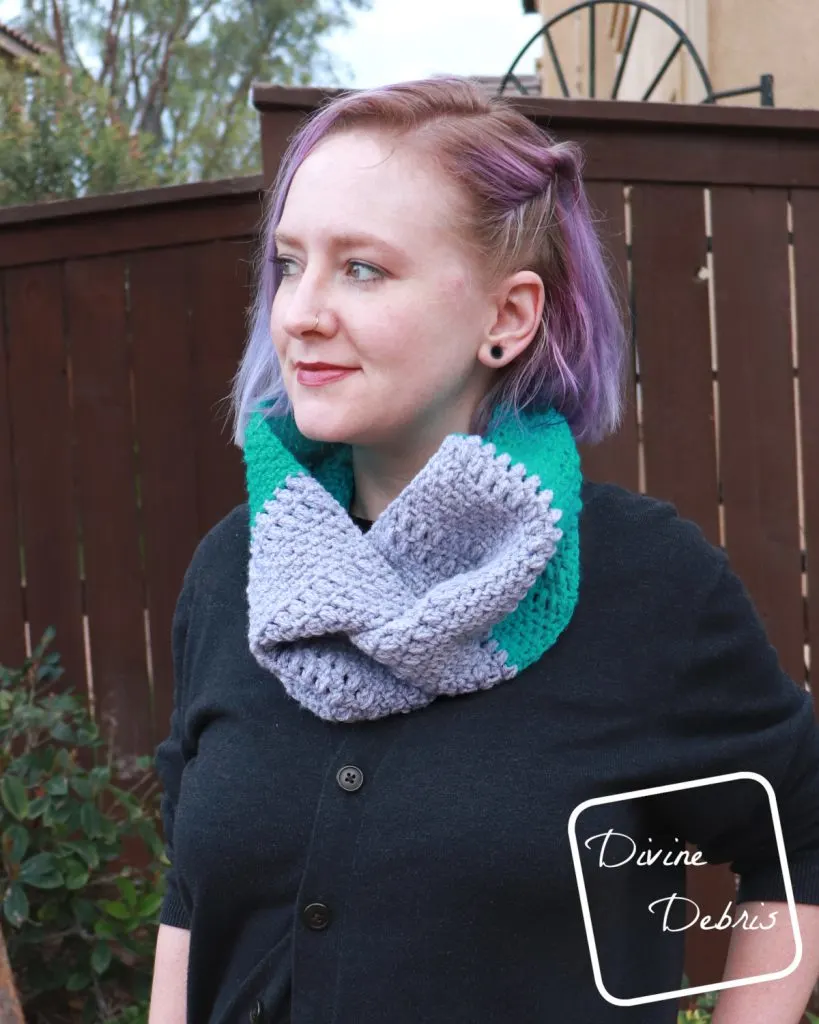
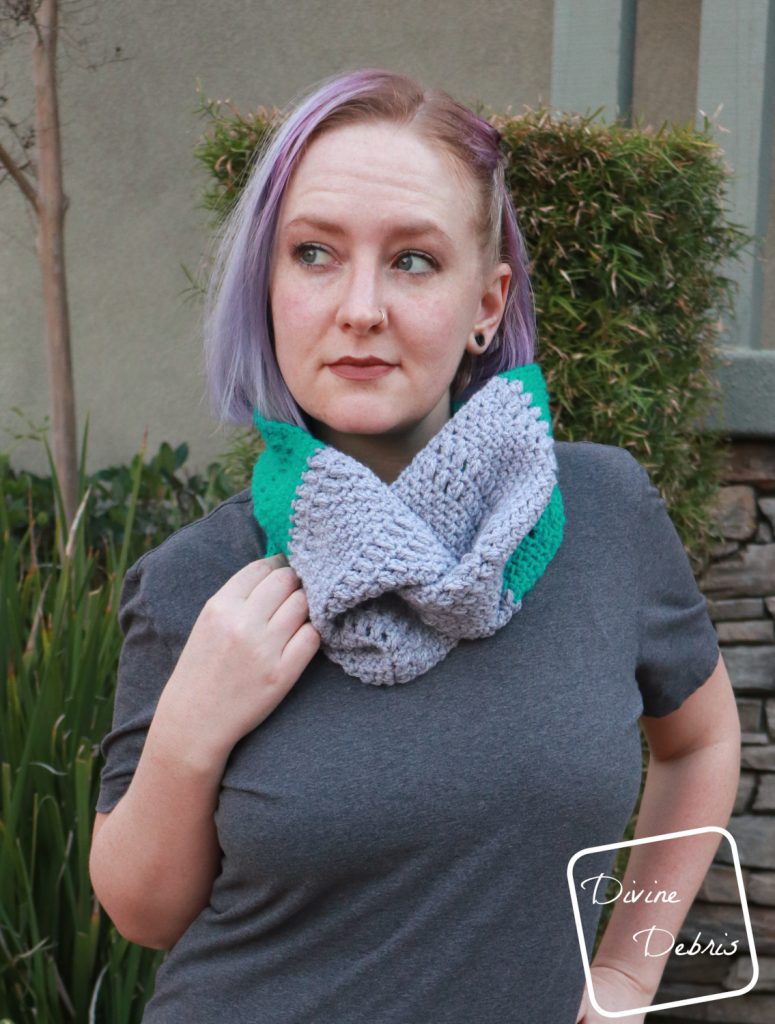
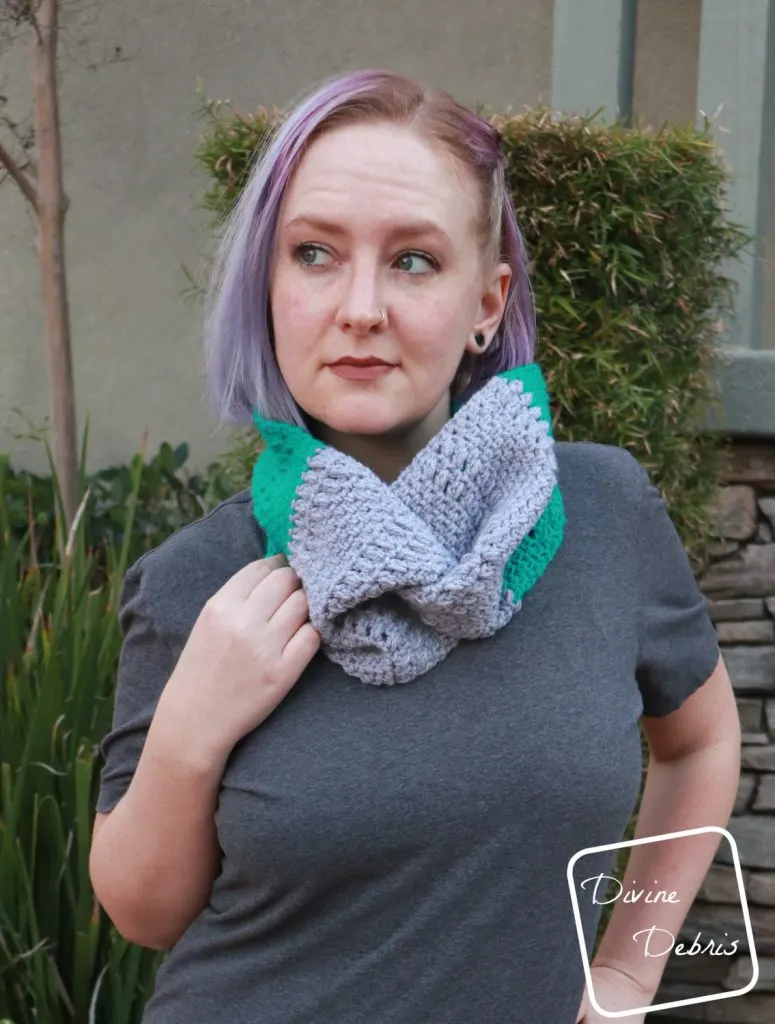
New month new Whitney design, huh? Happy March, of course, but I’m super exited to show you the new fun and twisty Whitney Cowl crochet pattern.
So… like I was saying, the Whitney line is growing again this month. I have to admit, again and again, that I LOVE the texture of this design. The linen stitch? It’s oh so simple but so so pretty, right? Single crochet and chain spaces, nothing easier, but put them together and you’ve got something special! And then a simple puff, a little cluster stitch, as a treat? Yes, please! Add those together and then, how much fun is that? And like the Whitney Headband, this design features a twist!
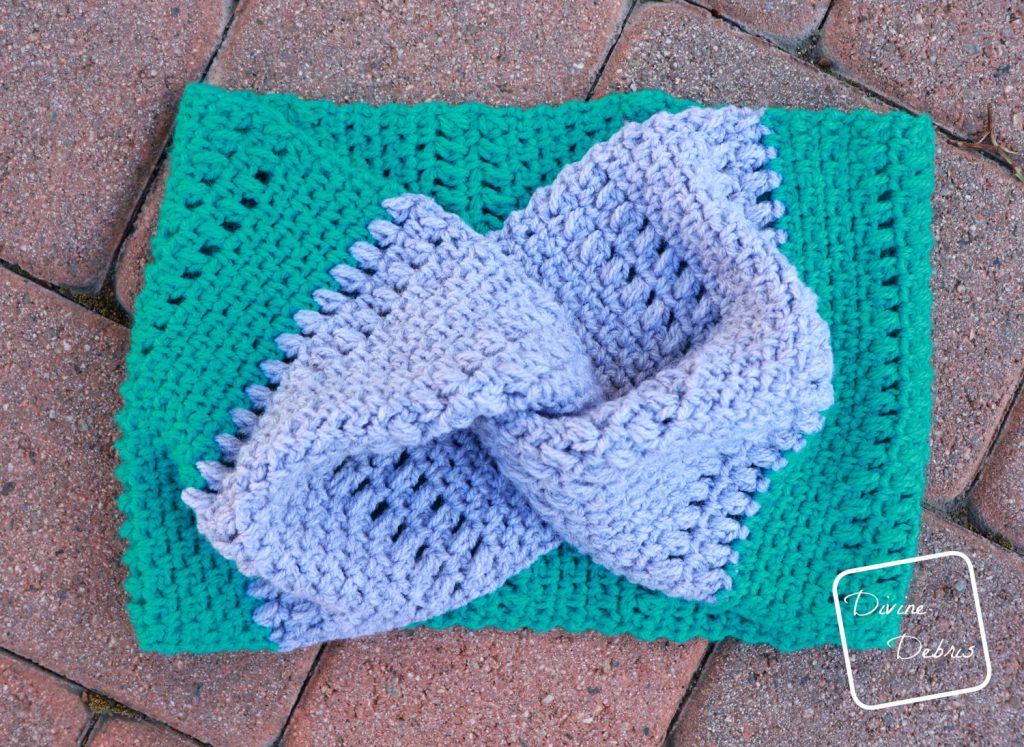
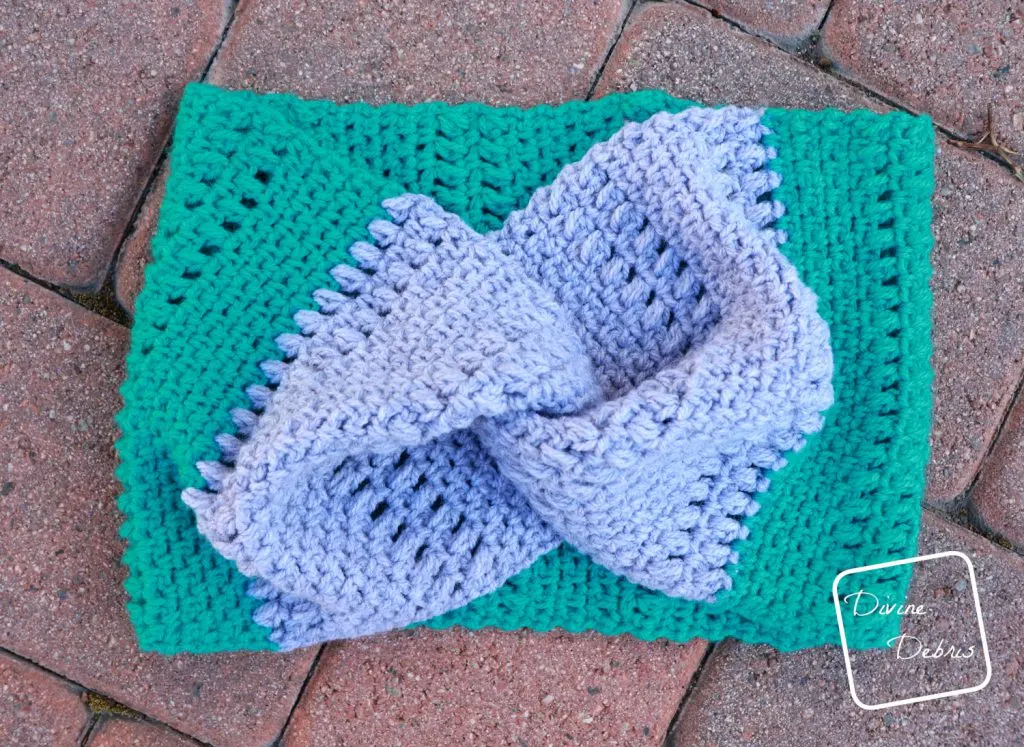
I thought a cowl with a twist would be fantastic and fun, so very bold while still staying simple. And like the Whitney Headband I wanted to make this design in 2 colors, it really makes the texture pop if you ask me. Not to mention, gives the wearer a lot of options when it comes to colors. I’d love to see it in many colors or maybe just one. How pretty would that be?
Have I sold you on this design yet? Do you love it as much as I do? Because I hope you do. I put a lot into each of these designs, I swear, and I want people to like them. I want to see their photos shared and their excitement about the design. I hope for excited me at least. I honestly hope you do like the Whitney Cowl crochet pattern <3 <3
Oh, barely related but there’s also going to be a new Whitney design next week! It’s a shawl!
(this post may contain affiliate links)


If you appreciate my weekly patterns I hope you’d consider purchasing an ad-free pdf of this pattern in my Ravelry shop.
Thank you Tish for becoming my newest patron on Patreon!
Materials
- US I (5.50 mm) crochet hook
- Aran/ medium/ size #4 weight yarn
- 2 colors
- I used Lion Brand Basic Stitch Premium
- Notions: scissors, measuring tape, needle
Gauge
- 16 rows × 19 sc & ch1 across = 4″ (Linen stitch)


Terms/ Stitches used
- RS: right side
- Ch: chain
- St: stitch
- Sc: single crochet
- Hdcc: half double crochet cluster
Notes
- Hdcc (half double crochet cluster): yarn over, insert hook into specified stitch, yarn over, pull up a loop, yarn over, insert hook into the same stitch, yarn over, pull up a loop, yarn over, pull through all 5 loops on your hook. This is basically a hdc2tog done in one stitch.
- This pattern is worked in one piece, from one shorter side to the other. Then you will seam the two shorter ends together.
- The yarn used in this sample is very thin for a worsted weight, closer to a dk. Make sure you do a gauge swatch and check your cowl as you work the pattern to ensure the best results.
- 7 rows of the Linen Stitch, 1 Hdcc row, 1 Linen stitch, and 1 Hdcc row = just over 2.75″ in height.
- The ch-1 at the beginning does not count as a stitch.
- You can make this pattern taller or smaller by adding or subtracting ch-s from the first row in multiples of 2.
- In the photos: color A is gray (Basic Stitch Premium in Slate | 1 oz/ 62.5 yds), and color B is teal (Basic Stitch Premium in Tourmaline | 2 oz/ 125 yds).
Finished product dimensions (measurements may vary by gauge and yarn used)
14.5” in diameter, 8.5” in height
Pattern instructions
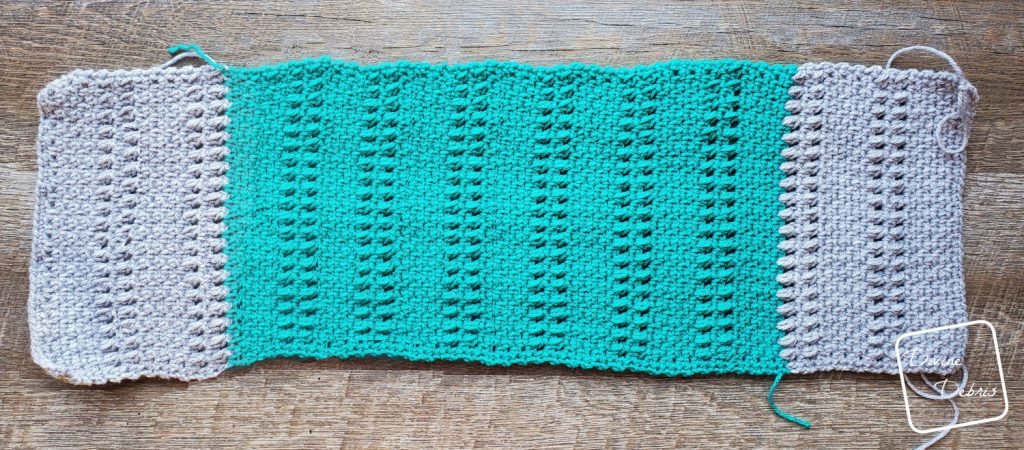

Row 1: A: Ch 41, sc into the second ch from the hook and into the next 39 sts — 40 sc
(RS) Row 2: Ch 1, turn, sc into the first st, *ch 1, skip the next st, sc into the next st,* repeat from * to * 18 more times, sc into the last st — 21 sc, 19 ch-1 spaces
Rows 3 – 8: Ch 1, turn, sc into the first st, *ch 1, skip the next st, sc into the next ch space,* repeat from * to * 18 more times, sc into the last st — 21 sc, 19 ch-1 spaces
Row 9: Ch 1, turn, sc into the first st, *ch 1, skip the next st, hdcc into the next ch space* repeat from * to * 18 more times, sc into the last st — 2 sc, 19 hdcc, 19 ch-1 spaces
Row 10: Ch 1, turn, sc into the first st, *ch 1, skip the next st, sc into the next ch space,* repeat from * to * 18 more times, sc into the last st — 21 sc, 19 ch-1 spaces
Row 11: Ch 1, turn, sc into the first st, *ch 1, skip the next st, hdcc into the next ch space* repeat from * to * 18 more times, sc into the last st — 2 sc, 19 hdcc, 19 ch-1 spaces
Rows 12 – 18: Ch 1, turn, sc into the first st, *ch 1, skip the next st, sc into the next ch space,* repeat from * to * 18 more times, sc into the last st — 21 sc, 19 ch-1 spaces
Row 19: Ch 1, turn, sc into the first st, *ch 1, skip the next st, hdcc into the next ch space,* repeat from * to * 18 more times, sc into the last st — 2 sc, 19 hdcc, 19 ch-1 spaces
Row 20: Ch 1, turn, sc into the first st, *ch 1, skip the next st, sc into the next ch space,* repeat from * to * 18 more times, sc into the last st — 21 sc, 19 ch-1 spaces
Row 21: Ch 1, turn, sc into the first st, *ch 1, skip the next st, hdcc into the next ch space,* repeat from * to * 18 more times, sc into the last st — 2 sc, 19 hdcc, 19 ch-1 spaces
Fasten off color A.
Rows 22 – 81: B: repeat rows 12 – 21, 6 times
Rows 82 – 88: B: repeat rows 12 – 18, once
Fasten off color B.
Rows 89 – 91: A: repeat rows 19 – 21, once
Rows 92 – 100: A: repeat rows 12 – 21, once
Rows 101 – 107: A: repeat rows 12 – 18, once.
Fasten off leaving a long tail, you will be using this tail to seam your cowl.
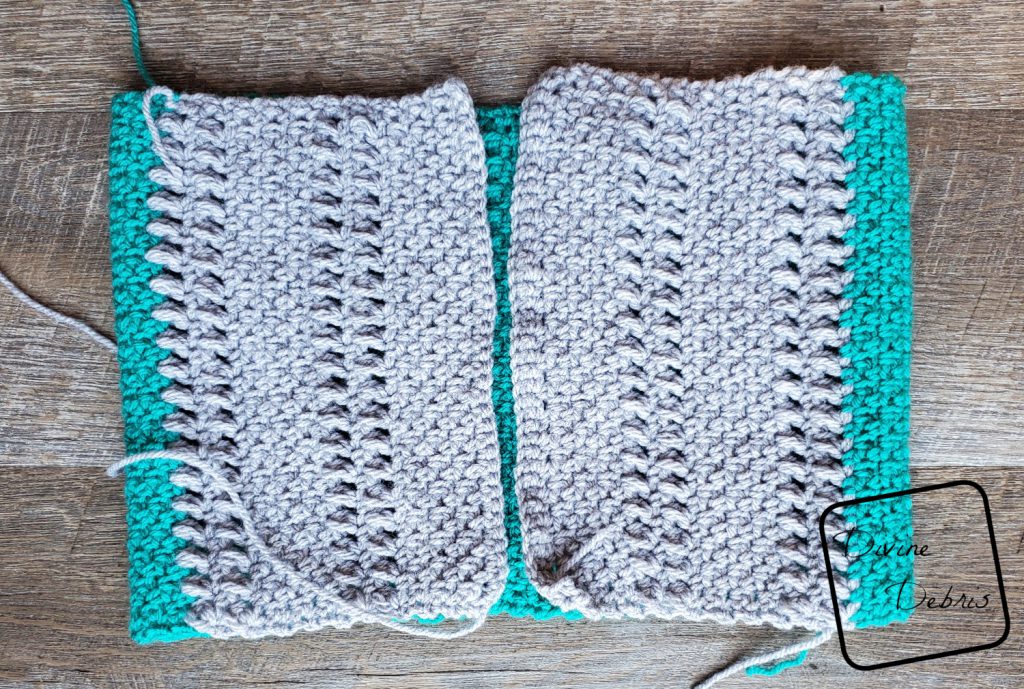

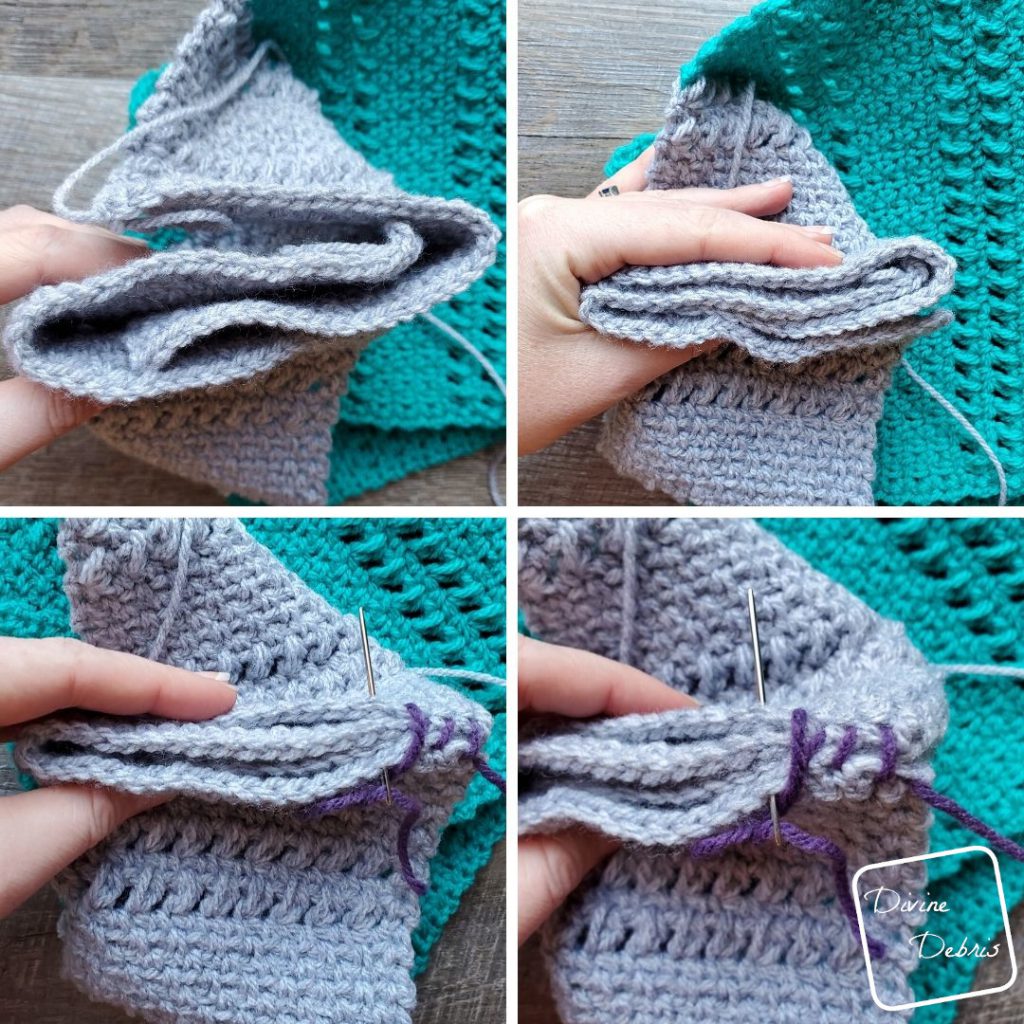
Seaming
With the wrong side facing you, fold row 1 and 107 in half and put the first st of 107 into the center of the fold of 1 and the fold the rest of 107 around the rest of the 1 row (as shown in the photos below). Squish the two end rows together, use your yarn and needle and go through all four layers you made by folding the ends together. Continue across the row, seaming all four layers in your preferred method of seaming.
Fasten off, weave in your ends.

Flip your cowl right side out and enjoy!