
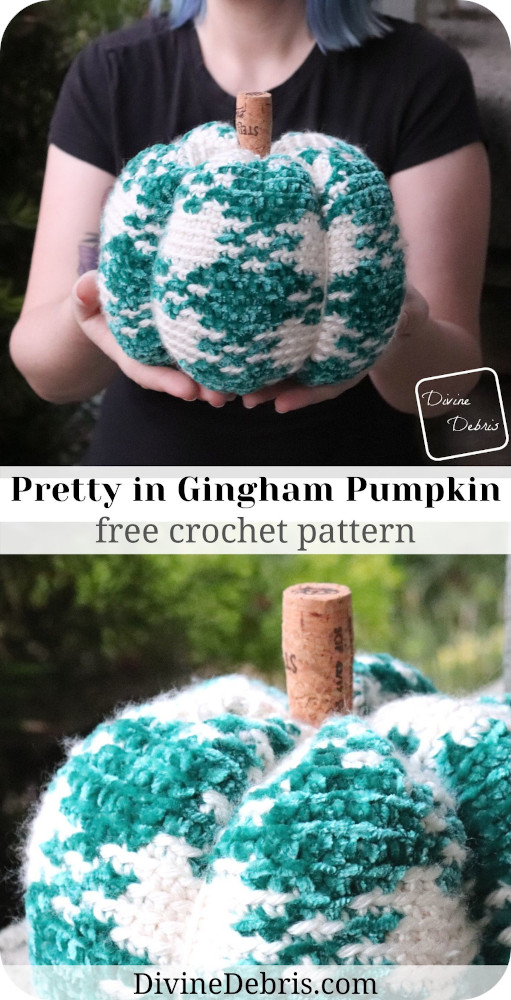
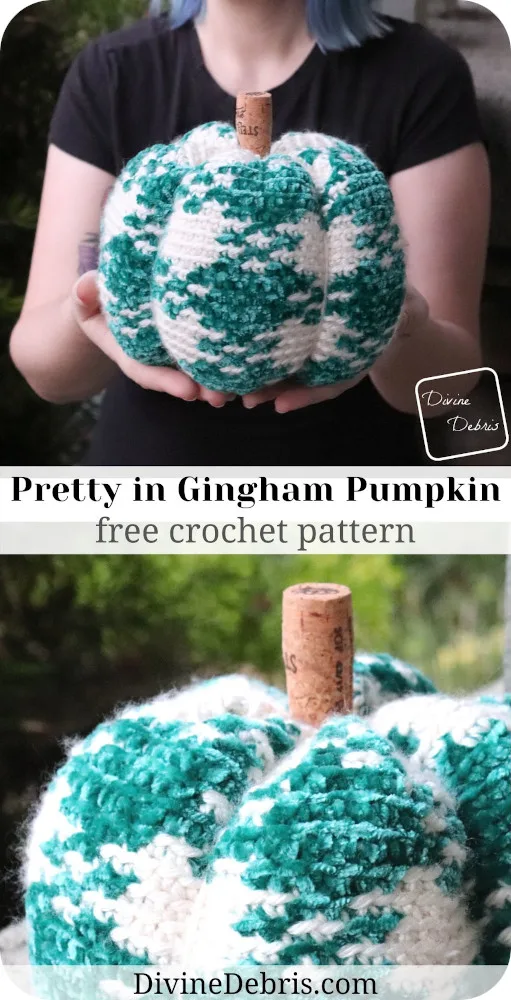
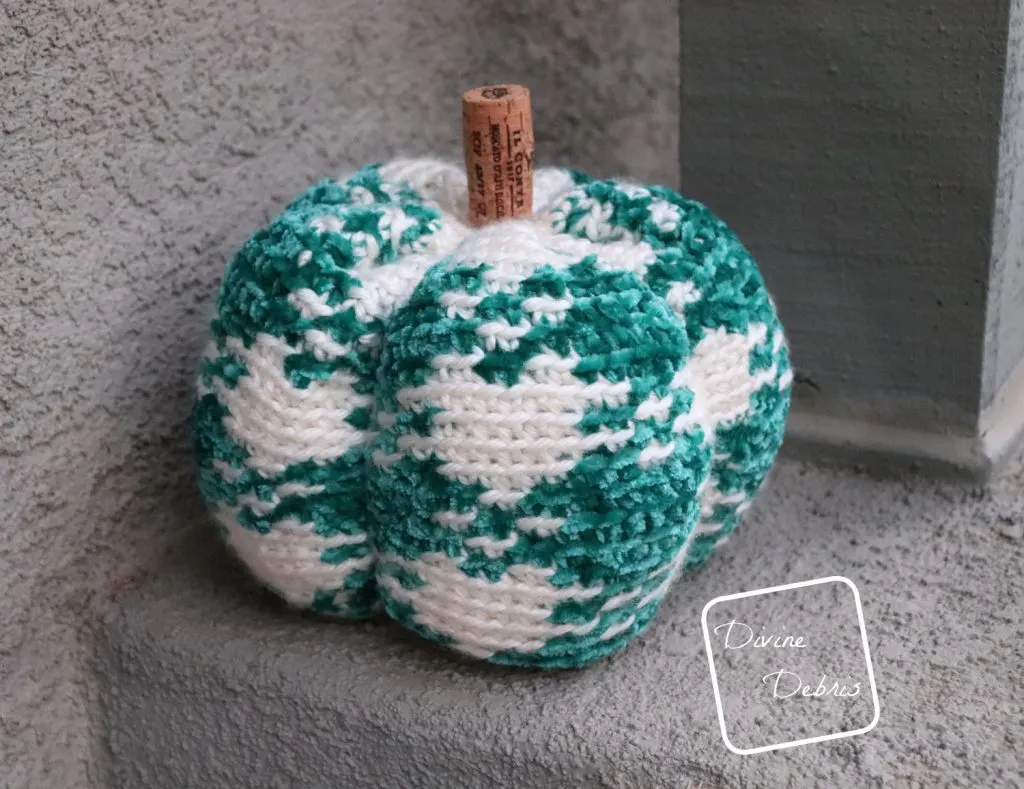
Happy pumpkin Tuesday everyone!
I know it’s not an official holiday or anything but here in my house, it could be. This is my first pumpkin of 2019 and I’m so jazzed about it, aren’t you?
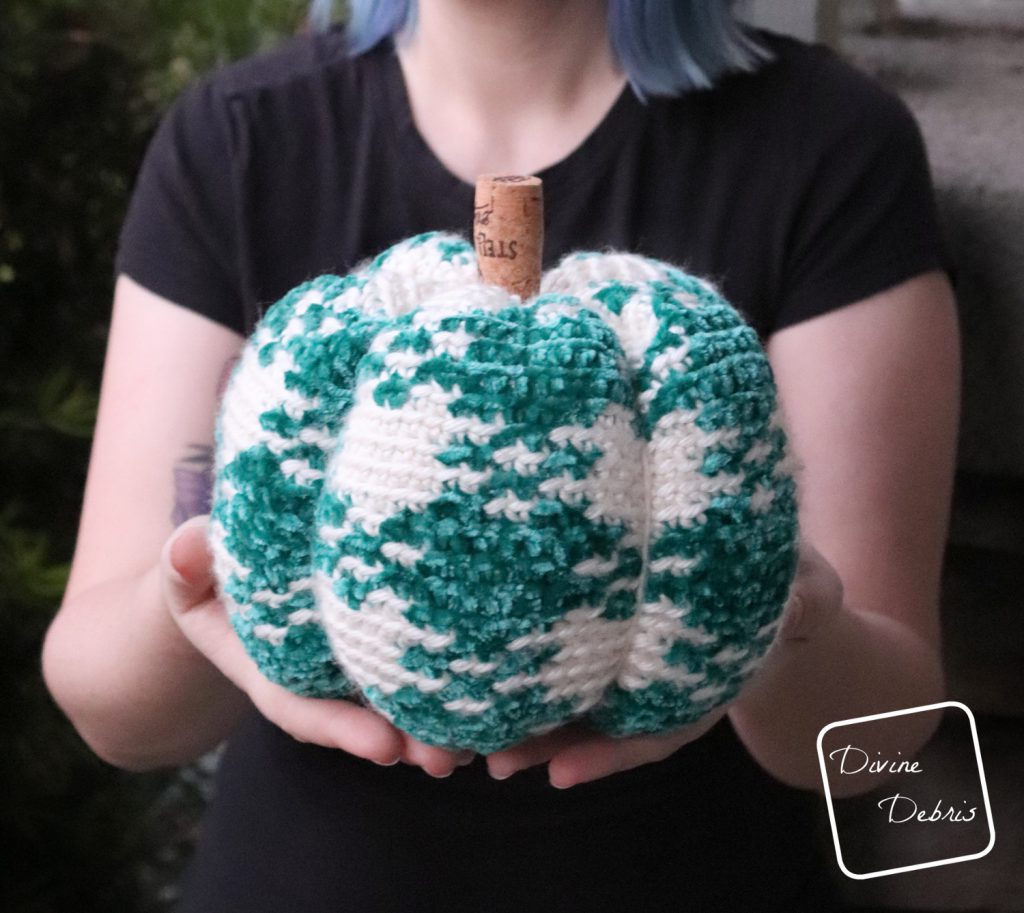
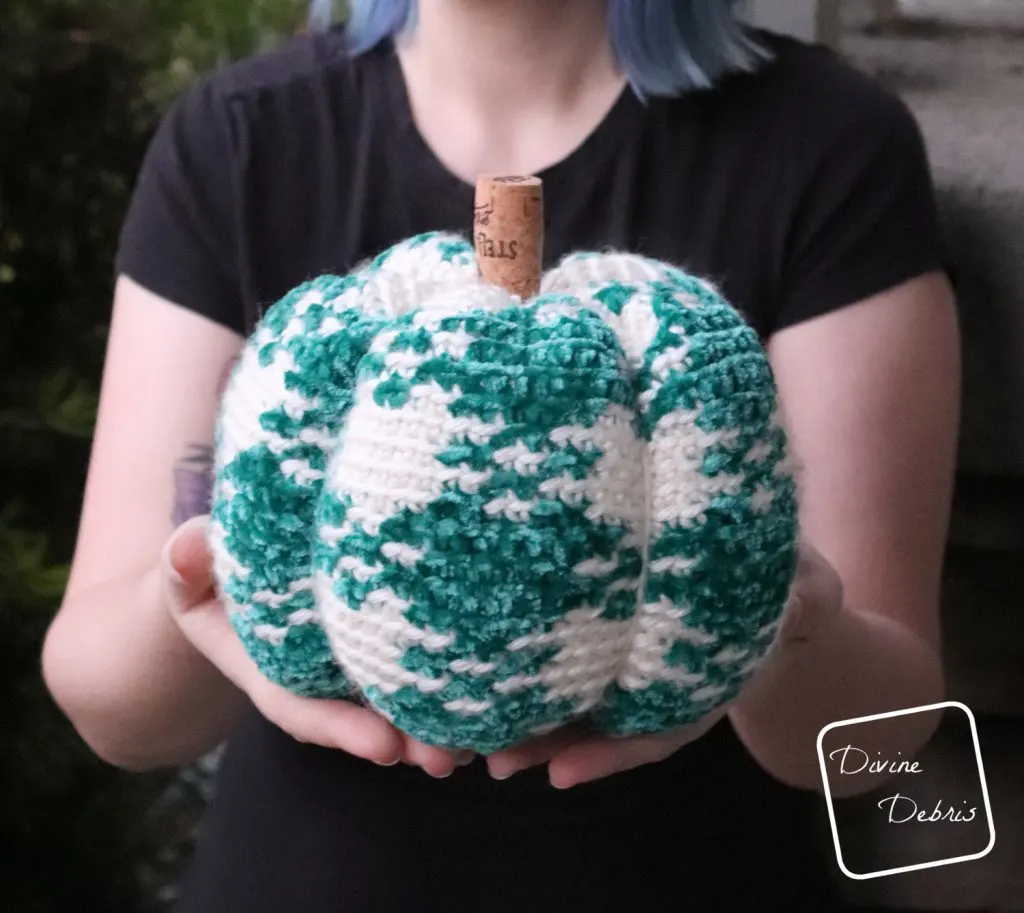
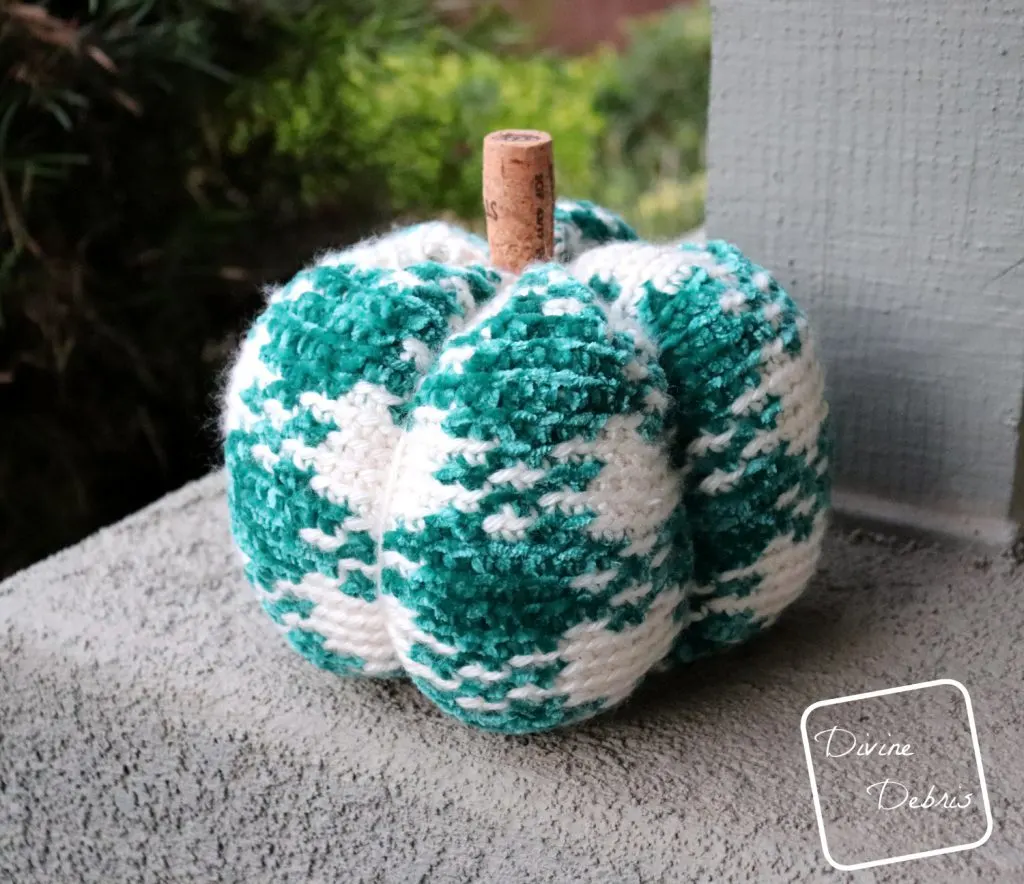
This cutie here is an idea I had cooking up in my head for a while, because I love the Pretty in Gingham line so much I wanted to make it into a really funky pumpkin this year.
Of course I had to go with velvet for the design, because my friend Chrisandra from And She Laughs makes amazing velvet designs that I’ve been truly inspired by her creativity. Also, this is way easy to make. You could make it in worsted weight yarn, probably need to go down to a 4.00 mm hook or something, and it’d still look so cool. I included the multiple below in the notes so you could make a REALLY huge one (I love a big pumpkin, I cannot lie about that). If you do, though, you HAVE TO tag me in the photos so I can see the amazingness for myself.
So, yeah. I’m all ready for Fall, I’ve already made 2 different apple pies and I’m browsing Pinterest for a pumpkin scone recipe right now (multitasking like a boss). I hope you’re as ready for pumpkins as I am.
See ya next week!
This post is linked to Hookin’ on Hump Day #199
(this post may contain affiliate links)
If you appreciate my weekly patterns I hope you’d consider purchasing an ad-free pdf of this pattern in my Ravelry shop.
Thank you Cecilia for becoming my newest patron on Patreon!


Level
Intermediate (you need to know color work)
Materials
- US I (5.50 mm) crochet hook
- Size 5/Bulky weight yarn
- 2 colors
- 5.5 oz/149 yds
- Needle that will weave in your ends
- Polyfill
- Hot Glue and Glue Gun (optional)
- Wine Bottle Cork (optional)
Gauge
- 12 hdc x 9 rows = 4”


Terms/ Stitches used
- RS: right side
- Ch: chain
- St: stitch
- Slip st: slip stitch
- Sc: single crochet
- Sc3tog: single crochet 3 sts together
Notes
- This pattern is worked in one piece that results in a tube shape, then you seam one end closed, stuff the middle, and seam the other end closed. You can add sections around the outside to make it more pumpkin like.
- The ch 1 at the beginning of the row does not count as a stitch.
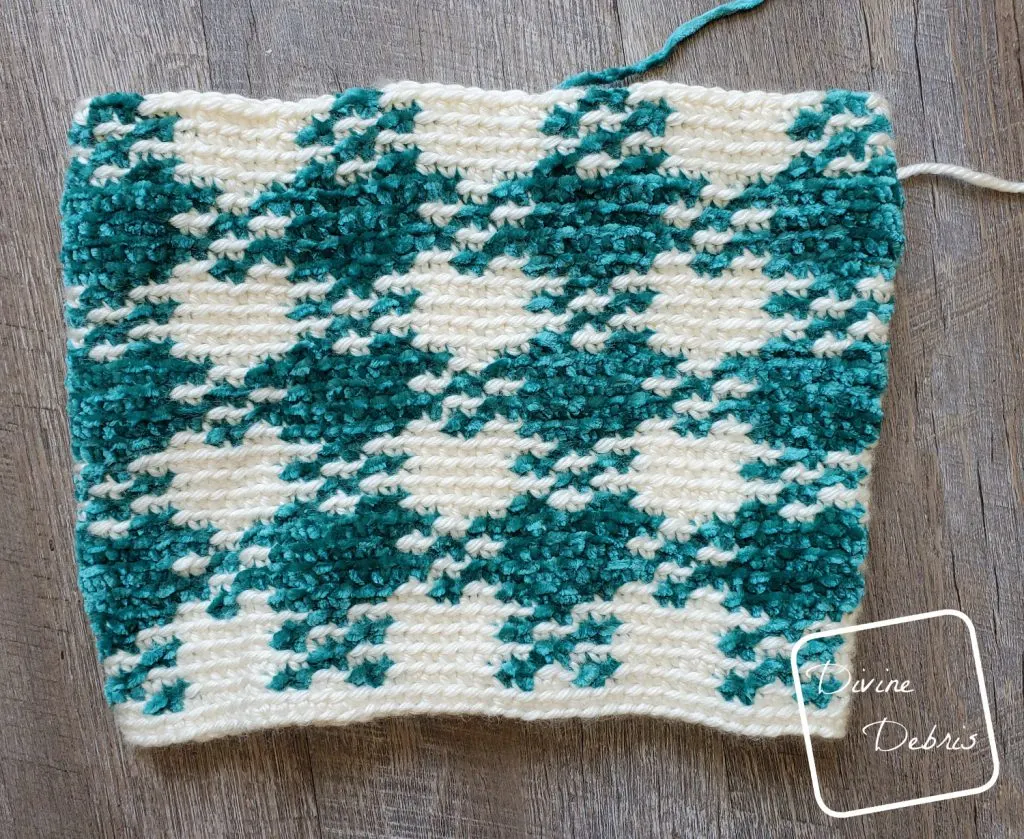
- Every stitch in this pattern is a single crochet. The directions will only tell you what color (ie: Color A, Color B, etc…) and the number in the parentheses tells you how many scs to make.
- The multiple of this pattern is 12. If you’d like to make it larger or smaller, just make sure the stitch count is divisible by 12.
- In the example, the inactive yarn is carried behind the active. If this is confusing, you might want to check out the helpful Moogly video on tapestry.
- Color A is cream (Red Heart Yarns Soft Essentials in Cream) 3.5 oz/89 yds and color B is teal (Bernat Velvet in Pagoda) 2 oz/ 60 yds.
Finished product dimensions (measurements may vary by gauge and yarn used)
Approx 14″ across x 5.5″ – 6″ high

Pretty in Gingham Pumpkin Pattern Instructions
Rnd 1: A: Ch 84, slip st to form a ring Do not twist this ring, sc into 84 chs, slip st into the first st – 84 sc
Note:
The following directions will only tell you what color (ie: Color A, Color B, etc…) and the number in the parentheses tells you how many stitches to make.
Rnd 2: A: Ch 1, *(6), B: (2), A: (2) B: (2),* repeat from * to * 6 more times, slip st into the first st – 84 sc
Rnd 3: A: Ch 1, (8), B: (2), *A: (10), B: (2),* repeat from * to * 5 more times, A: (2), slip st into the first st – 84 sc
Rnds 4 – 5: repeat rnds 2 – 3
Rnd 6: B: Ch 1, *(6), A: (2), B: (2) A: (2),* repeat from * to * 6 more times, slip st into the first st – 84 sc
Rnd 7: B: Ch 1, (8), A: (2), *B: (10), A: (2),* repeat from * to * 5 more times, B: (2), slip st into the first st – 84 sc
Rnds 8 – 9: repeat rows 6 – 7
Rnds 10 – 13: repeat rows 2 – 5
Rnds 14 – 17: repeat rows 6 – 9
Rnds 18 – 21: repeat rows 2 – 5
Rnds 22 – 25: repeat rows 6 – 9
Rnds 26 – 29: repeat rows 2 – 5
Fasten off color B.
Rnd 30: A: Ch 1, (84), slip st into the first st – 84 sc
Rnd 31: A: Ch 1, *sc3together the next 3 sts,* repeat from * to * 27 more times, slip st into the first st – 56 sc
Fasten off leaving a long tail.


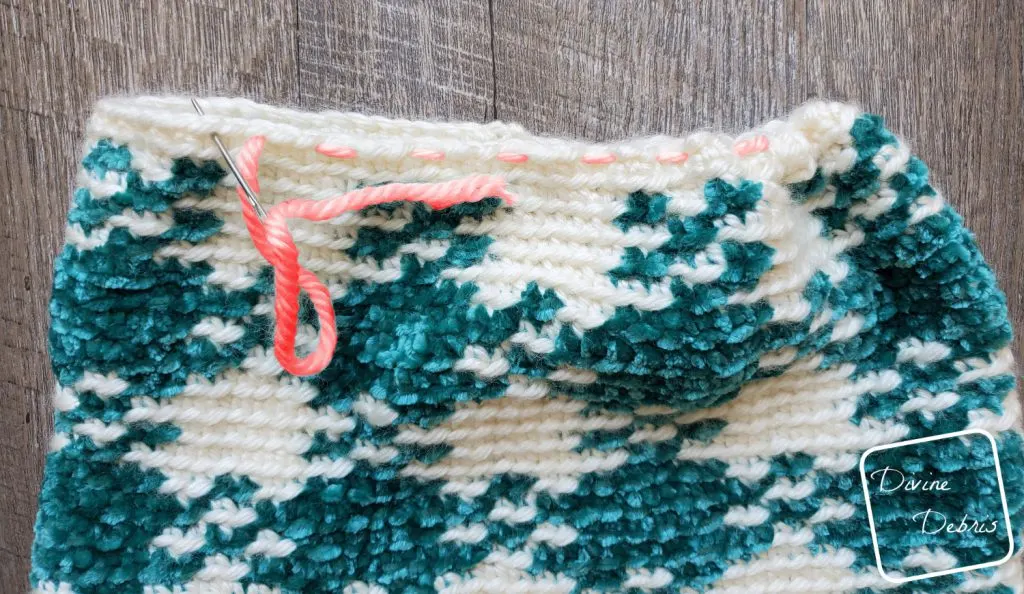
Closing
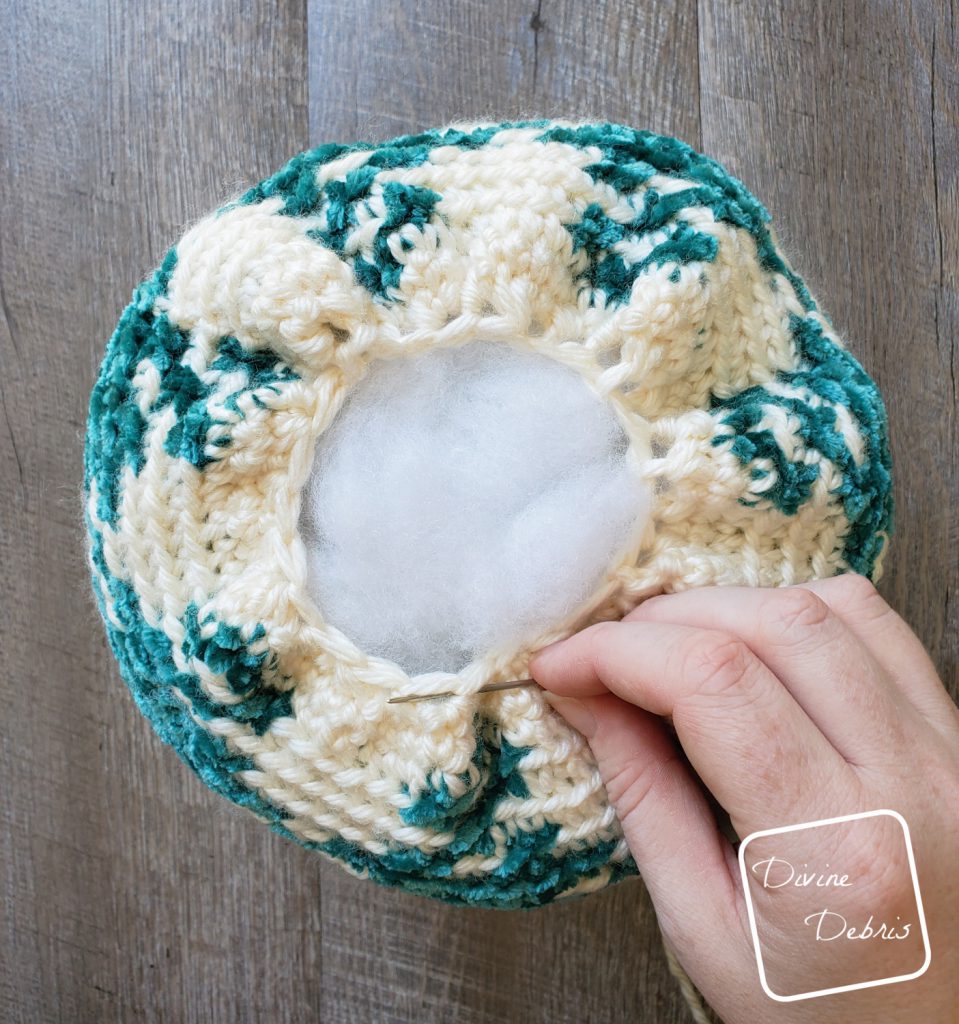
Use a long piece of color A yarn to weave back and forth all around Rnd 1 to create the bottom of your pumpkin. Pull your ends tight until the end closes (you can sew this closed if it doesn’t close completely). Weave in your ends.
Stuff your pumpkin with polyfill. Use the long tail you left on Rnd 31 to weave closed Rnd 31 to close the top of your pumpkin, pulling your ends closed until the hole closes (you can sew this closed also if it doesn’t close completely). Weave in your end.

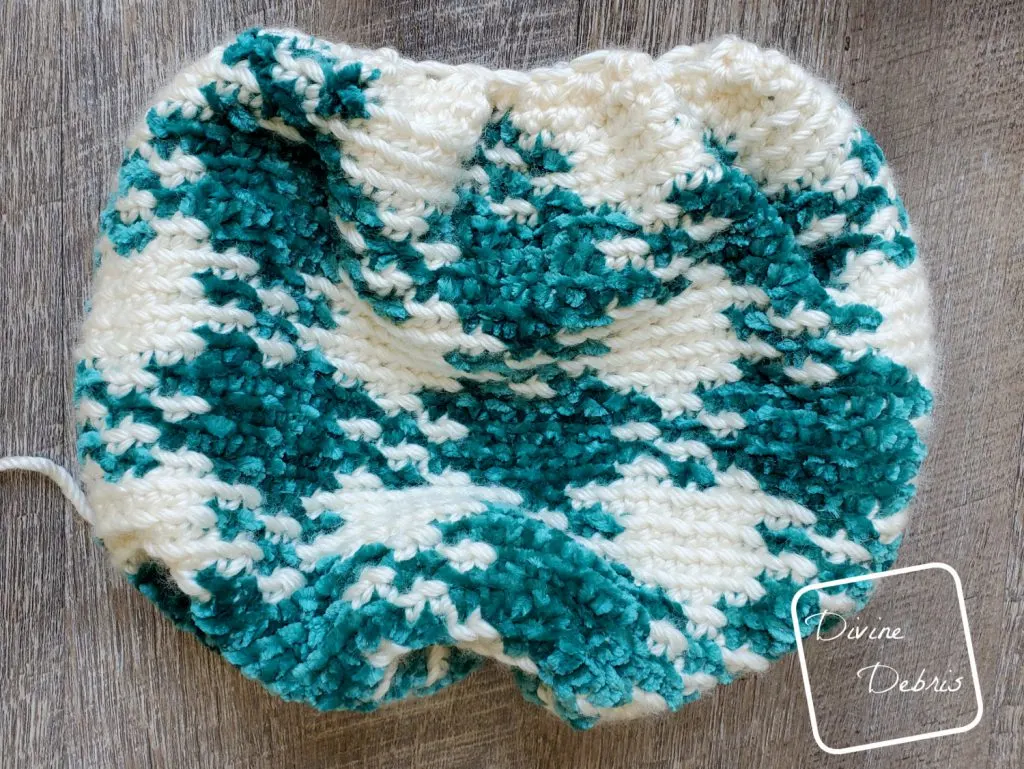
Creating the sections
Using another piece of yarn, attach it at the top of your pumpkin and run the yarn along the outside of your pumpkin and then securing it to the bottom of your pumpkin while pulling the yarn tight. Do this as many times as you’d like (5 times is shown in the photos) to create the sections on the outside of your pumpkin.
Weave in your ends.
You can glue a cork to the top of your pumpkin if you’d like or create a stems as I have on previous pumpkins.

Sheltie Times
Wednesday 18th of September 2019
Great fall pattern.