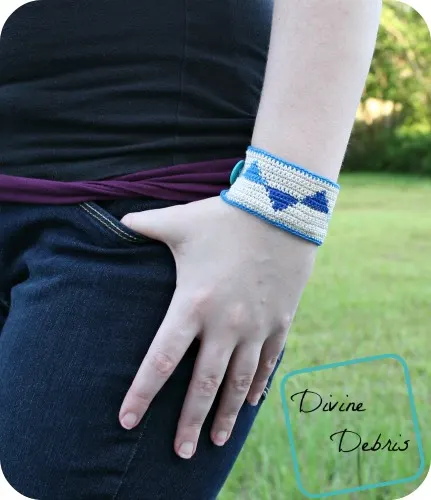
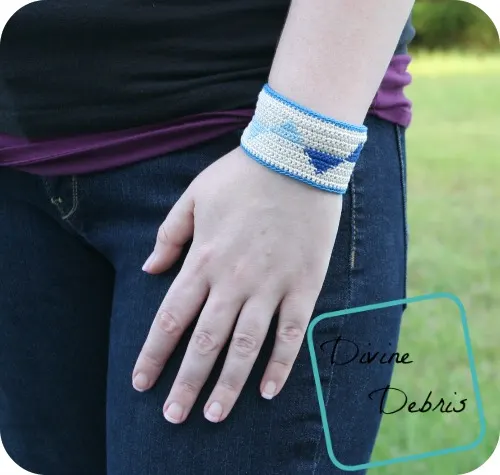
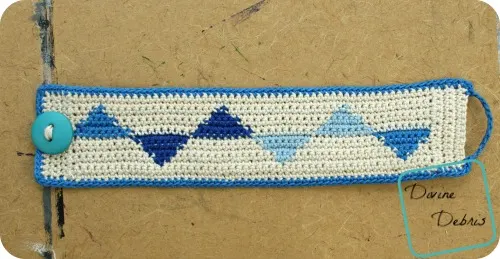
How’s it going? I’m well, having some fun with crochet thread again. Did you like last week’s earrings, the Carries, or perhaps the Carly Headband update? I really like working with thread, there’s a lot you can do with it and it looks so gorgeous. So this week I wanted to try to marry two of my current crochet obsessions, crochet thread and tapestry designs. I didn’t want to get too wild with it, so I just did some fun little triangles. I hope you get this design a try.
- 2.25 mm steel crochet hook
- Size 10 crochet thread
- I used Aunt Lydia‘s
- At least 2 colors (I used 4 different colors)
- Needle to weave in your ends
- 1 Button
Gauge:
- 14 scs x 15 rows = 1.5″ x 1.5″
Terms/ stitches used:
- Ch: chain
- Slip st: slip stitch
- St: stitch
- Sc: single crochet
Notes:
- This pattern is worked in parts, the base of the bracelet, rows on the ends and then a border. At the end you top it off with a button.
- I usually work over yarn when I’m graphing but for this design I didn’t. You can do whatever you feel comfortable with.
- This pattern is worked in rows, back and forth, with a turn at the beginning or end.
- The ch 1 at the beginning of the row does not count as a stitch
- The color changes below are not specified other than “color A, color B.”
Finished measurements:
- Height: just over 1.5″
- Width: 7″
Pattern instructions:
Row 1: Color A: Ch 54, sc into the second ch from the hook and across – 54 scs
Row 2: Ch 1, turn, sc across – 54 scs
Row 3: Color A: Ch 1, turn, sc into the next 13 sts, Color B: sc into the next st, *Color A: sc into the next 17 sts, Color B: sc into the next st,* repeat from * to * once more, Color A: sc into the next 4 sts – 54 scs
Row 4: Color A: Ch 1, turn, sc into the next 3 sts, Color B: sc into the next 3 sts, *Color A: sc into the next 15 sts, Color B: sc into the next 3 sts,* repeat from * to * once more, Color A: sc into the 12 sts – 54 scs
Row 5: Color A: Ch 1, turn, sc into the next 11 sts, Color B: sc into the next 5 sts, *Color A: sc into the next 13 sts, Color B: sc into the next 5 sts,* repeat from * to * once more, Color A: sc into the next 2 sts – 54 scs
Row 6: Color A: Ch 1, turn, sc into the next st, Color B: sc into the next 7 sts, *Color A: sc into the next 11 sts, Color B: sc into the next 7 sts,* repeat from * to * once more, Color A: sc into the 10 sts – 54 scs
Row 7: Color A: Ch 1, turn, sc into the next 9 sts, *Color B: sc into the next 9 sts, Color A: sc into the next 9 sts,* repeat from * to * once more, Color B: sc into the next 9 sts – 54 scs
Row 8: Color A: Ch 1, turn, sc into the next 9 sts, *Color B: sc into the next 9 sts, Color A: sc into the next 9 sts,* repeat from * to * once more, Color B: sc into the next 9 sts – 54 scs
Row 9: Color A: Ch 1, turn, sc into the next st, Color B: sc into the next 7 sts, *Color A: sc into the next 11 sts, Color B: sc into the next 7 sts,* repeat from * to * once more, Color A: sc into the next 10 sts – 54 scs
Row 10: Color A: Ch 1, turn, sc into the next 11 sts, Color B: sc into the next 5 sts, *Color A: sc into the next 13 sts, Color B: sc into the next 5 sts,* repeat from * to * once more, Color A: sc into the next 2 sts – 54 scs
Row 11: Color A: Ch 1, turn, sc into the next 3 sts, Color B: sc into the next 3 sts, *Color A: sc into the next 15 sts, Color B: sc into the next 3 sts,* repeat from * to * once more, Color A: sc into the next 12 sts – 54 scs
Row 12: Color A: Ch 1, turn, sc into the next 13 sts, Color B: sc into the next st, *Color A: sc into the next 17 sts, Color B: sc into the next st,* repeat from * to * once more, Color A: sc into the next 4 sts – 54 scs
Rows 13 – 14: Color A: Ch 1, turn, sc into the next 54 sts – 54 scs
Fasten off Color A.
Ends:
Rotate the whole piece and start down one of the short sides.
Row 1: Color A: Pull up a loop on the end of row 14, ch 1, sc into the next 13 row ends – 14 scs
Rows 2 – 5: Ch 1, turn, sc across – 14 scs
Fasten off Color A.
Rotate the whole piece so you’re working down the other short side.
Row 1: Color A: Pull up a loop on the end of row 1, ch 1, sc into the next 13 row ends – 14 scs
Rows 2 – 5: Ch 1, turn, sc across – 14 scs
Fasten off Color A.
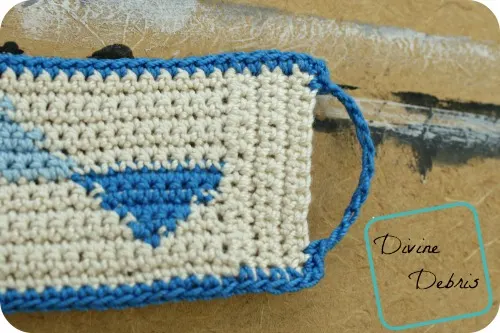
Row 6: Color B: Ch 1, turn, sc into the next 14 scs, ch 1 at the corner, turn the whole piece, sc into the next 64 sts, ch 1 at the corner, rotate the whole piece, sc into the next 2 sts, ch 10, skip the next 10 sts, sc into the next 2 sts, ch 1 at the corner, rotate the whole piece, sc into the next 64 sts, ch 1, slip st into the first st – 146 scs
Fasten off Color B. Weave in all your ends.
Finishing:
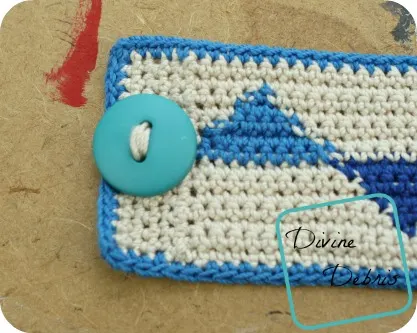
One you’ve got all your ends woven in and you’re bracelet is all pretty, you just need to attach your button. Make sure the scs from row 6 are facing up, attach a button to the end of the bracelet opposite the ch-10 space. I like to weave the thread through the button holes a few times to make sure the button is super secure. The ch-10 space wraps around the button and that’s how you keep the bracelet on your hand.
Tada! I hope you like the new design and have fun with it.

