

This post is for the 3rd square in the Stitch Together 2022 Stitch-A-Thon Blanket. If you’re unfamiliar with this CAL, head over to StitchTogether.com and find out all about how you can join us in 14 squares all year long.
Square 3 is designed by me, Amber from Divine Debris. For this square I wanted to have a little fun with the construction of this square, so that it is set apart from the other 2 squares for this CAL and because it’s a fun way to make a square. But when I started working it up I was worried people would be a touch confused in how to make it so I thought a photo tutorial would be the easiest way to explain things (also I don’t like to make videos, so that’s a no-go).
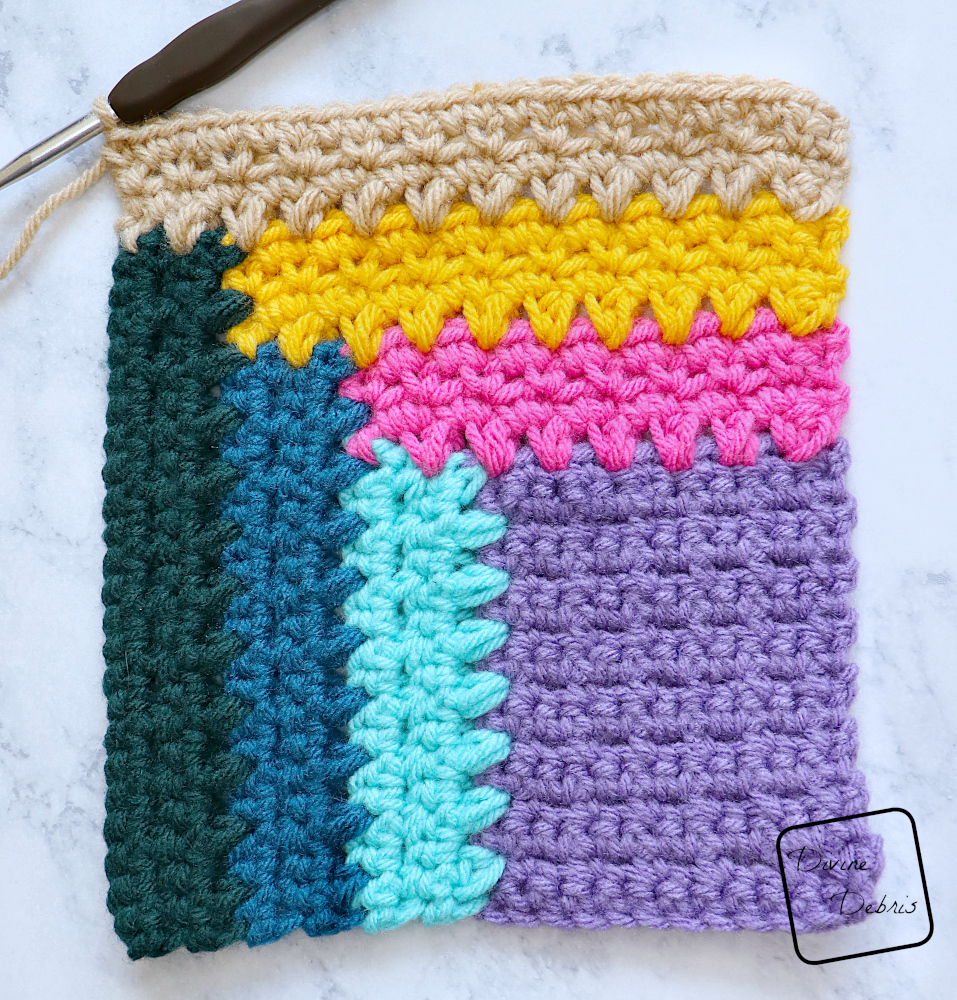
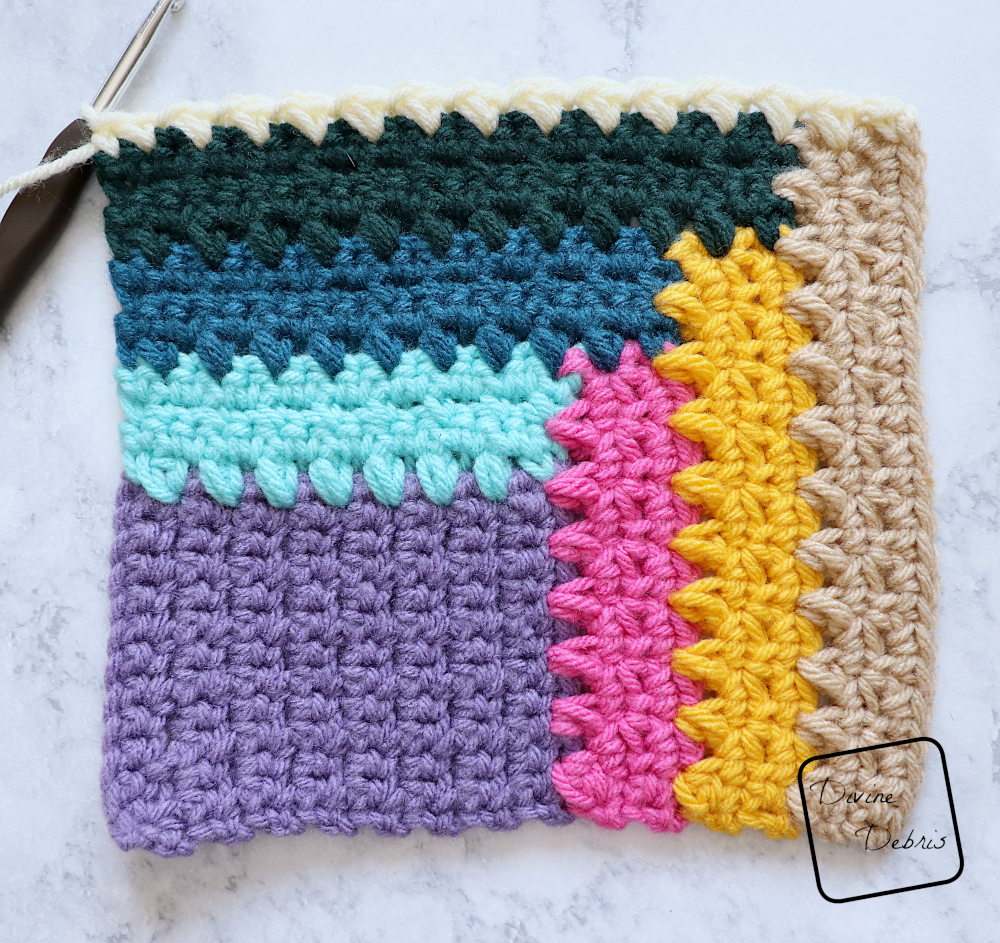
Below you’re going to find the square’s 8 sections broken up by color so you can see how you rotate the square to the right to work down row ends and in to a previous section (where applicable). And don’t forget to keep your ch sts even. If you pull these too tight you will definitely have a square that will be a bit off, if that makes sense. You could always block it to make it even, but you don’t want to rely on that. Just make sure you keep the tension loose. 🙂
If you have any questions, don’t forget to ask them in the Stitch Together Facebook Group (but let’s remember to keep it kind) and share those photos with the hashtag #Stitchathon2022 on Instagram.
And if you haven’t bought the pdf from We Crochet you can do that any time during the CAL and it will be updated with each new square!
Please note: I was provided Brava Worsted by We Crochet for the purposes of designing the my 2 squares for the Stitch Together Stitch-A-Thon Blanket, without compensation. I wasn’t provided the yarn with the expectations of positive or negative reviews but I honestly can say I do enjoy this yarn, I used it on my so many times, and it is a fantastic worsted. If you purchase yarn through any of the links in this post, I will be compensated.
(this post contains affiliate links)

Level
Easy
Materials
- US I (5.50 mm) crochet hook or any size to obtain gauge
- Size #4/ worsted weight yarn
- I used Brava Worsted by We Crochet
- Notions: scissors, measuring tape, yarn needle
Gauge
- 15 sc by 18 rows = 4″ square (blocked)
Finished Size (blocked)
- 7″ x 7″
Terms/ Stitches used
- RS/WS: Right side/ Wrong side
- St: Stitch
- Ch: Chain
- Sc: Single crochet
- Sk: Skip
- Mini Bean St (MB): insert your hook into the st, yarn over, pull up a loop, yarn over, insert your hook into the same st, yarn over, pull up a loop, yarn over, pull through all 4 loops on your hook
Notes
- This square is worked row by row with a ch at the beginning row and when you begin a new section, you will rotate your piece.
- Don’t make your ch between sts too tight or else it will distort your final square.
- The ch 1 at the beginning of the rows does not count as a st.
- Blocking is recommended for this pattern.
Square 3 Photo Tutorial
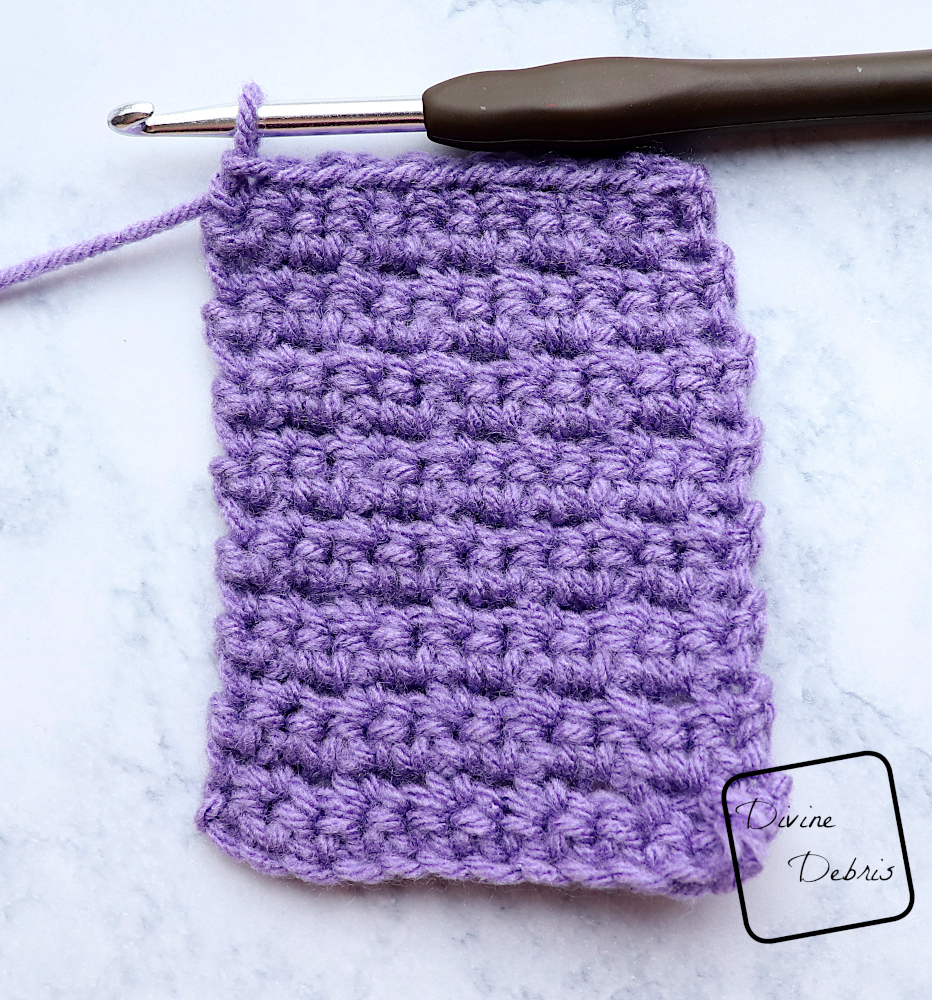
Section 1
(RS) Row 1: Ch 13, sc into the 2nd ch from the hook and across — 12 sc
(WS) Row 2: Ch 1, turn, sc into the 1st st, *ch 1, sk the next st, sc into the next st,* repeat from * to * until 1 st remains, sc into the last st — 7 sc, 5 ch-1
Row 3: Ch 1, turn, sc across (this counts sts and chs here and throughout) — 12 sc
Rows 4 – 15: repeat rows 2 – 3, a total of 6 more times.
Row 16: repeat row 2.
This section should be approx 3″ x 4″ at this point.
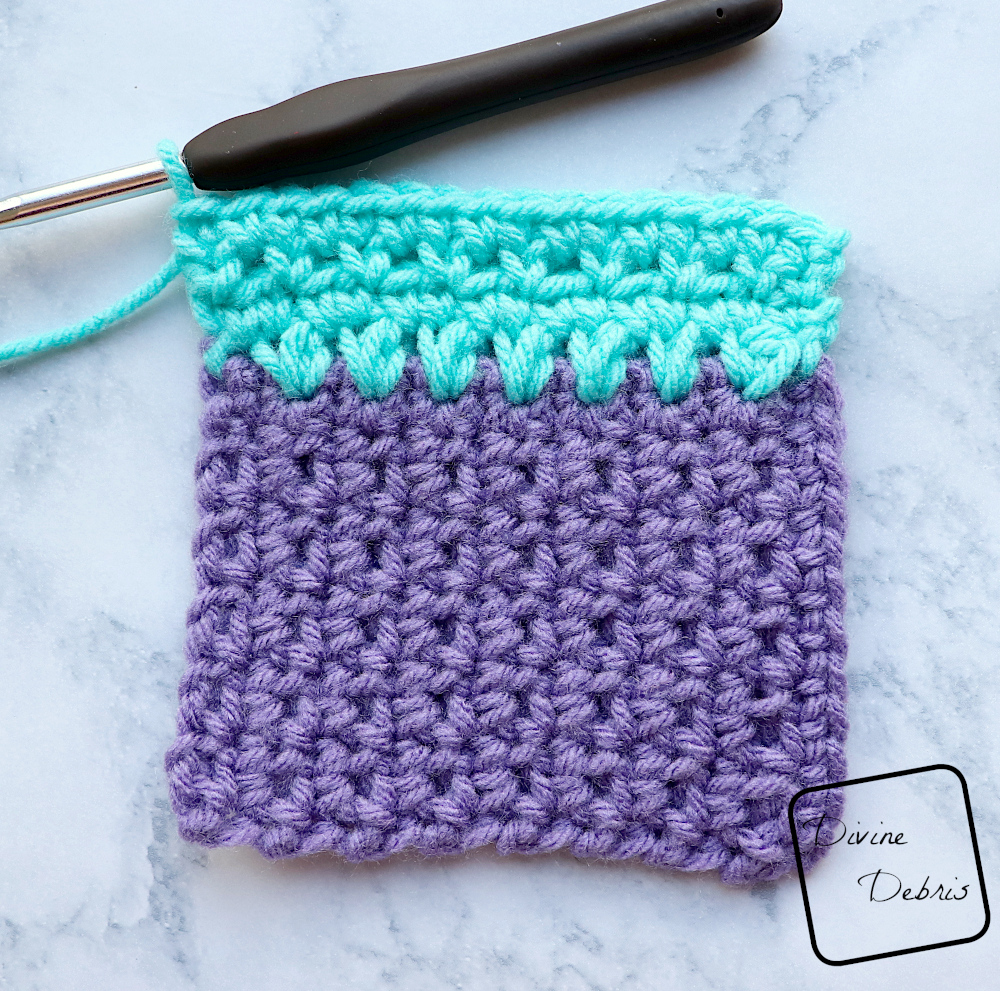
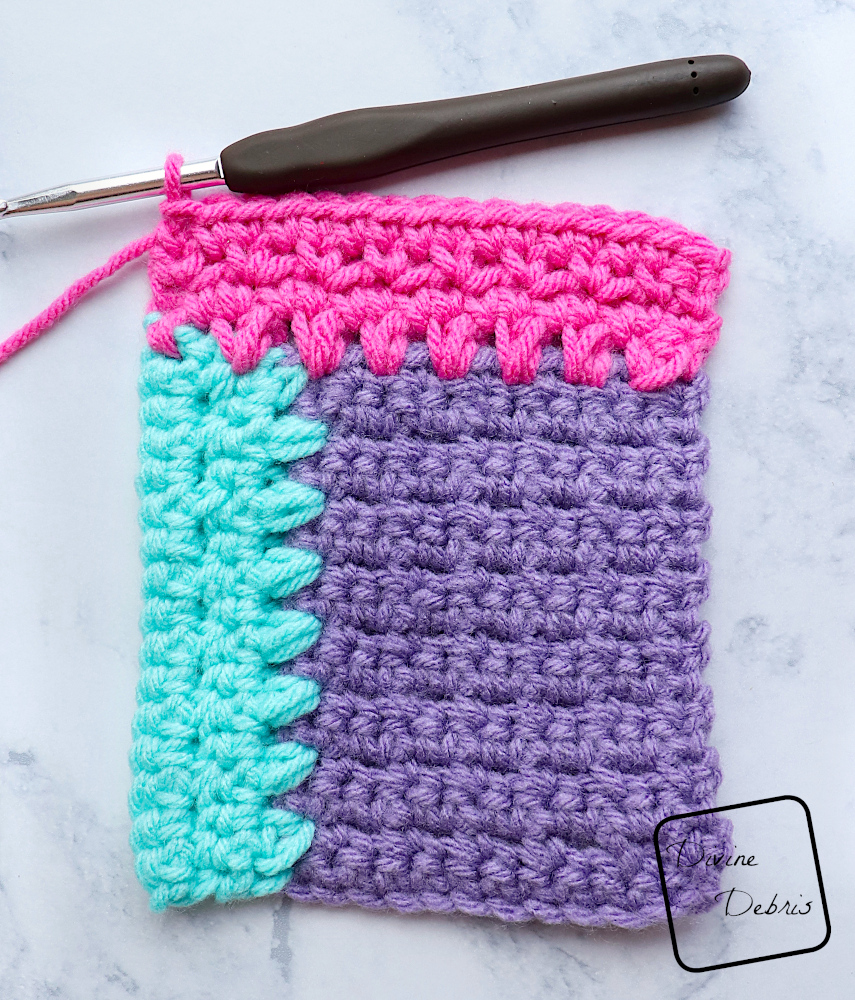
Section 2
With the WS facing you ch 1 and rotate your square 90° to the right so you’re working down the row ends of Section 1.

Row 17: Sc into the first row end, *ch 1, sk the next row end, MB into the next row end,* repeat from * to * until 1 row end remains, sc into the last row end — 2 sc, 7 MB, 7 ch-1
Row 18: Ch 1, turn, sc across — 16 sc
Row 19: Ch 1, turn, sc into the 1st st, *ch 1, sk the next st, sc into the next st,* repeat from * to * until 1 st remains, sc into the last st — 9 sc, 7 ch-1
Row 20: Ch 1, turn, sc across — 16 sc
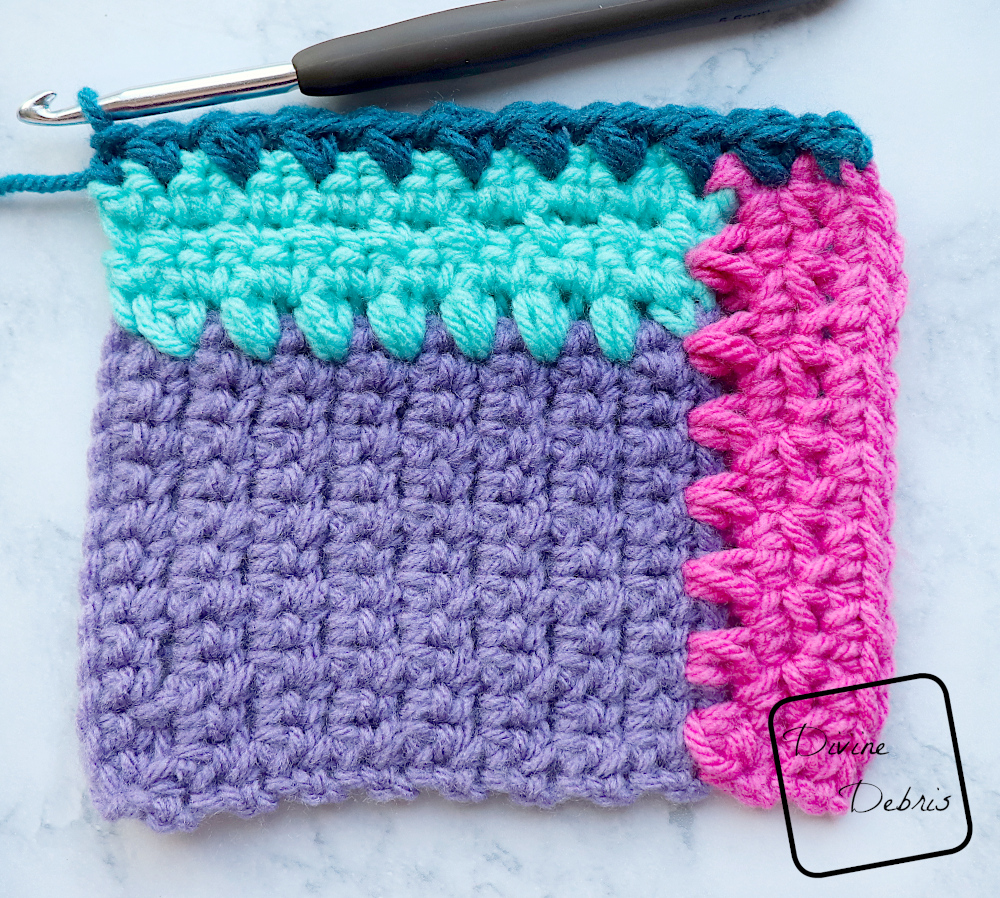
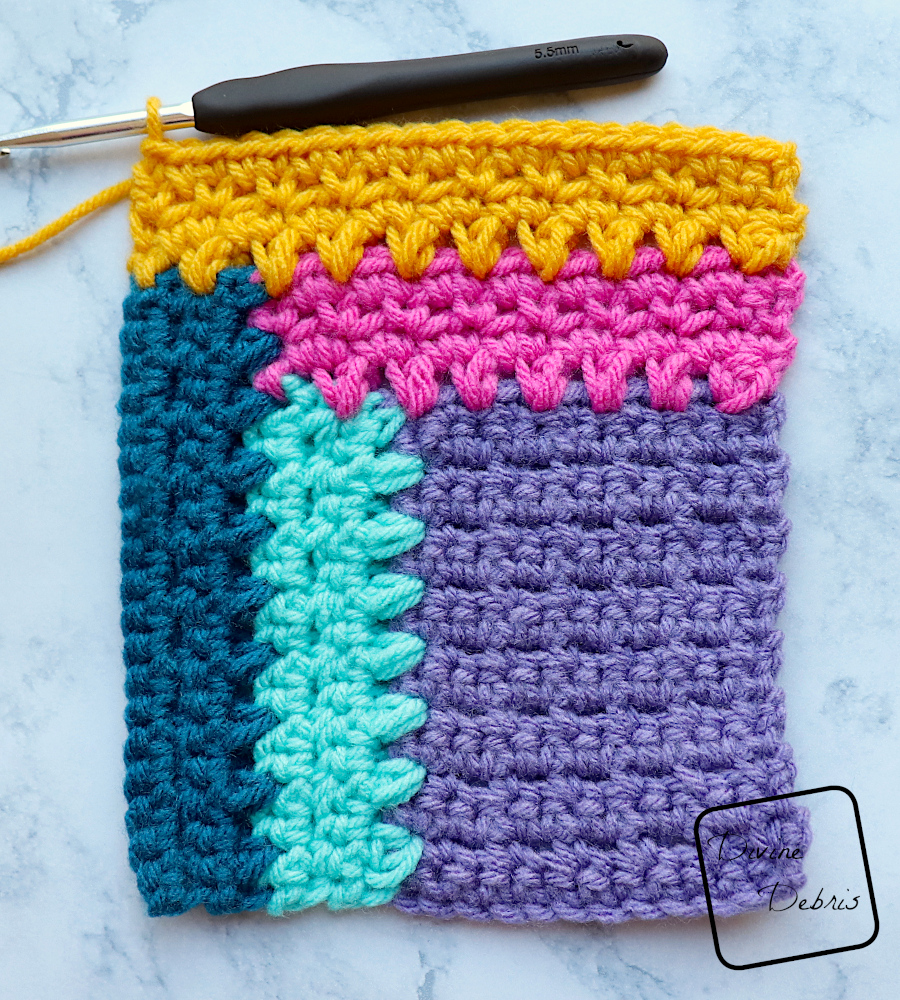
Section 3
With the RS facing you ch 1 and rotate your square 90° to the right so you’re working into Section 2’s row ends and Row 16 of Section 1.

Row 21: Sc into the first row end, ch 1, sk the next row end, MB into the next row end, *ch 1, sk the next st, MB into the next st,* repeat from * to * until 1 st end remains, sc into the last st — 2 sc, 7 MB, 7 ch-1
Rows 22 – 24: repeat rows 18 – 20, once more.
Section 4
With the WS facing you ch 1 and rotate your square 90° to the right so you’re working into Section 3’s row ends and Row 20 of Section 2.
Row 25: Sc into the first row end, ch 1, sk the next row end, MB into the next row end, *ch 1, sk the next st, MB into the next st,* repeat from * to * until 1 st end remains, sc into the last st — 2 sc, 9 MB, 9 ch-1
Row 26: Ch 1, turn, sc across — 20 sc
Row 27: Ch 1, turn, sc into the 1st st, *ch 1, sk the next st, sc into the next st,* repeat from * to * until 1 st remains, sc into the last st — 11 sc, 9 ch-1
Row 28: Ch 1, turn, sc across — 20 sc
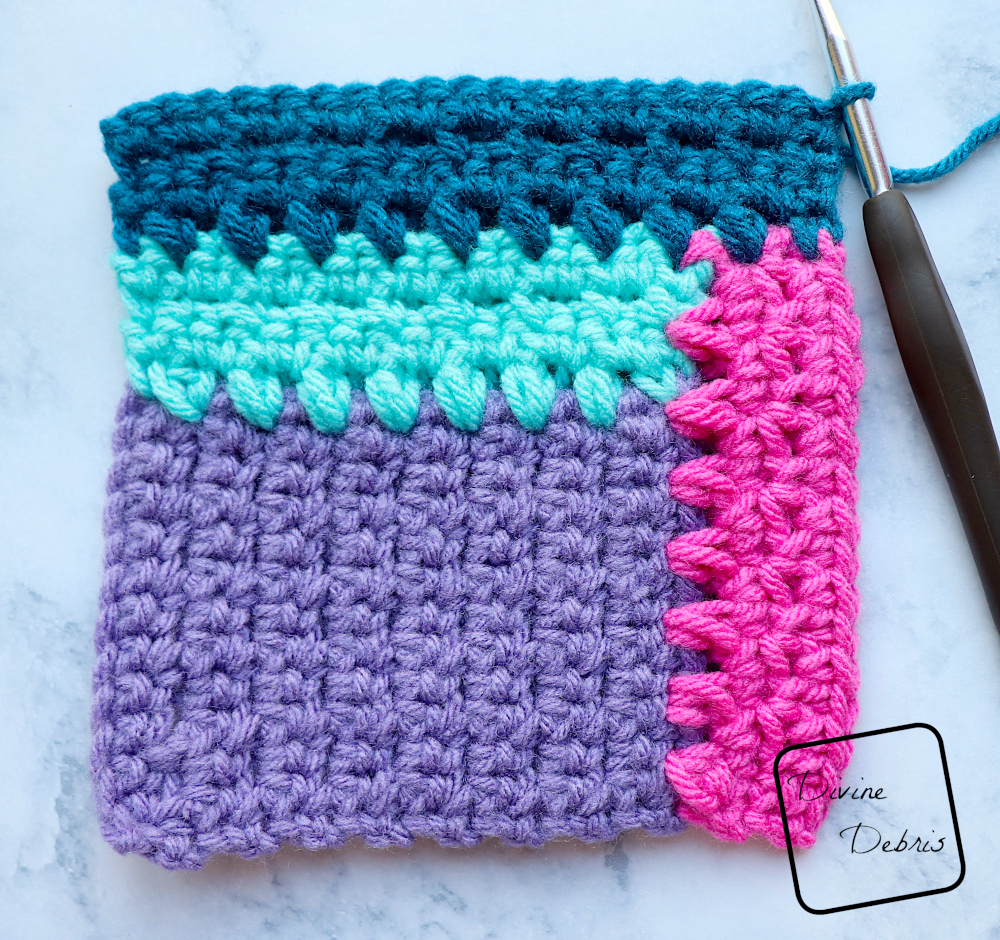
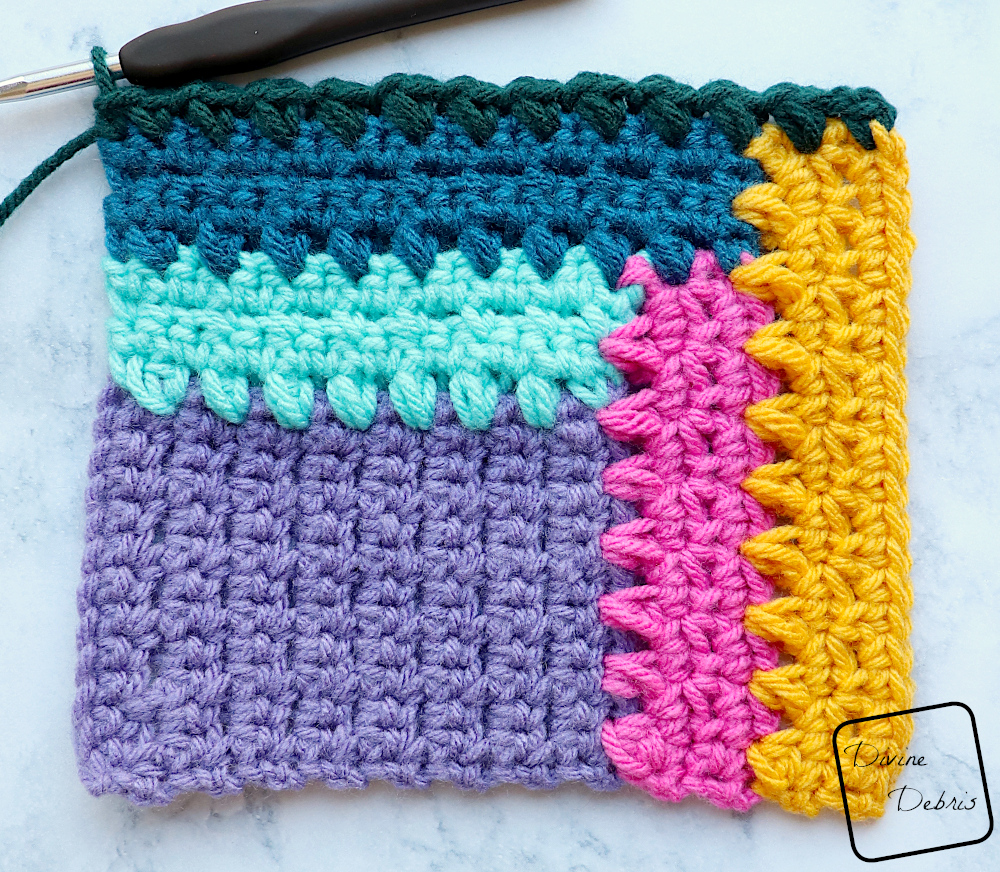
Section 5
With the RS facing you ch 1 and rotate your square 90° to the right so you’re working into Section 4’s row ends and Row 24 of Section 3.
Rows 29 – 32: repeat rows 25 – 28, once more.
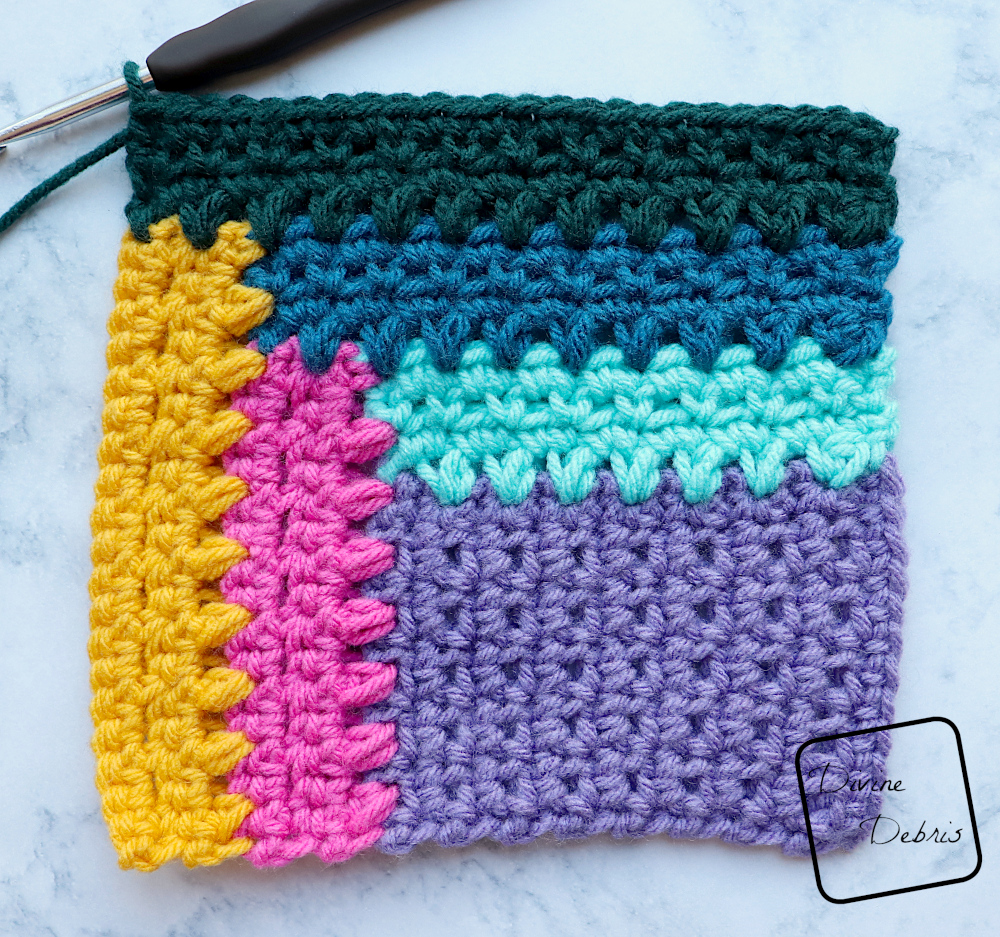
Section 6
With the WS facing you ch 1 and rotate your square 90° to the right so you’re working into Section 5’s row ends and Row 28 of Section 4.
Row 33: Sc into the first row end, ch 1, sk the next row end, MB into the next row end, *ch 1, sk the next st, MB into the next st,* repeat from * to * until 1 st end remains, sc into the last st — 2 sc, 11 MB, 11 ch-1
Row 34: Ch 1, turn, sc across — 24 sc
Row 35: Ch 1, turn, sc into the 1st st, *ch 1, sk the next st, sc into the next st,* repeat from * to * until 1 st remains, sc into the last st — 13 sc, 11 ch-1
Row 36: Ch 1, turn, sc across — 24 sc
Section 7
With the RS facing you ch 1 and rotate your square 90° to the right so you’re working into Section 6’s row ends and Row 32 of Section 5.
Rows 37 – 40: repeat rows 33 – 36, once more.
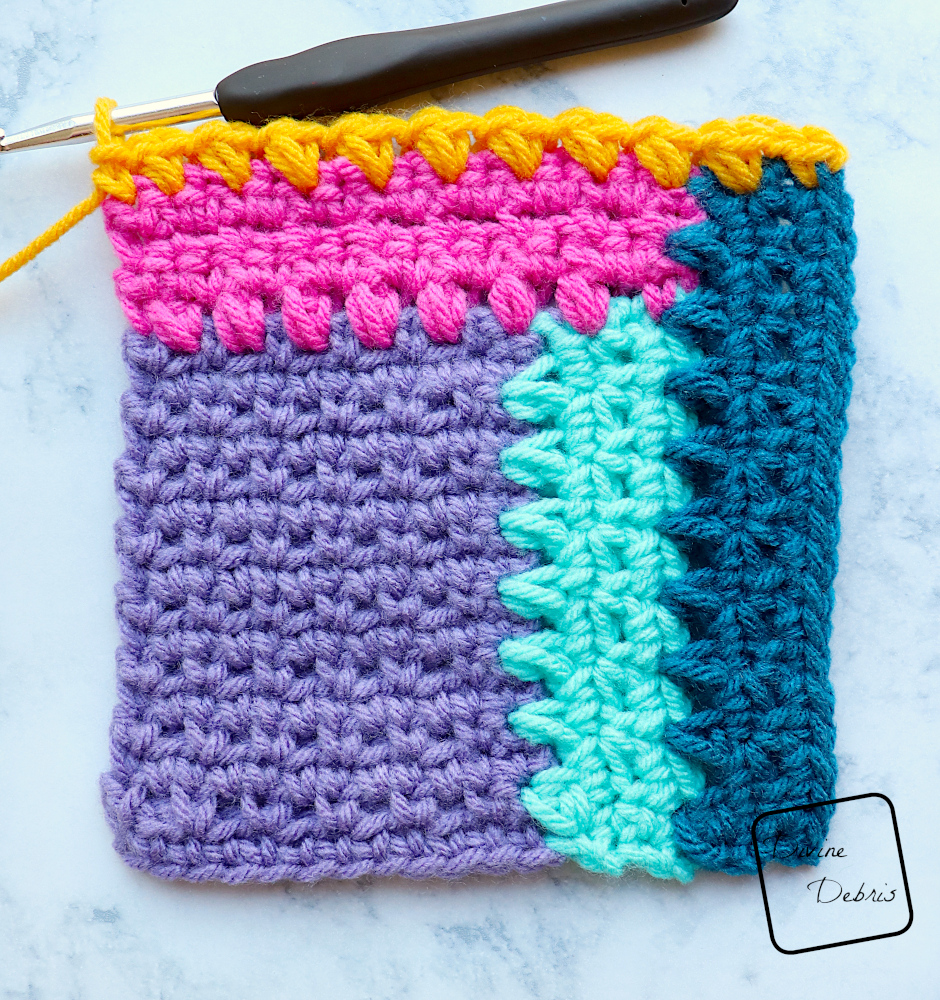
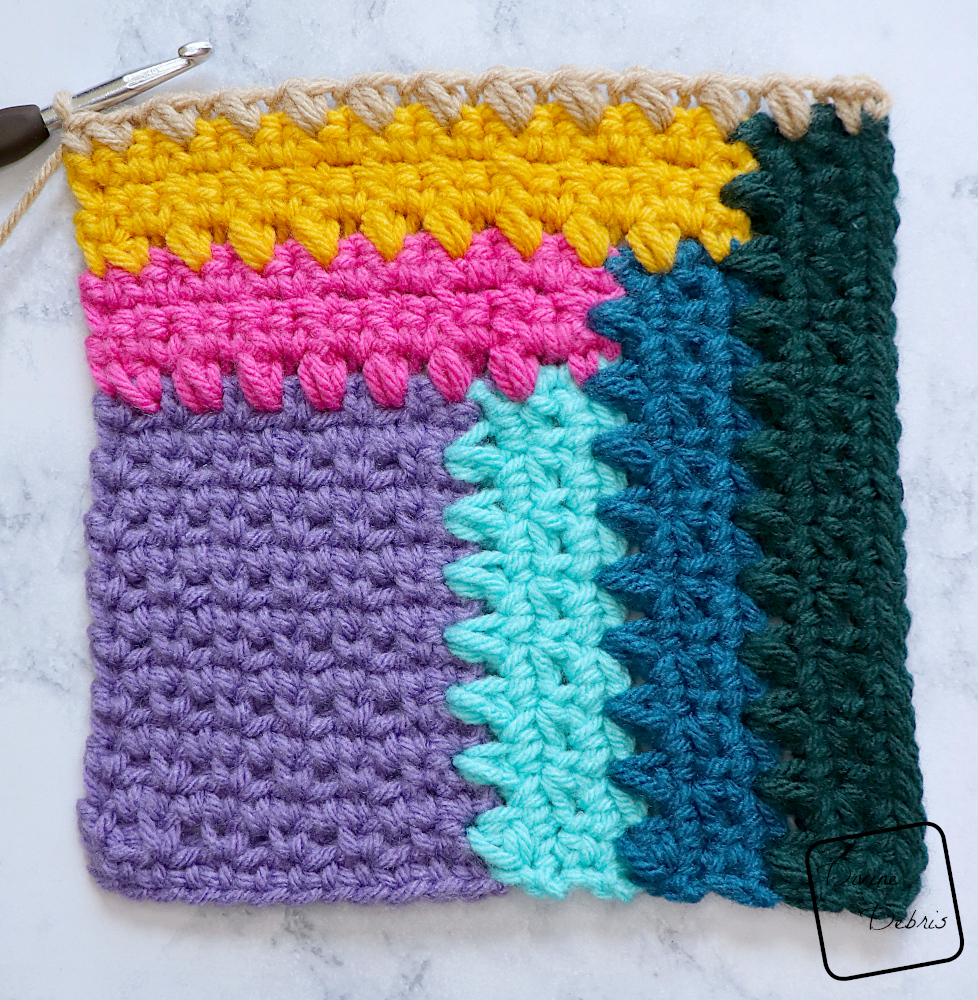
Section 8
With the WS facing you ch 1 and rotate your square 90° to the right so you’re working into Section 7’s row ends and Row 36 of Section 6.
Row 41: Sc into the first row end, ch 1, sk the next row end, MB into the next row end, *ch 1, sk the next st, MB into the next st,* repeat from * to * until 1 st end remains, sc into the last st — 2 sc, 13 MB, 13 ch-1
Row 42: Ch 1, turn, sc across — 28 sc
Fasten off. Weave in your ends. Block so your square is 7″ x 7″.
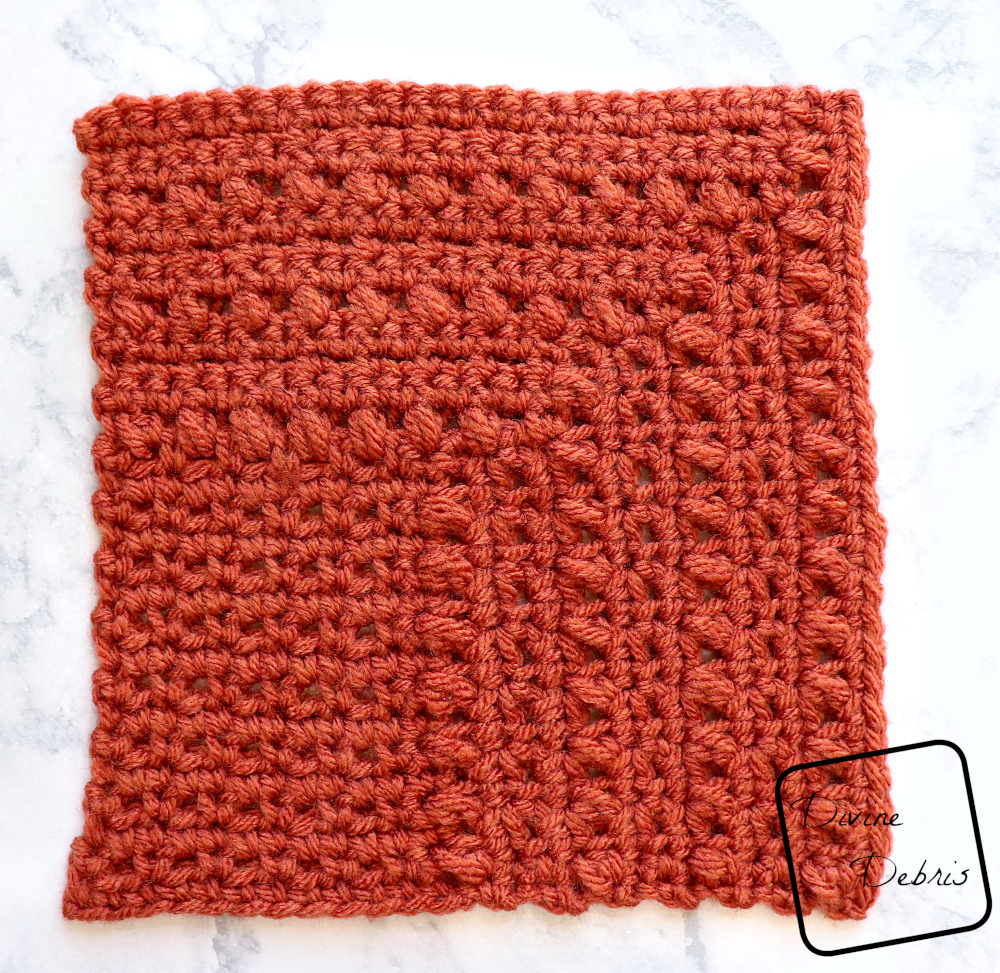
![[Image descriptin]](https://d3gel9wqxksnxm.cloudfront.net/wp-content/uploads/2022/03/StitchTogetherSquare3-1000x988-1.jpg)
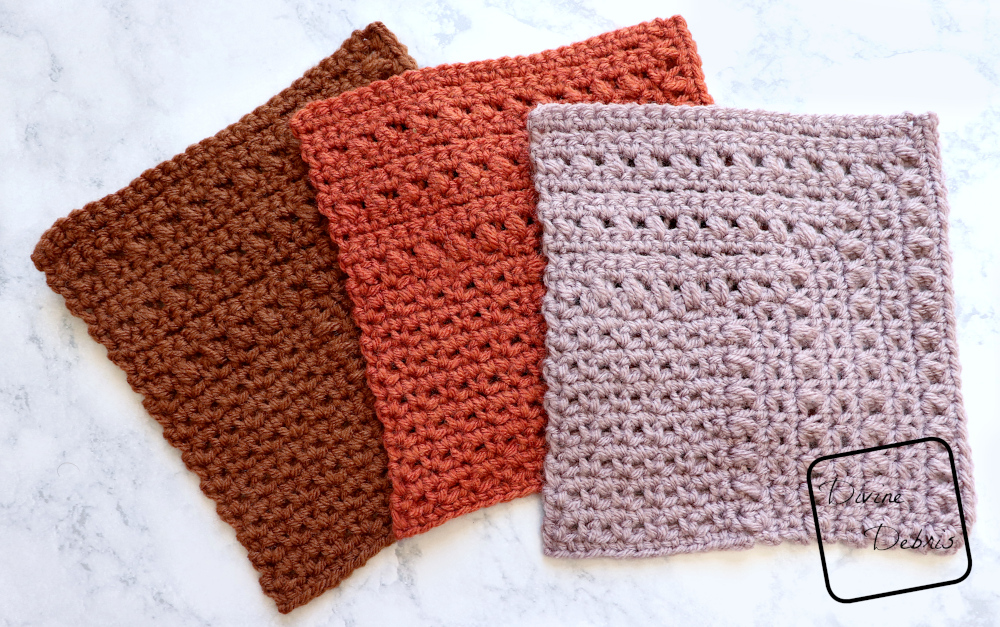
Tada! There’s square 3. I hope you like it and if you have any questions comment below. I hope you like this design and make sure to give your square a nice blocking. It will help to open up all the lovely texture. Don’t forget to share your photos in our Facebook group and when you share in Instagram use the hashtag #StitchaThon2022 and #DivineDebris and tag @DivineDebris in the photo so I can share 🙂
Copyright @ Divine Debris 2022. No part of this document may be reproduced or transmitted in any form by any means, electronic, mechanical, photocopying, or otherwise, without prior written permission from the author. Sales of finished products are permitted, but the designer requests that you link back to the pattern and credit Divine Debris with the original design under the Creative Commons Attribution-Share Alike license. If you have any questions, comments or concerns please contact info@divinedebris.com.
Noemi Delgado
Wednesday 22nd of June 2022
Is there a video on this square. Mines not quit coming out
Divine Debris
Tuesday 28th of June 2022
No, there is not. But a good way to troubleshoot this pattern is to make sure you know if you're looking at the right side or the wrong side by checking Row 1 and seeing if the front of the stitches is facing you. And the 90° turn is just a quarter turn to the right :) Hope that helps
-Amber
Heather
Wednesday 30th of March 2022
Hi! I'm wondering for the repeating rows 2-3, are we meant to be doing our single crochet into the chain SPACE, or into the top two loops of the chain? Thank you :-)
Malina Larson
Saturday 28th of May 2022
I am wondering the same thing. Are we crocheting into the ch1 space, or in to the stitch itself? Because I read the pattern and was crocheting into the stitch, but then I thought maybe it was supposed to be like a moss stitch and use the ch1 space instead.