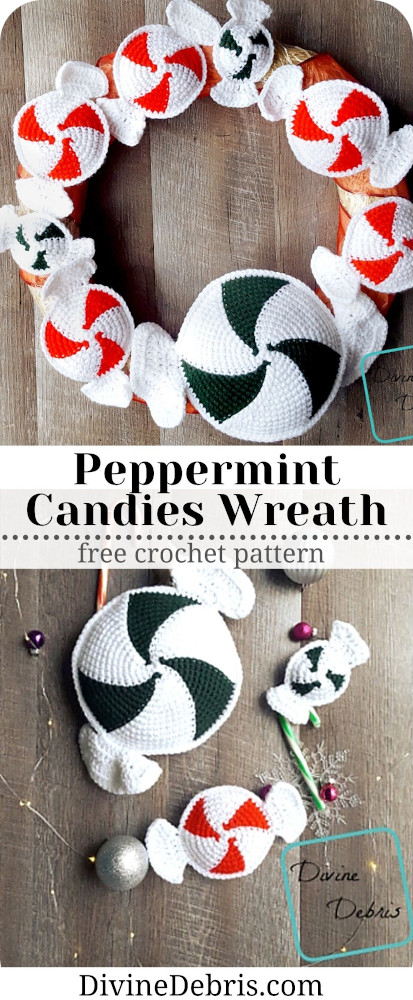
Peppermint Candies Wreath crochet pattern by DivineDebris.com
Hi everyone! Sorry to get a wreath design for you so late in the season… but luckily peppermints are super cute and can be a whole Winter theme. 😀
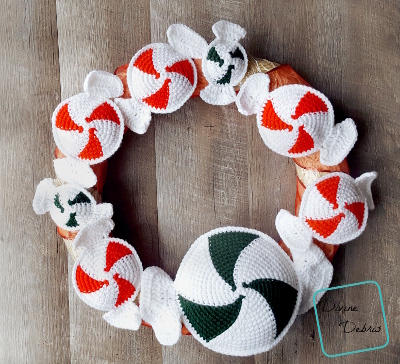
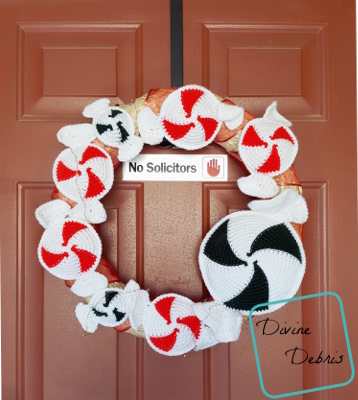
I really loved having my Too Cute Halloween Wreath up, which I kept up for about 2 months, because it’s just silly and fun and so I wanted to make another wreath design for my house. I didn’t want to make it anything you might see everywhere so I came up with the peppermint candies. The fun thing about this pattern is that you can make the wreath in as many or as few candies as you’d like, in an arrangement of that’s to your own liking or you don’t have to make a wreath! You can make earrings (which would be just like making the pumpkin earrings) or just add to a center piece with a couple lil handmade candies. It’s all up to your creativity, I’m just here to inspire!
You can purchase an ad-free pdf of this pattern in my Ravelry shop – this helps me to continue to make patterns week after week. 🙂
This pattern is worked in the round, with a slip st into the first st of the row.
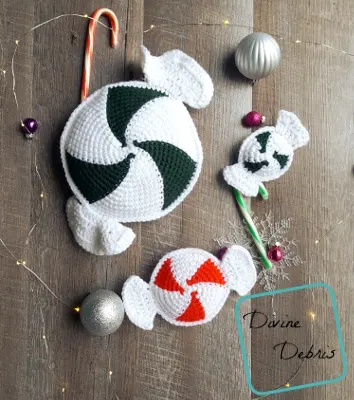
This pattern is worked in 4 parts, from the center of the candy out. You will make 2 circles and secure them together with a single crochet around the edge. You will then add the wrapper edges (there will be 2 of them).
All 3 sizes begin the same way and then differ as you make them larger, the wrapper edges are different in each.
The ch 1 at the beginning of the row does not count as a stitch.
The ch 3 in the wrapper section does count as a stitch.
The first st of the row is always worked into the same st as join.
Every stitch in the circle section is a single crochet. The directions for the circles (where the color changes are) will only tell you what color (ie: Color A, Color B, etc…) and the number in the parentheses tells you how many stitches to make. In the instructions that look like (number + 2x) or (2x + number) the 2x part means you will sc twice into the stitch.
– Circle – (RS) Row 1: A: Create a magic circle, ch 1, sc into the circle 6 times, slip st into the first st – 6 scs Row 2: A: Ch 1, (2x), B: (2x), *A: (2x), B: (2x),* repeat from * to * once more, slip st into the first st – 12 scs Row 3: A: Ch 1, (2x + 1), B: (2x), *A: (1 + 2x + 1), B: (2x),* repeat from * to * once more, A: (1), slip st into the first st – 18 scs Row 4: A: Ch 1, (2x + 2), B: (2x + 1), *A: (1 + 2x + 2), B: (2x + 1),* repeat from * to * once more, A: (1), slip st into the first st – 24 scs Row 5: A: Ch 1, (2x + 3), B: (2x + 2), *A: (1 + 2x + 3), B: (2x + 2),* repeat from * to * once more, A: (1), slip st into the first st – 30 scs
For small size, stop here. Fasten off, weave in all your ends. Row 6: A: Ch 1, (2x + 4), B: (2x + 3), *A: (1 + 2x + 4), B: (2x + 3),* repeat from * to * once more, A: (1), slip st into the first st – 36 scs Row 7: A: Ch 1, (2x + 5), B: (2x + 4), *A: (1 + 2x + 5), B: (2x + 4),* repeat from * to * once more, A: (1), slip st into the first st – 42 scs Row 8: A: Ch 1, (2x + 6), B: (2x + 5), *A: (1 + 2x + 6), B: (2x + 5),* repeat from * to * once more, A: (1), slip st into the first st – 48 scs
For medium size, stop here. Fasten off, weave in all your ends. Row 9: A: Ch 1, (2x + 7), B: (2x + 6), *A: (1 + 2x + 7), B: (2x + 6),* repeat from * to * once more, A: (1), slip st into the first st – 54 scs Row 10: A: Ch 1, (2x + 8), B: (2x + 7), *A: (1 + 2x + 8), B: (2x + 7),* repeat from * to * once more, A: (1), slip st into the first st – 60 scs Row 11: A: Ch 1, (2x + 9), B: (2x + 8), *A: (1 + 2x + 9), B: (2x + 8),* repeat from * to * once more, A: (1), slip st into the first st – 66 scs Row 12: A: Ch 1, (2x + 10), B: (2x + 9), *A: (1 + 2x + 10), B: (2x + 9),* repeat from * to * once more, A: (1), slip st into the first st – 72 scs Row 13: A: Ch 1, (2x + 11), B: (2x + 10), *A: (1 + 2x + 11), B: (2x + 10),* repeat from * to * once more, A: (1), slip st into the first st – 78 scs Row 14: A: Ch 1, (2x + 12), B: (2x + 11), *A: (1 + 2x + 12), B: (2x + 11),* repeat from * to * once more, A: (1), slip st into the first st – 86 scs Row 15: A: Ch 1, (2x + 13), B: (2x + 12), *A: (1 + 2x + 13), B: (2x + 12),* repeat from * to * once more, A: (1), slip st into the first st – 90 scs
For large size, stop here. Fasten off, weave in all your ends.
– Securing –
Peppermint Candies Wreath crochet pattern by DivineDebris.com
Sizing as follows: small (medium, large)
Take 2 circles of the same size, with the “wrong side” of both pieces touching, and create a slip knot on your hook with color A. Begin anywhere on the circles and sc into each single crochet around the edge (row 5, 8 or 15 of the circle) and slip st into the first st – 30 (48, 90) scs Note: if you would like a little bit of puff to the candies, like you see in the photos here, add a bit of polyfill or stuffing to the space between the two circles before you secure them all the way together.
Do not fasten off on this size, move onto the wrapper.
– Wrapper –
You will start this section from where you left off on securing the two pieces together.
– Small – Row 1: A: Ch 3, dc twice into the next st, dc into the next st, dc twice into the next st, dc into the next st – 7 dcs Row 2: A: Ch 3, turn, dc into the next st, dc three times into the next st, dc into the next 2 sts, dc three times into the next st, dc into the last st – 11 dcs
Fasten off, weave in your ends.
Skip 9 sts from the last dc you made on row 1, using the standing double crochet method create a dc into the next st, dc twice into the next st, dc into the next st, dc twice into the next st, dc into the next st – 7 dcs
Repeat row 2 from the first wrapper side.
Fasten off on this side. Weave in your ends.
– Medium – Row 1: A: Ch 3, dc twice into the next st, dc into the next st, dc twice into the next st, dc into the next st – 7 dcs Row 2: A: Ch 3, turn, dc into the next st, dc three times into the next st, dc into the next 2 sts, dc three times into the next st, dc into the last st – 11 dcs Row 3: A: Ch 3, turn, dc 4 times into the next st, dc into the next 4 sts, dc 4 times into the next st, dc into the next 4 sts – 17 dcs
Fasten off, weave in your ends.
Skip 19 sts from the last dc you made on row 1, using the standing double crochet method create a dc into the next st, dc twice into the next st, dc into the next st, dc twice into the next st, dc into the next st – 7 dcs
Repeat rows 2 and 3 from the first wrapper side.
Fasten off on this side. Weave in your ends.
– Large – Row 1: A: Ch 3, *dc twice into the next st, dc into the next st,* repeat from * to * twice more – 10 dcs Row 2: A: Ch 3, turn, *dc three times into the next st, dc into the next 2 sts,* repeat from * to * once more, dc three times into the next st, dc into the last 2 sts – 16 dcs Row 3: A: Ch 3, turn, dc into the next st, *dc 4 times into the next st, dc into the next 4 sts,* repeat from * to * once more, dc 4 times into the next st, dc into the next 3 sts – 25 dcs Row 4: A: Ch 3, turn, dc into the next 2 sts, *dc 4 times into the next st, dc into the next 7 sts,* repeat from * to * once more, dc 4 times into the next st, dc into the next 5 sts – 34 dcs
Fasten off, weave in your ends.
Skip 19 sts from the last dc you made on row 1, using the standing double crochet method create a dc into the next st, *dc twice into the next st, dc into the next st,* repeat from * to * twice more – 10 dcs
Repeat rows 2 – 4 from the first wrapper side.
Fasten off on this side. Weave in your ends.
– For the wreath –
You need to purchase a wreath base for this pattern. I used an 18″ Straw Wreath from Ashland that I purchased at Michael’s. I didn’t do anything fancy to the wreath, other than wrapping some ribbon around it, and then I pinned the candies to the wreath. You can use glue to attach them if you’d like, it’s totally up to you. I knew I was going to be removing them for photos so I didn’t glue them all down. If you’d like to make a peppermint colored wreath base, you could use the instructions for the Halloween Wreath and change the colors.
Tada! I hope you like this design and make it into a wreath or just make a bunch of lil candies and show off how cute they are! 😀