

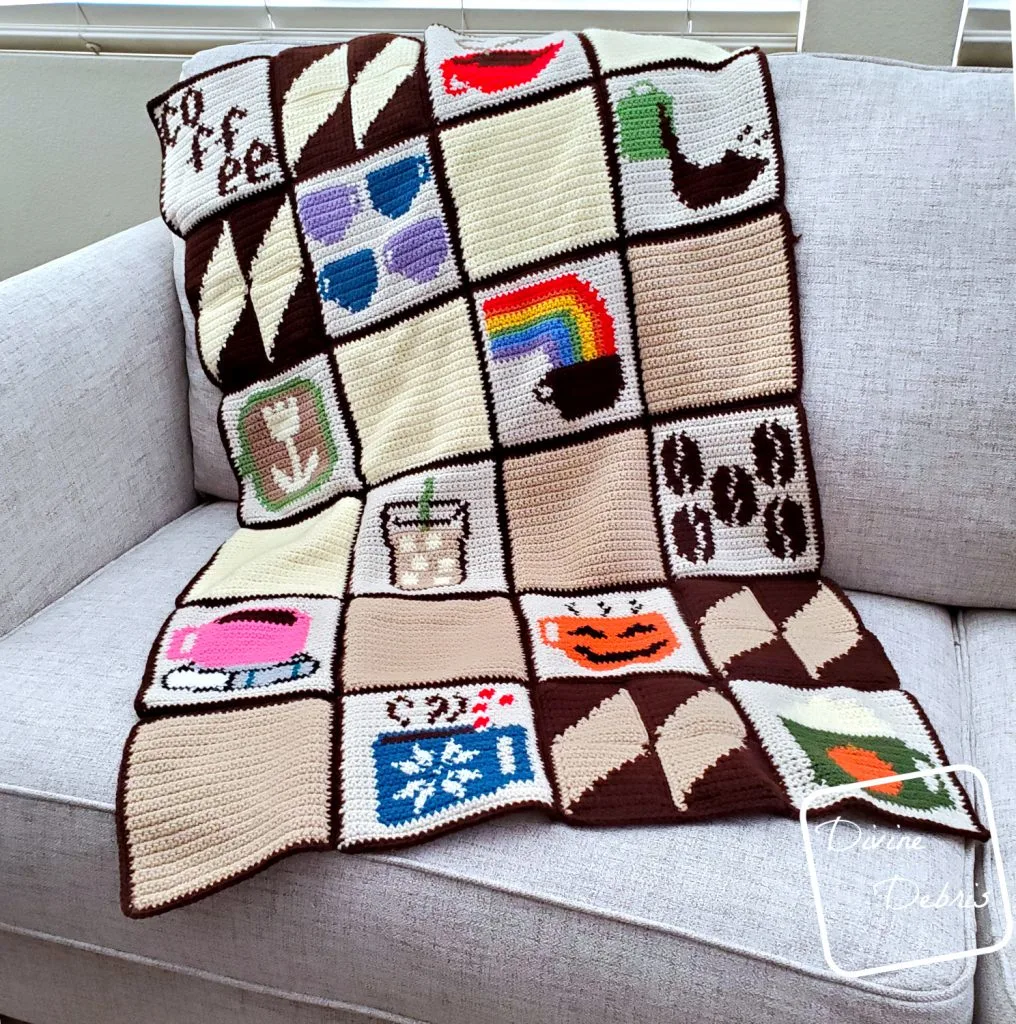
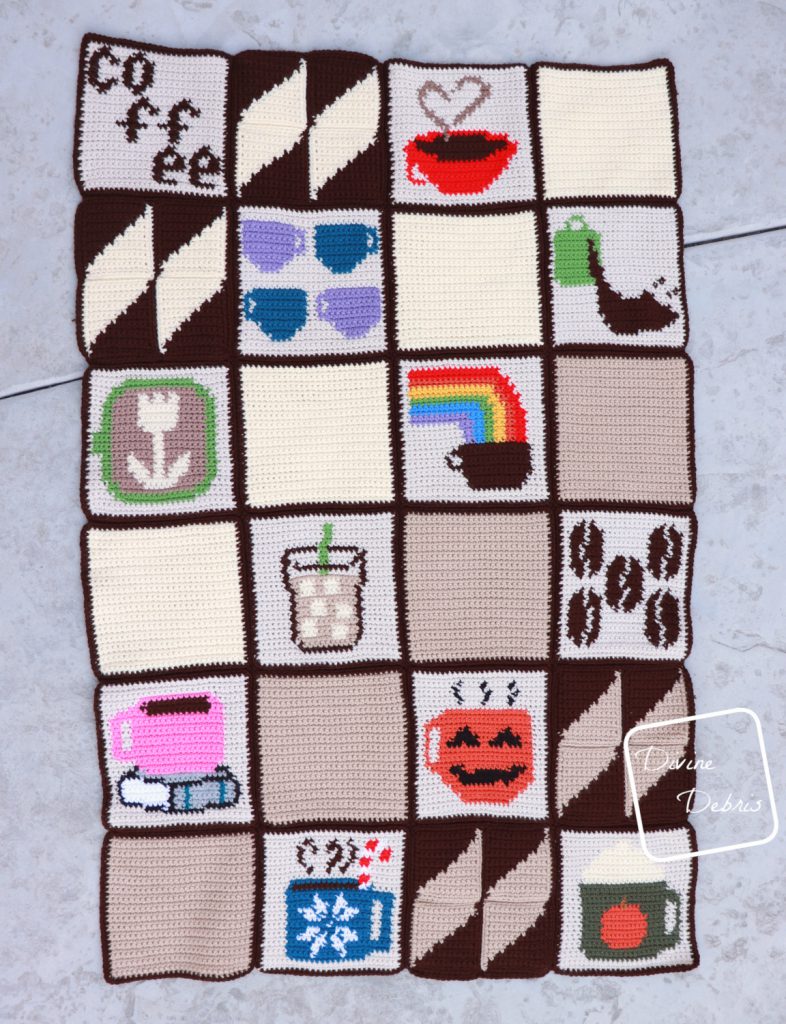
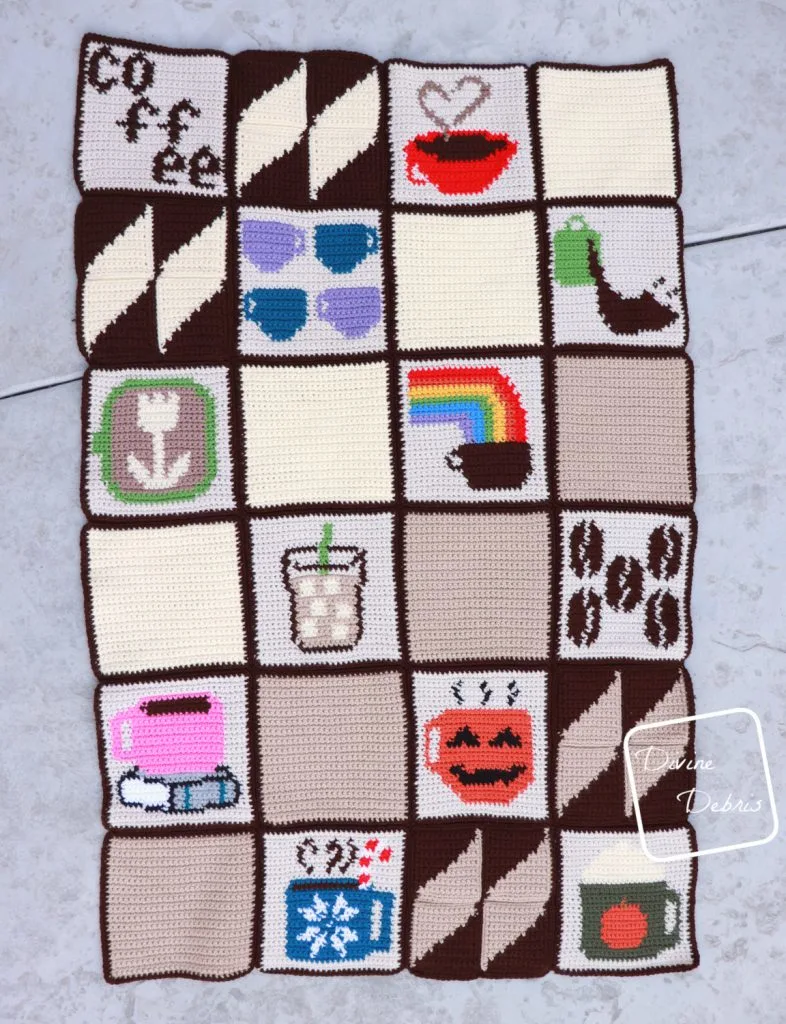
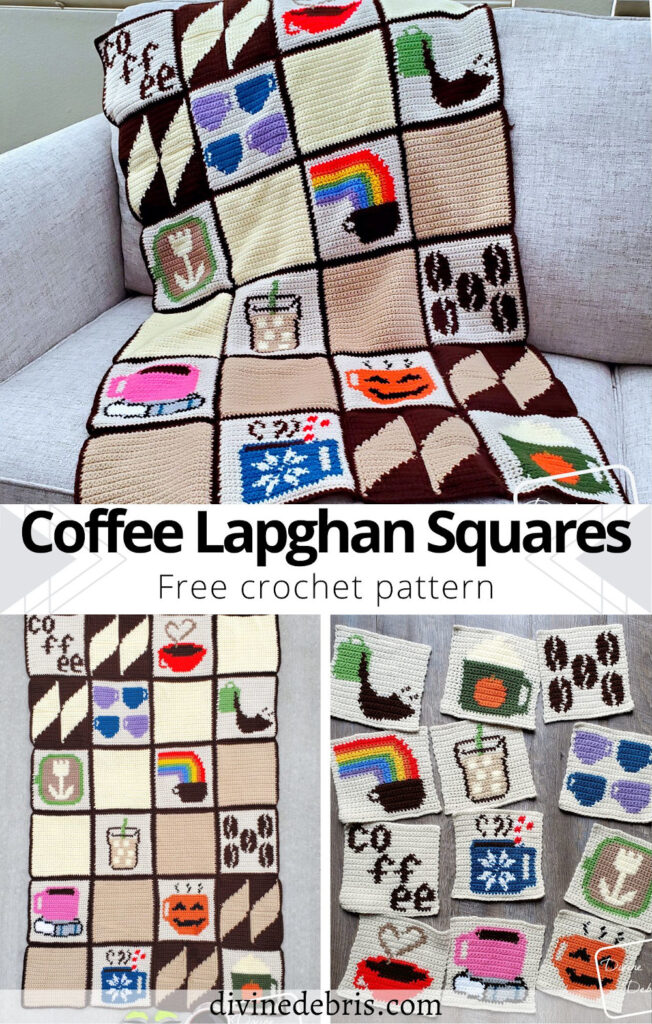
2019 Tapestry Square Afghan Project or #2019TSAP
I did! I made the lapghan before the end of the year.
When I made 2018’s TSAP lapghan I didn’t get all the squares done until the very last minute of the year. I might have even been working on it on New Years Eve. Who can say?
But this year I was on top of it, I got all 12 of the Squares done early and was able to get creative with my extra 12 squares. I did a mix of plain squares and some squares that were inspired by my Divine Diamonds Throw Blanket squares.
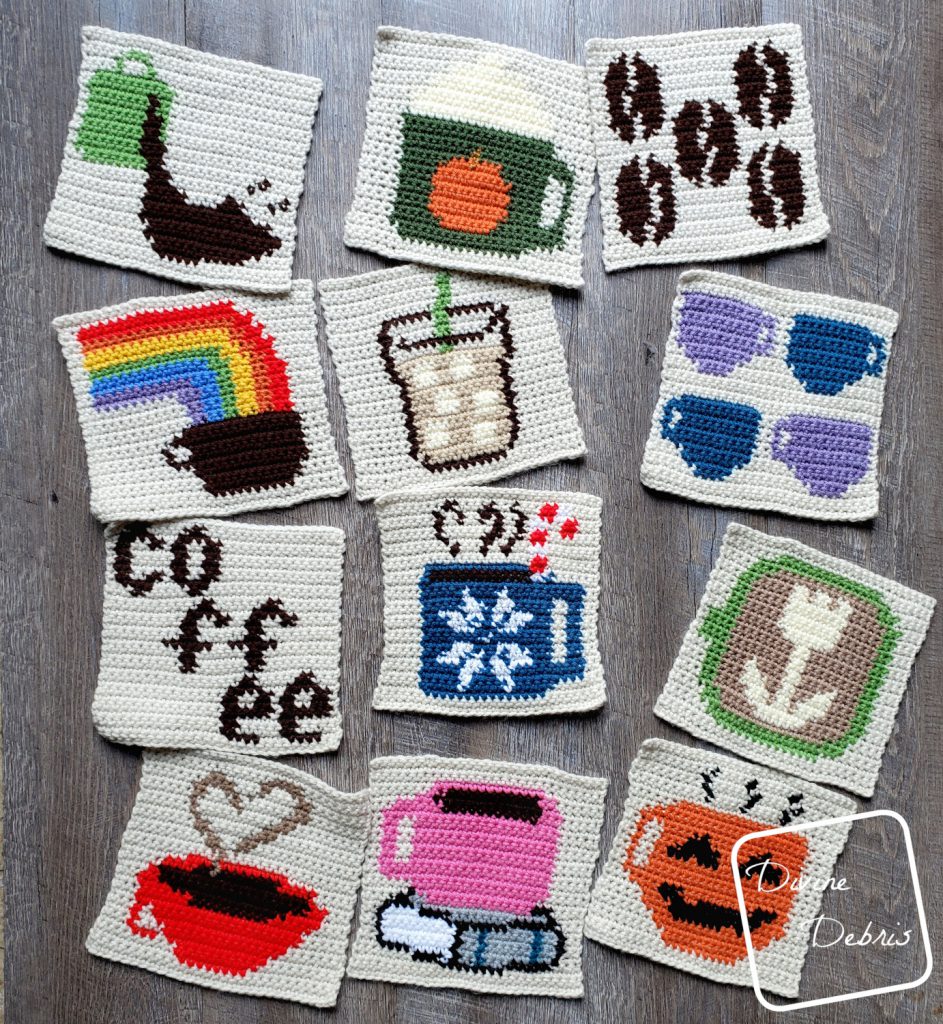
Original 12 squares
You can find all 12 of the Coffee Afghan Squares free here.
You can buy an ebook of all 12 squares here
These are the 12 coffee squares, the real meat of this blanket… erm, sandwich. The most important part. I designed the rest of this lapghan around it. I added some simple squares to fill the blanket out. Continue below to see the additional squares.

Decaf AKA Non-coffee 12 squares
Plain squares
(make 8)
Note: I made 8 plain sc, one color squares. 4 of them were in a tan color and 4 were in a cream color.
Row 1: Ch 29, sc into the second ch from the hook and into the next 27 sts – 28 sc
Rows 2 – 30: Ch 1, turn, sc into the next 28 sts – 28 sc
Fasten off. Weave in your ends.
Border
Create a slipknot on your hook and, with the RS facing you, sc into the next 28 sts of row 30, ch 1 at the corner and rotate your square, sc down the edges of the rows (30 scs), ch 1 at the corner and rotate your square, sc across the back loops of the original chain row (28 scs), ch 1 at the corner and rotate your square, sc down the edges of the rows (30 scs), ch 1 at the corner and rotate your square, slip st into the first st – 116 scs, 4 ch-1 spaces
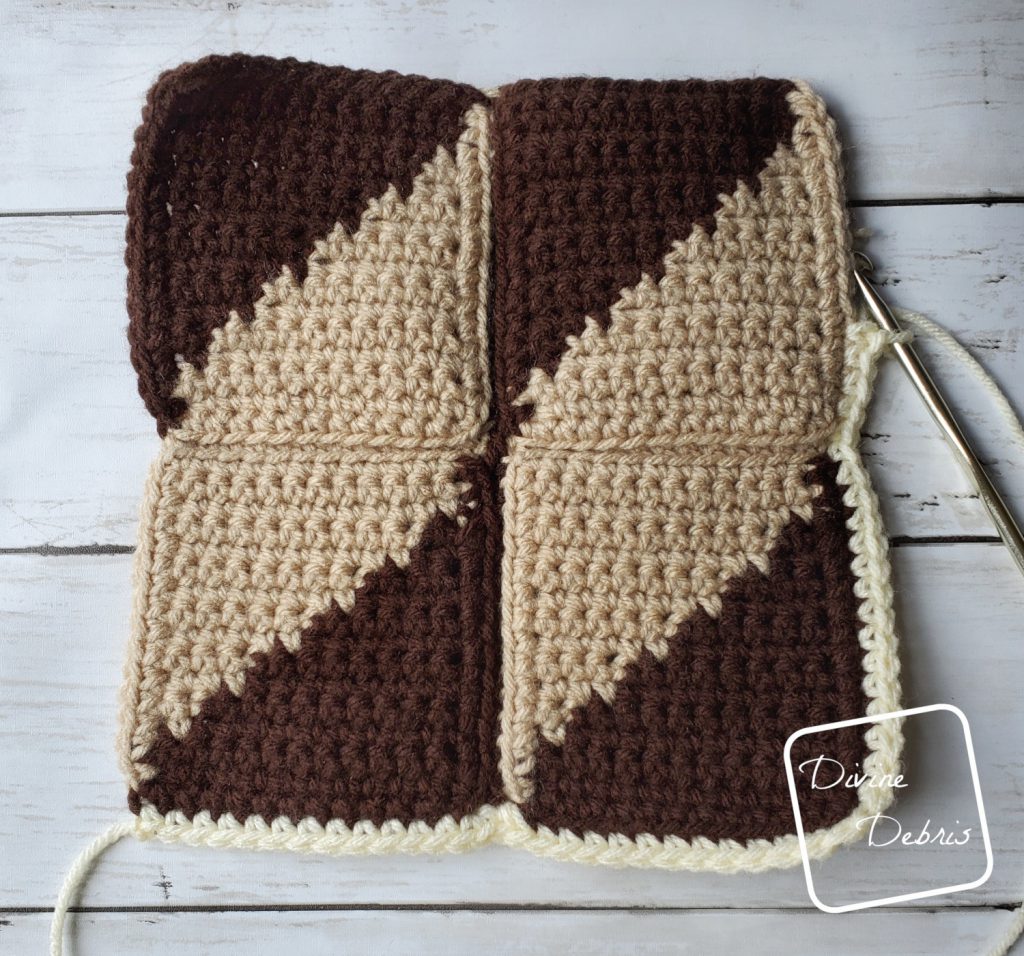
Divine Diamonds Squares
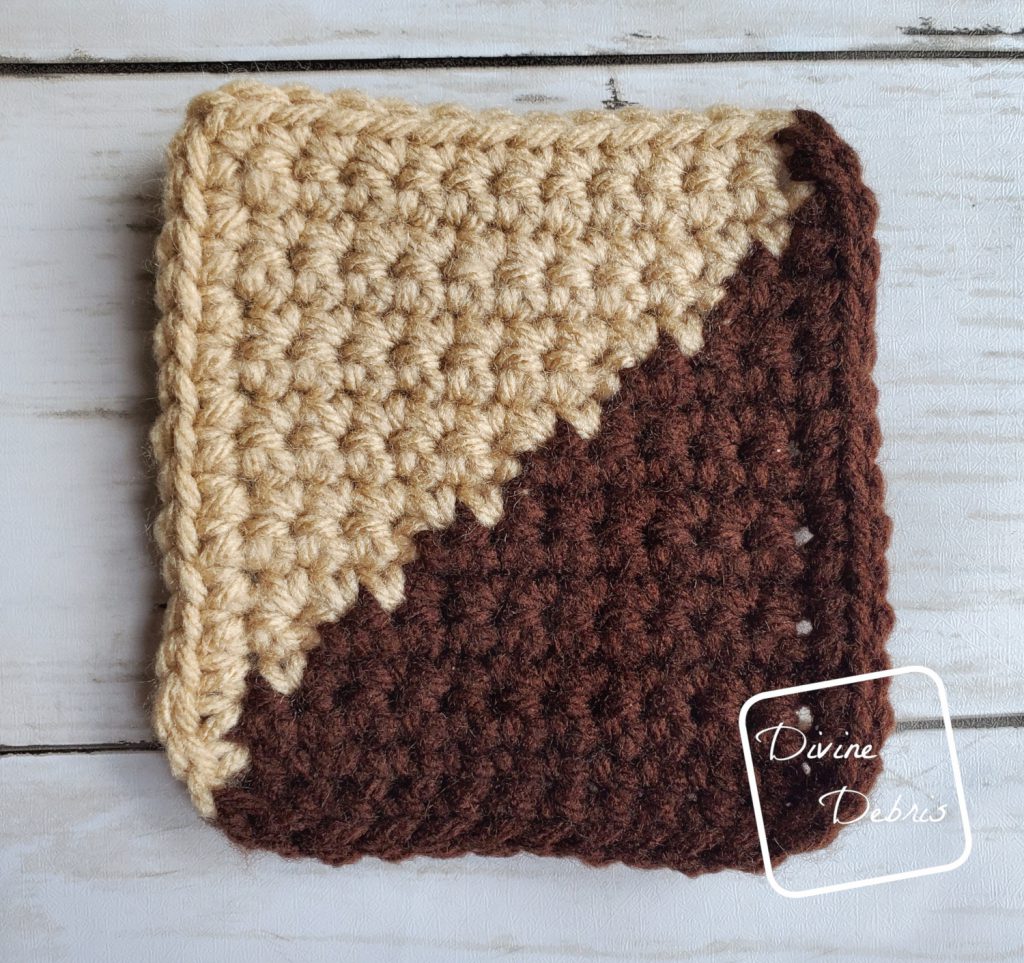

Small Square 1
(make 8)
(RS) Row 1: A: Ch 13, sc into the second ch from the hook and into the next 11 sts — 12 sc
Note:
- Color A in the photo is dark brown and color B is tan.
- The following directions will only tell you what color (ie: Color A, Color B, etc…) and the number in the parentheses tells you how many stitches to make.
Row 2: A: Ch 1, turn, (12) — 12 sc
Row 3: A: Ch 1, turn, (10), B: (2) — 12 sc
Row 4: B: Ch 1, turn, (2), A: (10) — 12 sc
Row 5: A: Ch 1, turn, (8), B: (4) — 12 sc
Row 6: B: Ch 1, turn, (4), A: (8) — 12 sc
Row 7: A: Ch 1, turn, (6), B: (6) — 12 sc
Row 8: B: Ch 1, turn, (6), A: (6) — 12 sc
Row 9: A: Ch 1, turn, (4), B: (8) — 12 sc
Row 10: B: Ch 1, turn, (8), A: (4) — 12 sc
Row 11: A: Ch 1, turn, (2), B: (10) — 12 sc
Row 12: B: Ch 1, turn, (10), A: (2) — 12 sc
Fasten off color A.
Rows 13 – 14: B: Ch 1, turn, (12) — 12 sc
Do not fasten off color B.
Border
Rnd 1: B: Ch 1, sc into the next 12 sts, ch 1 at the corner and rotate your whole piece, sc into the next 14 row ends, ch 1 at the corner and rotate your whole piece, switch to color A, sc into the next 12 sts (this will be the other side of your chain row), ch 1 at the corner and rotate your whole piece, sc into the next 14 row ends — 52 sc, 3 ch-1
Fasten off leaving a tail long enough to create an invisible join in the corner where you just ended (you could slip st into the first st if you’d prefer but this will create a more uniform look in your squares and eliminate a knot in one corner). Weave in all your ends.
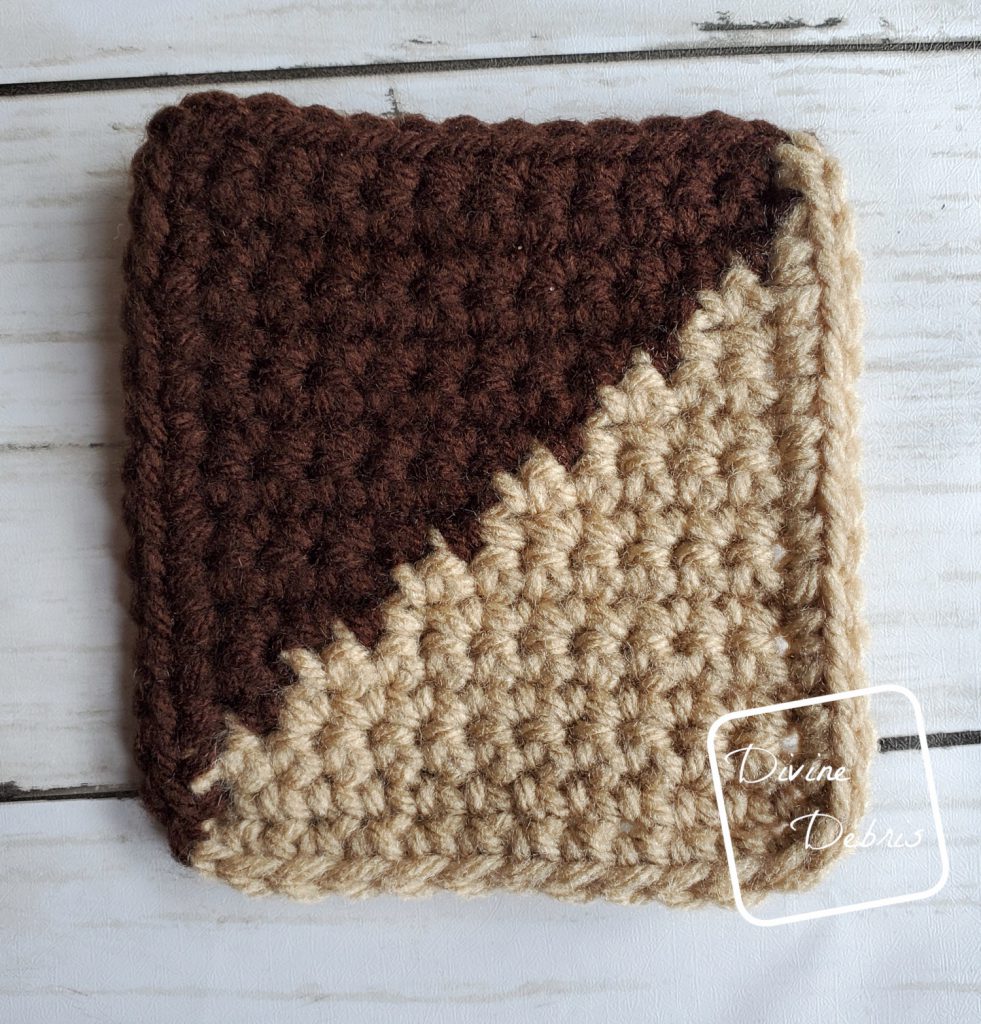

Small Square 2
(make 8)
(RS) Row 1: B: Ch 13, sc into the second ch from the hook and into the next 11 sts — 12 sc
Note:
- Color A in the photo is dark brown and color B is tan.
- The following directions will only tell you what color (ie: Color A, Color B, etc…) and the number in the parentheses tells you how many stitches to make.
Row 2: B: Ch 1, turn, (12) — 12 sc
Row 3: B: Ch 1, turn, (10), A: (2) — 14 sc
Row 4: A: Ch 1, turn, (2), B: (10) — 14 sc
Row 5: B: Ch 1, turn, (8), A: (4) — 14 sc
Row 6: A: Ch 1, turn, (4), B: (8) — 14 sc
Row 7: B: Ch 1, turn, (6), A: (6) — 14 sc
Row 8: A: Ch 1, turn, (6), B: (6) — 14 sc
Row 9: B: Ch 1, turn, (4), A: (8) — 14 sc
Row 10: A: Ch 1, turn, (8), B: (4) — 14 sc
Row 11: B: Ch 1, turn, (2), A: (10) — 14 sc
Row 12: A: Ch 1, turn, (10), B: (2) — 14 sc
Fasten off color B.
Rows 13 – 14: A: Ch 1, turn, (12) — 12 sc
Do not fasten off color A.
Border
Rnd 1: A: Ch 1, sc into the next 14 sts, ch 1 at the corner and rotate your whole piece, sc into the next 16 row ends, ch 1 at the corner and rotate your whole piece, switch to color A, sc into the next 14 sts (this will be the other side of your chain row), ch 1 at the corner and rotate your whole piece, sc into the next 16 row ends — 60 sc, 3 ch-1
Fasten off leaving a tail long enough to create an invisible join in the corner where you just ended (you could slip st into the first st if you’d prefer but this will create a more uniform look in your squares and eliminate a knot in one corner). Weave in all your ends.
Seaming your Divine Diamonds Square
Working right to left
Line up the squares so that the color B sections are touching. Hold 2 squares together so that their right sides (RS) are touching, start in the ch-1 at the corner with color B (you will be working into both squares for the following instructions), slip st into the ch-1 space, slip st into BLO of the next 12 stitches of the border, slip st into the ch-1 space, ch 1 between the squares, slip st into the ch-1 space, slip st into BLO of the next 12 stitches of the border, slip st into the ch-1. Fasten off. Weave in your ends.
Working top to bottom
Hold 2 squares together so that their right sides (RS) are touching, start in the ch-1 at the corner with color A (you will be working into both squares for the following instructions), slip st into the ch-1 space, slip st into BLO of the next 14 stitches of the border, slip st into the ch-1 space, ch 1 between the squares, slip st into the ch-1 space, slip st into BLO of the next 14 stitches of the border, slip st into the ch-1. Fasten off. Weave in your ends.
Divine Diamonds Border

Create as slipknot on your hook with color A and start in the first st to the left of the ch-1 space in the top right corner. Sc into the next 12 sts, sc twice into the next ch-1 space, sc twice into the next ch-1 space (of the next square), sc into the next 12 sts, ch 1 at the corner and rotate your piece, sc into the next 14 sts, sc into the next ch-1 space, sc into the next ch-1 space (of the next square), sc into the next 14 sts, ch 1 at the corner and rotate your piece, sc into the next 12 sts, sc twice into the next ch-1 space, sc twice into the next ch-1 space (of the next square), sc into the next 12 sts, ch 1 at the corner and rotate your piece, sc into the next 14 sts, sc into the next ch-1 space, sc into the next ch-1 space (of the next square), sc into the next 14 sts — 116 sc, 3 ch-1 spaces
Fasten off leaving a long tail that you’ll use to create an invisible seam on the corner as you did on the individual squares.
Repeat the Seaming and Border with the remaining 12 squares.
Organize your squares as you’d like in your blanket. I went with a checkerboard look.
Blanket seaming
Right to left
Hold 2 squares together so that their right sides are facing each other, start in the ch-1 space at the corner of the border (working into both squares), *slip st into the ch-1 space, slip st into the BLO of the next 28 sts, slip st into the ch-1 space, ch 1 between the squares,* repeat from * to * across (depends on how you arrange your squares)
Fasten off at the end of the row. Weave in your ends.
Top to bottom
Hold 2 squares together so that their right sides are facing each other, start in the ch-1 space at the corner of the border (working into both squares), *slip st into the ch-1 space, slip st into the BLO of the next 30 sts, slip st into the ch-1 space, ch 1 between the squares,* repeat from * to * across (depends on how you arrange your squares)
Fasten off at the end of the row. Weave in your ends.

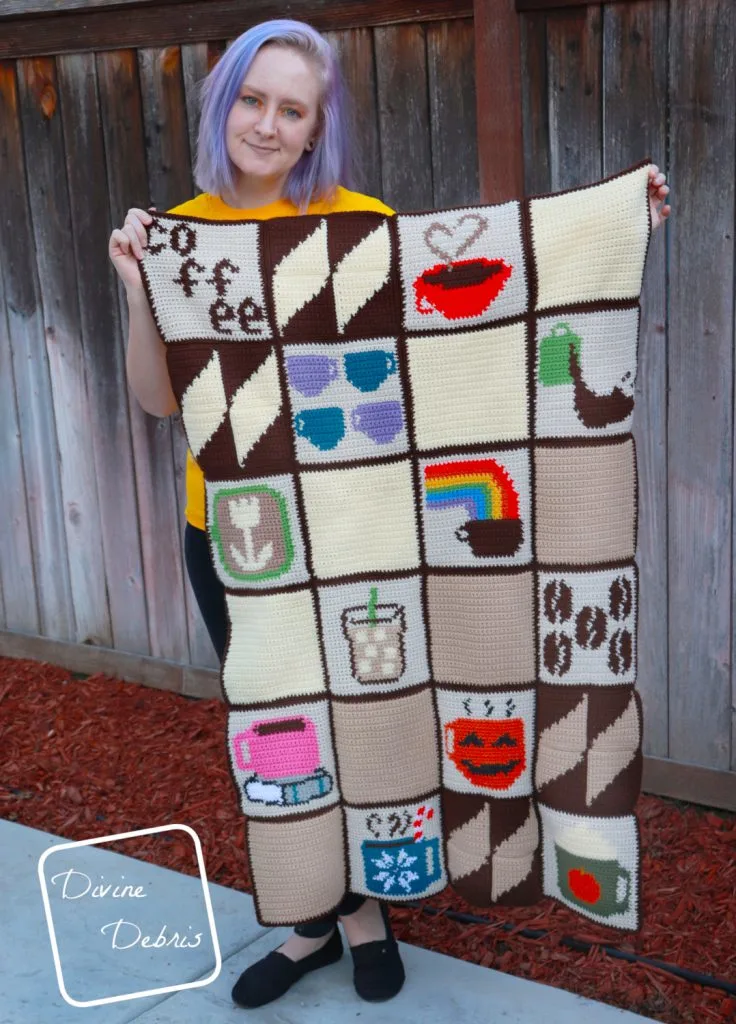
After I finished the seaming, I decided not to make a border for the blanket but you definitely can. All I know, is that it’s super cozy and totally worth all the work.

Catherine E Czarnowski
Tuesday 7th of January 2020
Love the squares . . . . use them for potholders . . . . EXCELLENT . . . . . Family loves them . . . . Can't wait to finish my lapghan . . . . Thank you. Also can't wait for this years project . . . . I have had many requests for a "Foodie" themed lapghan by some of the teens . . . . based on the food squares from previous projects that you have . . . . Such as the hamburg . . . . Still trying to take your watermelon, candy corn, and pizza patterns to come up with an appropiaite sized pizza square with different toppings ? (1 plain/cheese only; 1 with pepperoni only; 1 that is more veggie/deluxe). I am not so good at the creating thing, Also have request for taco and hot dog . . . . Thank you. I have had so much fun with these squares.