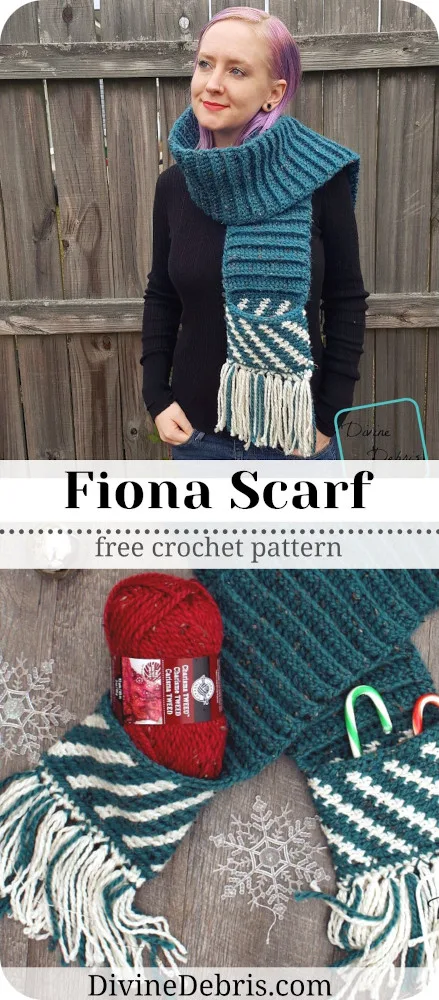
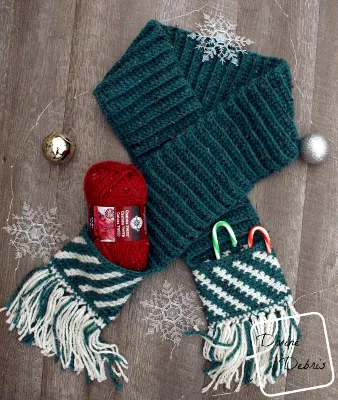
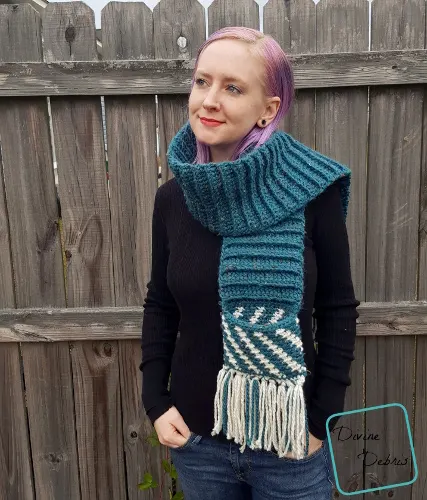
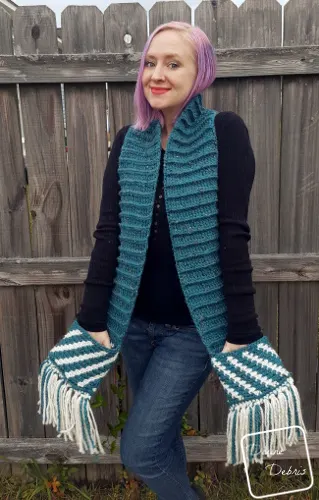
Hello everyone! How’s your Winter going? It’s a touch chilly here but no snow, not really a snowing place that I live any way. That doesn’t stop me from making cute and cozy scarves for the Winter season. This week’s design is all about cozy and, like the title says, it’s got pockets! Years ago I got a scarf that had pockets and I loved it, even if I didn’t really use the pockets for anything other than some lipstick, but it was so useful and cute. I’ve been wanting to make one for a while and finally got to this season. I’ve written out the instructions below, in two sizes and there are some notes on how make the pockets bigger and, as always, you can make the scarf as long as you’d want.
I hope you like this design as much as I do. 😀
To help me to continue to bring you free patterns week after week, please consider purchasing the pattern for design in my Ravelry shop.
Thank you to all my Patreon supporters.
Materials
- US K (6.50 mm) crochet hook
- Bulky yarn/ size #5 yarn
- 11 – 13.5 oz/ 343 – 420 yards
- 2 colors
- I used Loops and Threads Charisma
- Tapestry/ Yarn needle
Gauge
- 4” = 13 dcs x 4 rows
Terms/stitches used:
- RS: right side
- BLO: Back loop only
- Ch: chain
- St: stitch
- Slip st: slip stitch
- Sc: single crochet
- Dc: double crochet
- Bpdc: back post double crochet
- Fsc: foundation single crochet
Notes
- This pattern is worked in 3 sections: the 2 pockets, the scarf, and the fringe. The pockets are worked in the round, with a slip st into the first st of the row. The scarf is worked back and forth in rows, with a turn at the beginning/ end of the row. The pocket finishing is then done, which includes closing up the pockets with a row of single crochets and then fringe being added added at the end of the pockets.
- This pattern is worked from pocket 1 to pocket 2, in one piece.
- The ch 1 at the beginning of the pockets sections does not count as a stitch.
- The ch 3 at the beginning of the scarf rows does count as a stitch. Use a chainless starting double crochet on these rows to make your scarf cleaner.
- The stitch counts at the end of the scarf rows count both dcs and bpdcs.
- The pockets are into the back loop only (BLO). At the end of the row, slip st into both loops of your 1st st, this will help to keep your seam straight.
- You will need to know how to create a slipknot on your hook for this pattern.
- You will need to know how to make a foundation single crochet to extend a row for this pattern.
- When starting the row with a new color on the pockets, just pull up the color when you do the ch 1 at the beginning of the row.
- Every stitch in the pocket section is a single crochet. The directions for that section (where the graphing is) will only tell you what color (ie: Color A, Color B, etc…) and the number in the parentheses tells you how many stitches to make.
- In the example, the inactive yarn is carried behind the active. If this is confusing, you might want to check out the helpful Moogly video on tapestry.
- Color A is blue (Charisma Tweed in Blue was used) and color B is off white (Charisma in Off White was used).
Finished product dimensions
| Small
Length: 48″ Width: 6.5″ | Large
Length 58″ Width: 6.5″ |
Pattern instructions
– Pocket 1 –
Row 1: A: Ch 40, slip st to form a ring, ch 1, sc into the same st as join and into the next 39 sts, slip st into the first st – 40 scs
Note:
- Every row of the pockets are worked into the back loop only.
- Every stitch in the sides pockets of this pattern is a single crochet. The following directions will only tell you what color (ie: Color A, Color B, etc…) and the number in the parentheses tells you how many stitches to make.
- Following the ch 1, the first st is worked into the same st as join.
Row 2: A: Ch 1, (3), B: (2), *A: (3), B: (2),* repeat from * to * 6 more times, slip st into the first st – 40 scs
Row 3: A: Ch 1, (2), B: (2), *A: (3), B: (2),* repeat from * to * 6 more times, A: (1), slip st into the first st – 40 scs
Row 4: A: Ch 1, (1), B: (2), *A: (3), B: (2),* repeat from * to * 6 more times, A: (2), slip st into the first st – 40 scs
Row 5: B: Ch 1, (2), A: (3), *B: (2), A: (3),* repeat from * to * 6 more times, slip st into the first st – 40 scs
Row 6: B: Ch 1, (1), A: (3), *B: (2), A: (3),* repeat from * to * 6 more times, B: (1), slip st into the first st – 40 scs
Row 7: A: Ch 1, (3), B: (2), *A: (3), B: (2),* repeat from * to * 6 more times, A: (1), slip st into the first st – 40 scs
Row 8: A: Ch 1, (2), B: (2), *A: (3), B: (2),* repeat from * to * 6 more times, A: (1), slip st into the first st – 40 scs
Row 9: A: Ch 1, (1), B: (2), *A: (3), B: (2),* repeat from * to * 6 more times, A: (2), slip st into the first st – 40 scs
Row 10: B: Ch 1, (2), A: (3), *B: (2), A: (3),* repeat from * to * 6 more times, slip st into the first st – 40 scs
Row 11: B: Ch 1, (1), A: (3), *B: (2), A: (3),* repeat from * to * 6 more times, B: (1), slip st into the first st – 40 scs
Fasten off color B.
Note: if you’d like these pockets to be larger, repeat rows 7 – 11 as many times as you’d like before moving onto row 12.
Row 12: A: Ch 1, (40), slip st into the first st – 40 scs
– Scarf –
(worked into both loops)
Sizing as follows small (large)
Row 13: A: Ch 3, dc into the next 20 sts – 20 dcs
Rows 14 – 91 (112): A: Ch 3, turn, bpdc into the next 18 sts, dc into the last st – 20 dcs
– Pocket 2 –
Row 92 (113): A: Ch 1, turn, sc into the next 20 sts, fsc 20 sts, slip st into the first st – 40 scs
Note:
- Every row of the pockets are worked into the back loop only.
- Every stitch in the sides pockets of this pattern is a single crochet. The following directions will only tell you what color (ie: Color A, Color B, etc…) and the number in the parentheses tells you how many stitches to make.
- Following the ch 1, the first st is worked into the same st as join.
Row 93 (114): B: Ch 1, (1), A: (3), *B: (2), A: (3),* repeat from * to * 6 more times, B: (1), slip st into the first st – 40 scs
Row 94 (115): B: Ch 1, (2), A: (3), *B: (2), A: (3),* repeat from * to * 6 more times, slip st into the first st – 40 scs
Row 95 (116): A: Ch 1, (1), B: (2), *A: (3), B: (2),* repeat from * to * 6 more times, A: (2), slip st into the first st – 40 scs
Row 96 (117): A: Ch 1, (2), B: (2), *A: (3), B: (2),* repeat from * to * 6 more times, A: (1), slip st into the first st – 40 scs
Row 97 (118): A: Ch 1, (3), B: (2), *A: (3), B: (2),* repeat from * to * 6 more times, A: (1), slip st into the first st – 40 scs
Row 98 (119): B: Ch 1, (1), A: (3), *B: (2), A: (3),* repeat from * to * 6 more times, B: (1), slip st into the first st – 40 scs
Row 99 (120): B: Ch 1, (2), A: (3), *B: (2), A: (3),* repeat from * to * 6 more times, slip st into the first st – 40 scs
Row 100 (121): A: Ch 1, (1), B: (2), *A: (3), B: (2),* repeat from * to * 6 more times, A: (2), slip st into the first st – 40 scs
Row 101 (122): A: Ch 1, (2), B: (2), *A: (3), B: (2),* repeat from * to * 6 more times, A: (1), slip st into the first st – 40 scs
Row 102 (123): A: Ch 1, (3), B: (2), *A: (3), B: (2),* repeat from * to * 6 more times, A: (1), slip st into the first st – 40 scs
Fasten off color B.
Note: if you’d like these pockets to be larger, repeat rows 98 (119) – 102 (123) as many times as you’d like before moving onto row 103 (124). Just make sure the same amount of rows were made on pocket 1 as pocket 2.
Row 103 (124): A: Ch 1, (40), slip st into the first st – 40 scs
Fasten off color A, weave in all your ends.
– Pocket finishing –
Create a slip knot on your hook with color B, fold the pocket in half (make sure it lines up with your scarf) and sc across the 20 scs going through both the front and back scs of row 1 and 103 (124) separately, to close up your pocket – 20 scs
Fasten off color B, weave in your ends.
Add fringe or tassels or pompoms as you’d like to really make your design fancy!
Tada, there’s the new squishy, cozy, and fun scarf! I hope you love it <3
This post is linked to Linky Ladies Community Link Party 121
