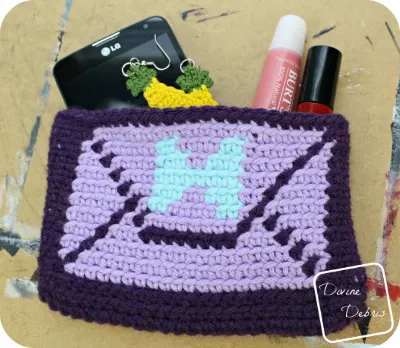
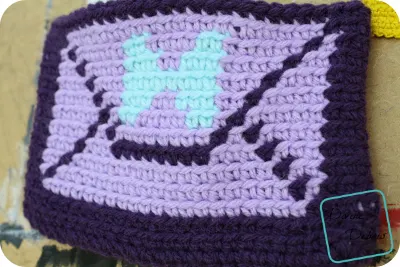
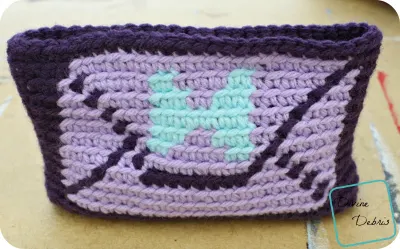
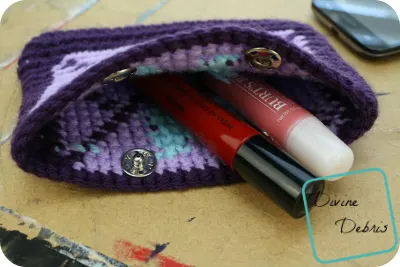
Hello! How’s Spring treating you? I’ve got a couple allergies here and there, and it’s kinda awful. But I’m well enough to still work and this week I’m bringing you a design that’s not inspired by a holiday! Yay? Were you getting sick of those seasonal designs? I wasn’t, but maybe some of you were. This design is inspired by the February Ipsy bag (affiliate type link) I received. It had a heart on it, so instead I decided to make a bow on the bag. Either is super cute, in my opinion. I just wanted to make something small and quick using tapestry crochet, which I hope you out there will like. I WISH I had some sewing skills, because I just put snaps inside the bag to keep it closed, a zipper would be amazing but isn’t really in my wheel house. If you make this and add a zipper, please share photos of your beautiful creation! I would love to see it.
Materials:
- US G (4.00 mm) crochet hook
- Worsted/ size #4/ medium weight yarn
- Just under 1 oz
- 3 colors
- I used Bernat Super Value
- Tapestry/ yarn needle
- Snaps/ buttons/ clips/ zipper (for closing)
Terms/ stitches used:
- Ch: chain
- St: stitch
- Slip st: slip st
- Sc: single crochet
Notes:
- This pattern is worked in 2 parts- the base and the sides. You can finish the top with a zipper or a button (as I have).
- This pattern is worked in the round, with a slip st into the first st following the last st of the row.
- The ch 1 at the beginning of the row does not count as a stitch.
- For this pattern you will need to know how to work into the back loop only.
- The sides of this purse are worked in the back loop only, this provides a lot of flexibility to the finished product. If you’d like, you can just work the stitches as you normally would, it’ll make a firmer product.
- All of the stitches in this pattern as single crochets, because of this the sides portion (where all the color changes are) only tells you how many stitches to do in what color, this is what the number in the parenthesis means.
- Rather than changing, cutting, and weaving in the ends of all the colors, the yarn is carried through the bags in the photos. Here’s a great tutorial on color changes. In this pattern, the active yarn is worked over the inactive.
- Color A is dark purple, Color B is light purple, and Color C is light blue.
- You might want to block the finished product, if you find it leans a bit on you.
Finished measurements:
Height: 3.75″
Diameter: 6″
Envelope Clutch Purse Pattern instructions:
Base:
Row 1: Color A: Ch 25, sc into the second ch from the hook and across – 25 scs
Row 2 – 3: Ch 1, turn, sc across – 24 scs
Row 4: Ch 1, turn, sc into the next 24 sts, ch 1 at the corner, rotate, sc into the next 3 row ends, ch 1 at the corner, rotate, sc into the next 24 sts, ch 1 at the corner, rotate, sc into the next 3 row ends, ch 1 at the corner, rotate, slip st into the first st to secure – 54 scs
Sides:
Row 5: Color A: Ch 1, sc into the back loop only in the same st as join and into the back loop only of the next 53 sts (skip the ch 1 spaces at the corners), slip st into the first st to secure – 54 scs
Row 6: Color A: Ch 1, *(2), Color B: (20), Color A: (5),* repeat from * to * once more, slip st into the first st to secure – 54 scs
Row 7: Color A: Ch 1, *(1), Color B: (1), Color A: (1), Color B: (18), Color A: (1), Color B: (1), Color A: (4),* repeat from * to * once more, slip st into the first st to secure – 54 scs
Row 8: Color A: Ch 1, *(1), Color B: (2), Color A: (1), Color B: (16), Color A: (1), Color B: (2), Color A: (4),8 repeat from * to * once more, slip st into the first st to secure – 54 scs
Row 9: Color A: Ch 1, *(1) Color B: (3), Color A: (1), Color B: (3), Color A: (8), Color B: (3), Color A: (1), Color B: (3), Color A: (4),* repeat from * to * once more, slip st into the first st to secure – 54 scs
Row 10: Color A: Ch 1, *(1), Color B: (4), Color A: (1), Color B: (1), Color A: (1), Color B: (8), Color A: (1), Color B: (1), Color A: (1), Color B: (4), Color A: (4),* repeat from * to * once more, slip st into the first st to secure – 54 scs
Row 11: Color A: Ch 1, *(1), Color B: (5), Color A: (1), Color B: (1), Color C: (2), Color B: (4), Color C: (2), Color B: (1), Color A: (1), Color B: (5), Color A: (4),* repeat from * to * once more, slip st into the first st to secure – 54 scs
Row 12: Color A: Ch 1, *(1), Color B: (4), Color A: (1), Color B: (2), Color C: (3), Color B: (2), Color C: (3) Color B: (2), Color A: (1), Color B: (4), Color A: (4),* repeat from * to * once more, slip st into the first st to secure – 54 scs
Row 13: Color A: Ch 1, *(1), Color B: (3), Color A: (1), Color B: (3), Color C: (8), Color B: (3), Color A: (1), Color B: (3), Color A: (4),* repeat from * to * once more, slip st into the first st to secure – 54 scs
Row 14: Color A: Ch 1, *(1), Color B: (2), Color A: (1), Color B: (4), Color C: (3), Color B: (2), Color C: (3), Color B: (4), Color A: (1), Color B: (2), Color A: (4),* repeat from * to * once more, slip st into the first st to secure – 54 scs
Row 15: Color A: Ch 1, *(1), Color B: (1), Color A: (1), Color B: (5), Color C: (2), Color B: (4), Color C: (2), Color B: (5), Color A: (1), Color B: (1), Color A: (4),* repeat from * to * once more, slip st into the first st to secure – 54 scs
Fasten off Color C.
Row 16: Color A: Ch 1, *(2), Color B: (20), Color A: (5),* repeat from * to * once more, slip st into the first st to secure – 54 scs
Fasten off Color B.
Row 17: Color A: Ch 1, (54), slip st into the first st to secure – 54 scs
Fasten off Color A, weave in all your ends.
Once you weave in all your ends, decide on how you want to make your bag closure. I went with snaps that I picked up from the store but if you’re handy with sewing, I am not (which you know if you read my notes on things on this blog), you can add a liner and zipper. I used glue but you can use yarn or thread to attach the snaps. This bag would be great with a liner in it but it’s such a tight knit that I don’t feel like I need one (also running from sewing there too).
I hope you like this design and share photos with me!
Don’t forget to visit Facebook to enter my giveaway!


The Eclectic Abuela
Tuesday 29th of March 2016
Very nice design--thanks.
lois cantrell
Tuesday 29th of March 2016
thank you for the pattern