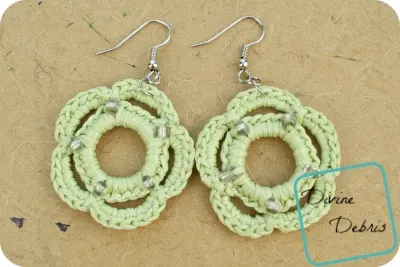
In an effort to figure out what sort of design to make this week, I asked FB if they’d be interested in an oldie but a goodie earring pattenr I designed a few years ago. These earrings are made from ribbon, as opposed to crochet thread, because I came across the thin ribbon at A. C. Moore while I worked there and thought it’d look great in crochet. I wasn’t wrong and these earrings are super cute when worn. I’ve sold a few pairs of these design and had numerous compliments when I worn them on my own. I hope you like these and enjoy this quick pattern.
Materials:
- Thin ribbon
- I used 1/8″ Offray Ribbon
- Plastic rings
- Size: 3/4″ circle
- 1.25 mm crochet steel hook
- Needle that will weave in your ends
- Fabric stiffener (optional)
- Jump rings
- Metal french hooks

- Jewelry pliers
- Seed beads
Gauge:
- Not critical
Terms/ stitches:
- Ch: chain
- St: stitch
- Slip st: slip stitch
- Sc: Single crochet
Notes:
- You’re going to need to know how to create a slip knot on your hook for this pattern.
- This pattern is worked in the round.
- You’ll need to know how to work with beads for this pattern.
Finished Measurements:
- Height/ Width: (not counts jewelry findings) 1.5″ x 1.5″
Pattern instructions:
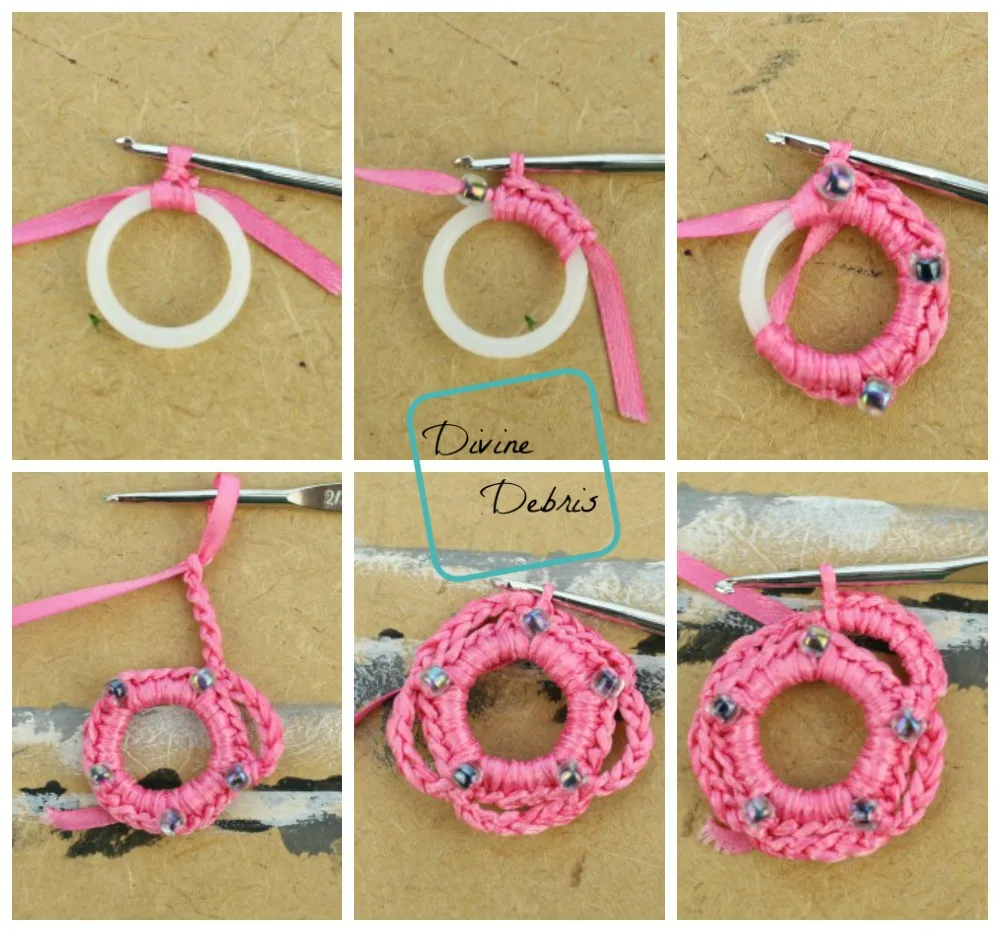
Above is a photo collage that’ll help you see some of the steps. (Click on the photo to enlarge to see more details)
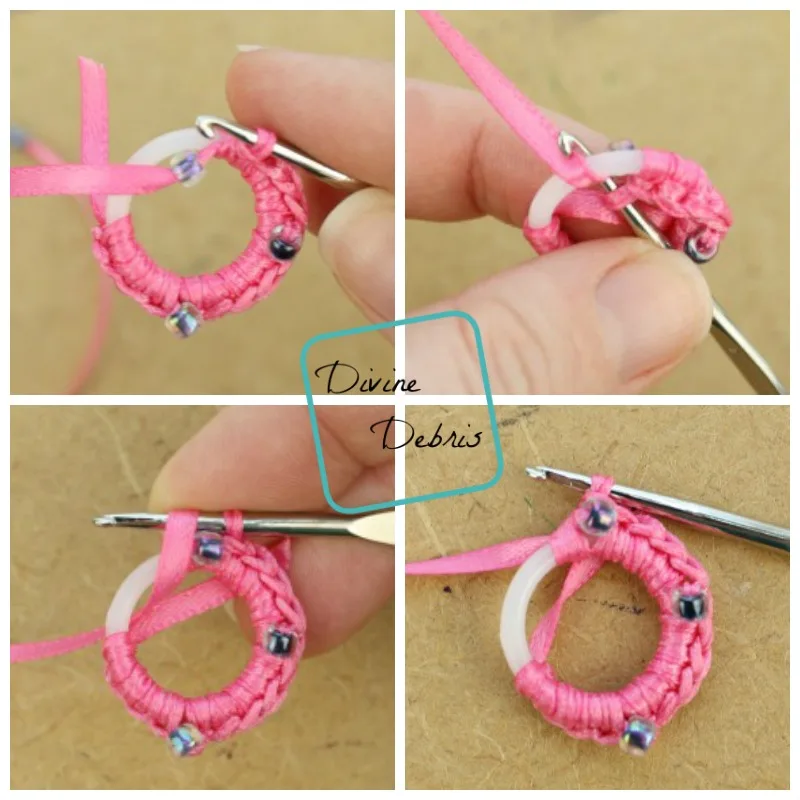
Row 1: Create a slip knot on your hook, sc 4 times into the ring, *catch a bead, sc 5 times,* repeat from * to * 3 more times, slip st into the first st to secure – 25 scs
Note: for this row you want to make sure the scs are squished close to each other, otherwise you will probably run out of space on the circle.
Below is a photo collage for the bead catching portion, you want to make sure the beads sits on the front of the design. I hope these help. (Click on the photo to enlarge to see more details)
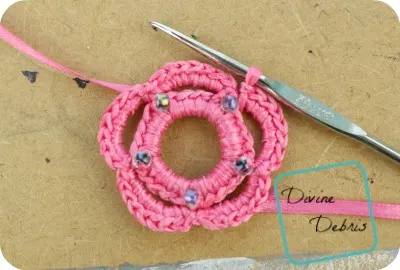
Row 2: *Ch 6, skip the next 4 scs, slip st into the sc behind the bead,* repeat from * to * 4 more times – 5 ch-6 spaces
Note: you do not slip st into the first ch-6 space after the last. You will start working in the next ch-6 space on the next row.
Row 3: *Slip st into the next ch-6 space, sc 7 times, slip st into the same ch-6 space,* repeat from * to * 4 more times – 35 scs
Note: like row 1, you need to make sure you squish the scs together, or else you will run out of space.
Fasten off, weave in your ends.
Finishing:
You can use fabric stiffener to make these earrings stay better. Unlike some of my other designs, using cotton thread, this design is pretty stiff so you might not need fabric stiffener, that’s your choice. If you do use it, wait until the earrings are completely dry to attach the findings and wear ’em!
I hope you like these earrings, because I know I do! And Offray ribbon is so cheap at so many places, you can make multiple pairs for less than $5. 😀
See you next week!
This post is linked up to the Linky Ladies’ Community Link Party #49.


How to Make Your Own Earrings: 45 Eye Catching DIY Earrings Designs • Cool Crafts
Tuesday 30th of May 2017
[…] DIY Crochet Earrings! A fun, easy, cute crochet earring pattern from Divine Debris adorned with little flowers are made with ribbon for an interesting touch. […]
Jane
Sunday 8th of May 2016
Wow! These earrings are so lovely. Thank you for the pattern.
Divine Debris
Monday 9th of May 2016
Thank you. I'm glad you like them. I hope you try out the pattern. :D
Ayla
Tuesday 26th of April 2016
Que bonitos te han quedado tejidos con la cinta :D Besote!!!!!