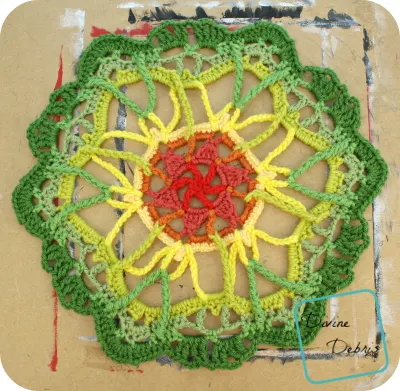
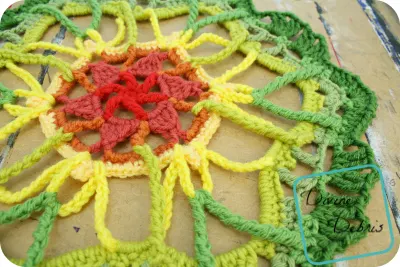
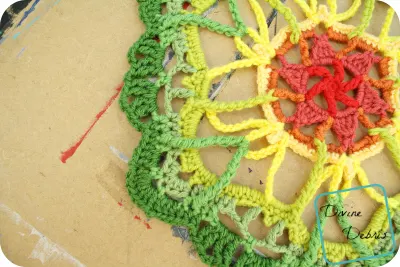
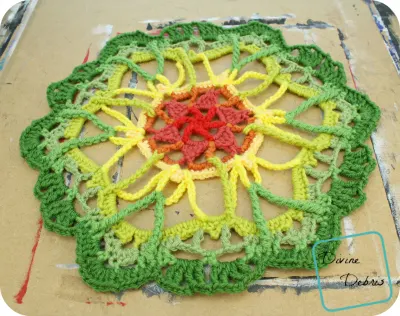
When I was making earrings nearly exclusively, many of the patterns were very much like little mandalas. It wasn’t until last year that I made a large one, the Memory Mandala, and I’ve been feelin’ like designing another one. In this design I’m really channeling my earrings designs, which is why it’s really open. I was thinking of it blooming from the center out, getting bigger and more open and it got larger. Also, the colors get “hotter” to “cooler” as you travel out. I did have a thought about making more rows, to add blues, purples, and maybe a pink or two, but I decided I really like the red to green colors.
Oh, and I have a new shawl pattern out, the Zelda Shawl. It’s on sale for $2.00 right now. 😀
Materials:
- US H hook
- Worsted weight/ medium/ size #4 yarn
- 1.5 0z/ 92 yards
- I used scraps, Red Heart SS, Bernat Super Value, Vanna’s Choice, etc…
- Tapestry needle
Gauge:
- 4.5” x 4.5” = 16 dcs x 8 rows
Terms/ stitches used:
- Magic circle
- Ch: chain
- St: stitch
- Slip st: slip stitch
- Sc: single crochet
- Spike sc: spike single crochet
- Hdc: half double crochet
- Dc: double crochet
- Dc3tog: double crochet 3 stitches together
- Dc4tog: double crochet 4 stitches together
- Tr: treble crochet
- Dtr: double treble crochet
- SeptTr: septule treble crochet
- Picot
Notes:
- This pattern is worked in the round, with a slip st into the first st from the last st.
- Numerous stitches require you to know how to create a slip knot on your hook.
- The ch 1 on some rows does not count as a stitch.
- There are 9 colors used in this pattern, feel free to eliminate some or all. A couple colors are repeated on more than one row.
- You’ll probably want to block the finished item. I used wet blocking for this.
- I didn’t fasten off the colors until I was sure that I did the row correctly. I would suggest doing this.
- Keep an eye on the stitches, I used non-traditional Tr stitches in this pattern. Moogly’s tutorial/ explanation on this is very helpful.
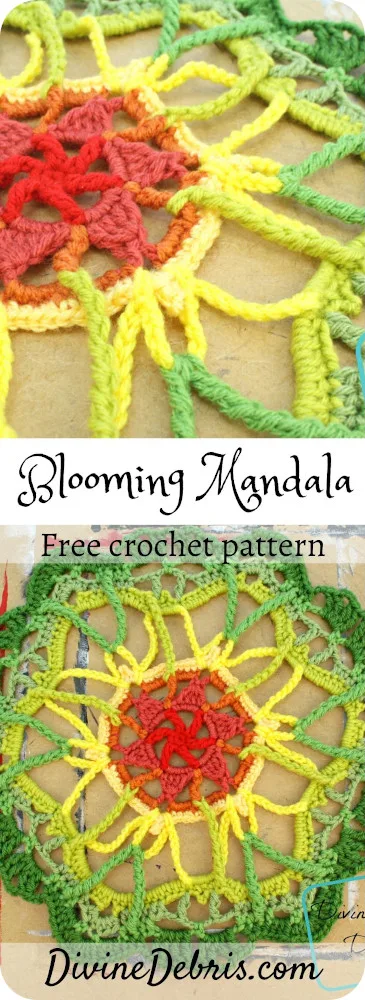
Finished measurements:
- Diameter: 12.5″ – 135.” (depending upon where you measure)
Pattern instructions:
Row 1: Color A: Create a magic circle, ch 1, sc 6 times into the circle, slip st into the first st to secure – 6 scs
Row 2: Ch 7 (counts as tr + 3), *tr into the next st, ch 3,* repeat from * to * 4 more times, slip st into the top of the ch 4 to secure – 6 trs, 6 ch-3 spaces
Fasten off Color A.
Row 3: Color B: Create a slip knot on your hook, sc into a ch-3 space, sc 3 more times into the same ch-3 space, ch 1, skip the next tr, *sc 4 times into the next ch-3 space, ch 1, skip the next tr,* repeat from * to * 4 more times, slip st into the first st to secure – 24 scs, 6 ch-1 spaces
Row 4: Ch 2 (counts as the first leg of the dc4tog), dc3tog the next 3 sts, skip the next ch 1 space, ch 8, *dc4tog the next 4 sts, skip the next ch 1 space, ch 8,* repeat from * to * 4 more times, slip st into the top of the dc3tog to secure – 6 dc4togs, 6 ch-8 spaces
Fasten off Color B.
Row 5: Color C: Create a slip knot on your hook, sc 4 times into a ch-8 space, dtr into the ch-1 space from row 2, sc 4 times into the same ch-8 space, ch 3, skip the next dc4tog, *[sc 4 times, dtr into the ch-1 space from row 2, sc 4 times] into the next ch-8 space, ch 3, skip the next dc4tog,* repeat from * to * 4 more times, slip st into the first st to secure – 48 scs, 6 dtrs, 6 ch-3 spaces
Fasten off Color C.
Row 6: Color D: Ch 1, sc into the same st as join, sc into the next 8 sts (this includes both sc and dtr), [2 sc, picot, 2 sc] into the next ch-3 space, *sc into the next 9 sts, [2 sc, picot, 2 sc] into the next ch-3 space,* repeat from * to * 4 more times, slip st into the first st to secure – 78 scs, 6 picots
Fasten off Color D.
Row 7: Color E: Create a slip knot on your hook, spike sc around the first sc of the next [2 sc, picot, 2 sc] in a ch-3 space, ch 10, spike sc around the last sc of the same [2 sc, picot, 2 sc], ch 20, *spike sc spike sc around the first sc of the next [2 sc, picot, 2 sc] in a ch-3 space, ch 10, spike sc around the last sc of the same [2 sc, picot, 2 sc], ch 20,* repeat from * to * 4 more times, slip st into the first spike sc to secure – 12 spike scs, 6 ch-10 spaces, 6 ch-20 spaces
Fasten off Color E.
Row 8: Color F: Create a slip knot on your hook, sc into a ch 20 space, sc 4 more times, ch 15, skip the next [spike sc, ch-10, spike sc], *sc 5 times into the next ch-20 space, ch 15, skip the next [spike sc, ch-10, spike sc],*repeat from * to * 4 more times, slip st into the first st to secure – 30 scs, 6 ch-15 spaces
Row 9: Ch 1, sc into the same st as join, sc into the next st, picot, skip the next st, sc into the next 2 sts, front post SeptTr around the next dtr from row 5, [10 hdc, ch 5, 10 hdc] into the next ch-20 space, *sc into the next 2 sts, picot, skip the next st, sc into the next 2 sts, front post SeptTr around the next dtr from row 5, [10 hdc, ch 5, 10 hdc] into the next ch-20 space,* repeat from * to * 4 more times, slip st into the first st to secure – 24 scs, 6 picots, 6 ch-5 spaces, 6 SeptTrs, 120 hdcs
Fasten off Color F.
Row 10: Color G: Pull up a loop in the first sc of a [2 sc, picot, 2 sc] section, ch 7 (counts as a tr and a ch 3 space), skip the next [sc, picot, sc], tr into the next st, ch 2, skip the next 4 sts, hdc into the next 5 sts, skip the next 2 sts, hdc 6 times into the next ch-5 space, skip the next 2 sts, hdc into the next 5 sts, ch 2, skip the next 3 sts, *tr into the next sc, ch 3, skip the next [sc, picot, sc], tr into the next st, ch 2, skip the next 4 sts, hdc into the next 5 sts, skip the next 2 sts, hdc 6 times into the next ch-5 space, skip the next 2 sts, hdc into the next 5 sts, ch 2, skip the next 3 sts,* repeat from * to * 4 more times, slip st into the 4th st from the bottom of the original ch-7 to secure – 12 trs, 96 hdcs, 6 ch-3 spaces, 12 ch-2 spaces
Fasten off Color G.
Row 11: Color H: Create a slip knot on your hook, sc into a ch-3 space, ch 5, skip the next [tr, ch-2 space, hdc], hdc into the next 2 sts, SeptTr into the ch-10 space from row 7 (skip the corresponding st on the row here and throughout this row), hdc into the next st, ch 3, skip the next 2 sts, sc into the next st, ch 3, sc into the next st, ch 3, skip the next 2 sts, hdc into the next st, SeptTr into the ch-10 space from row 7, hdc into the next 2 sts, ch 5, skip the next [hdc, ch-2, tr], sc into the next ch-3 space, ch 5, skip the next [tr, ch-2 space, hdc], hdc into the next 2 sts, SeptTr into the ch-10 space from row 7 (skip the corresponding st on the row here and throughout this row), hdc into the next st, ch 3, skip the next 2 sts, sc into the next st, ch 3, sc into the next st, ch 3, skip the next 2 sts, hdc into the next st, SeptTr into the ch-10 space from row 7, hdc into the next 2 sts, ch 5, skip the next [hdc, ch-2, tr],* repeat from * to * 4 more times, slip st into the first st to secure – 18 scs, 12 ch-5 spaces, 36 hdcs, 12 SeptTrs, 18 ch-3 spaces
Fasten off Color H.
Row 12: Color I: Pull up a loop in the ch-5 space left of the first sc of the previous row, ch 4 (counts as a tr), [tr, ch 3, 2 tr] into the same ch 5 space, ch 2, skip the next hdc, hdc into the next 3 sts, dc 3 times into the next ch-3 space, ch 2, skip the next sc, dc 7 times into the next ch-3 space, ch 2, skip the next sc, dc 3 times into the next ch-3 space, hdc in the next 3 sts, ch 2, skip the next hdc, [2 tr, ch 3, 2 tr] into the next ch-5 space, ch 2, skip the next sc, *[2 tr, ch 3, 2 tr] into the next ch-5 space, ch 2, skip the next hdc, hdc into the next 3 sts, dc 3 times into the next ch-3 space, ch 2, skip the next sc, dc 7 times into the next ch-3 space, ch 2, skip the next sc, dc 3 times into the next ch-3 space, hdc in the next 3 sts, ch 2, skip the next hdc, [2 tr, ch 3, 2 tr] into the next ch-5 space, ch 2, skip the next sc,* repeat from * to * 4 more times, slip st into the top of the original ch-4 to secure -48 trs, 12 ch-3 spaces, 30 ch-2 spaces, 18 hdcs, 78 dcs
Fasten off Color I.
Weave in all your ends.
Like I said above, you might want to block the finished version of this mandala, depending upon what you’re using it for. I really hope you like this design, it’s more open than a lot of mandalas out there, including my previous design, but I wanted something fun and Springy.
This post is linked to the Linky Ladies’ Community Link Party #47.



Michele Griffin Creamer
Friday 15th of April 2016
I think this is the perfect summer bed cover for me .Can You direct me somewhere to join them. Thank you so much
Divine Debris
Sunday 17th of April 2016
Hi! I'm not sure what would be the best way to join these into a larger blanket. You might have to play around with that individually, as I wrote this pattern to be a stand alone. Perhaps if you change the trs to hdcs on row 12 and instead of 7 dcs in the ch-3 space you did [3 dc, ch 3, 3 dc] and then linked up the ch-3 spaces from there it would work out. That would be my best guess, but without trying it out I'm not positive it'd work too well. Sorry I can't be more help.
Picks of the Week for April 15, 2016 | Hands Occupied
Friday 15th of April 2016
[…] rope chair makeover -a pair & a spare sand & sea knit bath set -knit picks crochet blooming mandala -divine […]