Hi everyone! I hope you’re doing well this week, I’m on a vacation in Madrid with the spouse. It’s been loads of fun and I can’t wait to share photos and talk about what a time I’m having.
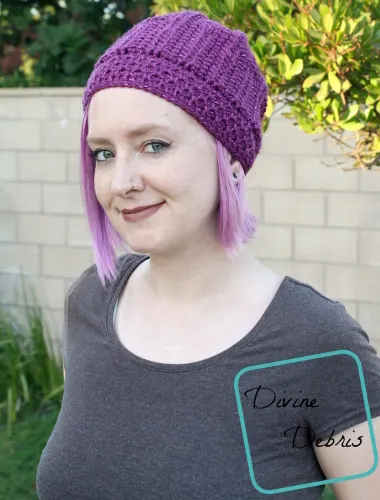
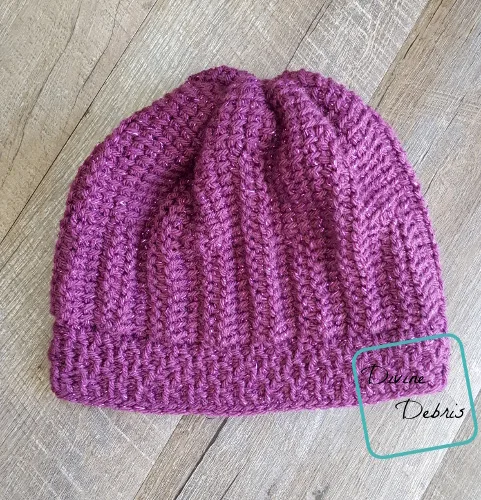
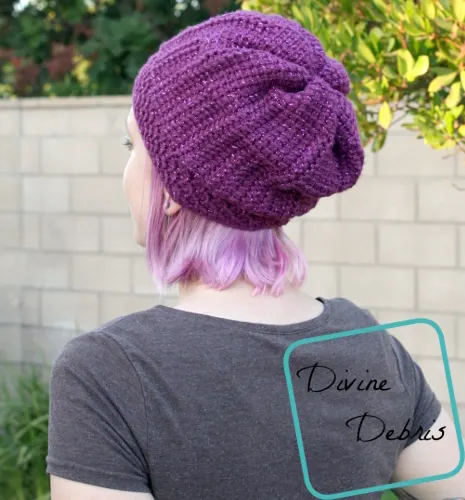
This week’s design is a new one in my learning Tunisian crochet. It’s got the same type of stitches as the other Tasha designs and I have been wearing it all over Madrid and just loving the way it fits. I think the band is probably my favorite part, it’s where I deviated from the other Tasha designs. That honeycomb look just makes me so happy 😀
I hope you like this design and are having a great October!
(This post may contain affiliate links)
If you appreciate my weekly patterns I hope you’d consider purchasing an ad-free pdf of this pattern in my Ravelry shop.
Thank you Anna S. for becoming my newest patron on Patreon!
Learn how you can get 4 patterns a month and become a patron here for as low as $2.50 a month.
Materials
- US K (6.50 mm) Tunisian crochet hook
- Aran/ medium/ size #4 weight yarn
- 2.4 – 2.8 oz. / 123 – 144 yards
- At least 1 color
- I used Mary Maxium Starlette
- Yarn needle
Gauge
Terms/stitches used
- RS: right side
- Ch: chain
- Slip st: slip stitch
- FP: forward pass
- RP: return pass
- TSS: Tunisian simple st
- TPS: Tunisian purl st
Notes
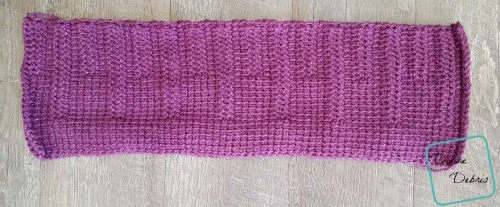
- This pattern is worked in 2 sections: the Main Body and the Brim. The Main body is worked first, in back and forth rows, and then the brim is added to one of the longer edges, also worked back and forth. Both sections are worked in forward and backward passes.
- As with Tunisian patterns, each row in the instructions below have a forward pass and a return pass.
- Check out some amazing videos by Kim Guzman or on Moogly if you’re unsure of Tunisian crochet.
- You will need to know how to create a slipknot on your hook for this pattern.
- Skip the first vertical bar (the beginning of the row).
- In the photos: the size worked is the small/ medium and made in Mary Maxium Starlette Sparkle in Amethyst.

Finished product dimensions (approx)
| – 18″ – 19″ –
Height: 9″ Diameter: 9″ – 9.5″ | – 21″ – 22″ –
Height: 9″ Diameter: 10.5″ – 11″ |
Pattern instructions
– Main Body –
(FP) Row 1: Ch 22 [26], begin in the second st from the hook and insert the hook and pull up a loop from each chain to the end (22 [26] loops on your hook)
(RP) Row 1: Ch 1, *yarn over, pull through 2 loops* repeat from * to * 20 [24] times
(FP) Row 2: TSS into the next 21 [25] sts, insert hook in last st under two outer vertical bars, pull up a loop (22 [26] loops on your hook)
(RP) Row 2: Ch 1, *yarn over, pull through 2 loops* repeat from * to * 20 [24] times
(FP) Rows 3 – 4: TPS into the next 14 [18] sts, TSS into the next 7 sts, insert hook in last st under two outer vertical bars, pull up a loop (22 [26] loops on your hook)
(RP) Rows 3 – 4: Ch 1, *yarn over, pull through 2 loops* repeat from * to * 20 [24] times
(FP) Rows 5 – 6: TSS into the next 21 [25] sts, insert hook in last st under two outer vertical bars, pull up a loop (22 [26] loops on your hook)
(RP) Rows 5 – 6: Ch 1, *yarn over, pull through 2 loops* repeat from * to * 20 [24] times
(FP) Rows 7 – 8: TPS into the next 6 [10] sts, TSS into the next 15 sts, insert hook in last st under two outer vertical bars, pull up a loop (22 [26] loops on your hook)
(RP) Rows 7 – 8: Ch 1, *yarn over, pull through 2 loops* repeat from * to * 20 [24] times
(FP) Rows 9 – 10: TSS into the next 21 [25] sts, insert hook in last st under two outer vertical bars, pull up a loop (22 [26] loops on your hook)
(RP) Rows 9 – 10: Ch 1, *yarn over, pull through 2 loops* repeat from * to * 20 [24] times
Rows 11 – 50 [58]: repeat rows 3 – 10, 5 [6] more times
Rows 51 [59] – 56 [64]: repeat rows 3 – 8, 1 more time
Fasten off leaving a tail longer than the length of one row (you will use this tail to seam your ends together later).
– Brim –
Note: the Brim is worked along the edge where the TPS are from your previous section. If you want it to be along the other edge, that’s maker’s prerogative.
(FP) Row 1: Create a slipknot on your hook and pull up a loop in each of the next 56 [64] rows ends (57 [65] loops on your hook)
(RP) Row 1: Ch 1, *yarn over, pull through 2 loops* repeat from * to * 55 [63] times
(FP) Row 2: TSS into the next st, *TPS into the next st, TSS into the next st,* repeat from * to * 26 [30] times, insert hook in last st under two outer vertical bars, pull up a loop (57 [65] loops on your hook)
(RP) Row 2: Ch 1, *yarn over, pull through 2 loops* repeat from * to * 55 [63] times
(FP) Row 3: TPS into the next st, *TSS into the next st, TPS into the next st,* repeat from * to * 26 [30] times, insert hook in last st under two outer vertical bars, pull up a loop (57 [65] loops on your hook)
(RP) Row 3: Ch 1, *yarn over, pull through 2 loops* repeat from * to * 55 [63] times
(FP) Row 4: TSS into the next st, *TPS into the next st, TSS into the next st,* repeat from * to * 26 [30] times, insert hook in last st under two outer vertical bars, pull up a loop (57 [65] loops on your hook)
(RP) Row 4: Ch 1, *yarn over, pull through 2 loops* repeat from * to * 55 [63] times
Slip st/ bind off across, leave a long tail so you can secure your Brim.
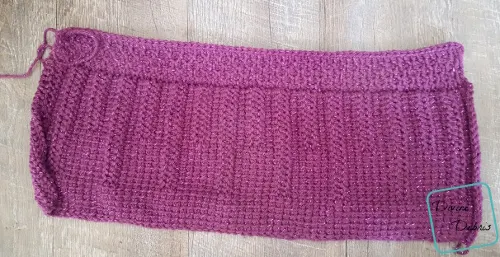
– Assembly –
Use your preferred method of seaming (I used a mattress stitch) to secure row 1 to row 56 [64] of the Main Body to each other and the end stitches of the together Brim (you can do this in one go or separately). Once you have a cylinder, on the end that’s open opposite the Brim, weave your needle and yarn back and forth through the rows until you get back to where you started (I used the same tail I left for the Main Body), pull your yarn tight to close the hole. You may have to (I did) sew the hole closed a little bit. You can always add a pom pom to that end to cover it up if it’s not super pretty. Weave in all your ends once your seaming is complete.
Tada – I hope you like this design. I love how easy it was to make a Tunisian hat, I will probably be making more soon enough. 😀


Karina
Tuesday 19th of October 2021
I love the purple color looks nice with your hair:)
Divine Debris
Thursday 21st of October 2021
Thank you!