Hey everyone! Can you believe it’s February already? It’s going by so fast! I’m working on a ton of new designs, getting stuff as read as I can for the next couple months. It’s going to be a seriously busy time.
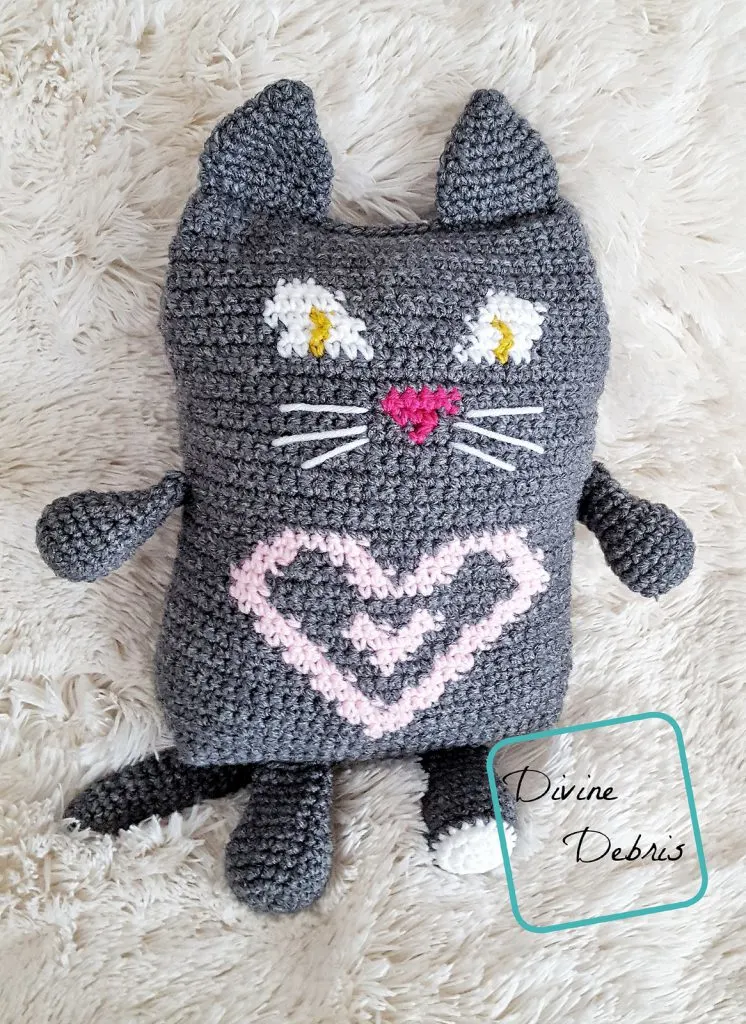
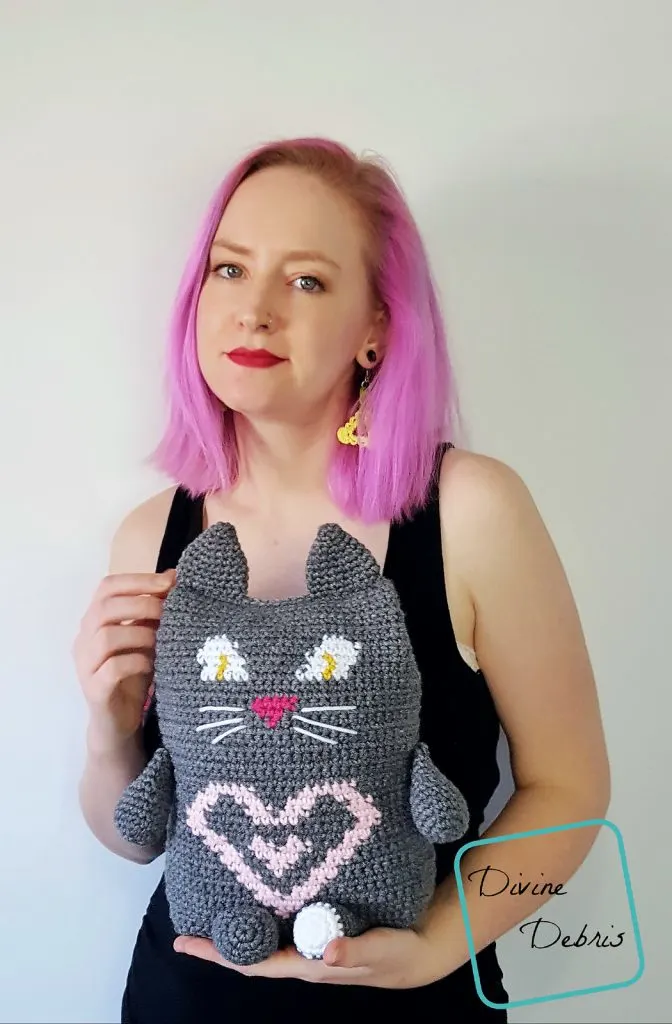
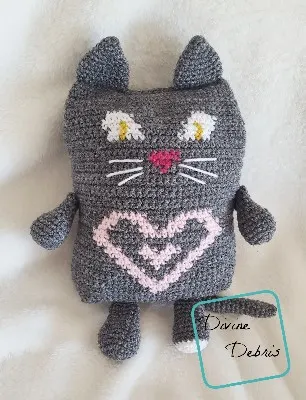
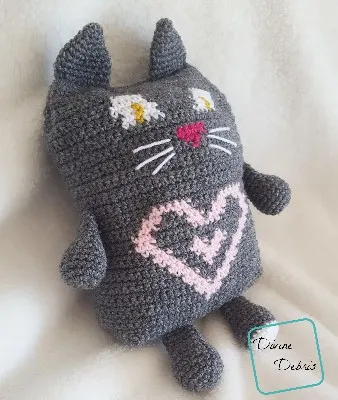
So, this week’s design is one that I started forever ago & you might have seen it if you follow on IG or FB. I wanted to do a variation of the Penguin Pal ami but with something for Valentine’s Day. I love cats so I kinda thought it would be a perfect ami to add a cute heart to. This pattern is fun, just keep an eye on turning and stitch counts. And as much as I hate sewing, I love how this turned out so it was totally worth it. 😀
See ya next week.
You can purchase an ad-free pdf of this pattern to help me keep making patterns week after week.
This post is linked to Hookin’ on Hump Day 160
Thank you to all my Patreon supporters.
Materials
- US G (4.00 mm) crochet hook
- Aran/ medium/ size #4 weight yarn
- approx 7.5 oz. / 390 yards
- I used Red Heart Super Saver
- Yarn needle
- Ami stuffing
Gauge
- 4″ = 16 scs x 17 rows
Notes
- This pattern is worked from the bottom up in 5 sections: the base, the body, the ears, the arms/ legs, and the tail. The base is worked back and forth in rows and the body, ears, arms/ legs, and tail are all worked in the round with a slip st into the first st of the row.
- The ch 1 at the beginning of the row does not count as a stitch.
- All of the stitches in this pattern are single crochets. The directions for the body will only tell you what color (ie: Color A, Color B, etc…) and the number in the parentheses tells you how many single crochets to make.
- In the example, the color A yarn is carried behind colors B – E using bobbins like this post by HodgePodge Crochet. If tapestry is confusing to you, you might want to check out this helpful Moogly video on tapestry.
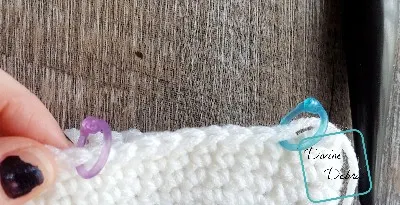
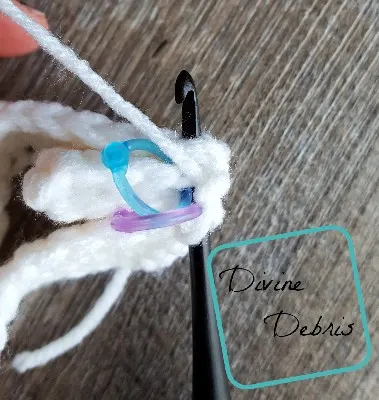
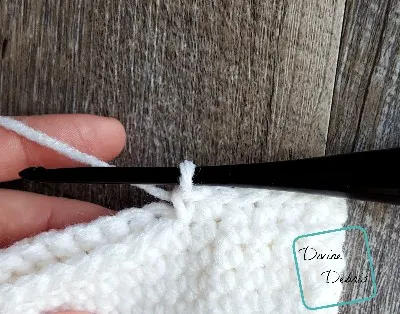
- The closing might be confusing so there are photos below. Just take it one step at a time, reading closely.
- Color A is gray (Caron One Pound in Off-White), color B is light pink (Caron One Pound in Forest Green), color C is dark pink (some misc color), color D is white (some misc color), and color E is yellow (some misc color).
Finished measurements
- Height:10.5″ (body)
- Diameter: 8″ – 9″ (body)
Sweetheart Cat Ami Crochet Pattern instructions
– Base –
Row 1: A: Ch 28, sc into the second ch from the hook and into the next 26 sts – 27 scs
Rows 2 – 10: A: Ch 1, turn, sc into the next 27 sts – 27 scs
Row 11: A: Ch 1, sc into the next 27 sts, ch 1 at the corner, rotate your whole piece, sc down the next 10 row ends, ch 1 at the corner, rotate your whole piece, sc across the other side of your ch row (27 scs), ch 1 at the corner, rotate your whole piece, sc down the next 10 row ends, ch 1 at the corner, rotate your whole piece, slip st into your first st – 74 scs, 4 ch-1 spaces
Do not fasten off , move directly onto the body.
– Body –
Note:
- The following directions will only tell you what color (ie: Color A, Color B, etc…) and the number in the parentheses tells you how many stitches to make.
- There is a turn after each row.
- Don’t work into the ch-1 spaces on row 12.
Rows 12 – 14: A: Ch 1, turn, (74), slip st into the first st – 74 scs
(RS) Row 15: A: Ch 1, turn, (23), B: (1), A: (50), slip st into the first st – 74 scs
Row 16: A: Ch 1, turn, (49), B: (3), A: (22), slip st into the first st – 74 scs
Row 17: A: Ch 1, turn, (21), B: (5), A: (48), slip st into the first st – 74 scs
Row 18: A: Ch 1, turn, (47), B: (3), A: (1), B: (3), A: (20), slip st into the first st – 74 scs
Row 19: A: Ch 1, turn, (19), B: (3), A: (3), B: (3), A: (46), slip st into the first st – 74 scs
Row 20: A: Ch 1, turn, (45), B: (3), A: (5), B: (3), A: (18), slip st into the first st – 74 scs
Row 21: A: Ch 1, turn, (17), B: (3), A: (3), B: (1), A: (3), B: (3), A: (44), slip st into the first st – 74 scs
Row 22: A: Ch 1, turn, (43), B: (3), A: (3), B: (3), A: (3), B: (3), A: (16), slip st into the first st – 74 scs
Row 23: A: Ch 1, turn, (15), B: (3), A: (3), B: (5), A: (3), B: (3), A: (42), slip st into the first st – 74 scs
Row 24: A: Ch 1, turn, (41), B: (3), A: (3), B: (3), A: (1), B: (3), A: (3), B: (3), A: (14), slip st into the first st – 74 scs
Row 25: A: Ch 1, turn, (13), B: (3), A: (5), B: (1), A: (3), B: (1), A: (5), B: (3), A: (40), slip st into the first st – 74 scs
Row 26: A: Ch 1, turn, (39), B: (3), A: (17), B: (3), A: (12), slip st into the first st – 74 scs
Row 27: A: Ch 1, turn, (12), B: (3), A: (6), B: (5), A: (6), B: (3), A: (39), slip st into the first st – 74 scs
Row 28: A: Ch 1, turn, (40), B: (3), A: (4), B: (3), A: (1), B: (3), A: (4), B: (3), A: (13), slip st into the first st – 74 scs
Row 29: A: Ch 1, turn, (14), B: (3), A: (2), B: (3), A: (3), B: (3), A: (2), B: (3), A: (41), slip st into the first st – 74 scs
Row 30: A: Ch 1, turn, (42), B: (6), A: (5), B: (6), A: (15), slip st into the first st – 74 scs
Fasten off color B.
Rows 31 – 37: A: Ch 1, turn, (74), slip st into the first st – 74 scs
Row 38: A: Ch 1, turn, (23), C: (1), A: (50), slip st into the first st – 74 scs
Row 39: A: Ch 1, turn, (49), C: (3), A: (22), slip st into the first st – 74 scs
Row 40: A: Ch 1, turn, (21), C: (5), A: (48), slip st into the first st – 74 scs
Fasten off color C.
Using white yarn, create the whiskers on your cat by running the yarn through the piece around the “nose” you just created with color C.
Rows 41 – 42: A: Ch 1, turn, (74), slip st into the first st – 74 scs
Row 43: A: Ch 1, turn, (15), D: (2), E: (1), D: (3), A: (5), D: (3), E: (1), D: (2), A: (42), slip st into the first st – 74 scs
Row 44: A: Ch 1, turn, (42), D: (2), E: (1), D: (2), A: (7), D: (2), E: (1), D: (2), A: (15), slip st into the first st – 74 scs
Row 45: A: Ch 1, turn, (14), D: (3), E: (1), D: (2), A: (7), D: (2), E: (1), D: (3), A: (41), slip st into the first st – 74 scs
Fasten off color E.
Row 46: A: Ch 1, turn, (41), D: (5), A: (9), D: (5), A: (14), slip st into the first st – 74 scs
Row 47: A: Ch 1, turn, (15), D: (3), A: (11), D: (3), A: (42), slip st into the first st – 74 scs
Fasten off color D.
Rows 48 – 54: A: Ch 1, turn, (74), slip st into the first st – 74 scs
Stuff your ami before moving onto closing. Fasten off.
– Closing –
The photos to the right should help you understand the closing more.
Place a stitch marker in the first st from the seam, count 9 sts from your st marker, place a st marker in that st (you’re portioning off 10 sts here), skip the next 27 sts, place a st marker in the next st, count 9 sts from that st, place a st marker in that st.
Fold in the 8 st sbetween the st markers (you can sew these closed with a needle & thread or catch them on the next row when you sc the remaining 27 sts on the front and back closed).
Row 55: A: Create a slipknot on your hook and start where you placed the st markers on one end (you won’t be working into the skipped 8 sts), sc into both the front and back sts across row 54 until you get to your next set of st markers – 29 scs
Fasten off, weave in your ends.
– Ears –
(make 2)
Row 1: A: Create magic circle, ch 1, sc 6 times into the circle, slip st into the first st – 6 scs
Row 2: A: Ch 1, sc into the same st as join and into the next 5 sts, slip st into the first st – 6 scs
Row 3: A: Ch 1, sc into the same st as join, sc twice into the next st, *sc into the next st, sc twice into the next st* repeat from * to * once more, slip st into the first st – 9 scs
Row 4: A: Ch 1, sc twice into the same st as join, sc into the next 2 sts, *sc twice into the next st, sc into the next 2 sts,* repeat from * to * once more, slip st into the first st – 12 scs
Row 5: A: Ch 1, sc into the same st as join and into the next st, sc twice into the next 2 sts, *sc into the next 3 sts, sc twice into the next st,* repeat from * to * once more, slip st into the first st – 15 scs
Row 6: A: Ch 1, sc twice into the same st as join, sc into the next 4 sts,*sc twice into the next st, sc into the next 4 sts,* repeat from * to * once more, slip st into the first st – 18 scs
Rows 7 – 9: A: Ch 1, sc into the same st as join and into the next 17 sts, slip st into the first st – 18 scs
Fasten of leaving a long tail that you will use to secure your ear to the top of the cat.
Fold the ear in half and sew the ear to row 55. Do this with your second ear. You can add a bit of stuffing to the center of the ear before sewing it to the ami if you want it to be puffed up.
– Arms/ Legs –
(make 4)
Row 1: A: Create magic circle, ch 1, sc 6 times into the circle, slip st into the first st – 6 scs
Row 2: A: Ch 1, sc twice into the same st as join, sc twice into the next 5 sts, slip st into the first st – 12 scs
Row 3: A: Ch 1, sc twice into the same st as join, sc into the next st, *sc twice into the next st, sc into the next st,* repeat from * to * 4 more times, slip st into the first st – 18 scs
Rows 4 – 12: A: Ch 1, sc into the same st as join and into the next 17 sts, slip st into the first st – 18 sc
Fasten off leaving a long tail. Stuff a little bit of ami filling in the bottom of the limb before securing it to the body. Add the arms and legs to the bottom and sides of the ami.
– Tail –
(make 1)
Row 1: A: Create magic circle, ch 1, sc 6 times into the circle, slip st into the first st – 6 scs
Row 2: A: Ch 1, sc into the same st as join and into the next 5 sts, slip st into the first st – 6 scs
Row 3: A: Ch 1, sc into the same st as join, sc twice into the next st, *sc into the next st, sc twice into the next st* repeat from * to * once more, slip st into the first st – 9 scs
Rows 4 – 28: A: Ch 1, sc into the same st as join and into the next 8 sts, slip st into the first st – 9 scs
Fasten off leaving a long tail. You can add some ami stuffing to the tail to puff it up or leave it empty. Use the tail from row 28 to secure the Tail to your ami.
Tada! I hope you love this design – I think it’s fun and squishy and totally worth the time it takes to sew the pieces together.



Cheryl B
Tuesday 2nd of February 2021
I have this one done up to Row 54, but it looks like part of the pattern is missing because 54 rows are not tall enough and it looks like the pattern is a little wider after Row 54.
I've been crocheting for about 58 years so I can figure out the other rows, but I wanted to see if anyone else has noticed the "missing" rows.
Cheryl B
Amber M
Tuesday 2nd of February 2021
Hi! I assure you, there are no missing rows after row 54. I just checked the pattern and the sample and after row 47, there are only 7 rows. And the reason that it looks wider it because of the way you fold the top portions in to make it pinched on the sides. When you're closing the top you do add another row, perhaps that why you think there are missing rows?
I hope that helps :)
Patti
Friday 6th of March 2020
When it says turn, do I crochet backwards?
Divine Debris
Monday 9th of March 2020
No, you turn your work and crochet across the row.
Julie
Friday 9th of February 2018
This is so adorable! Thanks for all your wonderful Designs..i am a HUGH fan!!
Sheltie Times
Wednesday 7th of February 2018
What a cutie.