
Hello everyone! How’s your Tuesday going? I’m over here trying to keep my fingers warm while I try to type (or crochet too). It’s so weird that I’m freezing and it’s on the 60s whereas when I lived in New York this would be short sleeve weather during the winter. Humans are so weird, ya know?
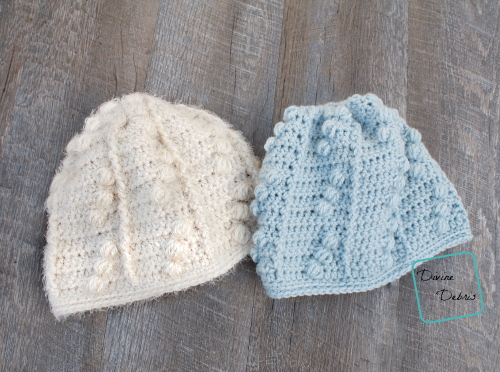
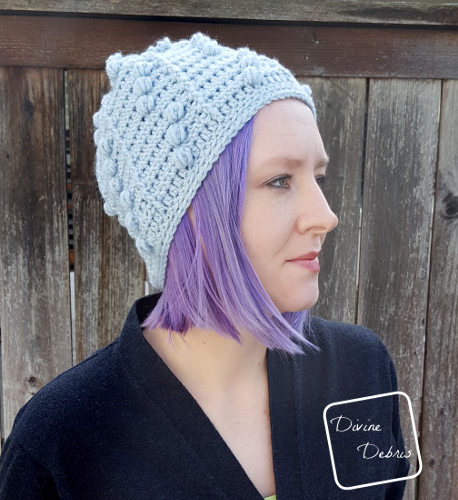
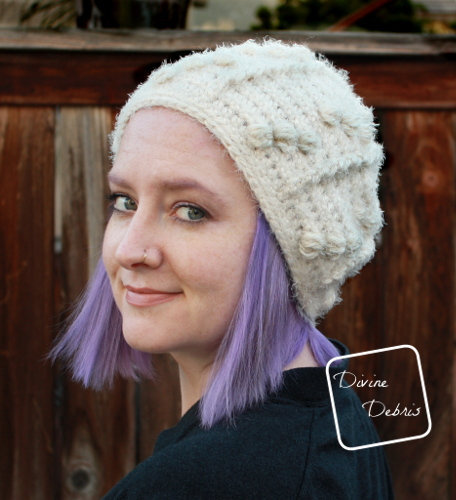
Anyway, that’s my set up for this week’s pattern, it’s cold and I wanted to make a hat. Actually I designed this for a hike because it was freezing (much colder than I am today) when we went on a hike up to the second largest peak on San Diego and so I wanted a hat for the hike (keep all that body heat in). Well, I took it off about 10 minutes into the hike because as soon as the sun came out I was cookin’. All the best laid plans, ya know? But it wasn’t an entire loss, I have been wearing this hat all over the place because I love how soft it is! I made my first version in the Hygge yarn from Red Heart and it’s just impossibly comfortable that I even wear it in the house when my head is cold (like it is now). I made a second in Vanna’s Choice because I felt like the Hygge wasn’t showcasing the adorable little puffs as well as it could have. So instead of one pattern with 2 sizes, you get 2 weights with 2 sizes. Who’s the real winner? All of us.
This hat is super easy though, just gotta to make sure you count and do your gauge swatch. If you have problems with hats turning out too big or too small, you should do a gauge swatch before you start. For real, even if you are using the same hook and yarn combo, your tension might be entirely different from mine. Ok, I’m done with my little rant. I just hate seeing people put in hours on a design only to have it come out the wrong size. Ya know? We’ve all been there.
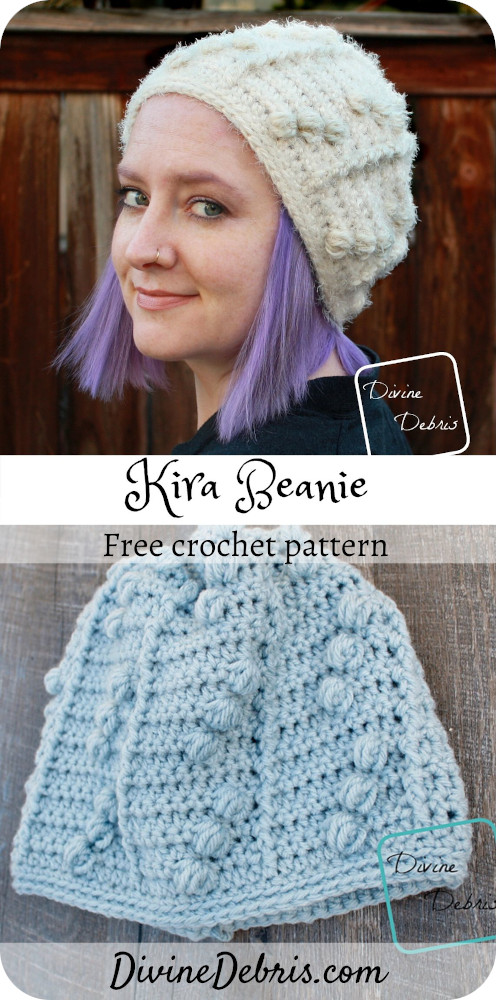
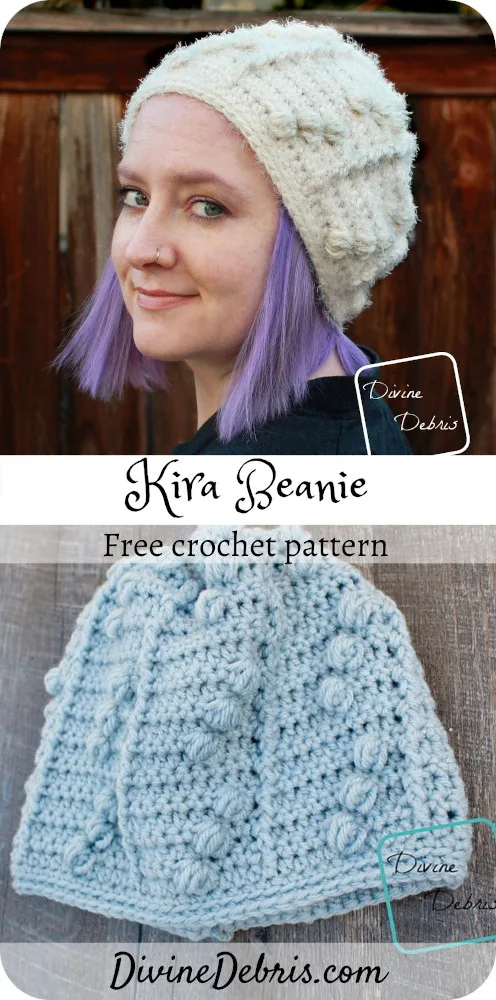
So, yeah, I hope you love this fun little hat design you can probably knock out in a day (at most, I made the Vanna’s in like 6 hours with amble breaks). And fun fact, I named this after one of the women that runs Hike for Beer San Diego, because her hikes inspired me to make it (spouse & I go hiking with them on occasion). Yes, I’m such a nerd.
(This post may contain affiliate links)
If you appreciate my weekly patterns I hope you’d consider purchasing an ad-free pdf of this pattern in my Ravelry shop.![]()
![]()
Thank you Caroline for becoming my newest patron on Patreon!
Learn how you can get 4 patterns a month and become a patron here for as low as $2.50 a month.
Materials
- US J (6.00 mm) crochet hook
- Bulky/ size #5 weight yarn
- approx 5.5 – 6.5 oz. / 145 – 172 yards
- I used Red Heart Yarn Hygge
- Worsted/ size #4 weight yarn
- 3 – 3.5 oz/ 146 – 170 yds
- I used Vanna’s Choice
- Yarn needle
Gauge
- Bulky: 9 rows x 12 hdc = 4”
- WW: 10 rows x 13 hdc = 4″


Terms/stitches used
- RS: right side
- Ch: chain
- St: stitch
- BLO: back loop only
- Slip st: slip stitch
- Sc: single crochet
- Hdc: half double crochet
- HDCPuff (explained below)
- FPDC/BPDC: front post/back post double crochet
Notes
- This pattern is worked in 2 parts, the Body (which is worked from the bottom up), and the Band (which is worked on the other side of rnd 1 of the Body). Once your done with the Body portion, you will cinch closed the opened end you’re working on in your preferred method. Then you will flip the hat around and work the Band.
- HDCPuff: *yarn over, insert your hook into the specified st, pull up a loop,* repeat from * to * 3 more times, yarn over, pull through all 9 loops on your hook.
- The two different weights are worked the same in the pattern.
- You will turn after each rnd on the Body.
- The ch 2 at the beginning of the rnd does count as a stitch.
- The ch 1 a the beginning of the rnd does not count as a stitch.
- You will need to know how to create a slipknot on your hook for this pattern.
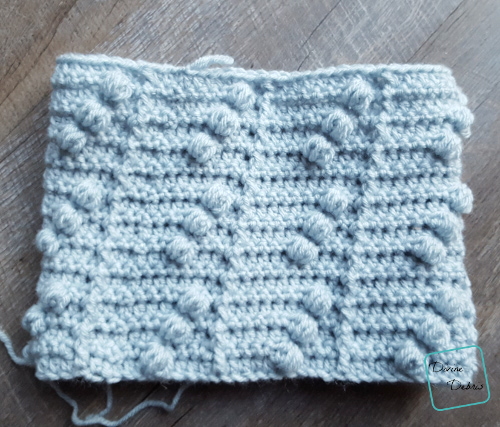
- The example is the 22″ – 23″ size, made in Red Heart Hygge in Pearl and Vanna’s Choice in Silver Blue.
Finished product dimensions (approx)
WW version:
| 20″ Height: 8.5″ Diameter: 9″ – 9.5 | 22″ – 23″ Height: 8.5″ Diameter: 10.5″ – 11″ |
Bulky version:
| 20″ Height: 8.5″ – 9″ Diameter: 10″ | 22″ – 23″ Height: 8.5″ – 9″ Diameter: 11″ – 11.5″ |
Pattern instructions
– Body –
Sizing as follows: 20″ (22″-23″)
Rnd 1: Ch 60 (70), slip st to form a ring. *Do not twist this ring*
(RS) Rnd 2: Ch 2 (counts as a st here & throughout), hdc into the next 59 (69) sts, slip st into the first st – 60 (70) hdc
Rnd 3: Ch 1, turn, sc into the same st as join and into the next st, HDCPuff into the next st, sc into the next 4 sts, bpdc round the next st, *sc into the next 4 sts, HDCPuff into the next st, sc into the next 4 sts, bpdc around the next st,* repeat from * to * 4 (5) more times, sc into the next 2 sts, slip st into the first st – 6 (7) HDCPuff, 48 (56) hdc, 6 (7) bpdc
Rnd 4: Ch 2, turn, hdc into the next st, fpdc around the next bpdc, *hdc into the next 9 sts, fpdc around the next bpdc,* repeat from * to * 4 (5) more times, hdc into the next 7 sts, slip st into the first st – 54 (63) hdc, 6 (7) fpdc
Rnd 5: Ch 1, turn, sc into the same st as join and into the next 2 sts, HDCPuff into the next st, sc into the next 3 sts, bpdc round the next fpdc, *sc into the next 5 sts, HDCPuff into the next st, sc into the next 3 sts, bpdc around the next fpdc,* repeat from * to * 4 (5) more times, sc into the next 2 sts, slip st into the first st – 6 (7) HDCPuff, 48 (56) hdc, 6 (7) bpdc
Rnd 6: Ch 2, turn, hdc into the next st, fpdc around the next bpdc, *hdc into the next 9 sts, fpdc around the next bpdc,* repeat from * to * 4 (5) more times, hdc into the next 7 sts, slip st into the first st – 54 (63) hdc, 6 (7) fpdc
Rnd 7: Ch 1, turn, sc into the same st as join and into the next 3 sts, HDCPuff into the next st, sc into the next 2 sts, bpdc round the next fpdc, *sc into the next 6 sts, HDCPuff into the next st, sc into the next 2 sts, bpdc around the next fpdc,* repeat from * to * 4 (5) more times, sc into the next 2 sts, slip st into the first st – 6 (7) HDCPuff, 48 (56) hdc, 6 (7) bpdc
Rnd 8: Ch 2, turn, hdc into the next st, fpdc around the next bpdc, *hdc into the next 9 sts, fpdc around the next bpdc,* repeat from * to * 4 (5) more times, hdc into the next 7 sts, slip st into the first st – 54 (63) hdc, 6 (7) fpdc
Rnd 9: Ch 1, turn, sc into the same st as join and into the next 6 sts, bpdc round the next fpdc, *sc into the next 9 sts, bpdc around the next fpdc,* repeat from * to * 4 (5) more times, sc into the next 2 sts, slip st into the first st – 6 (7) HDCPuff, 48 (56) sc, 6 (7) bpdc
Rnds 10 – 25: repeat rows 2 – 9, twice
Fasten off leaving a long tail. Use this tail to weave back and forth through the stitches all the way around. Pull your tail tight, closing the open end. If it doesn’t pull all the way tight, you can sew it together to close it fully.

– Band –
Rnd 1: Flip your at around so you’re working along the other side of rnd 1. Create a slipknot on your hook, sc into the next 60 (70) sts, slip st into the first st – 60 (70) sc
Rnd 2: Ch 1, sc into the BLO of the same st as join, sc into the BLO of the next 59 (69) sts, slip st into the first st – 60 (70) sc
Tada! There it is. I really hope you like it <3
Claudia Smith
Sunday 10th of March 2019
Great looking beanie. Wish it had instructions for newborn and various sizes to 1 year old.
Divine Debris
Monday 11th of March 2019
I'm glad you like it :)