Update: you can add it to your Ravelry queue here.
So, it’s January and I’ve been taking it easy since classes ended and work slowed down. How’s everyone doing? I’ve got one project in the works, it’s called the Roxanne, and it features a scarf and hat of the same style. I really love the pattern but I did something stupid, I worked up the hat but didn’t do as good with writing down the directions as I made it so… uh, I have to try to figure out what I did. Oops. I was watching a movie and in the zone, forgot to write the steps down. It’s ok, I’ll figure it out. 😀
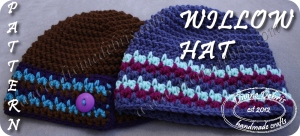
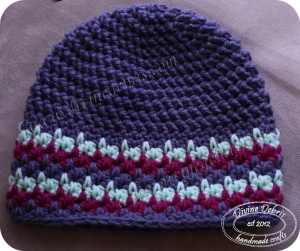
However, I didn’t forget to write down the instructions to the Willow hat. Score or just better planning. Do you remember the Willow rug and scarf? Well this pattern
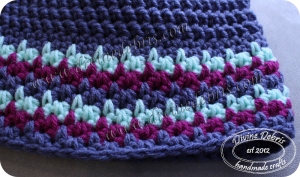
is a variation on that sc and spike sc I used on those two other patterns. Here I paired it with the herringbone hdc. If you are unfamiliar with the HBhdc Moogly has a video tutorial that’s very helpful. Speaking of Moogly, my festive winter mug cozies were #3 on the last Hookin’ on Hump Day of 2013.
Materials:
- 3 colors of WW yarn – one needs to be around an 0z, other less
- US J crochet hook (6 mm)
Notes:
- The spike sc is also known as a long sc crochet.
- Feel free to replace ch 2 at the beginning of the rows with an alternative stitch.
- The hat is worked row by row with a slip st into first st to secure the row before moving onto the next row.
- Following the hat body there are two options for the brim in the pattern instructions.
Pattern Instructions:
Row 1: Magic circle, ch 2 ( counts as hdc), HBhdc 11 times into circle, slip st into first st to secure – 12 hdcs
Row 2: Ch 2 (counts as hdc), HBhdc twice into next,* HBhdc into next st, HBhdc into next st* repeat from * to *4 more times, slip st into ch 2 to secure – 18 hdcs
Row 3: Ch 2 (counts as hdc), HBhdc into next st, HBhdc twice into next,* HBhdc into next st, HBhdc into next st, HBhdc into next st* repeat from * to * 4 more times, slip st into ch 2 to secure – 24 hdcs
Row 4: Ch 2 (counts as hdc), HBhdc into next st, HBhdc into next st, HBhdc twice into next st, *HBhdc into next st, HBhdc into next st, HBhdc into next st, HBhdc twice into next st* repeat from * to * 4 more times, slip st into ch 2 to secure- 30 hdcs
Row 5: Ch 2 (counts as hdc), HBhdc into next st, HBhdc into next st, HBhdc into next st, HBhdc twice into next st, *HBhdc into next st, HBhdc into next st, HBhdc into next st, HBhdc into next st, HBhdc twice into next st* repeat from * to * 4 more times, slip st into ch 2 to secure- 36 hdcs
Row 6: Ch 2 (counts as hdc), HBhdc into next st, HBhdc into next st, HBhdc into next st, HBhdc into next st, HBhdc twice into next st, *HBhdc into next st, HBhdc into next st, HBhdc into next st, HBhdc into next st, HBhdc into next st, HBhdc twice into next st* repeat from * to * 4 more times, slip st into ch 2 to secure- 42 hdcs
Row 7: Ch 2 (counts as hdc), HBhdc into next st, HBhdc into next st, HBhdc into next st, HBhdc into next st, HBhdc into next st, HBhdc twice into next st, *HBhdc into next st, HBhdc into next st, HBhdc into next st, HBhdc into next st, HBhdc into next st, HBhdc into next st, HBhdc twice into next st* repeat from * to * 4 more times, slip st into ch 2 to secure- 48 hdcs
Rows 8 – 12: Ch 2 (counts as hdc), HBhdc into all sts around – 48 hdcs
-Brims-
Style 1:
Rows 13 – 14: Ch 1, sc around – 48 scs
Change color, row 15: Ch 1, sc into same st as join, spike sc into next st, *sc into next st, spike sc into next st* repeat from * to * the rest of the way around – 24 scs, 24 spike scs
Row 16: Ch 1, spike sc into same st as join, sc into next st, *spike sc into next st, sc into next st* repeat from * to * the rest of the way around – 24 scs, 24 spike scs
Change color, row 17: Ch 1, sc into same st as join, spike sc into next st, *sc into next st, spike sc into next st* repeat from * to * the rest of the way around – 24 scs, 24 spike scs
Row 18: Ch 1, spike sc into same st as join, sc into next st, *spike sc into next st, sc into next st* repeat from * to * the rest of the way around – 24 scs, 24 spike scs
Change color, row 19: Ch 1, sc into same st as join, spike sc into next st, *sc into next st, spike sc into next st* repeat from * to * the rest of the way around – 24 scs, 24 spike scs
Row 20: Ch 1, spike sc into same st as join, sc into next st, *spike sc into next st, sc into next st* repeat from * to * the rest of the way around – 24 scs, 24 spike scs
Change color, row 21: Ch 1, sc into same st as join, spike sc into next st, *sc into next st, spike sc into next st* repeat from * to * the rest of the way around – 24 scs, 24 spike scs
Row 22: Ch 1, spike sc into same st as join, sc into next st, *spike sc into next st, sc into next st* repeat from * to * the rest of the way around – 24 scs, 24 spike scs
Change color, row 23: Ch 1, sc into same st as join, spike sc into next st, *sc into next st, spike sc into next st* repeat from * to * the rest of the way around – 24 scs, 24 spike scs
Row 24: Ch 1, spike sc into same st as join, sc into next st, *spike sc into next st, sc into next st* repeat from * to * the rest of the way around – 24 scs, 24 spike scs
Change color, row 25: Ch 1, sc into same st as join, spike sc into next st, *sc into next st, spike sc into next st* repeat from * to * the rest of the way around – 24 scs, 24 spike scs
Row 26: Ch 1, spike sc into same st as join, sc into next st, *spike sc into next st, sc into next st* repeat from * to * the rest of the way around – 24 scs, 24 spike scs
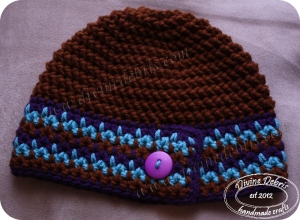
Style 2:
Change colors, row 13: Skip 34 sts from the seam, sc into next st and into the next 47 sts, ch 5 -47 scs, 5 chs
Row 14: Turn, sc into second st from the hook and into the next 51 sts – 52 scs
Change colors, row 15: turn, ch 1, spike sc into first st, sc into next st, *spike sc into next st, sc into next st* repeat from * to * the rest of the way across – 26 spike scs, 26 scs
Row 16: turn, ch 1, spike sc into first st, sc into next st, *spike sc into next st, sc into next st* repeat from * to * the rest of the way across – 26 spike scs, 26 scs
Change colors, row 17: turn, ch 1, spike sc into first st, sc into next st, *spike sc into next st, sc into next st* repeat from * to * the rest of the way across – 26 spike scs, 26 scs
Row 18: turn, ch 1, spike sc into first st, sc into next st, *spike sc into next st, sc into next st* repeat from * to * the rest of the way across – 26 spike scs, 26 scs
Change colors, row 19: turn, ch 1, spike sc into first st, sc into next st, *spike sc into next st, sc into next st* repeat from * to * the rest of the way across – 26 spike scs, 26 scs
Row 20: turn, ch 1, spike sc into first st, sc into next st, *spike sc into next st, sc into next st* repeat from * to * the rest of the way across – 26 spike scs, 26 scs
Change colors, row 21: turn, ch 1, spike sc into first st, sc into next st, *spike sc into next st, sc into next st* repeat from * to * the rest of the way across – 26 spike scs, 26 scs
Row 22: turn, ch 1, spike sc into first st, sc into next st, *spike sc into next st, sc into next st* repeat from * to * the rest of the way across – 26 spike scs, 26 scs
Change colors, row 23: turn, ch 1, spike sc into first st, sc into next st, *spike sc into next st, sc into next st* repeat from * to * the rest of the way across – 26 spike scs, 26 scs
Row 24: turn, ch 1, spike sc into first st, sc into next st, *spike sc into next st, sc into next st* repeat from * to * the rest of the way across – 26 spike scs, 26 scs
Change colors, row 25: turn, ch 1, sc into next 52 sts, rotate piece, ch 2, sc down the side (into the row ends) of the flap, ch 2, rotate, sc into the back of the ch sts from row 1 – 68 scs, 4 chs
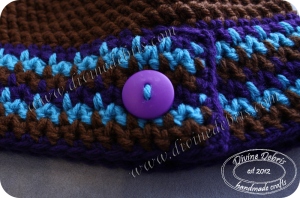
Finishing: Fasten off. Lay the flip you created over the top of the other side of the brim and secure. If you would like, add a button or embellishment of some sort over the top of the flap. Weave in ends.
You can find this post on Hookin’ on Hump Day from Moogly and My Merry Messy Life
I hope you guys like the pattern and if you find any problems please tell me. 😀 The pdf will be available soon, promise.

Roxanne
Saturday 11th of January 2014
My name is Roxanne so can't wait to see your hat & scarf for the Roxanne :)
knitnrun4sanity
Saturday 11th of January 2014
Fun design. Xx