Hey everyone! How was your week? I’m out visiting family and relaxing right now and I’m having a great time just kinda being. As a responsible adult (ha!) I made sure to plan a free pattern or two so I don’t have to rush and get everything out while I’m on vacation and when I get back. I’m telling you because I’m pretty proud of myself for being so on top of things, it doesn’t happen often. 😀
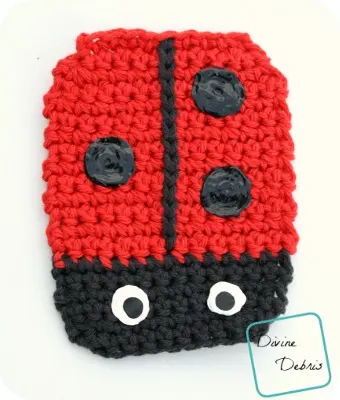
So this week I’ve got a ladybug coaster pattern to go with my new Ladybug Family of Amis that are also being released today. If you’re someone who visits my blog regularly, you know I’m someone who loves a good theme week and this week is the ladybug week.
If you appreciate my weekly patterns, I hope you consider purchasing the pdf for this pattern in my Ravelry shop to help me keep bringing patterns every week.
Materials:
- US H (5.00) mm crochet hook
- Worsted weight/ size #4/ medium weight yarn
- .5 Oz/ 25 yards
- I used Sugar and Cream cotton yarn for this (2 colors)
- Puffy paint
- Yarn needle
Gauge:
- 4″ x 4″ = 16 scs x 16 rows
Terms/ stitches:
- Ch: chain
- St: stitch
- Slip st: slip stitch
- Sc: single crochet
Notes:
- This pattern is worked back and forth in rows, with a turn at the end/ beginning.
- The ch 1 at the beginning of the row does not count as a stitch.
- This pattern is worked from the bottom up.
- You can replace the chain row with a foundation single crochet row.
- You need to know how to do surface crochet for this pattern.
- Color A is red and color B is black.
Finished dimensions:
- Height: 4.75″
- Width: 3.5″ – 3.75″
Ladybug Coaster crochet pattern
Row 1: A: Ch 10, sc into the second ch from the hook and across – 9 scs
Row 2: A: Ch 1, turn, sc twice into the first st, sc into the next 7 sts, sc twice into the last st – 11 scs
Row 3: A: Ch 1, turn, sc twice into the first st, sc into the next 9 sts, sc twice into the last st – 13 scs
Rows 4 – 14: A: Ch 1, turn, sc into the next 13 sts – 13 scs
Fasten off color A.
Row 15 – 18: B: Ch 1, turn, sc into the next 13 sts – 13 scs
Row 19: B: Ch 1, turn, sc2tog the first 2 sts, sc into the next 9 sts, sc2tog the last 2 sts – 11 scs
Row 20: B: Ch 1, turn, sc2tog the first 2 sts, sc into the next 7 sts, sc2tog the last 2 sts – 9 scs
Fasten off, weave in your ends.
Using surface crochet and color B, slip st down the middle sc in rows 1 – 14 to create the separate halves in the body.
Fasten off, weave in your ends.
Spots and eyes:
In the past I’ve drawn on the spots or eyes for things with Puffy Paint but this time I decided to do something different. I used Puffy Paint and drew the spots and the eyes on a piece of parchment paper or a plastic bag and let them dry overnight. After they’ve dried, you can peel them right off and glue them to the coaster. This allows the pieces to be smoother on the surface than if I drew directly on the coaster. Now, you don’t have to do this, you can make circles out of yarn and sew them onto the main body but I wasn’t in the mood and the Puffy Paint gives a little slip resistance to the piece.
So there’s a cute lil’ ladybug coaster pattern for ya. I hope you like it!


Michelle Baier
Thursday 19th of March 2020
This is so cute! Thank you for sharing! Happy spring ☘️🌸🍄
Divine Debris
Friday 20th of March 2020
I'm glad you like them!
MaryAnn Byrne
Wednesday 14th of March 2018
so cute!
Crochet Coaster Pattern – Lady Bug – user's Blog!
Tuesday 13th of March 2018
[…] set of 6 and give them as gifts or sew it to a bag and you’re all set. This pattern is for a crochet lady bug coaster […]
Ginger
Wednesday 14th of June 2017
Thank you for this darling pattern!!!
Stephanie R
Thursday 8th of June 2017
I LOVE all your patterns