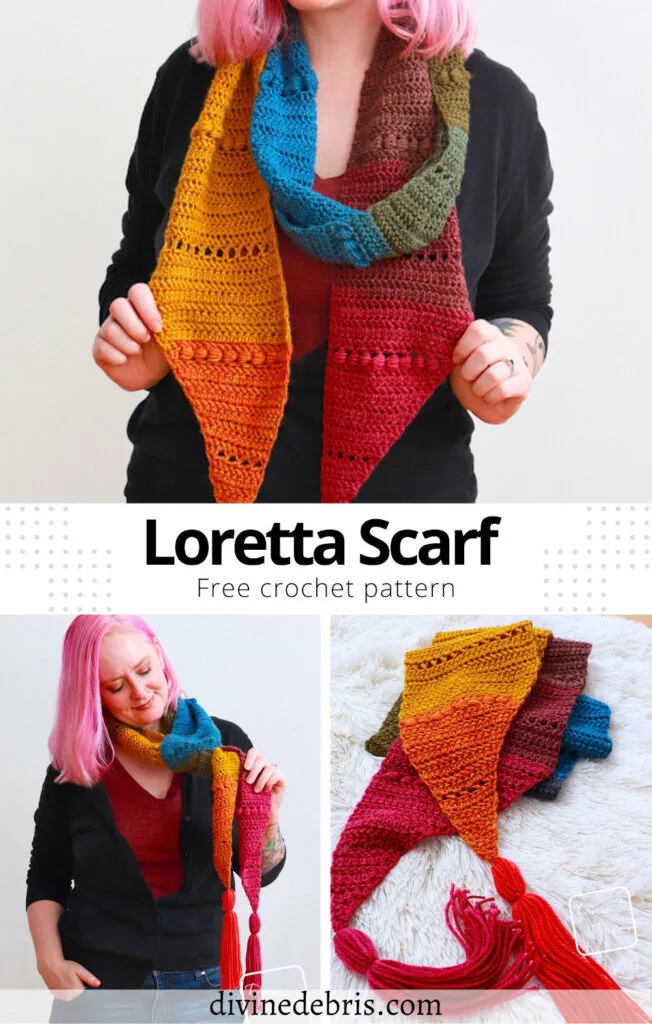
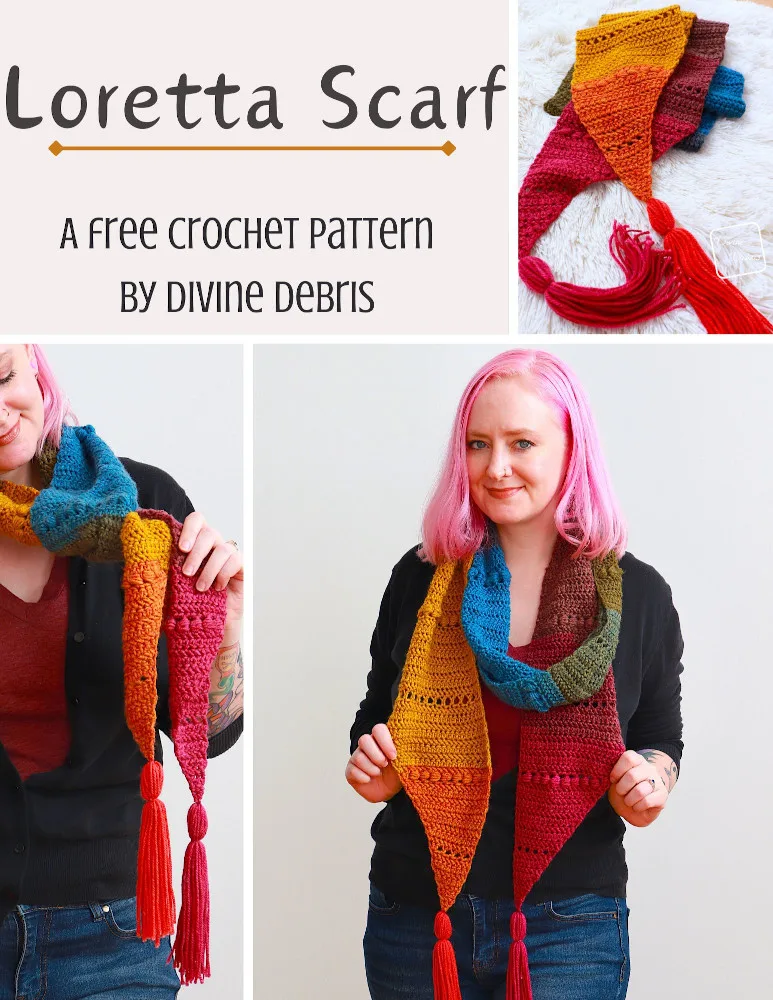
Hi again friends! How’s your November going? I have to admit it’s been so long and so much lately I needed some nice and calming crochet. Ya know the kind, that you can work on while watching a comfort show (another watch through of Ted Lasso :D) or movie. And that’s what brought me to design this week’s new design, the Loretta Scarf crochet pattern.
Did you know that I love to make lines of designs? That when I find a texture and/ or a combination of stitches I like to use it over an over again to make some pretty things? Well this week I’m expanding the Loretta Line with a brand new design because I just love that texture and how fun and fast these designs work up. And considering my last Loretta design was the Loretta Cowl Scarf, I decided I needed to make a long scarf too. And in addition to the Loretta Line, I took inspiration for this week’s scarf from the Sophie Scarf.
Above I said this pattern is easy and I mean it. It’s worked from point to point in one piece. It’s a simple increase on one side until you get to 25 sts and then you just repeat the texture for 120 rows and then you decrease on one side until you’re back down to 1 st. I love a good long scarf (this one is 84″ long) but if you’d like to make yours shorter, feel free to remove repeats during the “Rows 50 – 169” portion and make it shorter overall.
Last but not least, I added tassels (like I did in the Sophie Scarf) because I love a bit of drama in a design and in the original Loretta Shawl (from which all the Loretta designs are based) I used fringe in the shawl design itself. I almost did the same on this design but I already I knew I wanted the tassels and thought could be too much. Like, for real 😀
Anyway, I hope you like this week’s new release. I had a great time making such a fun scarf and I needed a nice and relaxing design to make. You know how that goes? It works up fast and it is really customizable and if you want to pick up the pdf, it is available on Ravelry.
Thank you so much for visiting and genuinely, from my heart, I hope you’re well. Remember, build your community and find people. It heals.
Please note: I was provided the yarn for this pattern by Lion Brand Yarn with no real purpose, just to make something fun and without compensation. I wasn’t provided the yarn with the expectations of positive or negative reviews but I love working with Mandala, it’s a gorgeous yarn with lots of fantastic colors and it really contributes to this lovely finished look of the scarf. This post contains affiliate links. If you purchase yarn through any of the links in this post, I may be compensated. And do not make videos using my patterns.
Copyright @ Divine Debris 2024. No part of this document may be reproduced or transmitted in any form by any means, electronic, mechanical, photocopying, or otherwise, without prior written permission from the author. Sales of finished products are permitted, but the designer requests that you link back to the pattern and credit Divine Debris with the original design under the Creative Commons Attribution-Share Alike license. If you have any questions, comments or concerns please contact info@divinedebris.com. DO NOT MAKE VIDEOS FROM MY PATTERNS.
(this post contains affiliate links)
If you appreciate my patterns I hope you’d consider purchasing an ad-free pdf of this pattern in my Ravelry shop and Lovecrafts shop (coming soon)!
Where to purchase the Loretta Scarf crochet pattern
Level
Easy
Materials
- US H (5.00 mm) crochet hook
- Size 3/ Light worsted weight yarn
- 5.3 oz/ 590 yds (approx a whole skein)
- I used Mandala by Lion Brand Yarn for this pattern
- In the color way Chimera
- Notions: scissors, measuring tape, yarn needle
Gauge
- 14 HBhdc x 9 rows = 4” (blocked)
Terms/ Stitches used
- St: Stitch
- Ch: Chain
- RS: Right Side
- Sc: Single Crochet
- HBhdc: Herringbone Half Double Crochet (explained below)
- HHPS: Half Double Crochet Horizontal Puff Stitch (explained below)
- HBhdc2tog: Herringbone Half Double Crochet 2 Sts Together (explained below)
Notes
- Herringbone Half Double Crochet (HBhdc): yarn over, insert your hook into the st, yarn over, pull up a loop and draw through the first loop on your hook, yarn over, draw through both loops on your hook.
- Half Double Crochet Horizontal Puff Stitch (HHPS): hdc into the next st, *yarn over, insert hook around the hdc, pull up a loop (approx the height of 2 chs),* repeat from * to * 3 more times, yarn over, pull through all 9 loops on the hook. You will work into the puff (not the hdc) when you work into this row later.
- Herringbone Half Double Crochet 2 Sts Together (HBhdc2tog): yarn over, insert your hook into the st, yarn over, pull up a loop and draw through the first loop on your hook, yarn over, insert your hook into the next st, yarn over, pull up a loop and draw through the first loop on your hook, yarn over, draw through all 3 loops on your hook.
- The ch 1 at the beginning of some rows does not count as a stitch.
- This scarf is worked in one piece, row by row, from one point to the other.
- The sample in the photos was made with 1 skein of Lion Brand Yarn’s Mandala in Chimera.
Blocked Loretta Scarf crochet pattern Finished Product Details (approx, excludes the tassels)
| Length | Width |
| 84” | 7.14” |
How to do the Horizontal Puff Stitch (HHPS)
Below is a quick video to help you make the Horizontal Puff Stitch I used on this pattern. If you can’t see it, you may need to disable your ad-block software.
Loretta Scarf Crochet Pattern
Increase section
Row 1: Ch 2, sc into the 2nd ch from the hook – 1 sc
Row 2: Ch 1, turn, hbhdc twice into the st – 2 hbhdc
Row 3: Ch 1, turn, hbhdc once into the first st, hbhdc twice into the next st – 3 hbhdc
Row 4: Ch 1, turn, hbhdc twice into the first st, hbhdc across – 4 hbhdc
Row 5: Ch 1, turn, hbhdc across until 1 st remains, hbhdc twice into the last st – 5 hbhdc
Rows 6 – 9: Repeat Rows 4 – 5, twice more. 9 hbhdc on Row 9.
Row 10: Ch 1, turn, hbhdc twice into the first st, *ch 1, skip the next st, hbhdc into the next st,* repeat from * to * across – 6 hbhdc, 5 ch-1 spaces
Row 11: Ch 1, turn, hbhdc across (including ch spaces here and throughout) until 1 st remains, hbhdc twice into the last st – 11 hbhdc
Row 12: Ch 1, turn, hbhdc twice into the first st, hbhdc across – 12 hbhdc
Row 13: Ch 1, turn, hbhdc across until 1 st remains, hbhdc twice into the last st – 13 hbhdc
Rows 14 – 19: Repeat Rows 12 – 13, a total of 3 more times – 19 hbhdc on Row 19.
Row 20: Ch 1, turn, hbhdc twice into the first st, *ch 1, skip the next st, HHPS into the next st,* repeat from * to * across until 2 sts remain, ch 1, skip the next st, hbhdc into the last st – 2 hbhdc, 8 HHPS, 9 ch-1 spaces
Row 21: Ch 1, turn, hbhdc across (including ch spaces here and throughout) until 1 st remains, hbhdc twice into the last st – 21 hbhdc
Row 22: Ch 1, turn, hbhdc twice into the first st, hbhdc across – 22 hbhdc
Row 23: Ch 1, turn, hbhdc across until 1 st remains, hbhdc twice into the last st – 23 hbhdc
Rows 24 – 25: Repeat Rows 22 – 23, once more.
Center Section
Rows 26 – 29: Ch 1, turn, hbhdc across – 25 hbhdc
Row 30: Ch 1, turn, hbhdc, *ch 1, skip the next st, hbhdc into the next st,* repeat from * to * across – 13 hbhdc, 12 ch-1 spaces
Rows 31 – 39: Ch 1, turn, hbhdc across – 25 hbhdc
Row 40: Ch 1, turn, hbhdc, *ch 1, skip the next st, HHPS,* repeat from * to * across until 2 sts remain, ch 1, skip the next st, hbhdc into the last st – 2 hbhdc, 11 HHPS, 12 ch-1 spaces
Rows 41 – 49: Ch 1, turn, hbhdc across – 25 hbhdc
Note: If you’d like the scarf to be shorter, do fewer repeats on Rows 50 – 169 but continue the instructions for Rows 170 – end (with different row counts).
Rows 50 – 169: Repeat Rows 30 – 49, a total of 6 more times.
Row 170: Repeat Row 30 once more.
Rows 171 – 174: Ch 1, turn, hbhdc across – 25 hbhdc
Decrease Section
Row 175: Ch 1, turn, hbhdc across until 2 sts remain, hbhdc2tog the last 2 sts – 24 hbhdc
Row 176: Ch 1, turn, hbhdc2tog the first 2 sts, hbhdc across – 23 hbhdc
Row 177: Ch 1, turn, hbhdc across until 2 sts remain, hbhdc2tog the last 2 sts – 22 hbhdc
Rows 178 – 179: Repeat Rows 176 – 177 once more. 20 hbhdc on Row 179.
Row 180: Ch 1, turn, hbhdc2tog the first 2 sts, *ch 1, skip the next st, HHPS,* repeat from * to * across until 2 sts remain, ch 1, skip the next st, hbhdc into the last st – 2 hbhdc, 8 HHPS, 9 ch-1 spaces
Rows 181 – 188: Repeat Rows 175 – 176, a total of 4 more times. 11 sts on Row 188.
Row 189: Ch 1, turn, hbhdc across until 2 sts remain, hbhdc2tog the last 2 sts – 20 hbhdc
Row 190: Ch 1, turn, hbhdc2tog the first 2 sts, *ch 1, skip the next st, hbhdc into the next st,* repeat from * to * across – 5 hbhdc, 4 ch-1 spaces
Row 191 – 196: Repeat Rows 175 – 176, a total of 3 times.
Row 197: Ch 1, turn, hbhdc into the first st, hbhdc2tog the last 2 sts – 2 hbhdc
Row 198: Ch 1, turn, hbhdc2tog the next 2 sts – 1 hbhdc
Row 199: Ch 1, turn, sc – 1 sc
Fasten off. Weave in all your ends. Block your scarf if necessary. Move onto the Tassels.
Tassels
For each tassel: make 20 lengths of yarn at about 10” – 11” each. Cut another piece of yarn and tie it around the center of the bundle you just cut. Fold the bundle in half around the piece you just tied and using another piece of yarn, tie the two halves back into one. Attach each tassel to Rows 1 and 199 respectively. Feel free to steam block the tassels to get the yarn to lay evenly.
You can pick up written instructions for the Loretta Scarf crochet pattern in my Ravelry shop.


![[Image description] Top down look of an unfinished Loretta Scarf made with Mandala being worked on by a pair of white woman's hands.](https://d3gel9wqxksnxm.cloudfront.net/wp-content/uploads/2024/11/Loretta-Scarf-818x1000-1.jpg.webp)
![[Image description] A white woman with pink hair stands against a white wall wearing the Loretta Scarf looped around her neck and hanging long.](https://d3gel9wqxksnxm.cloudfront.net/wp-content/uploads/2024/11/Loretta-Scarf-654x1000-1.jpg.webp)
![[Image description] the Loretta Scarf laying on a white furry background.](https://d3gel9wqxksnxm.cloudfront.net/wp-content/uploads/2024/11/Loretta-Scarf-793x1000-1.jpg.webp)

