
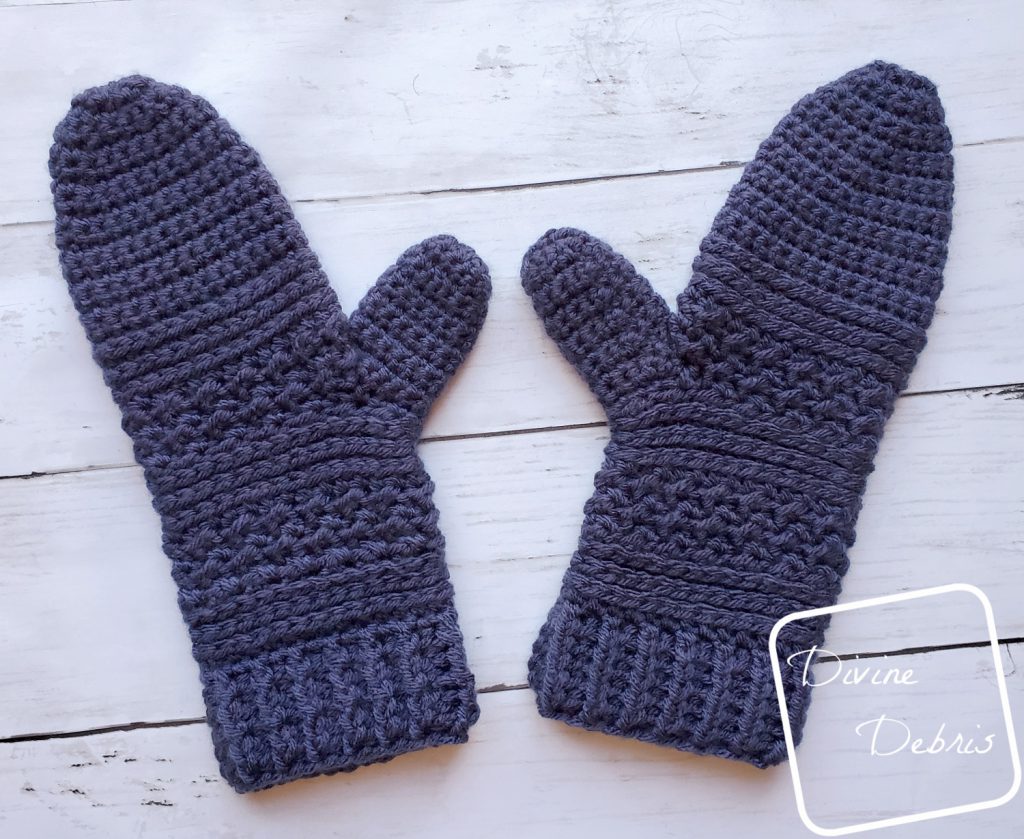
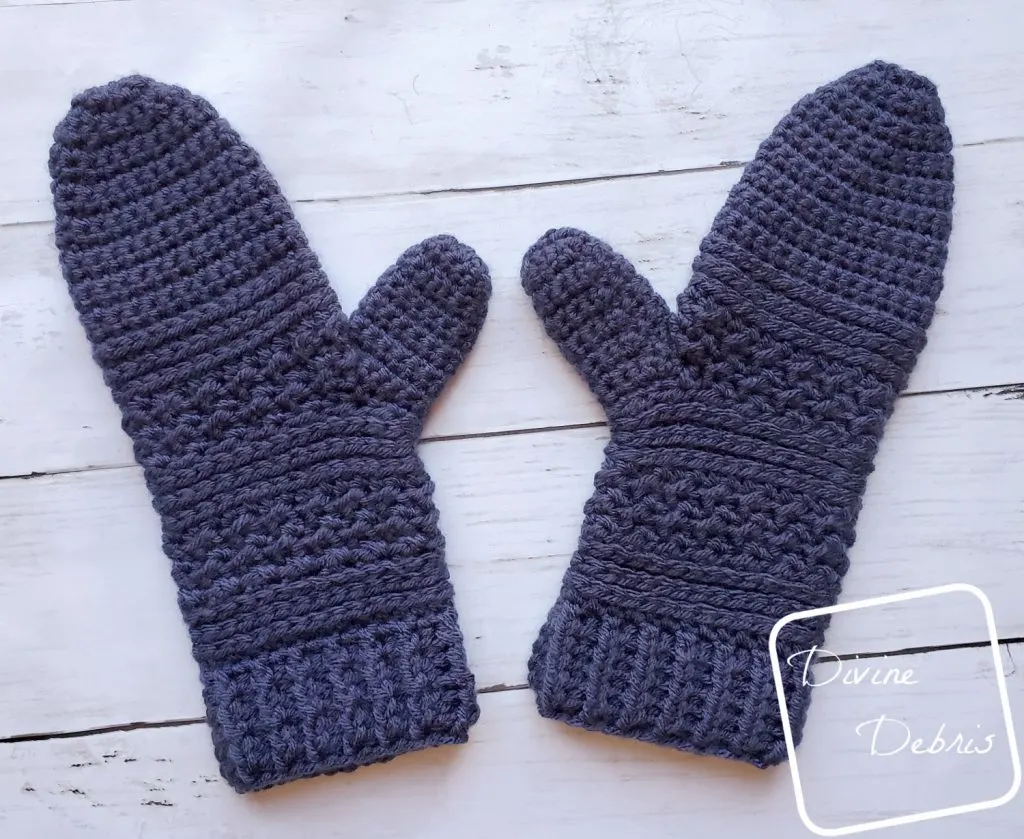
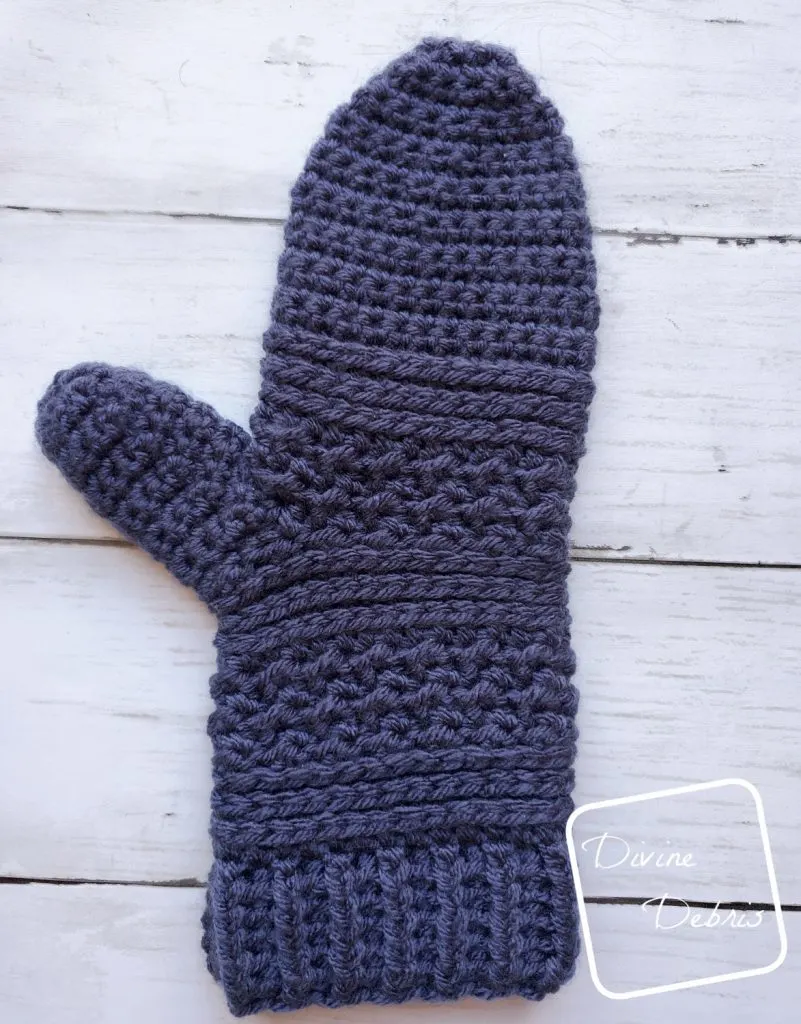
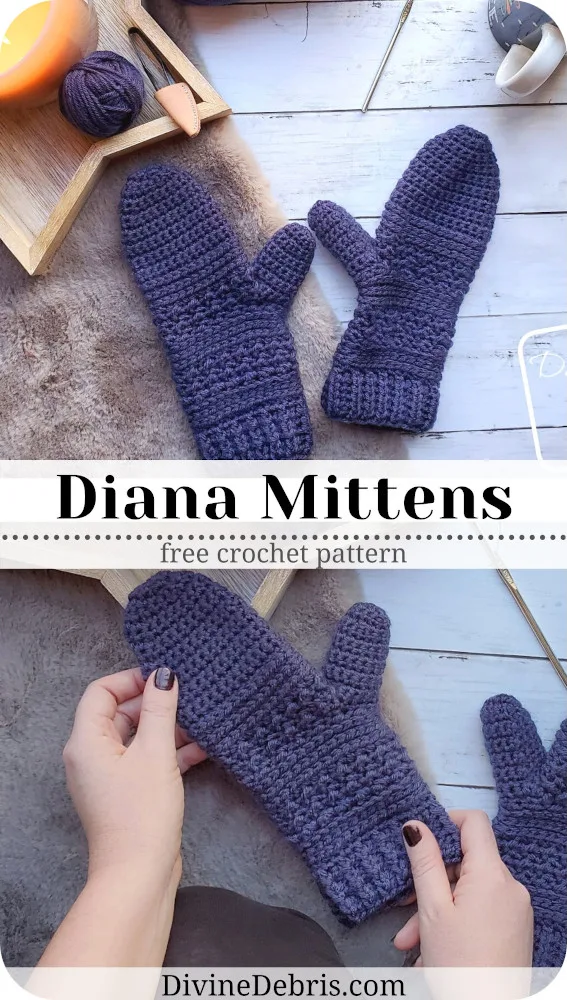
Hi everyone! Who’s sad to see October is almost over? I know I am. I keep hoping and making items that will be useful for the coming months, like this cozy Diana Mittens crochet pattern, but alas it has not gotten cold enough here in SoCal… which makes me feel like October isn’t really all that close to being over anyway. Also I haven’t given out candy… Halloween is the icing on the October cake after all.
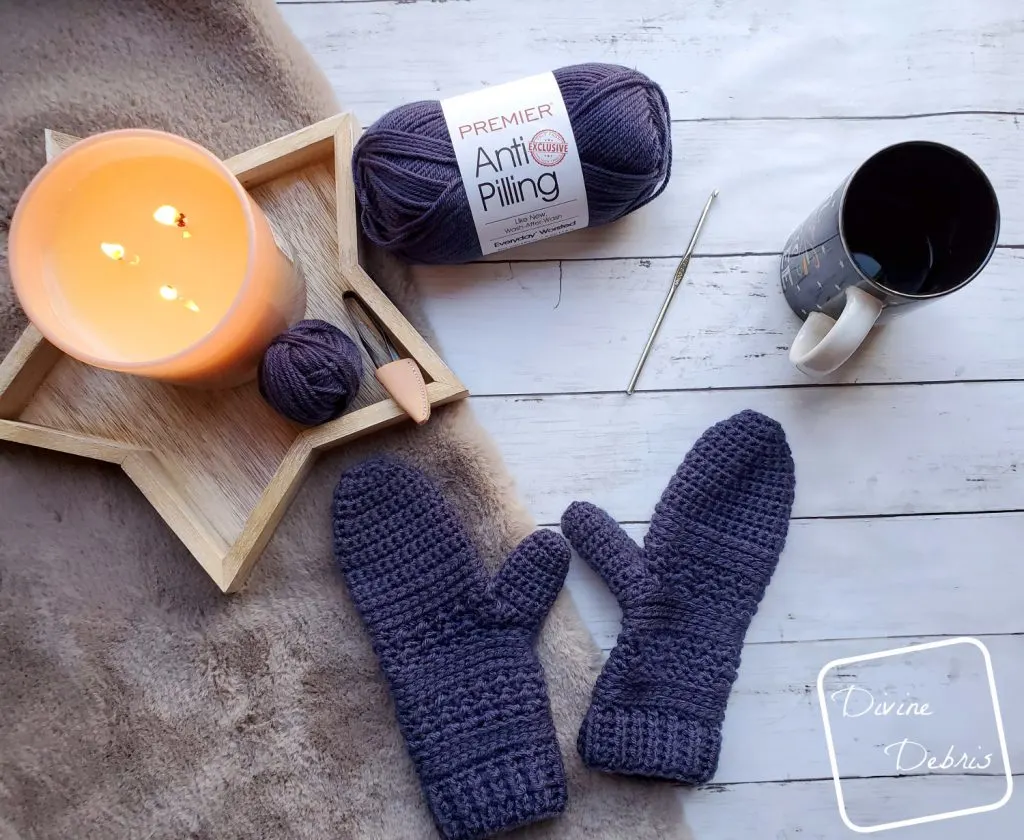
Anyway… on to this week’s new pattern. I was sent this fantastic yarn by Premier Yarns to make some cute little mittens and I knew exactly what I wanted to make. I wanted to expand my Diana Line. This is one of my oldest and favorite lines. I think I keep coming back to it because of all that lovely texture and how fun it is to make matching scarves, hats, boot cuffs, and even a bag (or 2). You could be decked out in your Diana finest. Also, I named the line after Wonder Woman. That’s cool enough for me at any time.
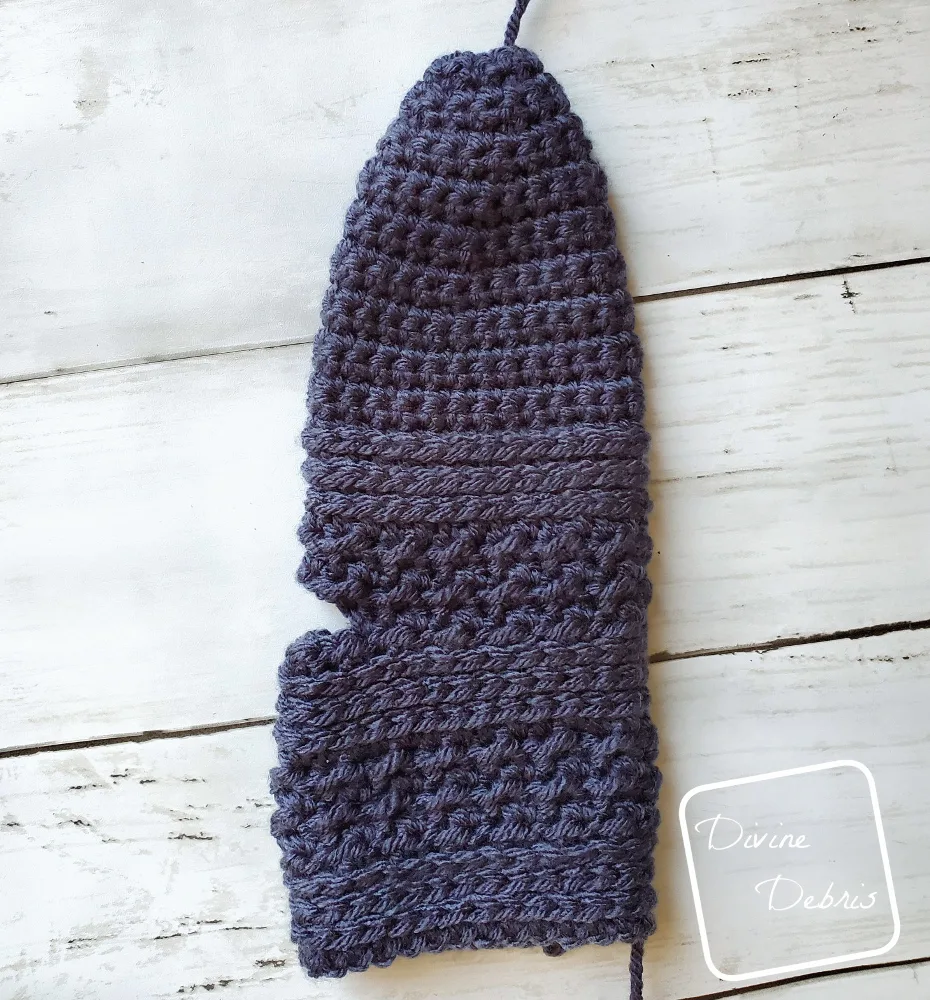
Now this pattern is so stinking easy, which means you can really get creative with your finished piece. Make it in all the colors! Add pompoms to the wrists (which I almost did, because why not!) or leave them as fingerless gloves. I have a photo below of them before I add the finger part and these would be super cute fingerless gloves.
Regardless if you make them all wild or one color (like I did here), I hope you like the Diana Mittens crochet pattern 🙂
(this post may contain affiliate links)
If you appreciate my weekly patterns I hope you’d consider purchasing an ad-free pdf of this pattern in my Ravelry shop.
Thank you Joanne for becoming my newest patron on Patreon!
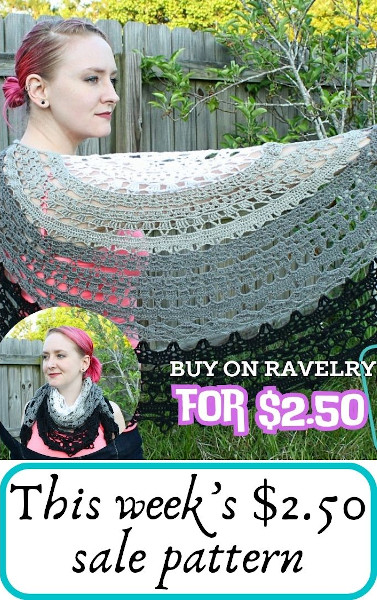
Learn how you can get 4 patterns a month and become a patron here for as low as $2.50 a month.

Materials
- US H (5.00 mm) crochet hook
- Size #4/ worsted, medium weight yarn
- I used Premier Anti-Pilling yarn
- Yarn needle
Gauge
- 10 rows x 14 hdc = 4″


Terms/ Stitches used
- RS: right side
- Rnd: round
- Ch: chain
- St: stitch
- Slip st: slip stitch
- Sc: single crochet
- BTL: back third loop only (explained in the notes)
- Sc2tog: single crochet 2 sts together
- Hdc: half double crochet
- Fphdc/Bphdc: front/back post half double crochet
Notes
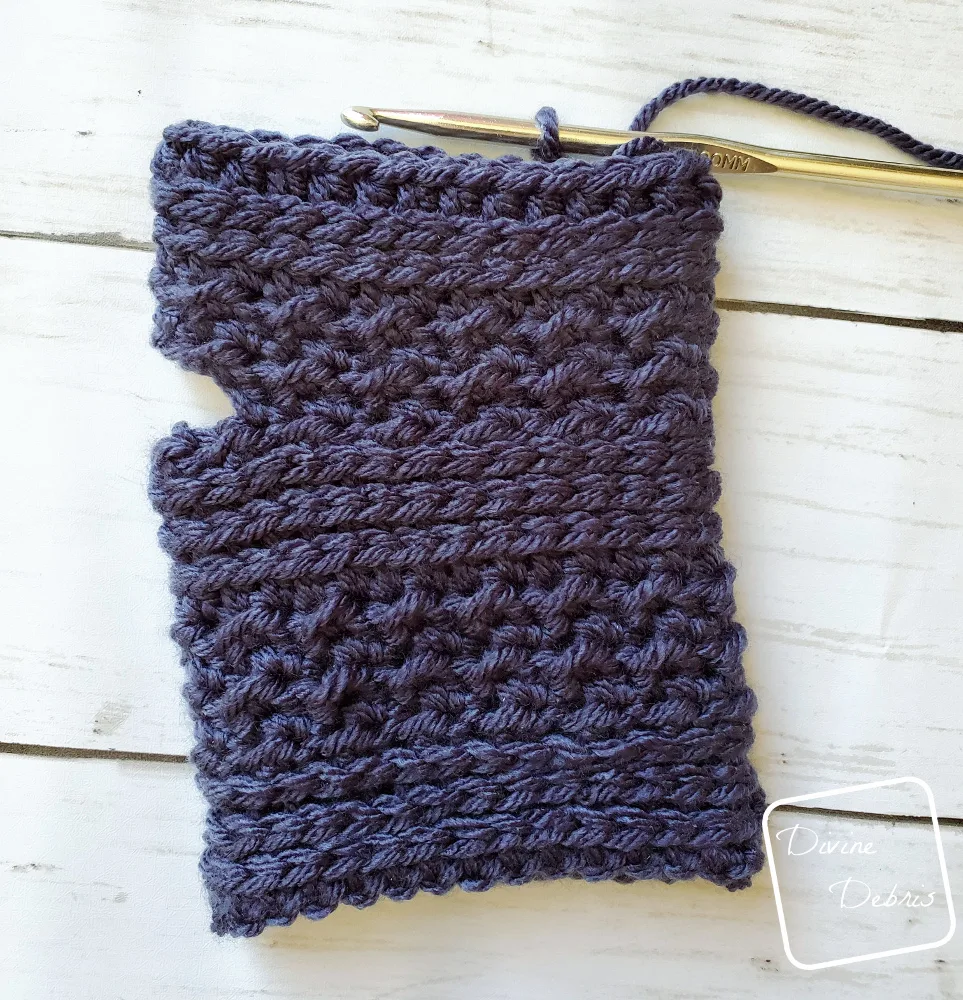
- These mittens are worked in the round one piece, in 3 sections: Body, Thumb, and Band.
- You will need to know how to work into the Back Third Loop (BTL) for this pattern. When looking at the you will have the 2 loops on top of the hdc (the V on top), lean the stitch towards you and will see the third loop that runs along the back of the stitch. This is the loop you will work into. This stitch is also known as the Camel Stitch.
- The ch-1 or ch-2 at the beginning of the rows does not count as a stitch.
- The size in the photos is the medium made in Premier Anti-Pilling in the color Admiral Blue.
Finished product dimensions (measurements may vary by gauge and yarn used)
| Small | Medium | Large |
| Around (at widest): 7″ Length (bottom of Band to tip of fingers) : 9″ – 9.25″ Yarn: 2.9 oz/ 147 yds | Around: 8″ Length: 10″ – 10.25″ Yarn: 3.5 oz/ 178 yds | Around: 9″ Length: 11″ – 11.25″ Yarn: 4.4 oz/ 223 yds |
Pattern instructions

Body
Sizing as follows: Small (Medium, Large)
(RS) Rnd 1: Ch 24 (28, 32), slip st to form a ring *do not twist this ring*
Rnd 2: Ch 2 (does not count as a stitch here and throughout), hdc into the same st as join and into the next 23 (27, 31) sts, slip st into the first st – 24 (28, 32) hdc
Rnds 3 – 4: Ch 2, hdc into the BTL of the same st as join and into the BTL of the next 23 (27, 31) sts, slip st into the first st – 24 (28, 32) hdc
Rnd 5: Ch 1, turn, hdc into the BTL of the same st as join, slip st into the BTL of the next st, *hdc into the BTL of the next st, slip st into the BTL of the next st,* repeat from * to * 11 (13, 15) more times, slip st into the first st – 12 (14, 16) hdc, 12 (14, 16) slip st
Rnds 6 – 9: Ch 1 (does not count as a st here and throughout), turn, *hdc into the next st, slip st into the next st,* repeat from * to * 12 (14, 16) more times, slip st into the first st – 12 (14, 16) hdc, 12 (14, 16) slip st
Rnd 10: Ch 2, turn, hdc into the same st as join and into the next 23 (27, 31) sts, slip st into the first st – 24 (28, 32) hdc
Rnds 11 – 12: Ch 2, hdc into the BTL of the same st as join and into the BTL of the next 23 (27, 31) sts, slip st into the first st – 24 (28, 32) hdc
Rnd 13: Ch 1, turn, hdc into the BTL of the same st as join, slip st into the BTL of the next st, *hdc into the BTL of the next st, slip st into the BTL of the next st,* repeat from * to * 11 (13, 15) more times, slip st into the first st – 12 (14, 16) hdc, 12 (14, 16) slip st
Note: Rnd 14 is the Thumb hole. This rnd is worked differently for right and left hand to keep the seam along the back. This is the only rnd that’s different in the pattern, all others are worked the same for either hand.
Left Hand
Small (Large)
Rnd 14: Ch 1, turn, *hdc into the next st, slip st into the next st,* repeat from * to * 2 (3) more times, ch 6 (8), skip the next 8 (10) sts, repeat from * to * 5 (7) more times, slip st into the first st – 8 (11) hdc, 8 (11) slip st, 1 ch-8 (ch-10) space
Medium
Rnd 14: Ch 1, turn, hdc into the next st, *slip st into the next st, hdc into the next st,* repeat from *to * 2 more times, ch 6, skip the next 8 sts, slip st into the next st, *hdc into the next st, slip st into the next st,* repeat from * to * 5 more times, slip st into the first st – 10 hdc, 10 slip st, 1 ch-6 space
Right hand
Small (Large)
Rnd 14: Ch 1, turn, *hdc into the next st, slip st into the next st,* repeat from * to * 5 (7) more times, ch 6 (8), skip the next 8 (10) sts, repeat from * to * 2 (3) more times, slip st into the first st – 8 (11) hdc, 8 (11) slip st, 1 ch-6 (ch-8) space
Medium
Rnd 14: Ch 1, turn, hdc into the next st, *slip st into the next st, hdc into the next st,* repeat from *to * 5 more times, ch 6, skip the next 8 sts, slip st into the next st, *hdc into the next st, slip st into the next st,* repeat from * to * 2 more times, slip st into the first st – 10 hdc, 10 slip st, 1 ch-6 space
Rnds 15 – 17: Ch 1, turn, *hdc into the next st, slip st into the next st,* repeat from * to * 10 (12, 14) more times (this includes the ch stitches), slip st into the first st – 11 (13, 15) hdc, 11 (13, 15) slip st
Rnd 18: Ch 2, turn, hdc into the same st as join and into the next 21 (25, 29) sts, slip st into the first st – 22 (26, 30) hdc
Rnds 19 – 20: Ch 2, hdc into the BTL of the same st as join and into the BTL of the next 21 (25, 29) sts, slip st into the first st – 22 (26, 30) hdc
Rnd 21: Ch 1, turn, sc into the BTL of the same st as join and into the BTL of the next 21 (25, 29) sts, slip st into the first st – 22 (26, 30) sc
Rnds 22 – 25 (27, 29): Ch 1, turn, sc into the next 22 (26, 30) sts, slip st into the first st – 22 (26, 30) sc
Rnd 26 (28, 30): Ch 1, turn, sc into the first st, sc2tog the next 2 sts, sc into the next 9 (11, 13) sts, sc2tog the next 2 sts, sc into the next 8 (10, 12) sts, slip st into the first st – 20 (24, 28) sc
Rnd 27 (29, 31): Ch 1, turn, sc into the next 20 (24, 28) sts, slip st into the first st – 20 (24, 28) sc
Rnd 28 (30, 32): Ch 1, turn, sc into the first st, sc2tog the next 2 sts, sc into the next 8 (10, 12) sts, sc2tog the next 2 sts, sc into the next 7 (9, 11) sts, slip st into the first st – 18 (22, 26) sc
Rnd 29 (31, 33): Ch 1, turn, sc into the next 18 (22, 26) sts, slip st into the first st – 18 (22, 26) sc
Rnd 30 (32, 34): Ch 1, turn, sc into the first st, sc2tog the next 2 sts, sc into the next 7 (9, 11) sts, sc2tog the next 2 sts, sc into the next 6 (8, 10) sts, slip st into the first st – 16 (20, 24) sc
Rnd 31 (33, 35): Ch 1, turn, sc into the next 16 (20, 24) sts, slip st into the first st – 16 (20, 24) sc
Rnd 32 (34, 36): Ch 1, turn, sc into the first st, *sc2tog the next 2 sts, sc into the next 2 (3, 4) sts,* repeat from * to * twice more, sc2tog the next 2 sts, sc into the next 1 (2, 3) sts, slip st into the first st – 12 (16, 20) sc
Rnd 33 (35, 37): Ch 1, turn, sc into the next 12 (16, 20) sts, slip st into the first st – 12 (16, 20) sc
Rnd 34 (36, 38): Ch 1, turn, sc2tog the first 2 sts, sc into the next 1 (2, 3) st(s), *sc2tog the next 2 sts, sc into the next 1 (2, 3) st(s),* repeat from * to * twice more, slip st into the first st – 8 (12, 16) sc
Fasten off Small leaving a long tail. Flip your mitten inside out, fold the 8 sts together and sew the end closed.
For Medium (Large)
Rnd 37 (39): Ch 1, turn, sc into the next 12 (16) sts, slip st into the first st – 12 (16) sc
Rnd 38 (40): Ch 1, turn, sc2tog the first 2 sts, sc into the next 1 (2) st(s), *sc2tog the next 2 sts, sc into the next 1 (2) st(s),* repeat from * to * twice more, slip st into the first st – 8 (12) sc
Fasten off Medium leaving a long tail. Flip your mitten inside out, fold the 8 sts together and sew the end closed. Weave in all your ends.
Large
Rnd 41: Ch 1, turn, sc into the next 12 sts, slip st into the first st – 12 sc
Rnd 42: Ch 1, turn, sc2tog the first 2 sts, sc into the next st, *sc2tog the next 2 sts, sc into the next 1 st,* repeat from * to * twice more, slip st into the first st – 8 sc
Fasten off leaving a long tail. Flip your mitten inside out, fold the 8 sts together and sew the end closed. Weave in all your ends.

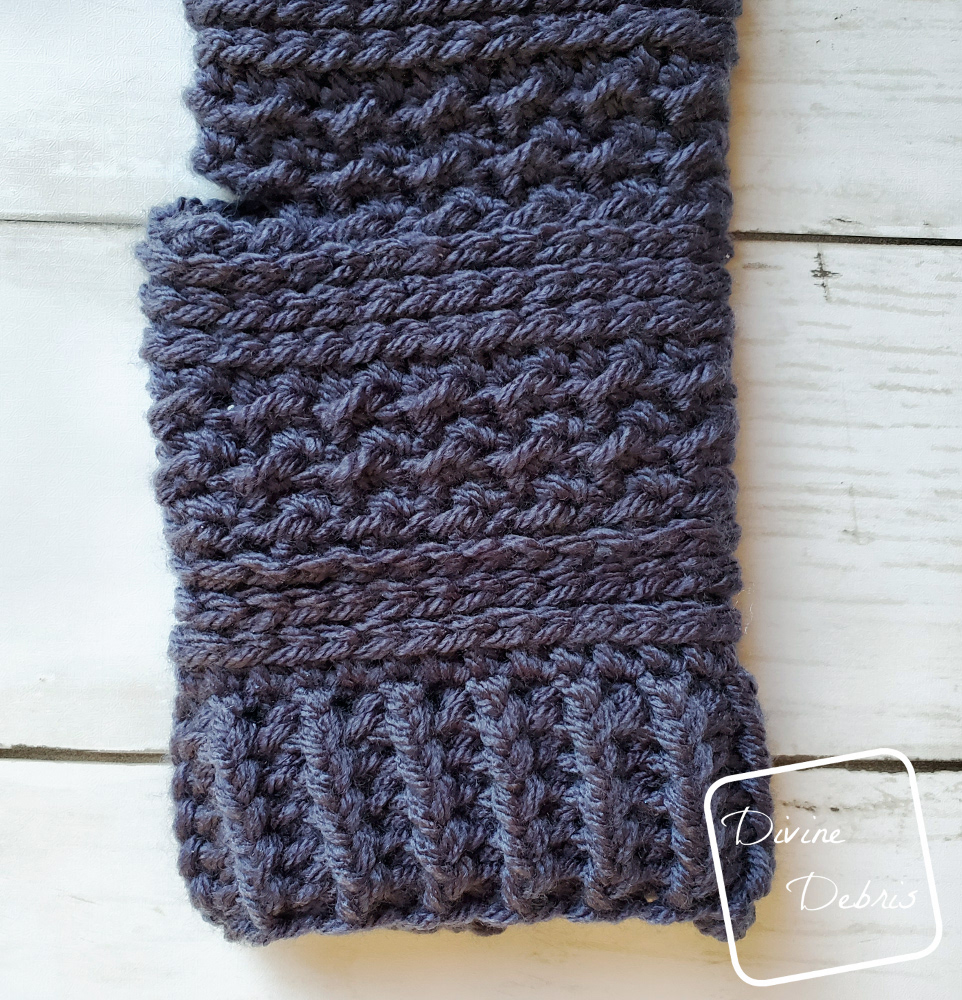
Band
Flip your mitten around and work along the other side of Rnd 1 of the Body.
Rnd 1: Create a slipknot on your hook, hdc into the next 24 (28, 32) sts, slip st into the first st – 24 (28, 32) hdc
Rnds 2 – 6: Ch 2 (does not count as a st here and throughout), fphdc around the first st, bphdc around the next st, *fphdc around the nextst, bphdc around the next st,* repeat from * to * 11 (13, 15) more times, slip st into the first st – 24 (28, 32) hdc (counts both fphdc and bphdc sts)

Thumb
Rnd 1: Create a slipknot on your hook and start in the first sc skipped st from Rnd 14, sc into the next 8 (8, 10) sts, rotate your whole piece and sc into the other side of the next 6 (6, 8) chs, slip st into the first st – 14 (14, 18) sc
Rnds 2 – 10: Ch 1, turn, sc into the next 14 (14, 18) sts, slip st into the first st – 14 (14, 18) sc
Rnd 11: Ch 1, turn, sc into the first st, sc2tog the next 2 sts, sc 5 (5, 7) sts, sc2tog the next 2 sts, sc into the next 4 (4, 6) sts, slip st into the first st – 12 (12, 16) sc
Rnd 12: Ch 1, turn, sc into the next 12 (12, 16) sts, slip st into the first st – 12 (12, 16) sc
Rnd 13: Ch 1, turn, *sc2tog the next 2 sts, sc into the next 1 (1, 2) sts,* repeat from * to * 3 more times, slip st into the first st – 8 (8, 12) sc
For Small and Medium, fasten off here. Flip your mitten inside out, fold the 8 sts of the thumb together and sew the end closed. Weave in all your ends.
Large
Rnd 14: Ch 1, turn, *sc2tog the next 2 sts, sc into the next 1 sts,* repeat from * to * 3 more times, slip st into the first st – 8 sc
Flip your mitten inside out, fold the 8 sts of the thumb together and sew the end closed. Weave in all your ends.


Deb H Gilbert
Tuesday 12th of November 2019
Love this pattern - can you help me? I made a left and a right, but the right had the seam on top of my hand. What am i doing wrong??
Divine Debris
Tuesday 12th of November 2019
Hi! What size are you working? With all the turns in the pattern, is there perhaps a turn you missed or added somewhere?