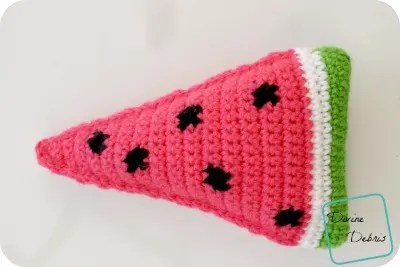
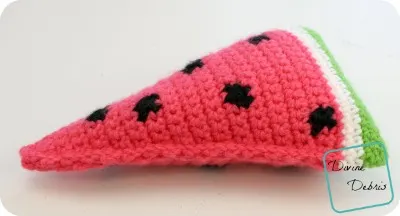
Hello! So, did you see Friday’s pattern? Well, I was inspired by the fun pizzas to make a watermelon of similar design. It’s a fun lil thing that will take you no time at all. It’s just a small little ami, which great way to practice your tapestry and ami skills. I still don’t make that many ami designs but I think I’m beginning to like them. And I rather like the way these look sitting on my couch, they’re still little amis that are just a whole lot of fun.
You can purchase an ad-free downloadable pdf of this pattern in my Ravelry shop.
Materials:
- US G (4.00 mm) crochet hook
- Worsted/ medium/ size #4 weight yarn
- 1 oz / 52 yds
- 3 colors
- I used Bernat Super Value & Red Heart Super Saver
- Yarn needle
- Ami filling
- Stitch markers
Gauge:
Terms/ stitches:
- Ch: chain
- St: stitch
- Slip st: slip stitch
- Sc: single crochet
- Sc2tog: single crochet 2 sts together
Notes:
- This pattern is worked from the rind to the point of the triangles. The rind is worked in the round, with a slip st into the first st from the last and the triangle parts are worked back and forth, separately, until you slip stitch the edges closed and stuff it.
- The ch 1 at the beginning of the row does not count as a stitch.
- All of the stitches in this pattern are single crochets, because of this the triangle portions (where all the color changes are) only tell you how many stitches to do in what color, this is what the number in the parentheses means.
- The instructions that read (sc2tog + a number) or (a number + sc2tog) mean that you sc2tog the first or last two sts of the row and work scs in the number of stitches indicated.
- Also check out this post about tapestry crochet from Moogly, it’s helpful.
- The triangles are the same front and back.
Finished measurements:
- Height: 7.75″
- Diameter: 5″ (widest), .5″ (thinnest)
- Thickness: it will vary based on your stuffing level
Pattern instructions
Rind:
Row 1: A: Ch 21, sc into the second ch from the hook and into the next 18 sts, sc 4 times into the next st, rotate the whole piece, sc into the next 18 sts (this is the back of the original ch row), sc 3 times into the last st, slip st into the first st – 44 scs
Rows 2 – 4: Ch 1, sc into the same st as join and into the next 43 sts, slip st into the first st – 44 scs
Rows 5 – 6: B: Ch 1, sc into the same st as join and into the next 43 sts, slip st into the first st – 44 scs
Fold your piece to this point in half and using stitch markers, mark the 22 scs on the front of the piece.
Triangles:
Note:
- Every stitch in this section of the ami is a single crochet, because of this the directions will only tell you what color (ie: Color A, Color B, etc…) and the number in the parentheses tells you how many single crochets to make.
- Using bobbins for the seeds suggested for this section.
- Color C is pink and color D is black.
- The instructions that read (sc2tog + a number) or (a number + sc2tog) mean that you sc2tog the first or last two sts of the row and work scs in the number of stitches indicated.
- The instructions below do not tell you when you fasten off between colors, do that at your own discretion.
Row 1: C: Create a slipknot on your hook and using the stitch markers you placed as guides, sc into the 22 back scs – 22 scs
Row 2: C: Ch 1, turn, (3), D: (2), C: (17) – 22 scs
Row 3: C: Ch 1, turn, (17), D: (2), C: (3) – 22 scs
Row 4: C: Ch 1, turn, (sc2tog + 13), D: (2), C: (3 + sc2tog) – 20 scs
Row 5: C: Ch 1, turn, (4), D: (2), C: (14) – 20 scs
Row 6: C: Ch 1, turn, (20) – 20 scs
Row 7: C: Ch 1, turn, (sc2tog + 16 + sc2tog) – 18 scs
Row 8: C: Ch 1, turn, (18) – 18 scs
Row 9: C: Ch 1, turn, (11), D: (2), C: (5) – 18 scs
Row 10: C: Ch 1, turn, (sc2tog + 3), D: (2), C: (9 + sc2tog) –
Row 11: C: Ch 1, turn, (16) – 16 scs
Row 12: C: Ch 1, turn, (10). D: (2), C: (4) – 16 scs
Row 13: C: Ch 1, turn, (sc2tog + 2), D: (2), C: (8 + sc2tog) – 14 scs
Rows 14 – 15: C: Ch 1, turn, (14) – 14 scs
Row 16: C: Ch 1, turn, (sc2tog + 10 + sc2tog) – 12 scs
Row 17: C: Ch 1, turn, (12) – 12 scs
Row 18: C: Ch 1, turn, (4), D: (2), C: (6) – 12 scs
Row 19: C: Ch 1, turn, (sc2tog + 4), D: (2), C: (2 + sc2tog) – 10 scs
Rows 20 – 21: C: Ch 1, turn, (10) – 10 scs
Row 22: C: Ch 1, turn, (sc2tog + 6 + sc2tog) – 8 scs
Row 23: C: Ch 1, turn, (4) + D: (2), C: (2) – 8 scs
Row 24: C: Ch 1, turn, (2), D: (2), C: (4) – 8 scs
Row 25: C: Ch 1, turn, (sc2tog + 4 + sc2tog) – 6 scs
Rows 26 – 27: C: Ch 1, turn, (6) – 6 scs
Row 28: C: Ch 1, turn, (sc2tog + 2 + sc2tog) – 4 scs
Rows 29 – 30: C: Ch 1, turn, (4) – 4 scs
Row 28: C: Ch 1, turn, (sc2tog + sc2tog) – 2 scs
Row 29: C: Ch 1, turn, (2) – 2 scs
Fasten off, weave in your ends.
Turn the whole piece over and start back at the rind portion and start from the first row of the triangle again.
Finishing:
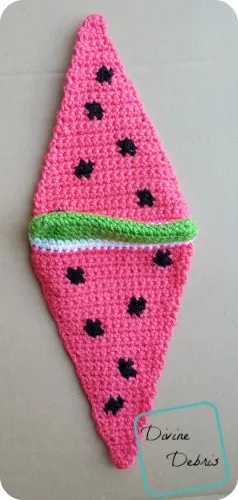
Once both triangles are completed (like the photo to the right), lay them on top of one and other and line up the ends. Create a slip knot on your hook and slip st the two row ends together (example above) or seam it closed in your preferred method of seaming. Go most of the way around before you stuff the piece, but be sure to stuff the ami before you close it all the way up.
Tada! I hope you like this fun pattern and it gets you all excited for Summer, just like me. 😀


Linda L.
Sunday 7th of May 2017
That pink is such a perfect watermelon colour - which yarn was it and in what colour? My daughter is watermelon-obsessed and she's going to love this ;-) Thanks for the pattern.
Divine Debris
Sunday 7th of May 2017
Thank you! I used Bernat Super Value in Peony Pink - http://www.yarnspirations.com/yarn/super-value.html I hope you like this pattern and I hope your daughter loves it as well. :)