

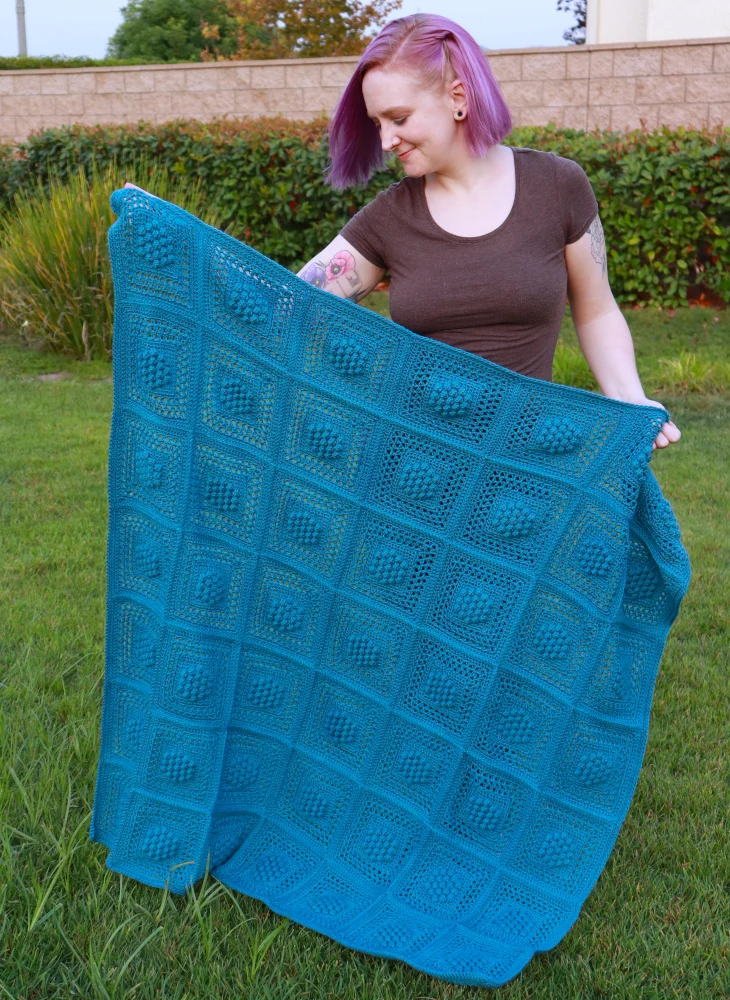
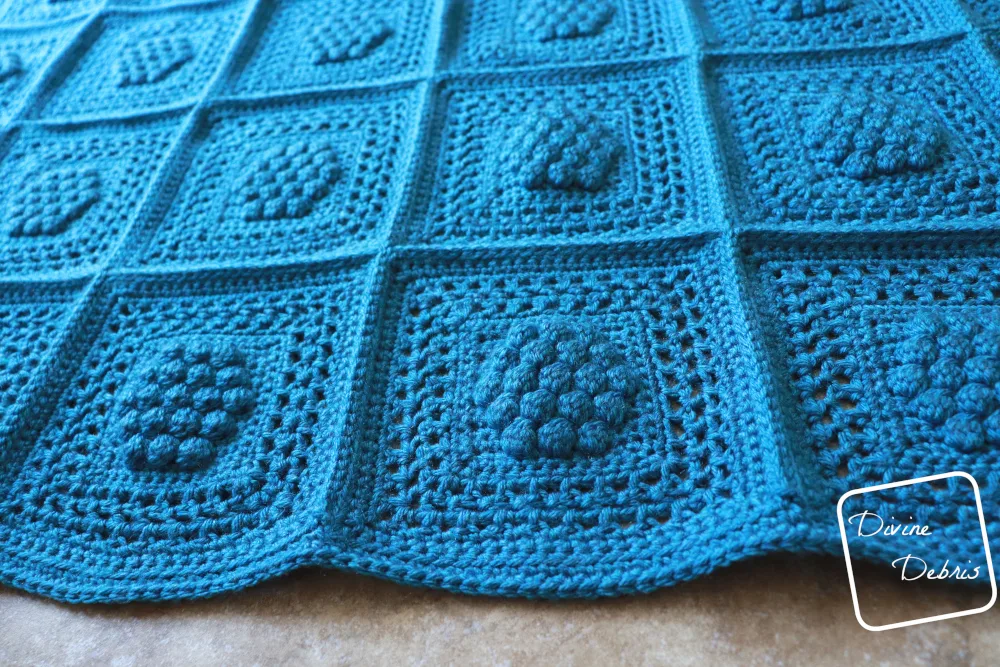
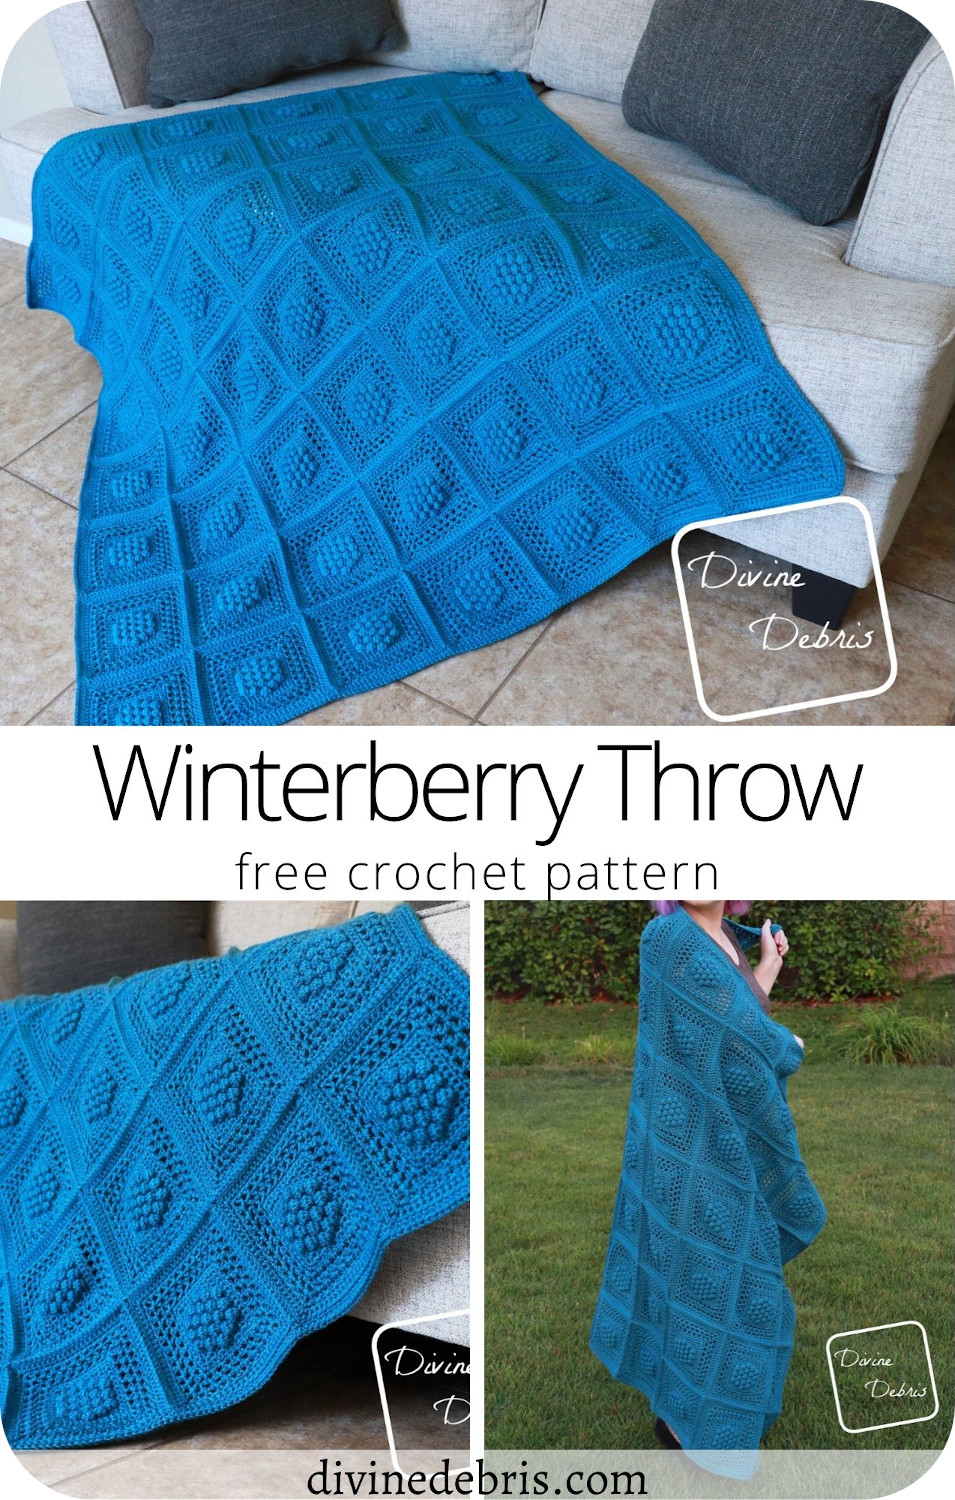
It might still be over 90 degrees outside, but this month I’m ready for all kinds of Fall wonder. I mean, I released 2 sweaters (the Stephanie Sweater and the Evelyn Crop Top Sweater) and now here’s a new and cozy throw blanket. Say hello to the Winterberry Throw crochet pattern – my new favorite blanket!
If you’ve been following me on Instagram or Facebook lately, you’ve definitely seen me working on this design. I posted more than once about it, of the woes of making 49 squares or seaming the blanket. Don’t get me wrong, I’m glad it’s done but wow, blankets are huge projects ya know? If you’ve ever received a blanket from someone, it’s a labor of love and beyond kind.
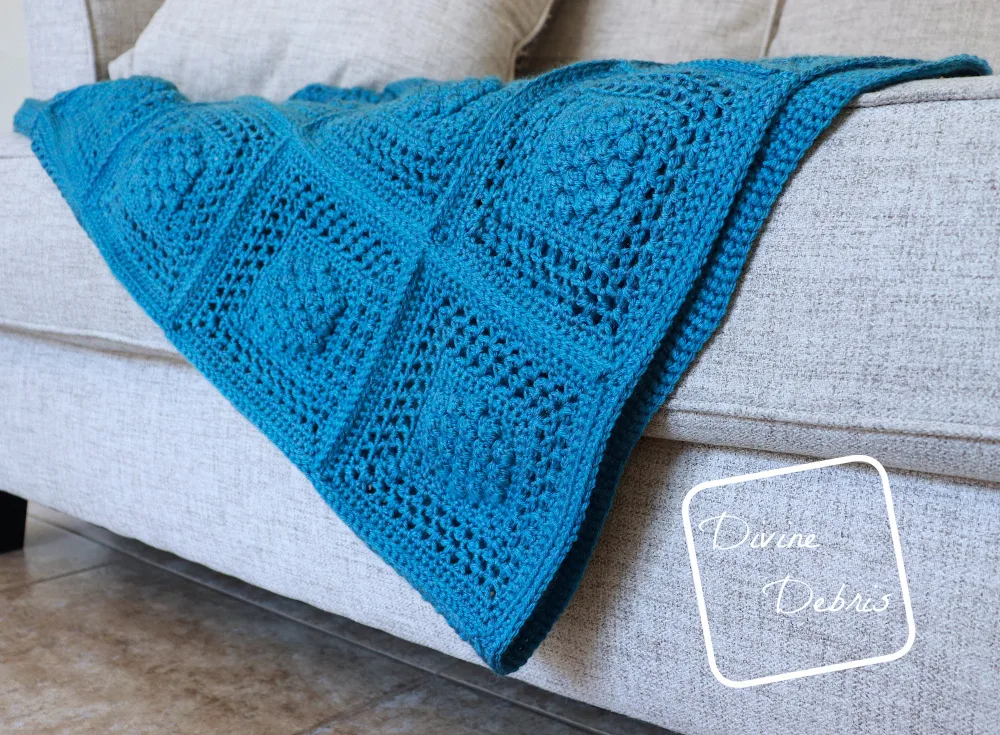
But, yeah, you’re not like me so you probably don’t need to get this blanket done in less than a month so it’ll be easier and funner for you, probably. I personally do like blankets of squares because then you can pick them up and put them away as you need, it’s a good “in between projects WIP,” which I know I always have a few of.
Anyway, I do hope you like the Winterberry Throw crochet pattern here and give it a try. If you do, make sure to tag me in photos on Instagram!
Please note: I was provided the yarn for this pattern by Lion Brand Yarn for the purposes of making this design, without compensation. I wasn’t provided the yarn with the expectations of positive or negative reviews but I did enjoy using this yarn, I’ve used it many times and it’s always a great worsted acrylic yarn.


(this post contains affiliate links)


If you appreciate my weekly patterns I hope you’d consider purchasing an ad-free pdf of this pattern in my Ravelry shop and Lovecrafts shop.
Thank you Carrie and Stephanie for becoming my newest patrons on Patreon!


Level
Easy
Materials
- US H (5.00 mm) crochet hook
- Size #4/ light worsted/ sport weight yarn
- Per square – .7 – 1 oz/ 56 – 80 yds
- Total – 45 oz / 2405 yds
- I used Lion Brand Yarn Basic Stitch Anti-Pilling in Turquoise Heather
- Notions: scissors, measuring tape, yarn needle
Gauge
- 15 sc x 18 rows = 4” (blocked)
Terms/ Stitches used
- RS: right side
- Rnd: round
- Ch: chain
- St: stitch
- Join
- BLO: back loop only
- Sc: single crochet
- HBhdc: herringbone half double crochet (explained below)
- DCBbl: double crochet bobble stitch (explained below)
- Msc: modified single crochet (explained below)
Notes
- HBhdc (herringbone half double crochet): yarn over, insert your hook into the st, yarn over, pull up a loop and draw through the first loop on your hook, yarn over, draw through both loops on your hook.
- DCBbl (double crochet bobble stitch): *yarn over, insert your hook into the specified st, pull up a loop, yarn over, pull through 2 loops,* repeat from * to * 3 more times, yarn over, pull through all 5 loops on your hook.
- Msc (modified sc): insert your hook into the BLO of the ch-1 at the corner of the square you’re currently working and insert your hook into the BLO of the ch-1 at the corner of the next square, yarn over, pull up a loop, yarn over, pull through the 2 loops on your hook. This will only be used on the Border section and it’s to eliminate any gaps that might happen where the squares meet the border.
- This pattern is worked in first as individual squares, which are then seamed up, and then a border is added.
- The square worked in 2 sections – the first section is rows 1 – 11, which is worked back and forth in rows. The second section is rnds 12 – 19, which are worked in the round with a join at the end of the rnd with a slip st.
- The ch 1 at the beginning of the rows/rnds does not count as a stitch.
- There is a turn after each rnd/row.
- Blocking is suggested for this square.
- The sample in the photos is made with Lion Brand Basic Stitch in Turquoise Heather.
Approx finished product dimensions (measurements may vary by gauge and yarn used)
| Square | Blanket (as written) |
| Size: 7″ x 7″ Yarn: .7 – 1 oz/ 56 – 80 yds | Size: 50″ x 50″ Yarn: 45 oz / 2405 yds |

Winterberry Throw crochet pattern instructions
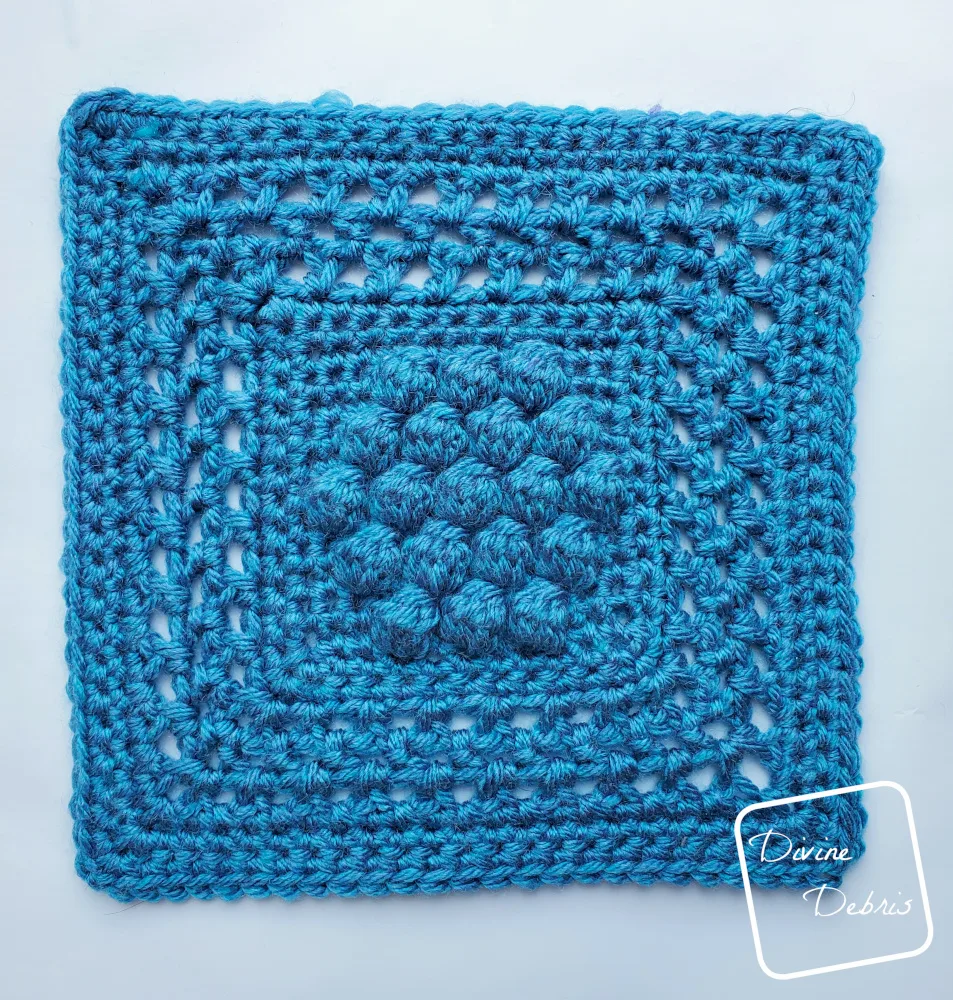
Winterberry Square instructions
(RS) Row 1: Ch 12, sc into the second ch from the hook and the next 10 sts — 11 sc
Row 2: Ch 1, turn, sc into the first 3 sts, DCBbl into the next st, *sc into the next st, DCBbl into the next st,* repeat from * to * once more, sc into the last 3 sts — 8 sc, 3 DCBbl spaces
Row 3: Ch 1, turn, sc into the next 11 sts — 11 sc
Row 4: Ch 1, turn, sc into the first 2 sts, DCBbl into the next st, *sc into the next st, DCBbl into the next st,* repeat from * to * twice more, sc into the last 2 sts — 7 sc, 4 DCBbl spaces
Row 5: Ch 1, turn, sc into the next 11 sts — 11 sc
Row 6: Ch 1, turn, sc into the first st, DCBbl into the next st, *sc into the next st, DCBbl into the next st,* repeat from * to * 3 more times, sc into the last st — 6 sc, 5 DCBbl spaces
Row 7: Ch 1, turn, sc into the next 11 sts — 11 sc
Row 8: Ch 1, turn, sc into the first 2 sts, DCBbl into the next st, *sc into the next st, DCBbl into the next st,* repeat from * to * twice more, sc into the last 2 sts — 7 sc, 4 DCBbl spaces
Row 9: Ch 1, turn, sc into the next 11 sts — 11 sc
Row 10: Ch 1, turn, sc into the first 3 sts, DCBbl into the next st, *sc into the next st, DCBbl into the next st,* repeat from * to * once more, sc into the last 3 sts — 8 sc, 3 DCBbl spaces
Row 11: Ch 1, turn, sc into the next 11 sts — 11 sc
Do not fasten off.
Rnd 12: Ch 1, turn, sc into the next 11 sts, ch 2 at the corner, rotate your piece, sc into the next 11 row ends, ch 2 at the corner, rotate your piece, sc into the next 11 sts (this is the other side of the original ch row), ch 2 at the corner, rotate your piece, sc into the next 11 row ends, ch 2, join — 44 sc, 4 ch-2 spaces
Rnd 13: Ch 1, turn, slip st into the ch-2 space, ch 1, sc into the ch-2 space, *sc into the next 11 sts, (sc, ch 2, sc) into the next ch-2 space,* repeat from * to * twice more, sc into the next 11 sts, sc into the next ch-2 space, ch 2, join — 52 sc, 4 ch-4 spaces
Rnd 14: Ch 1, turn, slip st into the ch-2 space, ch 1, HBhdc into the ch-2 space, [ch 1, skip the next st, *HBhdc into the next st, ch 1, skip the next st,* repeat from * to * 5 more times, (HBhdc, ch 2, HBhdc) into the next ch-2 space,] repeat from [ to ] twice more, *HBhdc into the next st, ch 1, skip the next st,* repeat from * to * 5 more times, HBhdc into the next ch-2 space, ch 2, join — 32 HBhdc, 28 ch-1 spaces, 4 ch-4 spaces
Rnd 15: Ch 1, turn, slip st into the ch-2 space, ch 1, HBhdc into the ch-2 space, [ch 1, skip the next st, *HBhdc into the next ch-1 space, ch 1, skip the next st,* repeat from * to * 6 more times, (HBhdc, ch 2, HBhdc) into the next ch-2 space,] repeat from [ to ] twice more, *HBhdc into the next ch-1 space, ch 1, skip the next st,* repeat from * to * 6 more times, HBhdc into the next ch-2 space, ch 2, join — 36 HBhdc, 22 ch-1 spaces, 4 ch-4 spaces
Rnd 16: Ch 1, turn, slip st into the ch-2 space, ch 1, HBhdc into the ch-2 space, [ch 1, skip the next st, *HBhdc into the next ch-1 space, ch 1, skip the next st,* repeat from * to * 7 more times, (HBhdc, ch 2, HBhdc) into the next ch-2 space,] repeat from [ to ] twice more, *HBhdc into the next ch-1 space, ch 1, skip the next st,* repeat from * to * 7 more times, HBhdc into the next ch-2 space, ch 2, join — 40 HBhdc, 36 ch-1 spaces, 4 ch-4 spaces
Rnd 17: Ch 1, turn, slip st into the ch-2 space, ch 1, sc into the ch-2 space, *sc into the next 19 sts (this counts HBhdc, ch-1 spaces here and throughout this rnd), (sc, ch 2, sc) into the next ch-2,* repeat from * to * twice more, sc into the next 19 sts, sc into the ch-2 spaces, ch 2, join — 84 sc, 4 ch-2 spaces
Rnd 18: Ch 1, turn, slip st into the ch-2 space, ch 1, sc into the ch-2 space, *sc into the next 21 sts, (sc, ch 2, sc) into the next ch-2 space,* repeat from * to * twice more, sc into the next 21 sts, sc into the next ch-2 space, ch 2, join — 92 sc, 4 ch-4 spaces
Rnd 19: Ch 1, turn, slip st into the ch-2 space, ch 1, sc into the ch-2 space, *sc into the next 23 sts, (sc, ch 1, sc) into the next ch-2 space,* repeat from * to * twice more, sc into the next 23 sts, sc into the next ch-2 space, ch 1, join — 100 sc, 4 ch-4 spaces
Fasten off, weave in your ends. Block your square so it measures 7” x 7”.

Seaming
Click here to check out a photo tutorial of how to seam this blanket.
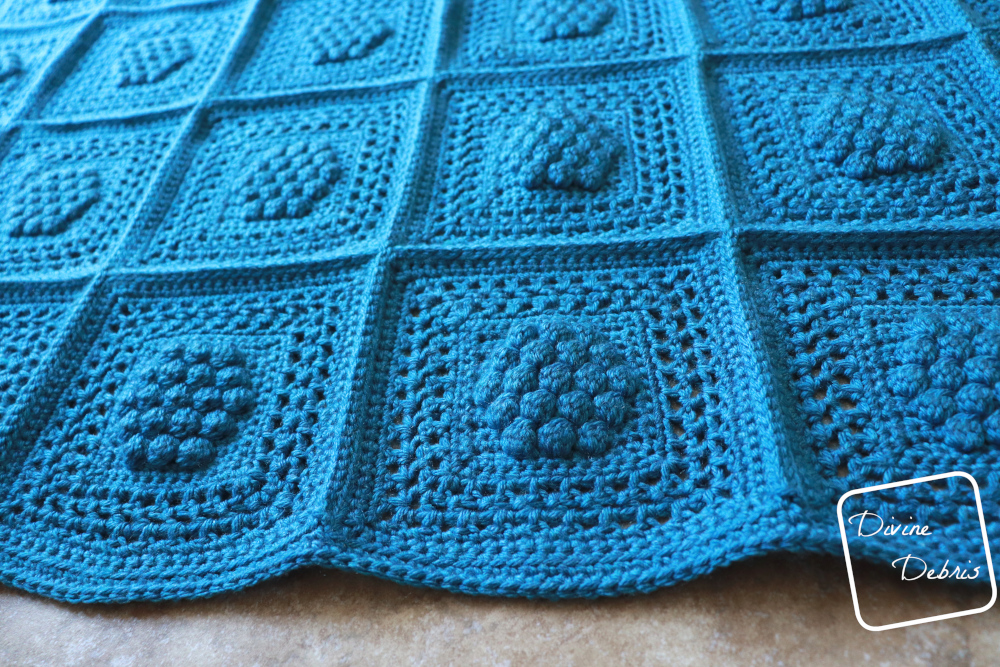
Once you’ve finished 49 squares, arrange the blanket in 7 rows by 7 squares. Begin on the first 2 rows, working from right to left, hold 2 squares together so that their right sides (RS) are facing up. Skip the ch-1 at the corner, slip st into the BLO of the next 25 stitches of rnd 19, *skip the ch-1s at the corners, ch 1 between sets of squares, skip the ch-1s at the corners, hold together the next 2 squares and slip st across the BLO of the next 25 sts, * repeat from * to * until all 7 sets of squares are seamed. Repeat this seaming for the remaining rows of squares.
Repeat the process of going the other direction (top to bottom) while making a ch-1 around the previous ch-1s between the sets of squares.
Blanket Border
Note:
For this section you will need to do a modified sc (abbreviated as msc below) to single crochet together the ch-1 spaces at the corners of the squares (this will help eliminate gaps at the your border): insert your hook into the BLO of the ch-1 at the corner of the square you’re currently working and insert your hook into the BLO of the ch-1 at the corner of the next square, yarn over, pull up a loop, yarn over, pull through the 2 loops on your hook.
This border is just a sc around, with ch-2s at the corner. Feel free to adjust this as you’d like.
Rnd 1: Create a slipknot on your hook (this will make your first st a standing sc) and start in the top right-hand corner, sc into the next 25 sts of the first square, *msc the ch-1s, sc into the 25 sts of the next square,* repeat from * to * 5 more times, ch 2 at the corner and rotate your blanket, sc into the next 25 sts, *msc the ch-1s, sc into the 25 sts of the next square,* repeat from * to * 5 more times, ch 2 at the corner and rotate your blanket, sc into the next 25 sts, *msc the ch-1s, sc into the 25 sts of the next square,* repeat from * to * 5 more times, ch 2 at the corner and rotate your blanket, sc into the next 25 sts, *msc the ch-1s, sc into the 25 sts of the next square,* repeat from * to * 5 more times, ch 2 at the corner and rotate your blanket, slip st into the first st — 700 sc, 24 msc, 4 ch-2 spaces
Fasten off, weave in your ends.
Rnd 2: Ch 1, *sc into the next 181 sts, (sc, ch 2, sc) into the next ch-2 space,* repeat from * to * 3 more times, slip st into the first st – 732 sc, 4 ch-4 spaces
Fasten off, weave in your ends. Block (if necessary) to reach the 50” x 50” size.
I hope you like this new blanket design! It’s very easy, I swear. And I love how it turned out 🙂
Denise
Wednesday 20th of October 2021
Really like the look of this blanket. I have a box of hew red yarn waiting for the right pattern. This might be it. Thank you, Denise
Divine Debris
Monday 25th of October 2021
I'm so glad you like it!
debbie goodwin
Wednesday 26th of August 2020
this is a lovely blanket and I want to do now but have to wait till hook empty but thanks for a wonderful pattern, I think I might go for mustard and raspberry colours xx