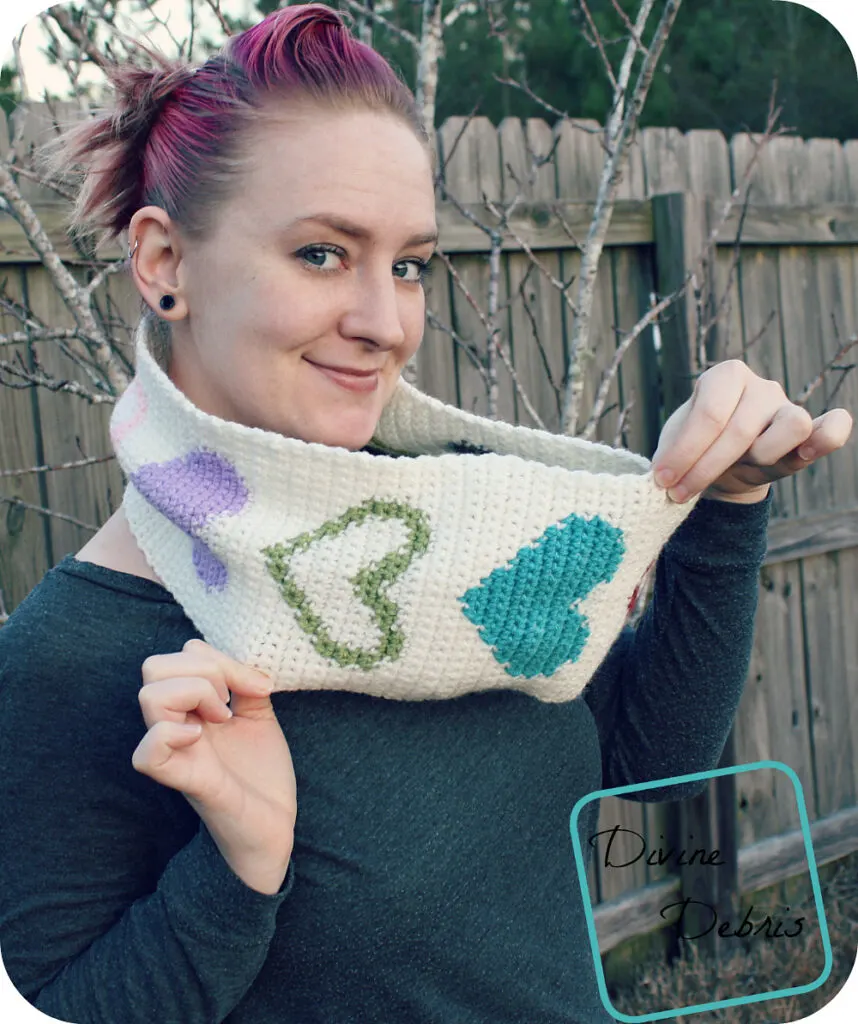
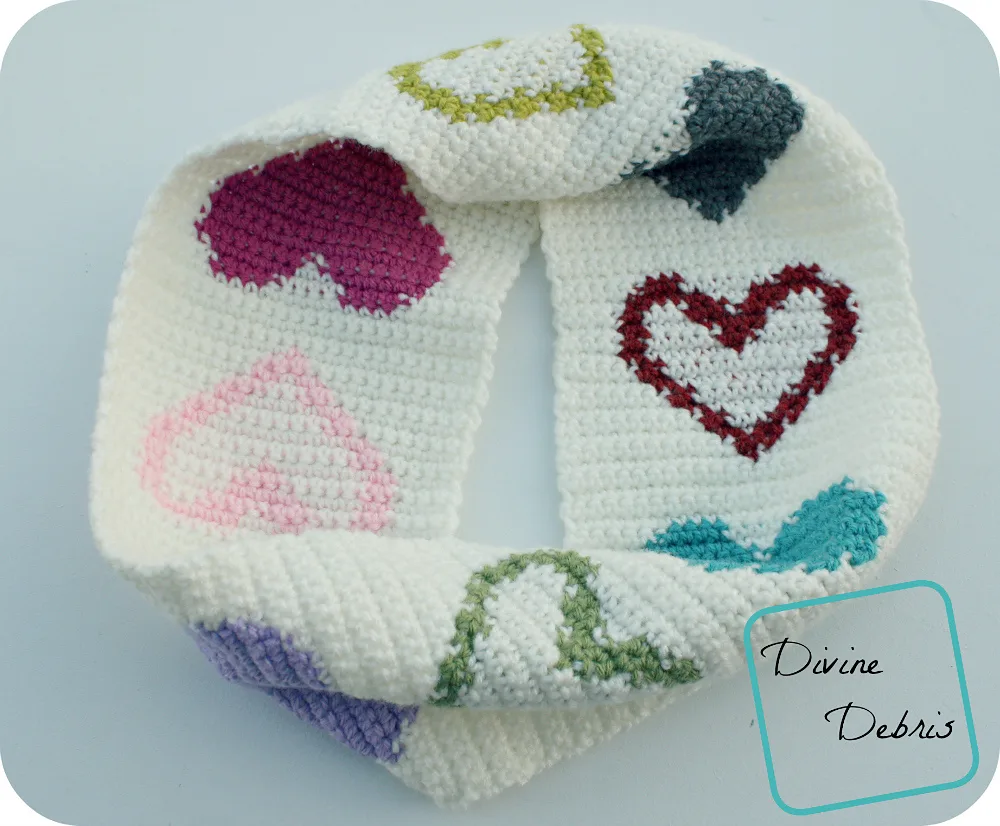
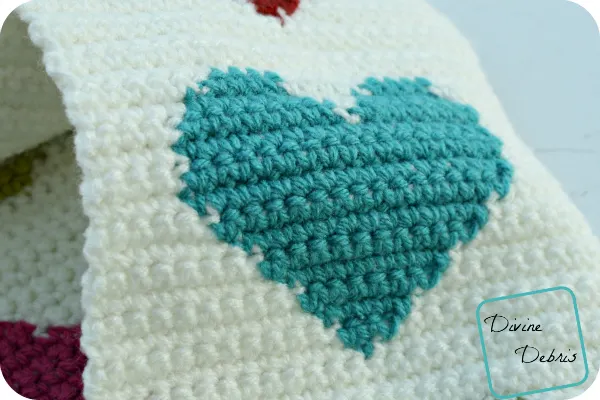
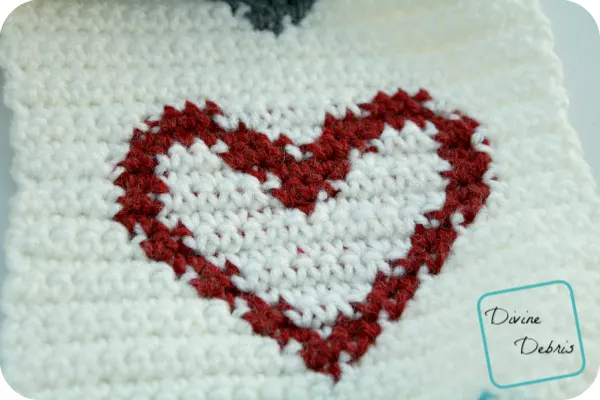
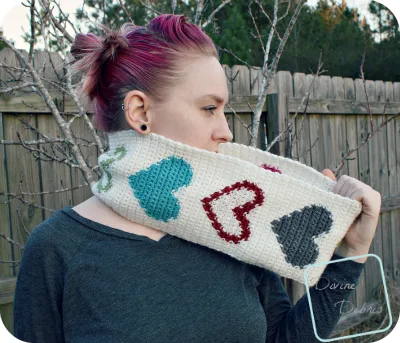
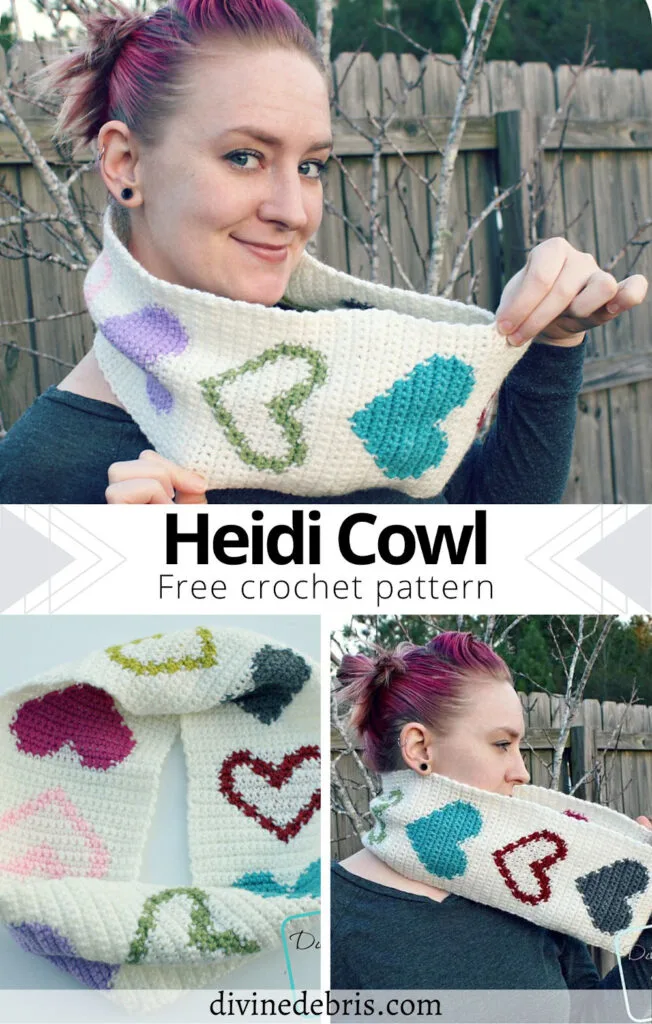
Hey, look! It’s already February. Of course you know it’s February, it just sometimes makes me stop and be surprised that time seems to just go by so fast. Here I am, again, with a fun Valentine’s Day pattern for you. I’ve been playing around with graphs and such, to make pictures and what not in crochet, and I’m really enjoying it. This week I wanted something a little more challenging to post on the blog, but it’s really quick to work up when you get the hang of things and it is really lovely when worn. Introducing, my Heidi Cowl. The notes section has some info on how to make the scarf larger or smaller, even turning it into a more traditional scarf too. It’s all about your imagination and what you want to do. That’s why I went with only a couple pink/ red hearts, because Valentine’s Day isn’t all about pink and red for me, it’s also blues and greens and grays. It’s the whole rainbow. Actually, if I was thinking I would have made this whole scarf in a rainbow of hearts. Wow, that would have been gorgeous. Well, next time, I guess. I hope you love this pattern! Because it’s hearts. 😀
Materials:
- US (5.00) mm crochet hook
- Worsted weight/ size #4 yarn
- I used a combination of Red Heart Super Saver and Bernat Super Value
- 4 oz/ 209 yards
- Yarn needle

Gauge:
- 4.5” x 4.5” = 16 dcs x 8 rows
Terms/ stitches used:
- Ch: chain
- St: stitch
- Sc: single crochet
Notes:
- This scarf is worked in rows, back and forth, with a turn at the beginning or end of the row.
- The ch 1 at the beginning of the rows does not count as a stitch.
- These instructions are written with only 2 colors; color A is the cream and color B is any other color (in the photos).
- If you would like to make the individual rows wider, just adjust your ch row by multiples of 25 and repeat the instructions twice or more for how many hearts you want to make.
- To make the cowl longer, just repeat rows 2 – 38 as many times as you would like.
- This cowl also works well as a traditional scarf, maybe with some fringe on the ends (!). Just work it flat and don’t secure the ends together. If you want all the hearts facing the correct direction (point on the bottom) create two pieces of your desired repeats of rows 2 – 38 (so they’re the same length) and then seam the final rows together. The seam can sit behind your head and you’ll have a lovely, heart scarf.
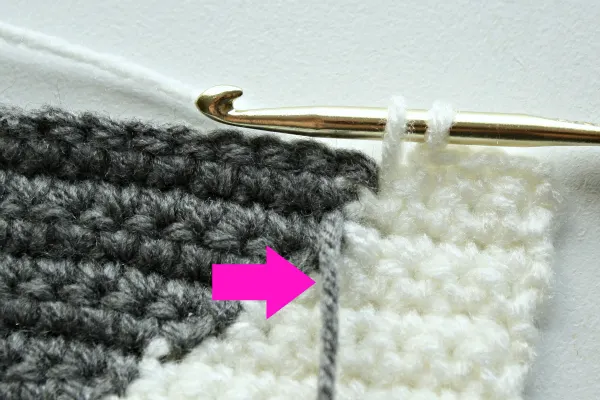
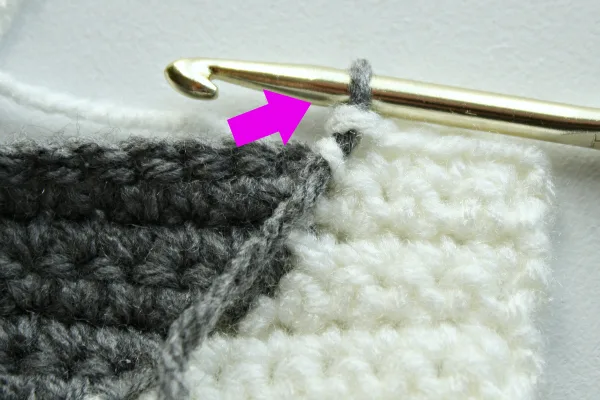
- In this pattern the yarn is carried. This is a great tutorial on how to work over yarn. When you’re working the hearts, the cream color yarn is carried under the color yarn and then dropped when you’re not working it. Do not carry color B when you’re working the outside of the hearts, just the middle of the heart when it’s the heart that has the open middle.
Heidi Hearts Cowl Finished measurements:
- Diameter: 16.75″
- Width: 6″
Below are photos showing that you just drop the color B yarn when it’s not active and pick it back up when you need it.
Heidi Hearts Cowl Crochet Pattern Instructions
Row 1: Color A: Ch 26, sc into the second ch from the hook and into the next 24 sts – 25 scs
Row 2: Color A: Ch 1, turn, sc into the next 12 sts, Color B: sc into the next st, Color A: sc into the next 12 sts – 25 scs
Row 3: Color A: Ch 1, turn, sc into the next 11 sts, Color B: sc into the next 3 sts, Color A: sc into the next 11 sts – 25 scs
Row 4: Color A: Ch 1, turn, sc into the next 10 sts, Color B: sc into the next 5 sts, Color A: sc into the next 10 sts – 25 scs
Row 5: Color A: Ch 1, turn, sc into the next 9 sts, Color B: sc into the next 7 sts, Color A: sc into the next 9 sts – 25 scs
Row 6: Color A: Ch 1, turn, sc into the next 8 sts, Color B: sc into the next 9 sts, Color A: sc into the next 8 sts – 25 scs
Row 7: Color A: Ch 1, turn, sc into the next 7 sts, Color B: sc into the next 11 sts, Color A: sc into the next 7 sts – 25 scs
Row 8: Color A: Ch 1, turn, sc into the next 6 sts, Color B: sc into the next 13 sts, Color A: sc into the next 6 sts – 25 scs
Row 9: Color A: Ch 1, turn, sc into the next 5 sts, Color B: sc into the next 15 sts, Color A: sc into the next 5 sts – 25 scs
Rows 10 – 12: Color A: Ch 1, turn, sc into the next 4 sts, Color B: sc into the next 17 sts, Color A: sc into the next 4 sts – 25 scs
Row 13: Color A: Ch 1, turn, sc into the next 4 sts, Color B: sc into the next 8 sts, Color A: sc into the next st, Color B: sc into the next 8 sts, Color A: sc into the next 4 sts – 25 scs
Row 14: Color A: Ch 1, turn, sc into the next 5 sts, Color B: sc into the next 6 sts, Color A: sc into the next 3 sts, Color B: sc into the next 6 sts, Color A: sc into the next 5 sts – 25 scs
Row 15: Color A: Ch 1, turn, sc into the next 6 sts, Color B: sc into the next 4 sts, Color A: sc into the next 5 sts, Color B: sc into the next 4 sts, Color A: sc into the next 6 sts – 25 scs
Fasten off with color B.
Rows 16 – 19: Color A: Ch 1, turn, sc into the next 25 sts – 25 scs
Row 20: Color A: Ch 1, turn, sc into the next 12 sts, Color B: sc into the next st, Color A: sc into the next 12 sts – 25 scs
Row 21: Color A: Ch 1, turn, sc into the next 11 sts, Color B: sc into the next 3 sts, Color A: sc into the next 11 sts – 25 scs
Row 22: Color A: Ch 1, turn, sc into the next 10 sts, Color B: sc into the next 2 sts, Color A: sc into the next st, Color B: sc into the next 2 sts, Color A: sc into the next 10 sts – 25 scs
Row 23: Color A: Ch 1, turn, sc into the next 9 sts, Color B: sc into the next 2 sts, Color A: sc into the next 3 sts, Color B: sc into the next 2 sts, Color A: sc into the next 9 sts – 25 scs
Row 24: Color A: Ch 1, turn, sc into the next 8 sts, Color B: sc into the next 2 sts, Color A: sc into the next 5 sts, Color B: sc into the next 2 sts, Color A: sc into the next 8 sts – 25 scs
Row 25: Color A: Ch 1, turn, sc into the next 7 sts, Color B: sc into the next 2 sts, Color A: sc into the next 7 sts, Color B: sc into the next 2 sts, Color A: sc into the next 7 sts – 25 scs
Row 26: Color A: Ch 1, turn, sc into the next 6 sts, Color B: sc into the next 2 sts, Color A: sc into the next 9 sts, Color B: sc into the next 2 sts, Color A: sc into the next 6 sts – 25 scs
Row 27: Color A: Ch 1, turn, sc into the next 5 sts, Color B: sc into the next 2 sts, Color A: sc into the next 11 sts, Color B: sc into the next 2 sts, Color A: sc into the next 5 sts – 25 scs
Row 28: Color A: Ch 1, turn, sc into the next 4 sts, Color B: sc into the next 2 sts, Color A: sc into the next 6 sts, Color B: sc into the next st, Color A: sc into the next 6 sts, Color B: sc into the next 2 sts, Color A: sc into the next 4 sts – 25 scs
Row 29: Color A: Ch 1, turn, sc into the next 4 sts, Color B: sc into the next 2 sts, Color A: sc into the next 5 sts, Color B: sc into the next 3 sts, Color A: sc into the next 5 sts, Color B: sc into the next 2 sts, Color A: sc into the next 4 sts – 25 scs
Row 30: Color A: Ch 1, turn, sc into the next 4 sts, Color B: sc into the next 2 sts, Color A: sc into the next 4 sts, Color B: sc into the next 5 sts, Color A: sc into the next 4 sts, Color B: sc into the next 2 sts, Color A: sc into the next 4 sts – 25 scs
Row 31: Color A: Ch 1, turn, sc into the next 4 sts, Color B: sc into the next 2 sts, Color A: sc into the next 3 sts, Color B: sc into the next 3 sts, Color A: sc into the next st, Color B: sc into the next 3 sts, Color A: sc into the next 3 sts, Color B: sc into the next 2 sts, Color A: sc into the next 4 sts – 25 scs
Row 32: Color A: Ch 1, turn, sc into the next 5 sts, Color B: sc into the next 6 sts, Color A: sc into the next 3 sts, Color B: sc into the next 6 sts, Color A: sc into the next 5 sts – 25 scs
Row 33: Color A: Ch 1, turn, sc into the next 6 sts, Color B: sc into the next 4 sts, Color A: sc into the next 5 sts, Color B: sc into the next 4 sts, Color A: sc into the next 6 sts – 25 scs
Fasten off with color B.
Rows 34 – 37: Color A: Ch 1, turn, sc into the next 25 sts – 25 scs
Rows 38 – 111: repeat rows 2 – 38 twice
Rows 112 – 147: repeat rows 2 – 37
Fasten off following row 147 (if you’re happy with the length) but be sure to leave a tail at least 4″ longer than one row. Using your favorite method of joining, secure row 147 to the other side of row 1.
Tada! I’m LOVING graphs right now and I’m having a bit of a moment for them. I’ve also released my first paid scarf with graphs, the Sally Cowl. Enter to win a copy of the new Sally Cowl here. I based it on a cardigan I bought fall 2014, super cozy and skull themed. I love it and have received numerous compliments, so I set about creating a similar cowl. I hope you like it! It’s now on sale for $1.99 and comes in 2 sizes (diameter of 13.25″ and 16.5″) with instructions on how to make it larger/ smaller.
Ooh! Another great thing that happened to me this week was when I opened up Twitter to see MY design, which had been recently published on Red Heart Yarns’ website! Last year I sent a couple of photos to Red Heart to see if they’d be interested in the patterns and they were! Now they’re on the website, with my name and everything. It’s so cool. It’s almost like I’m famous. Almost. They are the Butler’s Bottle Hugger (the Ravelry link for saving for later) and the Dottie Bottle Cozy (the Ravelry link for saving for later). So, needless to say this week so far has been busy and awesome for me. I wouldn’t have it any other way! 😀
Next week the blog post will be on Monday, not Tuesday, because I’m taking part in the HodgePodge Crochet Sampler Afghan CAL. I’m super excited about it and can’t wait for you to see my design!
This pattern is linked to Linky Ladies’ Community Link Party #37 and Hookin’ on Hump Day #112.


Jane
Thursday 5th of May 2016
Beautiful. Thank you for sharing the pattern.
Divine Debris
Thursday 5th of May 2016
Thank you! I'm glad you like it. :)
Mary W
Thursday 28th of April 2016
Did I miss it ? Can’t find Row 23. Love the pattern. TY much. - Mary W
Divine Debris
Thursday 28th of April 2016
Nope, you didn't, apparently I did. I don't know how that happened, just miss numbered. It won't affect the pattern. I fixed it though. Thank you for letting me know. :D
Joann
Friday 12th of February 2016
Thank you for sharing this beautiful pattern and for your clear instructions.
Kristina & Millie
Tuesday 9th of February 2016
totally cute and I would wear it year round for sure :) Thanks for sharing the pattern with us!
Linky Ladies ~ Community Link Party #38 | Crystalized Designs Blog
Tuesday 9th of February 2016
[…] Heart Bunting by Crochet Memories 2. C2C Heart Washcloth by Crochet Zone 3. Heidi Cowl by Divine Debris 4. Heart Boot Cuffs by Allie Cats Hats & Crafts 5. Monster Hat by […]