
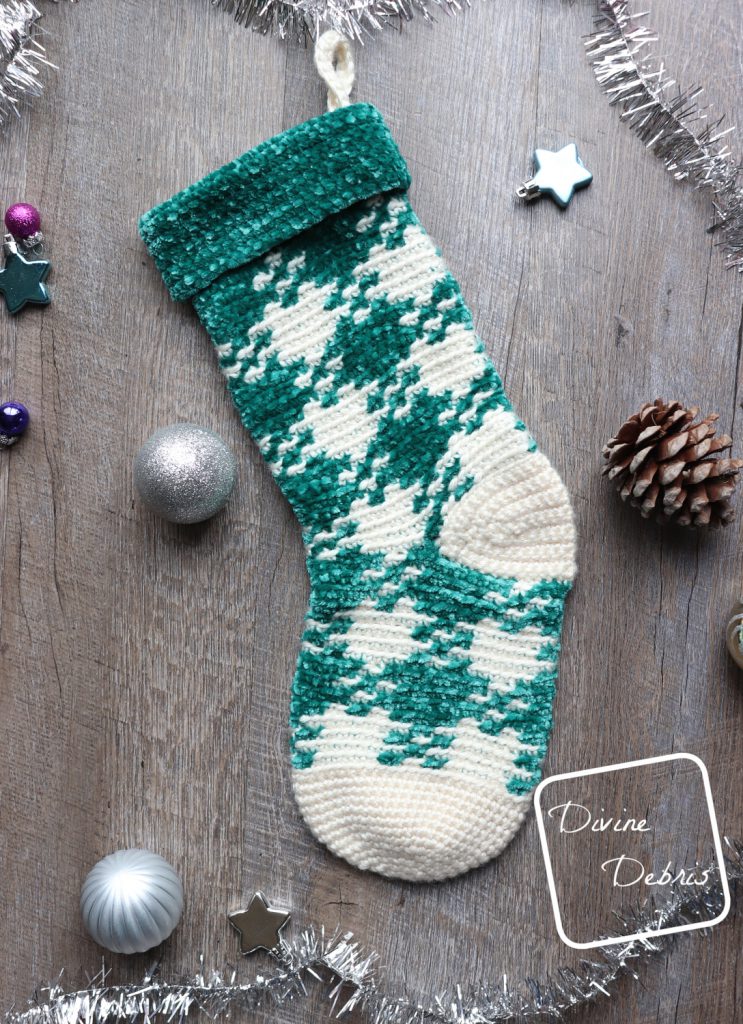

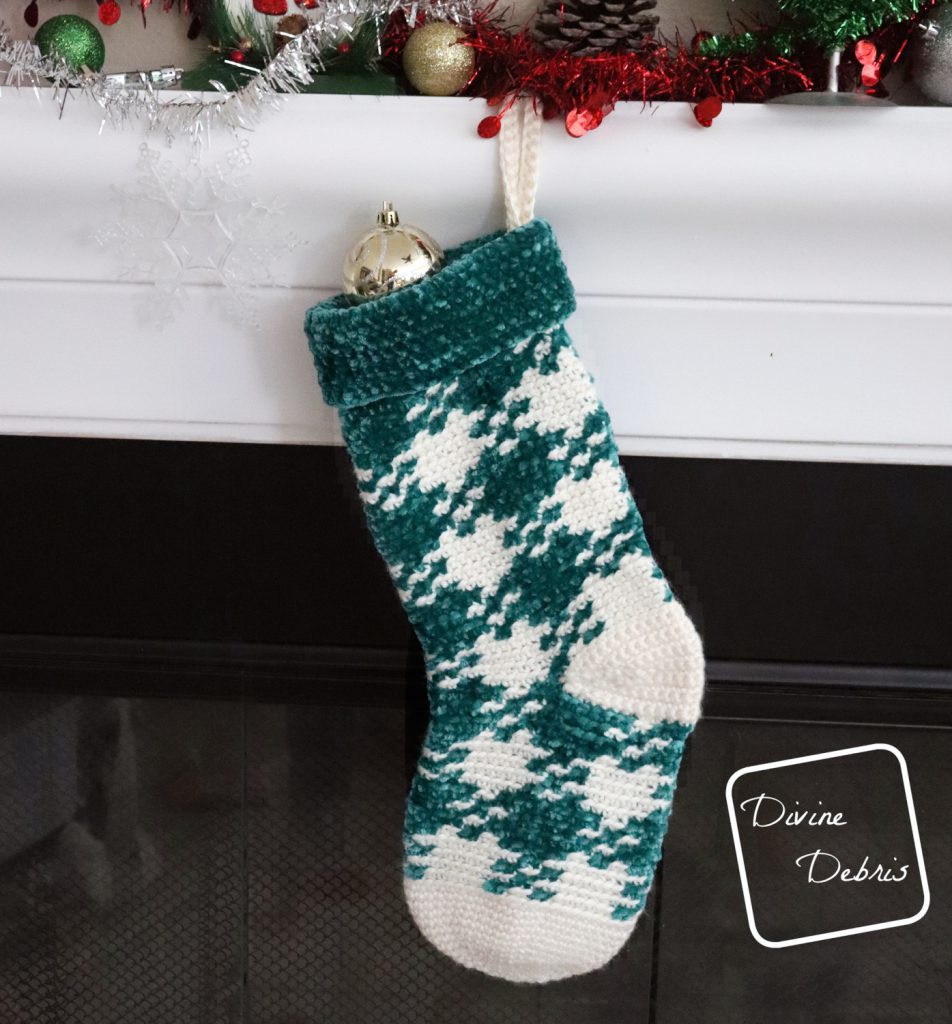
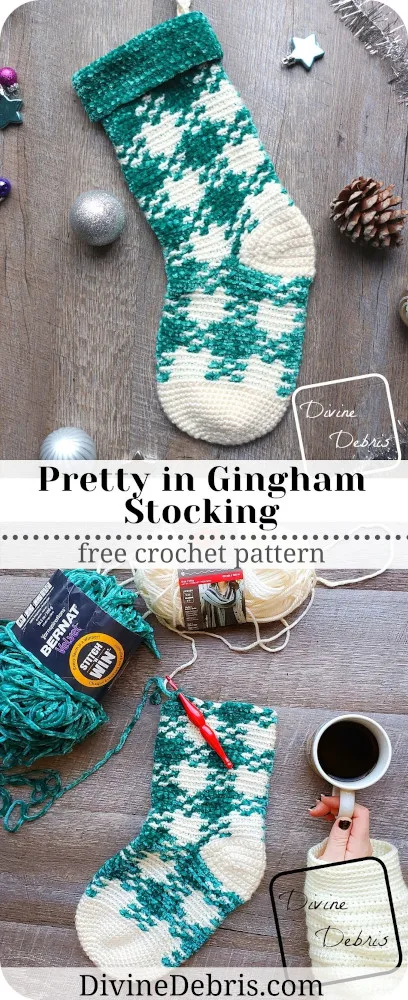
Happy December friends! Isn’t it wild that it’s already December? To celebrate the last month of the year, here’s a new design in my Pretty in Gingham line, the Pretty in Gingham Stocking crochet pattern.
Back in October I made a pumpkin. I had the idea for the pumpkin to be made in my Pretty in Gingham line but I wanted to use bulky yarn and some of the soft, soft Bernat Velvet. Needless to say, I fell in love and decided to make more designs in the line.
Last month I released the Pretty in Gingham Gift Bag, while working on this design. In my head they’re kind of like a duo, two patterns that fit super well together you could give them as a gift. I love them both so much and I really hope you do too. And you can easily make this in different weighted yarns. Or maybe cream and a variegated color! I can totally see all the different color combinations you could make in this gingham that will totally look amazing. I cannot wait to see project photos.
Also, I wanted to go all out with my only Christmas design. I will have a snowflake design out next month but I’m not going as big on Winter designs as I usually do… it’s been a busy year for me. I bet it has for you too!
I hope the rest of your 2019 is fantastic!
This post is linked to Hookin’ on Hump Day #204
(this post may contain affiliate links)

If you appreciate my weekly patterns I hope you’d consider purchasing an ad-free pdf of this pattern in my Ravelry shop.
Thank you to all my patrons on Patreon!
Thank you to all my Patreon supporters.

Materials
- US H (5.00 mm) crochet hook
- Size #5 Bulky Weight yarn
- 2 colors
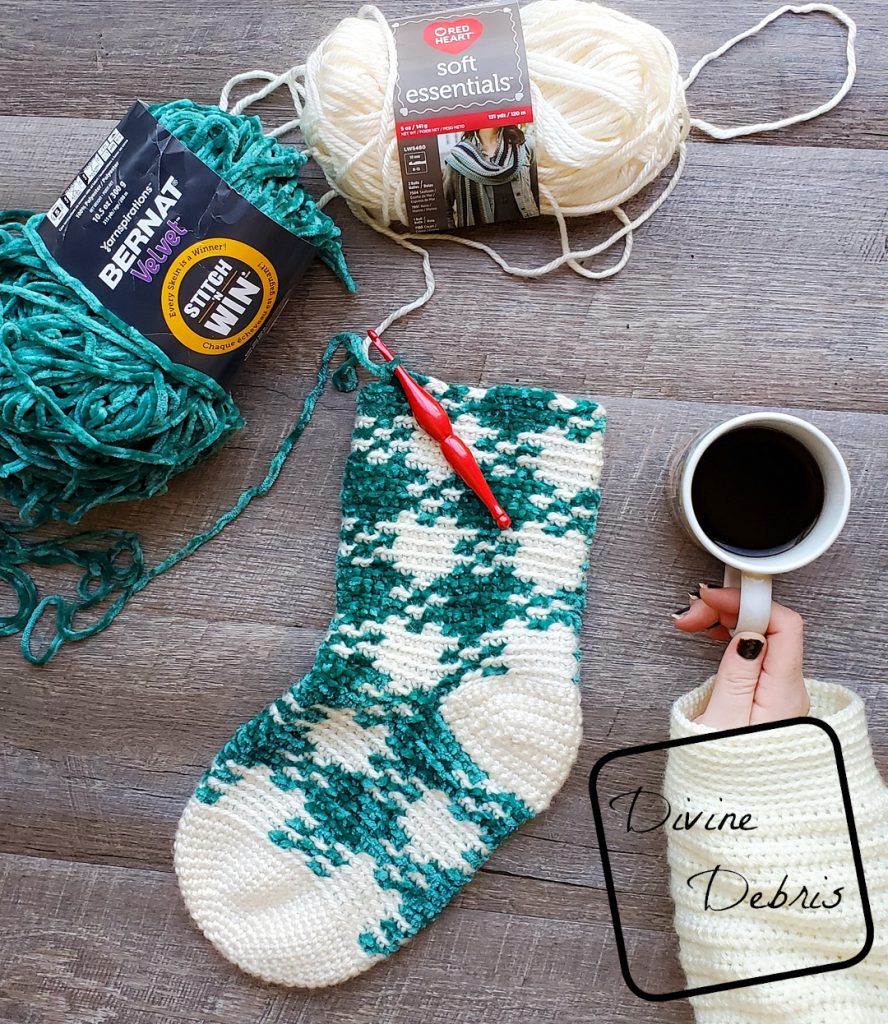
- I used Red Heart Essentials (3.3 oz/ 87 yds) and Bernat Velvet (4.9 oz/ 147 yds)
- Needle that will weave in your ends
- Notions: scissors, measuring tape
Gauge
- 17 sc x 13 rows BLO= 4”


Terms/ Stitches used
- Magic Circle
- RS: right side
- Rnd: round
- Join: join the round with a slip st
- Ch: chain
- St: stitch
- Slip st: slip stitch
- Sc: single crochet
- Sc2tog: sc 2 sts together
- BLO: back loop only
Notes
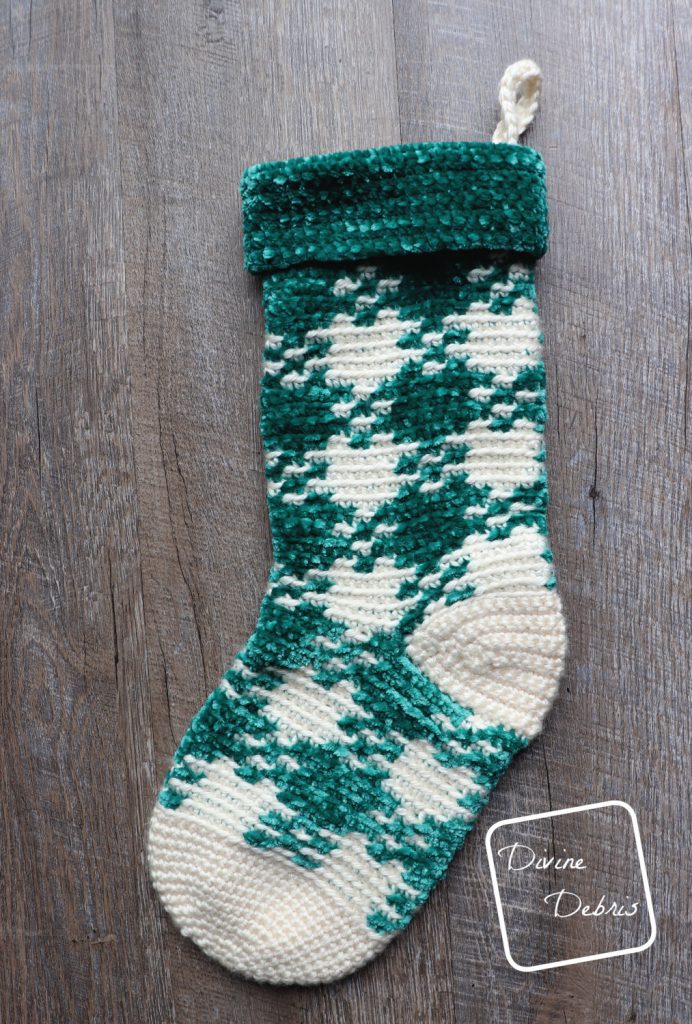
- This pattern is worked in one piece from the toe up. It will be worked in sections: Toe, Arch, Heel, Ankle, Cuff, and Loop. The Toe, Arch, Ankle, and Cuff are worked in the round with a slip st into the first st of the rnd. The Heel is worked back and forth in rows and then seamed.
- The ch 1 at the beginning of the row does not count as a stitch.
- Every stitch in Arch and the Ankle sections is a single crochet. The directions will only tell you what color (ie: Color A, Color B, etc…) and the number in the parentheses tells you how many scs to make.
- In the example, the inactive yarn is carried behind the active. If this is confusing, you might want to check out the helpful Moogly video on tapestry.
- Color A is cream (Red Heart Yarns Soft Essentials in Cream) 3.3 oz/ 87 yds and color B is teal (Bernat Velvet in Pagoda) 4.9 oz/ 147 yds.
Finished product dimensions (measurements may vary by gauge and yarn used)
1 size: 6” across x 18” high
Pattern instructions

Toe
Rnd 1: A: Create a magic circle, ch 1, sc 6 times into the circle, join – 6 sc
Rnd 2: Ch 1, sc twice into the same st as join, *sc twice into the next st,* repeat from * to * 4 more times, join – 12 sc
Rnd 3: Ch 1, sc twice into the same st as join, sc into the next st, *sc twice into the next st, sc into the next st,* repeat from * to * 4 more times, join – 18 sc
Rnd 4: Ch 1, sc twice into the same st as join, sc into the next 2 sts, *sc twice into the next st, sc into the next 2 sts,* repeat from * to * 4 more times, join – 24 sc
Rnd 5: Ch 1, sc twice into the same st as join, sc into the next 3 sts, *sc twice into the next st, sc into the next 3 sts,* repeat from * to * 4 more times, join – 30 sc
Rnd 6: Ch 1, sc twice into the same st as join, sc into the next 4 sts, *sc twice into the next st, sc into the next 3 sts,* repeat from * to * 4 more times, join – 36 sc
Rnd 7: Ch 1, sc twice into the same st as join, sc into the next 5 sts, *sc twice into the next st, sc into the next 5 sts,* repeat from * to * 4 more times, join – 42 sc
Rnd 8: Ch 1, sc twice into the same st as join, sc into the next 6 sts, *sc twice into the next st, sc into the next 6 sts,* repeat from * to * 4 more times, join – 48 sc
Rnds 9 – 14: Ch 1, sc into the same st as join and into the next 47 sts, join – 48 sc
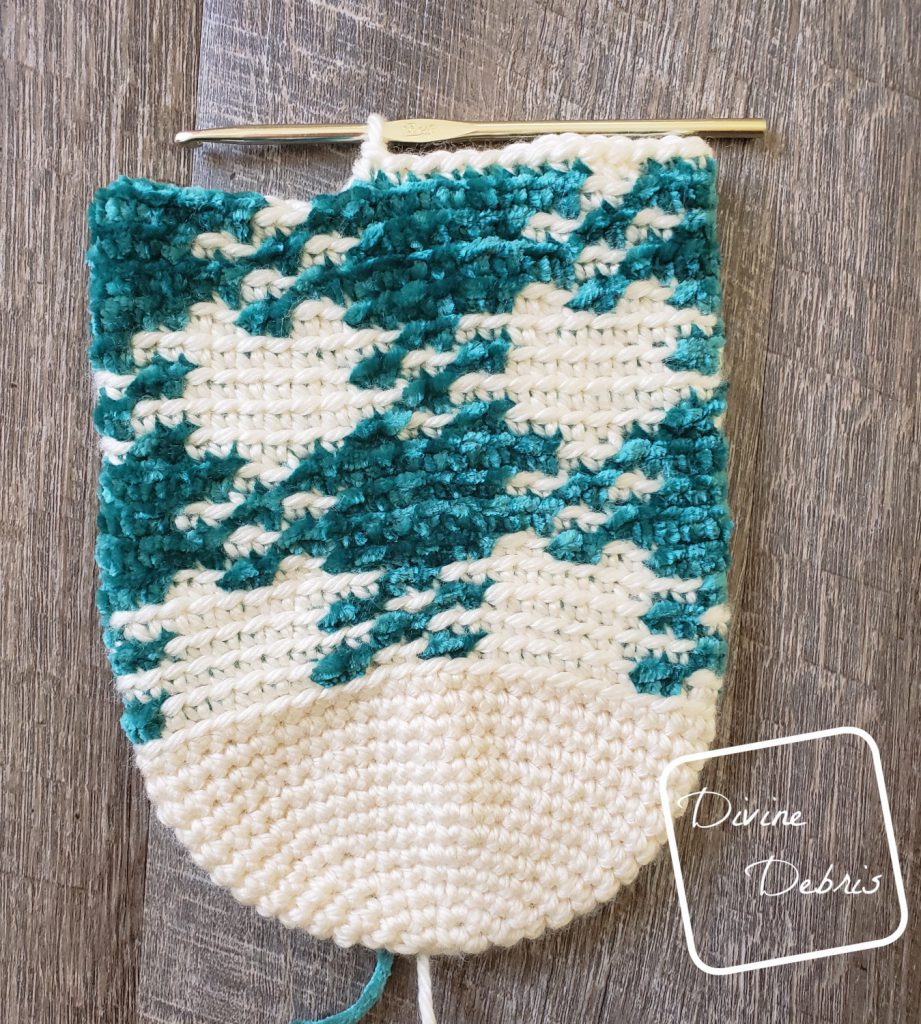
Arch
Note:
- The following directions will only tell you what color (ie: Color A, Color B, etc…) and the number in the parentheses tells you how many stitches to make.
- The rnds 15 – 30 are worked into the BLO. Slip st into both loops on the join to help keep your seam straight.The first st is always worked into the same st as the join.
Rnd 15: A: Ch 1, *(6), B: (2), A: (2), B: (2),* repeat from * to * 3 more times, join – 48 sc
Rnd 16: A: Ch 1, (8), B: (2), *A: (10), B: (2),* repeat from * to * twice more, A: (2), join – 48 sc
Rnds 17 – 18: repeat rnds 15 – 16, once.
Rnd 19: A: Ch 1, *(2), B: (2), A: (2), B: (6),* repeat from * to * 3 more times, join – 48 sc
Rnd 20: B: Ch 1, (2), A: (2),* B: (10), A: (2),* repeat from * to * twice more, B: (8), join – 48 sc
Rnds 21 – 22: repeat rnds 19 – 20, once.
Rnds 23 – 26: repeat rnds 15 – 20, once.
Rnds 27 – 30: repeat rnds 19 – 20, twice.
Do not fasten off. Color A will be used in the Heel and color B can be dropped temporarily.

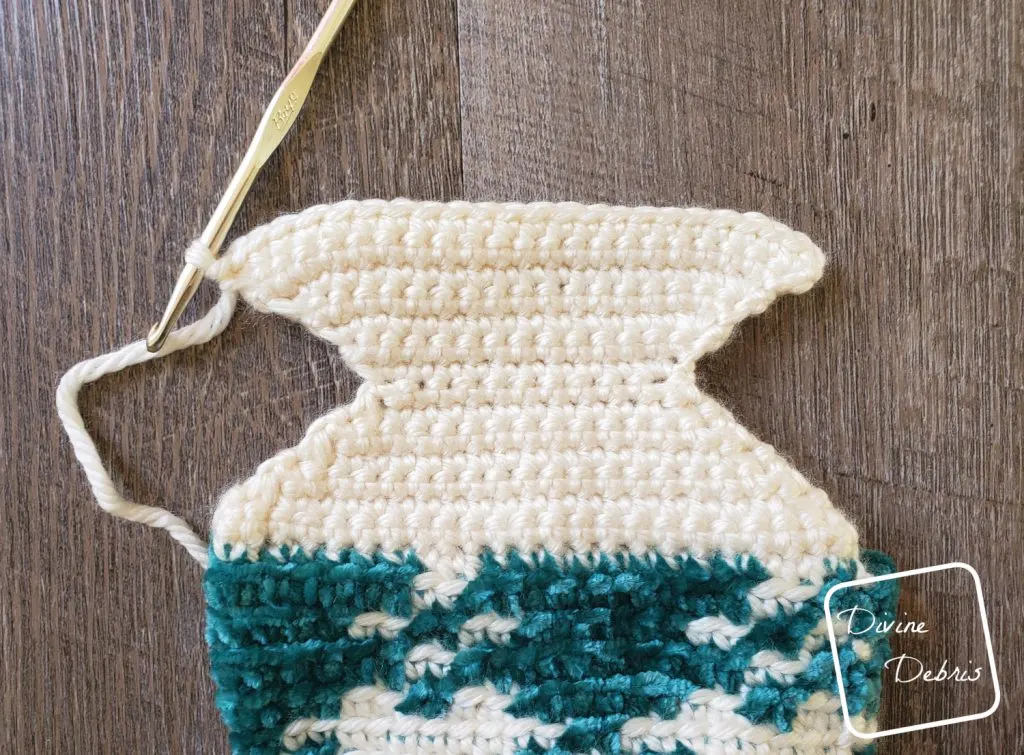
Heel
Note:
- The Heel has its own row count.
- This section is worked in piece and folded in half, with the row ends being secured to create the Heel.
Row 1: A: Ch 1, sc into the BLO of the next 24 sts – 24 sc
Row 2: Ch 1, turn, sc2tog the first 2 sts, sc into the next 20 sts, sc2tog the last 2 sts – 22 sc
Row 3: Ch 1, turn, sc2tog the first 2 sts, sc into the next 18 sts, sc2tog the last 2 sts – 20 sc
Row 4: Ch 1, turn, sc2tog the first 2 sts, sc into the next 16 sts, sc2tog the last 2 sts – 18 sc
Row 5: Ch 1, turn, sc2tog the first 2 sts, sc into the next 14 sts, sc2tog the last 2 sts – 16 sc
Row 6: Ch 1, turn, sc2tog the first 2 sts, sc into the next 12 sts, sc2tog the last 2 sts – 14 sc
Row 7: Ch 1, turn, sc2tog the first 2 sts, sc into the next 10 sts, sc2tog the last 2 sts – 12 sc
Row 8: Ch 1, turn, sc2tog the first 2 sts, sc into the next 8 sts, sc2tog the last 2 sts – 10 sc
Row 9: Ch 1, turn, sc twice into the first st, sc into the next 8 sts, sc twice into the last st – 12 sc
Row 10: Ch 1, turn, sc twice into the first st, sc into the next 10 sts, sc twice into the last st – 14 sc
Row 11: Ch 1, turn, sc twice into the first st, sc into the next 12 sts, sc twice into the last st – 16 sc
Row 12: Ch 1, turn, sc twice into the first st, sc into the next 14 sts, sc twice into the last st – 18 sc
Row 13: Ch 1, turn, sc twice into the first st, sc into the next 16 sts, sc twice into the last st – 20 sc
Row 14: Ch 1, turn, sc twice into the first st, sc into the next 18 sts, sc twice into the last st – 22 sc
Row 15: Ch 1, turn, sc twice into the first st, sc into the next 20 sts, sc twice into the last st – 24 sc
Fasten off.

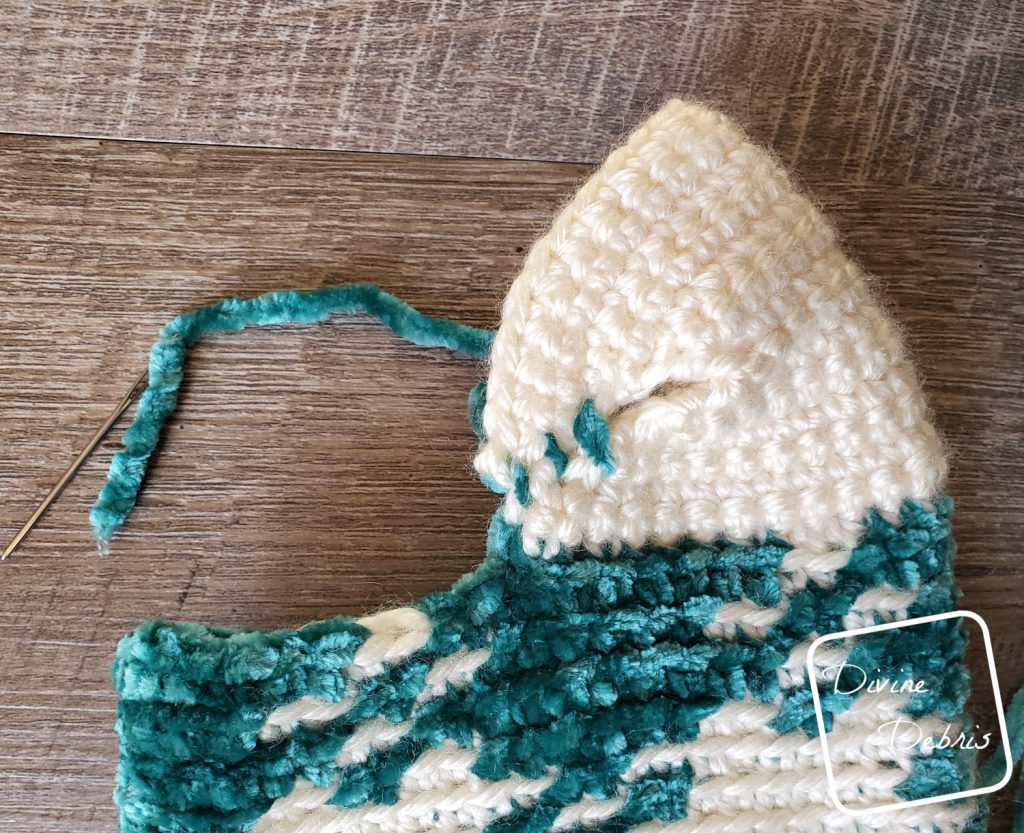
Seaming
Fold your Heel in half along Row 8, lining up Rows 1 – 7 with Rows 9 – 15 (7 rows) and seam the row ends together in your preferred method of seaming. Repeat on the other side of the Heel.
Fasten off, weave in your ends.

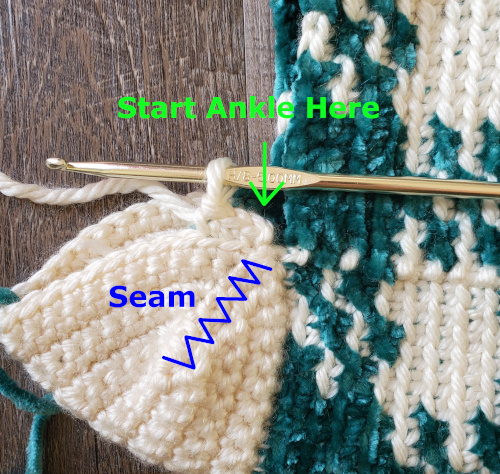

Ankle
Note:
- The following directions will only tell you what color (ie: Color A, Color B, etc…) and the number in the parentheses tells you how many stitches to make.
- The rnds 15 – 30 are worked into the BLO. Slip st into both loops on the join to help keep your seam straight.The first st is always worked into the same st as the join.
- For rnd 31 you will work into the BLO for the 24 sts of the Heel and then into the 24 sts of the Arch before joining at the end of the rnd.
Create a slip knot on your hook and start in the first st on the Row 15 of the Heel on the Back so that it lines up with the seam of your previous sections.
Rnd 31: A: Ch 1, *(6), B: (2), A: (2), B: (2),* repeat from * to * 3 more times, join – 48 sc
Rnd 32: A: Ch 1, (8), B: (2), *A: (10), B: (2),* repeat from * to * twice more, A: (2), join – 48 sc
Rnds 33 – 34: repeat rnds 31 – 32, once.
Rnd 35: A: Ch 1, *(2), B: (2), A: (2), B: (6),* repeat from * to * 3 more times, join – 48 sc
Rnd 36: B: Ch 1, (2), A: (2),* B: (10), A: (2),* repeat from * to * twice more, B: (8), join – 48 sc
Rnds 37 – 38: repeat rnds 35 – 36, once.
Rnds 39 – 54: repeat rnds 31 – 38, twice.
Fasten off color A.
Cuff
Note:
- The following directions rnds feature a turn at the beginning of the rnd. This is for added texture.
- The Cuff is made tall and then you fold it over itself down toward the Toe.
Rnd 55: B: Ch 1, sc into the same st as join and into the next 47 sts, join – 48 sc
Rnds 56 – 73: Ch 1, turn, sc into the next 48 sts, join – 48 sc
Fasten off, weave in your ends.


Jen
Tuesday 26th of December 2023
I love this pattern! The only thing I did differently is I tweaked it a bit so the seam lined up right on the edge of the stocking. That way it can be hung facing either direction! Thank you for sharing your talent!
Lindsey Lorio
Thursday 9th of December 2021
Love the pattern! I’m making a set of them for my family and they are turning out great. I’m using Caron simply soft with a 5 mm hook.
Maisy
Sunday 21st of November 2021
Oh gosh… I meant stocking 😂
Maisy
Sunday 21st of November 2021
I really want to make this for my sons actual Christmas stalking! I was wondering if it is functional for this purpose? If so do you have any recommendations how to make it slightly larger? Thank you in advance such a beautiful pattern!
Divine Debris
Monday 22nd of November 2021
It's functional but really only holds little hings. If you want to make it bigger you can use a thicker yarn and that would probably make it bigger and sturdier.
I hope that helps <3
-Amber
Sarah Spears
Wednesday 25th of November 2020
I’ve tried 5 times but the arch never lines up right. I’ve triple checked my count and it’s always a stitch off. Any help?
Divine Debris
Wednesday 25th of November 2020
Hi! Can you explain how the arch is off? If your gingham isn't lining up, make sure you're working into the BLO and the slip st into both loops at the end of the row. And make sure your Toe section is correct and that you're not working into the slip st. Hope that helps. :)