Hey everyone! How are you doing this week?
I’m both full of anxiety and fear about what’s coming this year but my hubs and I are preparing well so far that I’m also feeling really good about things. Being a person is so exhausting, right? We can be full of conflicting emotions and that’s so messy! But in a beautiful way, ya know? I’m dreading change and all that comes with it but I’m also feeling so good about new opportunities! I hope you’re approaching this week with an excited reserve *hug*
So, this week’s design is a bit silly. I have other beer designs, like a Mug of Beer or Glass of Pilsner, or which I release around St. Patrick’s Day but work for any time use. 😀 My hubs are beer fans, we like to travel and seek out fun beers to drink so I love a good beer themed design.
You can purchase an ad-free pdf of this pattern in my Ravelry shop. This purchase helps me to make patterns week after week.
A big thank you to Jill, Leslie, Helen, & Stacey for being my new patrons on Patreon!
Learn how you can become a patron here. If you’ve wanted to sign up, better do it sooner rather than later – the $1 tier is almost full!
Materials
- US G (4.00 mm) crochet hook
- Aran/ medium/ size #4 weight yarn
- approx 4 oz. / 113 yards
- I used Caron One Pound
- Yarn needle
- Ami stuffing
Gauge
- 4″ = 14 rows x 15 scs
Terms/ stitches
- RS: right side (side that faces out)

- Ch: chain
- St: stitch
- Slip st: slip stitch
- Sc: single crochet
- Sc2tog: single crochet 2 sts together
Notes
- This pattern is worked in 4 pieces, the front, the back, and the handle (x2). All the pieces are worked individually and then the front and the back pieces are secured together, and the handle is sewn to the side. All 4 pieces are worked back and forth in rows, with a turn at the beginning/ end of the row.
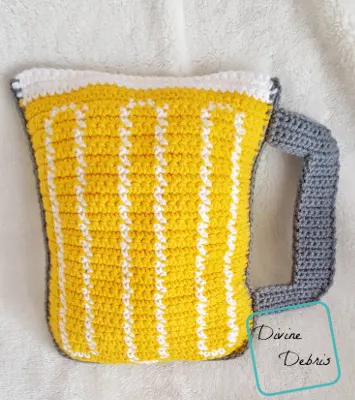
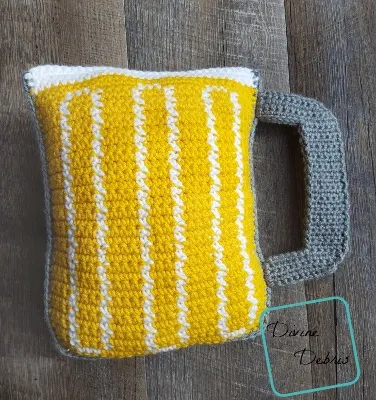
- There are 2 options below for the front/ back portion – one with the pattern that mimics the lines on a mug and one that’s plain.
- The ch 1 at the beginning of the row does not count as a stitch.
- All of the stitches in this pattern are single crochets. The directions for the body will only tell you what color (ie: Color A, Color B, etc…) and the number in the parentheses tells you how many single crochets to make.
- The instructions that read (2x + a number) or (a number + 2x) mean that you sc twice into the first or last st of the row and work scs in the number of stitches indicated.
- You’ll need to know how to create a slipknot on your hook for this pattern.
- In the example, the color A yarn is carried behind colors B – E using bobbins like this post by HodgePodge Crochet. If tapestry is confusing to you, you might want to check out this helpful Moogly video on tapestry.
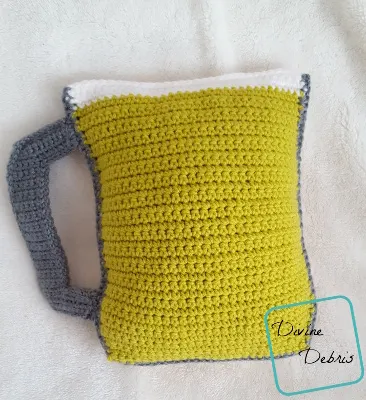
- Color A is yellow (Caron One Pound in Sunflower), color B is white (Caron One Pound in white), and color C is gray (some misc color).
Finished measurements
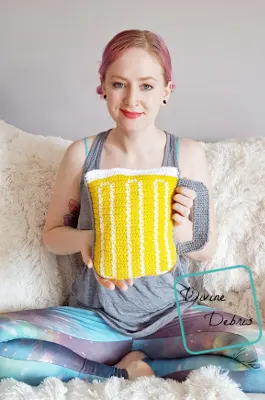
- Height: 11.5″ (body)
- Diameter: 8″ (body)
Pattern instructions
– Front/ Back (with mug detail) –
Row 1: Ch 28, sc into the second ch from the hook and across – 27 scs
Note:
- The following directions will only tell you what color (ie: Color A, Color B, etc…) and the number in the parentheses tells you how many stitches to make.
Row 2: A: Ch 1, turn, (27) – 27 scs
Row 3: A: Ch 1, turn, (2x + 2), B: (3), A: (6), B: (3), A: (6), B: (3), A: (2 + 2x) – 29 scs
Row 4: A: Ch 1, turn, (3), B: (1), A: (3), B: (1), A: (4), B: (1) A: (3), B: (1), A: (4), B: (1), A: (3), B: (1), A: (3) – 29 scs
Row 5: A: Ch 1, turn, (2x + 2), B: (1), A: (3), B: (1), A: (4), B: (1) A: (3), B: (1), A: (4), B: (1), A: (3), B: (1), A: (2 + 2x) – 31 scs
Rows 6 – 34: A: Ch 1, turn, (4), B: (1), A: (3), B: (1), A: (4), B: (1) A: (3), B: (1), A: (4), B: (1), A: (3), B: (1), A: (4) – 31 scs
Row 35: A: Ch 1, turn, (5), B: (3), A: (6), B: (3), A: (6), B: (3) A: (5) – 31 scs
Fasten off color B.
Rows 36 – 37: A: Ch 1, turn, (31) – 31 scs
Fasten off color A.
Rows 38 – 39: B: Ch 1, turn, (31) – 31 scs
Fasten off.
– Front/ Back (plain) –
Row 1: Ch 28, sc into the second ch from the hook and across – 27 scs
Row 2: A: Ch 1, turn, turn, sc into the next 27 sts – 27 scs
Row 3: A: Ch 1, turn, sc twice into the first st, sc into the next 25 sts, sc twice into the last st – 29 scs
Row 4: A: Ch 1, turn, sc into the next 29 sts – 29 scs
Row 5: A: Ch 1, turn, sc twice into the first st, sc into the next 27 sts, sc twice into the last st – 31 scs
Rows 6 – 37: A: Ch 1, turn, sc into the next 31 sts – 31 scs
Fasten off color A.
Rows 38 – 39: B: Ch 1, turn, sc into the next 31 sts – 31 scs
Fasten off.
– Securing –
Top: With color B, hold both the front and back pieces together and sc across the top/ row 39 of the two pieces (this way you can have a white top) – 31 scs
Fasten off, weave in all your ends.
Sides: Create a slip knot on your hook with color C (gray) and starting on the edge of the top row, sc down the row ends all the way down the side (40 scs), rotate your whole piece, sc across the bottom of your original ch row (27 scs), rotate your whole piece, sc down the row ends (40 scs), slip st into the first st of your “top” row – 107 scs
Note: Make sure to stuff your ami before you finish your “sides” row.
– Handle –
(make 2)
Row 1: C: Ch 11, sc into the second ch from the hook and into the next 9 – 10 scs
Row 2: C: Ch 1, turn, sc into the next 10 sts, sc twice into the last st – 11 scs
Row 3: C: Ch 1, turn, sc twice into the first st, sc into the next 11 sts – 12 scs
Row 4: C: Ch 1, sc into the next 12 sts, sc twice into the last st – 13 scs
Row 5: C: Ch 1, turn, sc into the next 6 sts (this will leave 7 sts unworked) – 6 scs
Row 6 – 28: C: Ch 1, turn, sc into the next 6 sts – 6 scs
Row 29: C: Ch 1, turn, sc into the next 6 sts, ch 8 – 6 scs, 8 chs
Row 30: C: Ch 1, turn, sc into the second ch from the hook, sc into the next 6 chs and 6 sts – 13 scs
Row 31: C: Ch 1, turn, sc2tog the first 2 sts, sc into the next 11 sts – 12 scs
Row 32: C: Ch 1, turn, sc into the next 10 sts, sc2tog the next 2 sts – 11 scs
Row 33: C: Ch 1, turn, sc2tog the first 2 sts, sc into the next 9 sts – 10 scs
Fasten off, leave a long tail (you can use this tail to secure your handle to the mug).
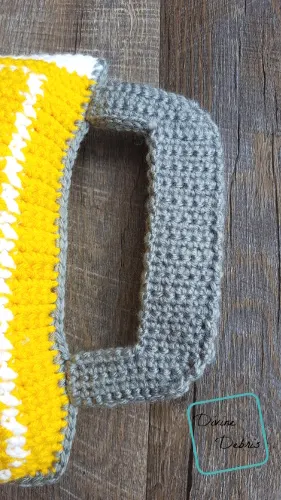
Hold your 2 handles together so they line up and sew 2 together (the 2 pieces create a more solid handle). When you’ve got the two pieces into 1 solid piece, line it up along one of the sides of your mug and sew it to the “sides” row.
Fasten off, weave in all your ends.
Tada! There it is. I hope you like it or get a kick out of it 🙂


Jeanetta
Tuesday 13th of March 2018
Mug of beer looks like so much fun .... make it bigger and hubby can carry it as a cushion to sit on at a picnic or sports event
Diane
Thursday 1st of March 2018
I found a perfect gift to a friend! hahaha She likes celebrating St Patricks day and definitely love beer.
Mug of Beer Amigurumi Pattern | It's Handmade
Thursday 1st of March 2018
[…] you love a good nuanced beer… but you can’t always be drinking a beer. This ami is for a fun St. Patrick’s decoration or for that beer-enthusiast in your life. It’s silly and can be made … Read […]
Pineapples Mug Cozy free crochet pattern | Divine Debris
Tuesday 27th of February 2018
[…] pineapples with Summer? I also wanted a fun and quick design this week, because last week’s Beer Mug Ami pattern is a lot. Depending upon how fast you crochet, it might take you a little or a long time to make. […]
ELIZABETH RIVERA
Tuesday 20th of February 2018
Adorable
Divine Debris
Tuesday 20th of February 2018
Thank you! :)