
Tapestry Easter Basket crochet pattern by DivineDebris.com
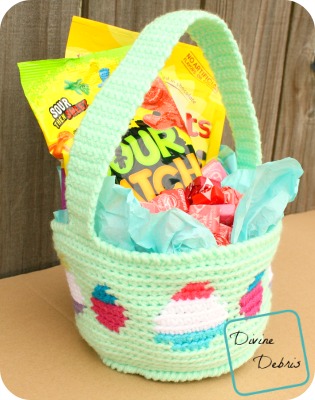
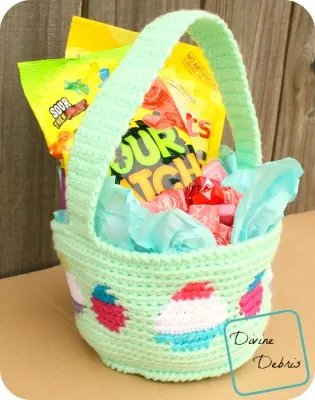
How’s it going today? I’m doing well, getting ready for Easter and that means baskets and eggs! I’ve already got the design ready for next week too, another Easter one, and I hope you like both of these holiday designs. They’re fun, silly, and give you a lot of creative control in terms of how you change up the colors, you can get wild or be subtle and the result will still be very lovely and look great on your table. This week I went with the traditional Easter design, a basket. Large and small eggs repeat around the basket’s sides and both the top and bottom are accented with twisted single crochets. I saw the twisted single crochet come through my FB feed from a Moogly post (link below in the terms/stitches) and I knew I had to make something with it. I like that it’s workable going the same direction you normally do, that made it so that I could add a couple single crochets in the final row w/ much work. I liked it and I hope you do too.
You can purchase an ad-free downloadable pdf of this pattern in my Ravelry shop.
Materials:
- US G (4.00 mm) crochet hook
- Worsted/ medium/ size #4 weight yarn
- 1.5 oz. / 92 yards
- I used Bernat Super Value and Red Heart Super Saver
- Yarn needle
Gauge:
- 4″ x 4″ = 16 scs x 16 rows
Terms/ stitches:
- Magic circle
- RS: right side (side that faces out)
- Ch: chain
- St: stitch
- Slip st: slip stitch
- Sc: single crochet
- TSC: twisted single crochet
Notes:
- This pattern is worked in the round, with a slip st into the first st from the last st.


- The ch 1 at the beginning of the row does not count as a stitch.
- Following the base, the sides are worked into the back loop only.
- If you don’t work this pattern in the back loop only, it might end up leaning. You can block the finished item to make it lean less.
- This pattern is worked from the bottom up
- All of the stitches in this pattern are single crochets, because of this the sides portion (where all the color changes are) only tells you how many stitches to do in what color, this is what the number in the parentheses means.
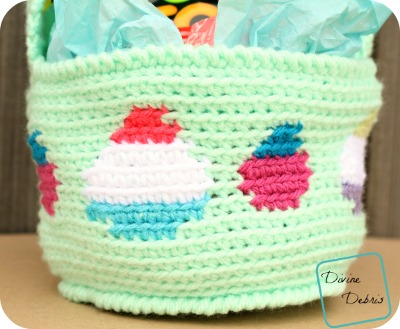
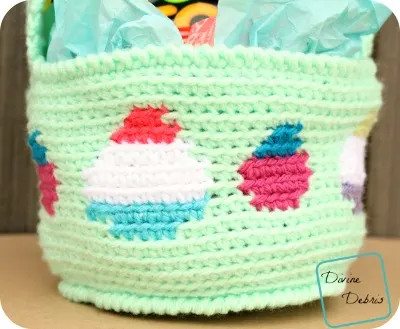
- Color A is mint, colors B, D, and F are the large egg, and colors C and E are the small egg.
- The eggs are created by dropping the yarn and pulling it back across to where you started.
- Also check out this post about tapestry crochet from Moogly, it’s helpful.
Finished measurements:
- Height: 4.5″ (sides), 11.5″ (handles pulled up)
- Diameter: 8″
- Base: 5″ in diameter
Tapestry Easter Basket crochet pattern by DivineDebris.com
Pattern instructions
Base:
Row 1: A: Create a magic circle, ch 1, sc 8 times into the circle, slip st into the first st – 8 scs
Row 2: Ch 1, sc twice into the same st as join and sc twice into the next 7 sts, slip st into the first st – 16 scs
Row 3: Ch 1, sc into the same st as join, sc twice into the next st, *sc once into the next st, sc twice into the next st,* repeat from* to * 6 more times, slip st into the first st – 24 scs
Row 4: Ch 1, sc once into the same st as join, sc once into the next st, sc twice into the next st, *sc once into the next 2 sts, sc twice into the next st,* repeat from * to * 6 more times, slip st into the first st – 32 scs
Row 5: Ch 1, sc once into the same st as join, sc once into the next 2 sts, sc twice into the next st, *sc once into the next 3 sts, sc twice into the next st,* repeat from * to * 6 more times, slip st into the first st – 40 scs
Row 6: Ch 1, sc once into the same st as join, sc once into the next 3 sts, sc twice into the next st, *sc once into the next 4 sts, sc twice into the next st,* repeat from * to * 6 more times, slip st into the first st – 48 scs
Row 7: Ch 1, sc once into the same st as join, sc once into the next 4 sts, sc twice into the next st, *sc once into the next 5 sts, sc twice into the next st,* repeat from * to * 6 more times, slip st into the first st – 56 scs
Row 8: Ch 1, sc once into the same st as join, sc once into the next 5 sts, sc twice into the next st, *sc once into the next 6 sts, sc twice into the next st,* repeat from * to * 6 more times, slip st into the first st – 64 scs
Row 9: Ch 1, sc once into the same st as join, sc once into the next 6 sts, sc twice into the next st, *sc once into the next 7 sts, sc twice into the next st,* repeat from * to * 6 more times, slip st into the first st – 72 scs
Row 10: Ch 1, sc once into the same st as join, sc once into the next 7 sts, sc twice into the next st, *sc once into the next 8 sts, sc twice into the next st,* repeat from * to * 6 more times, slip st into the first st – 80 scs
Row 11: Ch 1, sc into the BLO of the first st, sc into the BLO of the next 79 sts, slip st into the first st – 80 scs
Sides:
Note:
- Every row of the sides are worked into the back loop only.
- Every stitch in the sides portion of the pattern is a single crochet, because of this the directions only tell you what color (ie: Color A, Color B, etc…) and the number in the parentheses then tells you how many single crochets to make.
- Following the ch 1, the first st is worked into the same st as join.
(RS) Rows 12 – 15: A: Ch 1, (80), slip st into the first st – 80 scs
Row 16: A: Ch 1, (3), B: (5), *A: (15), B: (5),* repeat from * t0 * twice more, A: (12), slip st into the first st – 80 scs
Row 17: A: Ch 1, (1), B: (9), *A: (4), C: (4), A: (3), B: (9),* repeat from * to * twice more, A: (4), C: (4), A: (2), slip st into the first st – 80 scs
Rows 18 – 19: A: Ch 1, (1), D: (9), *A: (3), C: (6), A: (2), D: (9),* repeat from * to * twice more, A: (3), C: (6), A: (1), slip st into the first st – 80 scs
Row 20: A: Ch 1, (2), D: (7), *A: (5), E: (4), A: (4), D: (7),* repeat from * to * twice more, A: (5), E: (4), A: (2), slip st into the first st – 80 scs
Row 21: A: Ch 1, (3), F: (5), *A: (7), E: (2), A: (6), F: (5),* repeat from * to * twice more, A: (7), E: (2), A: (3), slip st into the first st – 80 scs
Row 22: A: Ch 1, (4), F: (3), *A: (17), F: (3),* repeat from * to * twice more, A: (13), slip st into the first st – 80 scs
Rows 23 – 25: A: Ch 1, (80), slip st into the first st – 80 scs
Row 26: A: Ch 1, tsc into the next 17 sts, sc into the next 6 sts, tsc into the next 34 sts, sc into the next 6 sts, tsc into the next 17 sts, slip st into the first st – 68 tsc, 12 sc
Fasten off, weave in all your ends.
Handles:
With color A, create a slip knot on your hook and sc into the first st sc of row 26 and into the next 5 sts – 6 scs
Rows 2 – 67: Ch 1, sc into the next 6 sts – 6 scs
Fasten off leaving a long tail and secure row 67 to the other 6 scs from row 26. Weave in all your ends.
Bottom detail:
Create a slip knot on your hook and begin in either stitch next to the seam, tsc or reverse sc into each of the un-used loops from row 11 (80 scs), slip st into the first st – 80 tscs
Fasten off, weave in all your ends.
Tada! There’s the fun Easter basket design I wanted to show everyone. I hope you get a chance to make it and play around with the colors. I wanted to make the larger eggs different colors so the design popped but you can do one color or more, it’s entirely up to you!
This post is linked to Hookin’ on Hump Day #139.