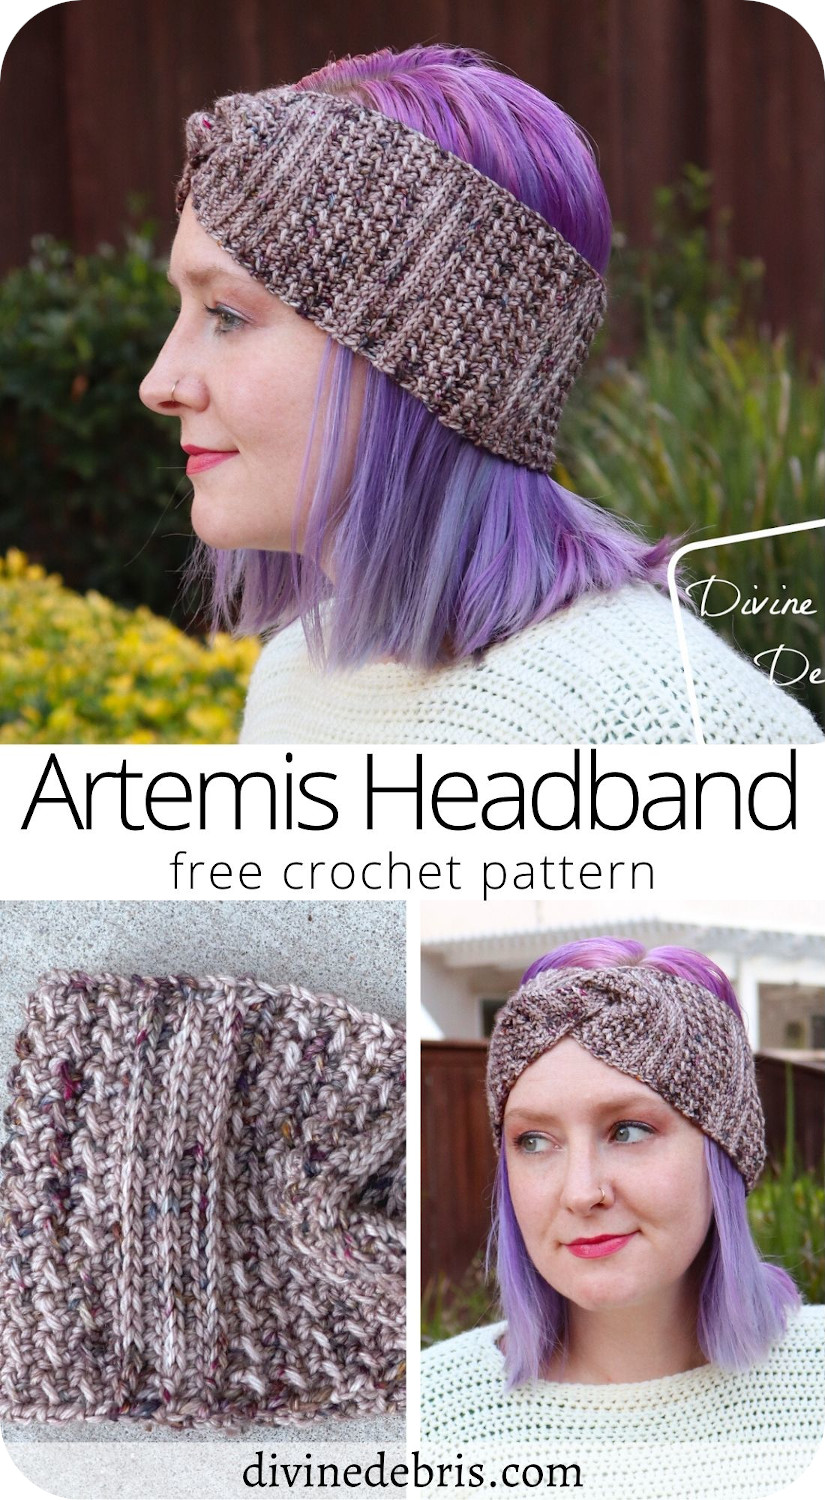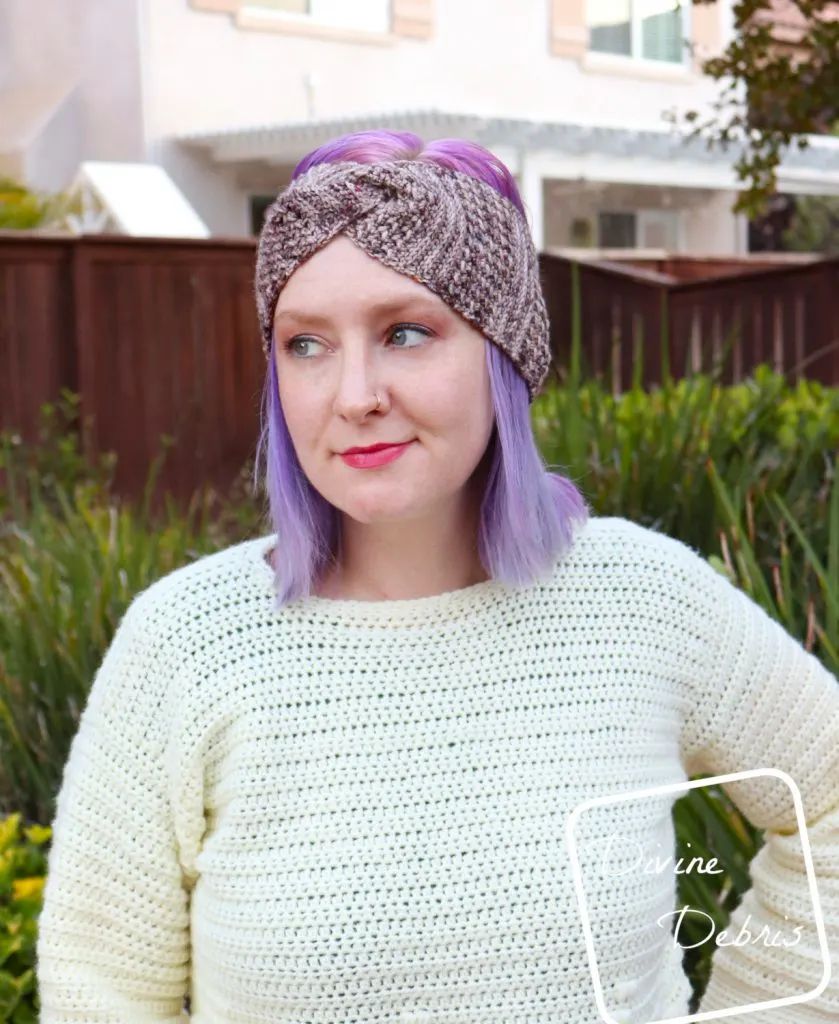
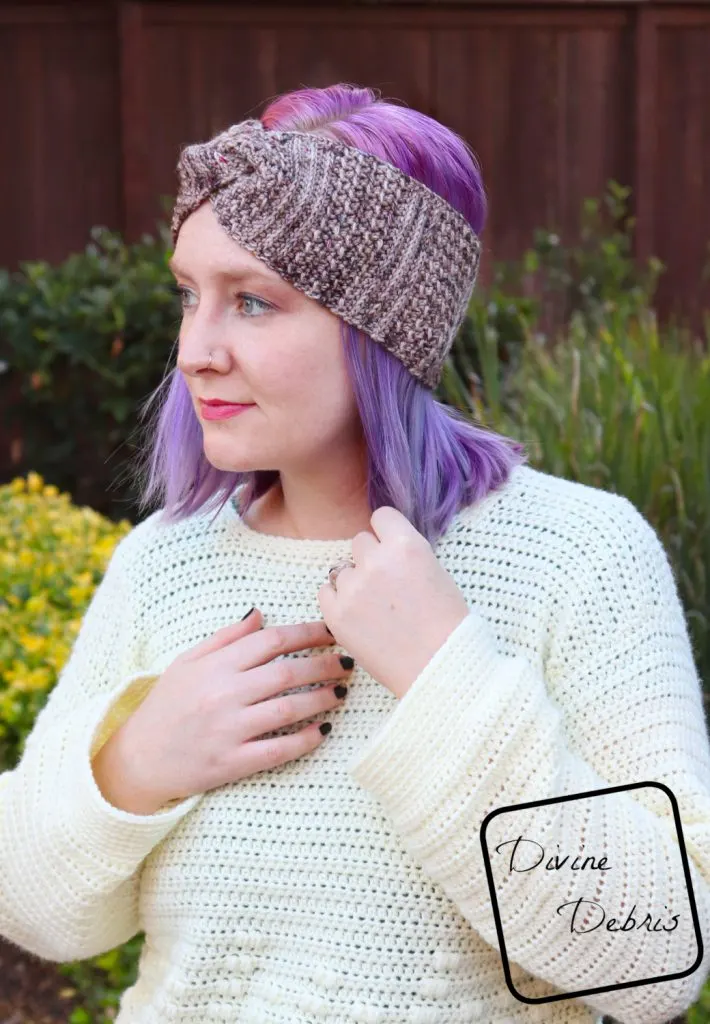
Is it just me or did this month fly by? I feel like I was just starting the month, looking forward to the cooler temps and thinking of pie. And now here we are, knee deep in sweaters and making lists for gifts. Luckily my Artemis Headband crochet pattern will be perfect for most of those things. 😀
This really is such an easy design. I wanted a step up from the Simple Twist Headband, which I really love, but I wanted more. I wanted more texture. I wanted it to be more dynamic (hello, that the yarn is doing that in huge amounts). And I wanted it to be eye-catching. Also, it’s still really easy. Like, you could make this in a day easy.
Just make sure you keep an eye on your slip sts. All through this pattern you are using slip stitches to create lots of texture, because this design is based on my Diana Line I use the crunch st/ slip st and hdc combo, but if you pull those stitches too tight you will not be able to work into them again. PS there will be another in the Artemis Line out next month if you like this design you’ll love that one.
Also, because there was some questions on the Simple Twist Headband‘s seaming, I wanted to make sure that I included a video at the bottom of this post. You want to make sure your seams all lines up so that if you were to cut down the center of the seam all your ends would look like an X. I can’t tell if that made sense or made things more confusing. Basically, just take the seaming slow and give it a try before giving up. It will work out, just try. 😛
Anyway. I hope you have a great holiday (if you celebrate) and a good rest of your November!
(this post contains affiliate links)


If you appreciate my weekly patterns I hope you’d consider purchasing an ad-free pdf of this pattern in my Ravelry shop.
Thank you Gail for becoming my newest patron on Patreon!

Materials
- US G (4.00 mm) crochet hook
- Size #3/ DK weight yarn
- 1 color
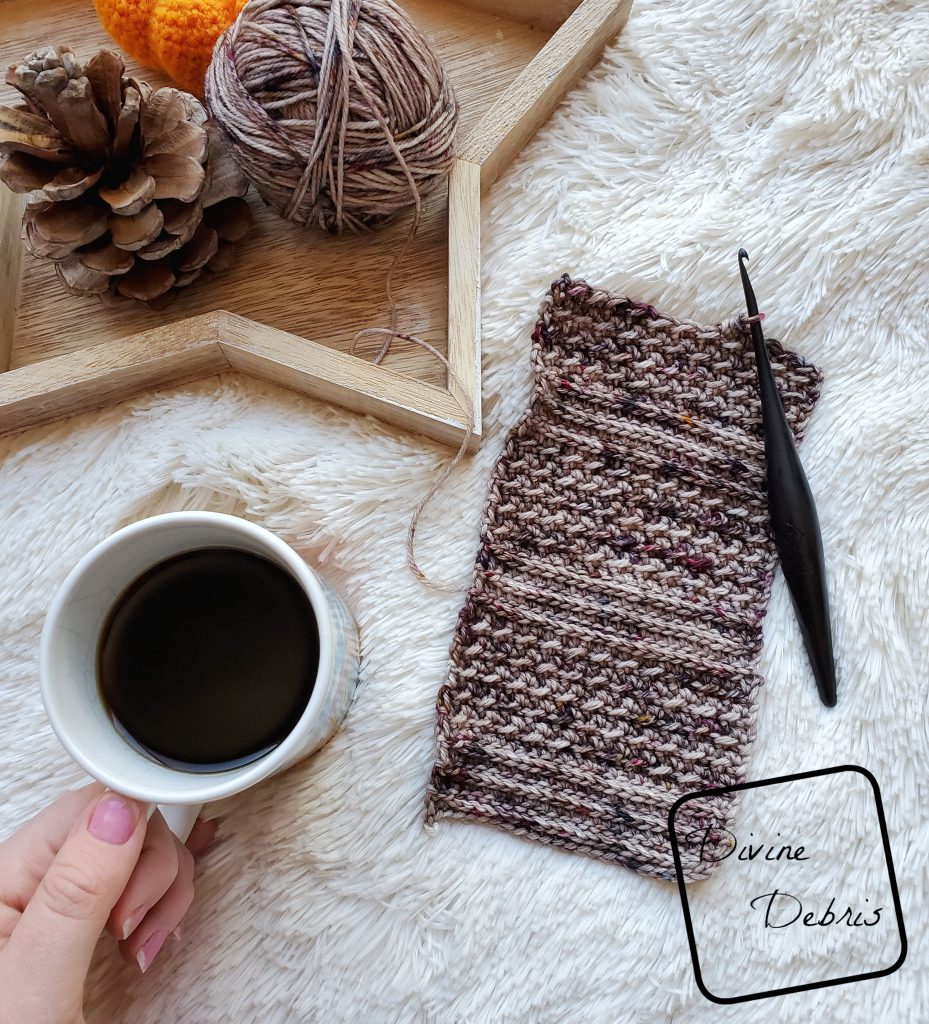
- I used Kt and the Squid’s Squid DK
- Needle that will weave in your ends
- Notions: Scissors, tape measure
Gauge
- 22 st (using Crunch St) x 22 rows = 4″


Terms/ Stitches used
- RS: right side
- Ch: chain
- St: stitch
- Slip st: slip stitch
- Hdc: half double crochet
Notes
- You will need to know how to work into the Back Third Loop (BTL) for this pattern. When looking at the you will have the 2 loops on top of the hdc (the V on top), lean the stitch towards you and will see the third loop that runs along the back of the stitch. This is the loop you will work into. This stitch is also known as the Camel Stitch. Please note that when you work this stitch you will be looking at the back of the previous row’s hdc, so the third loop will be facing you.
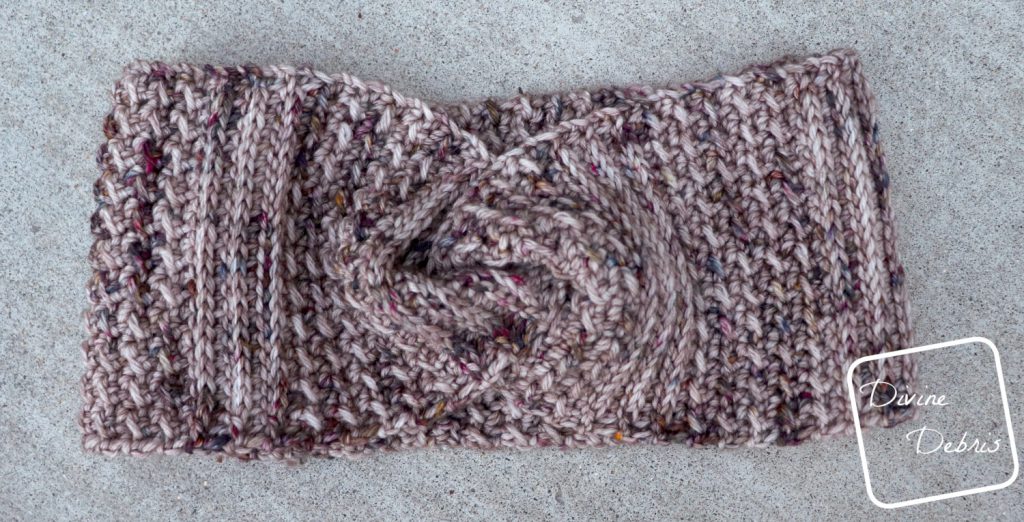
- This pattern is worked in 1 piece (the Body), in back and forth rows with a turn at the beginning/end of the row. The ends are then seamed up to create the twist.
- The ch-1 at the beginning of the row does not count as a stitch. The ch-1 is used in place of the traditional ch-2 to eliminate extra space on the beginning of the row. Feel free to use the ch-2 if you prefer.
- Make your ch-1 approx the same high as a hdc.
- This design is very easy to make taller, just chs to the beginning ch row. And to make it bigger or smaller in diameter, just add or subtract rows.
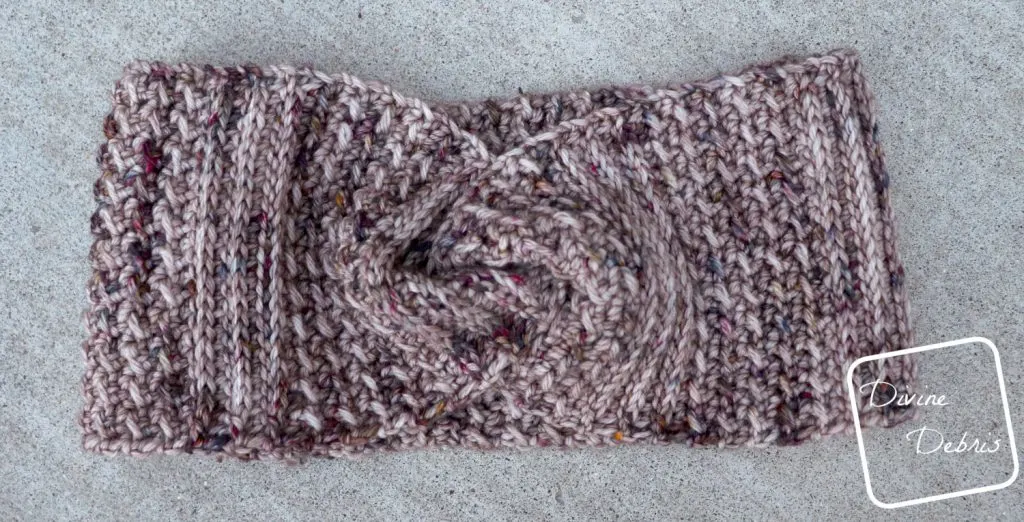
- The size in the photos is 22″ and was made using Kt and the Squid’s Squish DK in Bryna.
Artemis Headband Crochet Pattern Finished product dimensions (measurements may vary by gauge and yarn used)
| 20″ | 22″ |
| Height: 4.25″ Diameter: 10″ approx 1.5 oz/ 111 yds | Height: 4.25″ Diameter: 11″ approx 2 oz/ 146 yds |
Artemis Headband Crochet Pattern Instructions
(RS) Row 1: Ch 24, turn, hdc into the 3rd ch from the hook (the skipped sts count as a hdc) and into the next 21 sts – 23 hdc
Row 2: Ch 1, turn, slip st into the BTL of the next 23 sts – 23 slip st
Please note: the BTL will be the 3rd loop on the back of the previous row’s hdcs here and throughout
Row 3: Ch 1, turn, hdc into the next 23 slip sts – 23 hdc
Row 4: Ch 1, turn, slip st into the BTL of the next 23 sts – 23 slip st
Rows 5 – 6: repeat rows 3 – 4, once.
Row 7: Ch 1, turn, slip st into the first slip st, *hdc into the next slip st, slip st into the next slip st,* repeat from * to * 10 more times – 12 slip st, 11 hdc
Row 8: Ch 1, turn, hdc into the first st, *slip st into the next st, hdc into the next st,* repeat from * to * 10 more times – 12 slip st, 11 hdc
Row 9: Ch 1, turn, slip st into the first st, *hdc into the next st, slip st into the next st,* repeat from * to * 10 more times – 12 slip st, 11 hdc
Row 10: repeat row 8
Rows 11 – 16: repeat rows 9 – 10
Row 17: Ch 1, turn, hdc into the next 23 sts – 23 hdc
Row 18: Ch 1, turn, slip st into the BTL of the next 23 sts – 23 slip st
Row 19: Ch 1, turn, hdc into the next 23 slip sts – 23 hdc
Row 20: Ch 1, turn, slip st into the BTL of the next 23 sts – 23 slip st
Rows 21 – 22: repeat rows 19 – 20, once.
Rows 23 – 102: repeat rows 7 – 22, 5 times.
For size 20″ fasten off here leaving a long tail.
For size 22 only:
Rows 103 – 112: repeat rows 7 – 16.
Fasten off leaving a long tail.

Seaming
Fold Row 102 (122) in half and line up the first 11 and last 11 stitches. Using your preferred method of seaming, use the tail you leftover and seam the 11 sts on both sides of Row 102 (122) together. You will have one unworked stitch at the fold point.
Make sure you don’t have a twist in the band at all, the back needs remain flat. With the RS facing you, start in the first 2 sts seamed after the fold on Row 102 (122), sew the first 1 sts from Row 1 to the seam. Continue wrapping around and seaming the first 11 sts of Row 1 to the seam from Row 102 (122). Flip the seam of Row 102 (122) inside out and sew the last 11 sts to the other side (wrong side) of the side of the seam you started on. Weave in all your ends.
Below are some photos to help your seaming followed by a video if that’s preferred.
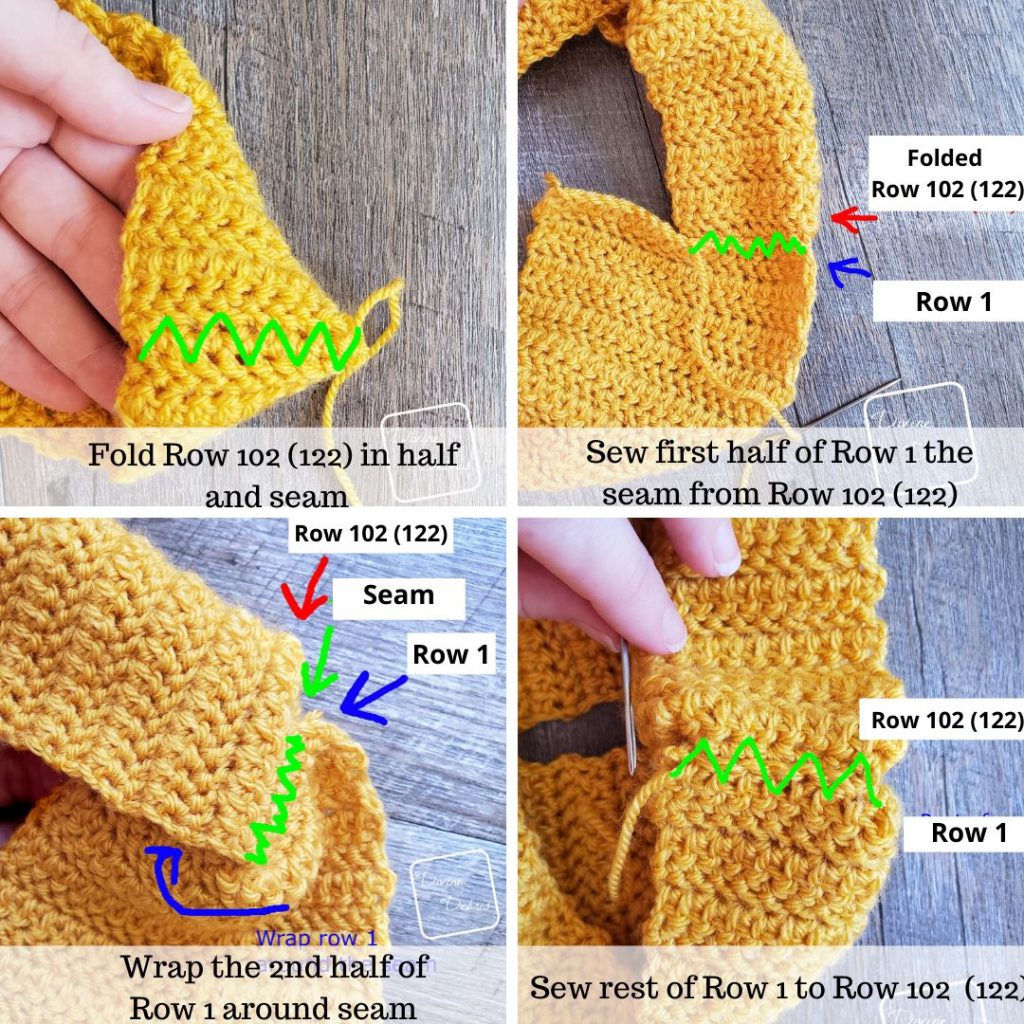

Here’s a video to help seaming