
 Materials:
- US I (5.50 mm) crochet hook
- Aran weight/ medium/ size #4 yarn
- 3.5 oz/ 170 yds
- At least 3 colors
- I used Vanna’s Choice
- Tapestry needle
Gauge:
- 4” = 14 dcs x 7 rows
Terms/stitches used:
- RS: right side
- Ch: chain
- St: stitch
- Slip st: slip stitch
- Sc: single crochet
- Spike sc: spike single crochet
- Sc2tog: single crochet 2 stitches together
- Hdc: half double crochet
Notes:
- This hat is worked from the top down, in 2 sections – the main hat, which is worked in the round with a slip st into the first st from the last, and the triangle piece, which is worked back and forth in rows with a turn at the beginning/ end of the row. The triangle piece is created directly from the last row of the main hat and the then sewn to the main hat.
- The ch 1 at the beginning of the rows does not count as a stitch.
- You only turn on some rows. The turn gives your hat some texture.
The spike sc is also known as a long sc crochet. You work the sc into the space (and around the sc) from the previous row. - Your first hdc is into the same stitch as join in each row, unless otherwise specified.
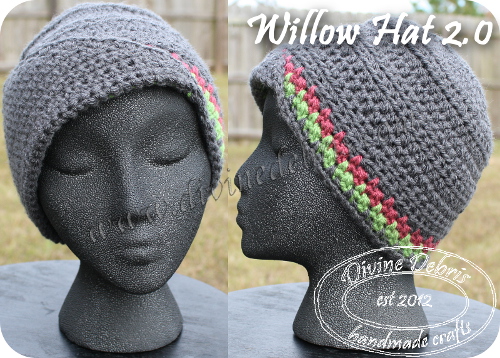
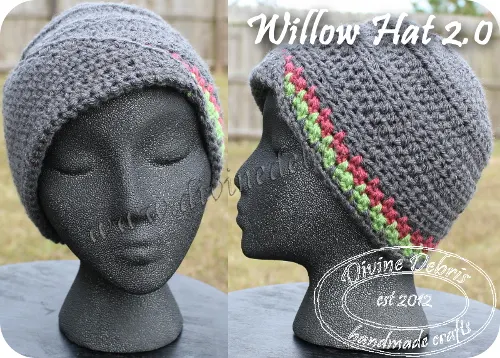
- In the photos, color A is gray, color B is pink, and color C is green. Vanna’s Choice yarn was used for all 3 colors.
- For more color, change to color B or C on row 45.
Finished product dimensions:
- Height: 8” – 8.5”
- Diameter: 11”
Pattern directions:
Row 1: A: Make a magic circle, ch 2 (does not count as a st), hdc 10 times into the circle, slip st into the first hdc – 10 hdcs
(RS) Row 2: Ch 1, hdc twice into each stitch around, slip st into the first hdc – 20 hdcs
Row 3: (wrong side) Turn, ch 1, hdc into the first st, hdc twice into the next st, *hdc into the next st, hdc twice into the next st,* repeat from * to * 8 more times, slip st into first hdc – 30 hdcs
Row 4: Ch 1, hdc into the first two sts, hdc twice into the next st, *hdc once into the next two sts, hdc twice into the next st,* repeat from * to * 8 more times, slip st into the first hdc – 40 hdcs
Row 5: Turn, ch 1, hdc into the first 3 sts, hdc twice into the next st, *hdc once into the next 3 sts, hdc twice into the next st,* repeat from * to * 8 more times, slip st into the first hdc – 50 hdcs
Row 6: ch 1, hdc into the first 4 sts, hdc twice into the next st, *hdc once into the next 4 sts, hdc twice into the next st,* repeat from * to * 8 more times, slip st into the first hdc – 60 hdcs
Row 7: Turn, ch 1, hdc into each st all the way around, slip st into first hdc – 60 hdcs
Row 8: Ch 1, hdc into each st all the way around, slip st into first hdc – 60 hdcs
Rows 9 – 16: Repeat rows 7 and 8 4 more times, including the turn every second row.
Row 17: Turn, ch 1, sc all the way around, slip st into first sc – 60 scs
You can fasten off color A here or you can drop it and pick it up again on row 22.
Row 18: B: Ch 1, sc into first st, spike sc into next st, *sc into next st, spike sc into next st,* repeat from * to * 28 more times, slip st into first sc – 30 scs, 30 spike scs
Row 19: Ch 1, spike sc into first st, sc into next st, * spike sc into first st, sc into next st,* repeat from * to * 28 more times, slip st into first spike sc – 30 spike scs, 30 scs
Fasten off color B.
Rows 20 – 21: C: Repeat rows 18 and 19 – 30 scs, 30 spike scs
Fasten off color C.
Row 22: A: Repeat row 18 – 30 scs, 30 spike scs
Do not fasten off from Row 22
Triangle piece:
Row 23: A: Ch 1, sc into the next 40 sts – 40 scs
Row 24: Turn, ch 1, sc2tog, sc into next 36 sts, sc2tog – 38 scs
Row 25: Turn, ch 1, sc2tog, sc into next 34 sts, sc2tog – 36 scs
Row 26: Turn, ch 1, sc2tog, sc into next 32 sts, sc2tog – 34 scs
Row 27: Turn, ch 1, sc2tog, sc into next 30 sts, sc2tog – 32 scs
Row 28: Turn, ch 1, sc2tog, sc into next 28 sts, sc2tog – 30 scs
Row 29: Turn, ch 1, sc2tog, sc into next 26 sts, sc2tog – 28 scs
Row 30: Turn, ch 1, sc2tog, sc into next 24 sts, sc2tog – 26 scs
Row 31: Turn, ch 1, sc2tog, sc into next 22 sts, sc2tog – 24 scs
Row 32: Turn, ch 1, sc2tog, sc into next 20 sts, sc2tog – 22 scs
Row 33: Turn, ch 1, sc2tog, sc into next 18 sts, sc2tog – 20 scs
Row 34: Turn, ch 1, sc2tog, sc into next 16 sts, sc2tog – 18 scs
Row 35: Turn, ch 1, sc2tog, sc into next 14 sts, sc2tog – 16 scs
Row 36: Turn, ch 1, sc2tog, sc into next 12 sts, sc2tog – 14 scs
Row 37: Turn, ch 1, sc2tog, sc into next 10 sts, sc2tog – 12 scs
Row 38: Turn, ch 1, sc2tog, sc into next 8 sts, sc2tog – 10 scs
Row 39: Turn, ch 1, sc2tog, sc into next 6 sts, sc2tog – 8 scs
Row 40: Turn, ch 1, sc2tog, sc into next 4 sts, sc2tog – 6 scs
Row 41: Turn, ch 1, sc2tog, sc into next 2 sts, sc2tog – 4 scs
Row 42: Turn, ch 1, sc2tog, sc2tog – 2 scs
Row 43: Turn, ch 1, sc2tog – 1 sc
Row 44: Turn, ch 1, sc – 1 sc (this row creates a better point)
The following row creates a clean edge around your triangle piece and your hat. You’re just creating a border along the finished rows.
Row 45: Ch 1, sc into the edge of rows 44 – 23, sc into the remaining sts from row 22, sc up the edge of rows 23 – 44, ch 1, slip st into first sc from this row – 64 scs
Finishing: Fasten off the yarn from row 45, if you leave a very long tail (measure how long you should make the tail by following the edge of your triangle and adding some) you can use it to secure the triangle to the hat. Fold the triangle along row 22 and secure the triangle to the hat using whatever method you prefer.
You may sell all finished products made from this pattern; however you may not share, sell, or distribute this pattern in any way, in whole or in part. I would greatly appreciate a link back to my shop or this pattern anytime you sell this item online.
You MAY NOT use any of the photos from this listing, or the ones contained in the pattern, to sell your item. You MUST take your own photos.
This pattern is in pdf form and includes full color photos.
Copyright @ Divine Debris 2012 – 2018. No part of this document may be reproduced or transmitted in any form by any means, electronic, mechanical, photocopying, or otherwise, without prior written permission from the author. Sales of finished product are permitted, but designer requests that you link back to pattern and credit Divine Debris with the original design under the Creative Commons Attribution-Share Alike license. If you have any questions, comments or concerns please contact info@divinedebris.com