
Hi there! How are you this week? I’ve been a bit of a mess, had to travel for a thing last week and it threw my whole schedule out of wack – you should have seen me, I was running around getting things together and planning this week’s new releases while also trying to book a flight. It was probably a pretty impressive moment for me, someone who describes themselves as a bit of a mess. 😀
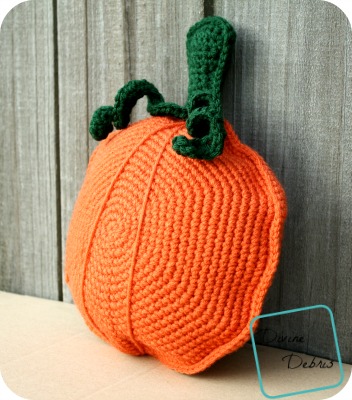
So… if you follow me on Facebook you probably know I am SO ready for Fall. I cannot wait! I love the colors, the smells, the food, the decorations… all of it! I want it all. That’s the reason that you get a pumpkin, today the first day of August. I hope I’m not the only one that’s read for pumpkins, sweaters, and cups of cocoa.
If you appreciate my weekly patterns, I hope you consider purchasing the pdf for this pattern to help me continue to bring you new free patterns.
Thank you to all my Patreon supporters.
Materials
- US G (4.00 mm) crochet hook
- Worsted/ medium/ size #4 weight yarn
- 3.0 oz. / 185 yards
- At least 2 colors
- I used Loops and Threads Impeccable Solids
- Yarn needle
- Amigurumi stuffing 2 – 3 oz
Gauge
- 4″ = 16 scs x 16 rows


Terms/stitches used
- Magic circle
- Ch: chain
- St: stitch
- Slip st: slip stitch
- Sc: single crochet
- Sc2tog: single crochet 2 sts together
- Hdc: half double crochet
- Picot
Notes
- The ch 1 at the beginning of the row does not count as a stitch.
- This pattern is worked in 3 sections (2 pieces each) – the pumpkin (which are worked in the round), the stem (which is worked back and forth), and the tendrils (which are worked back and forth).
- The sides of the pumpkin and the sides of the stem are made separately, sc-ed together (stem to stem, pumpkin to pumpkin), and then you sew the stem to the top of the pumpkin. Go about 75% of the way closed when you’re sc-ing the pieces together, stuff them with ami stuffing, before closing it the rest of the way.
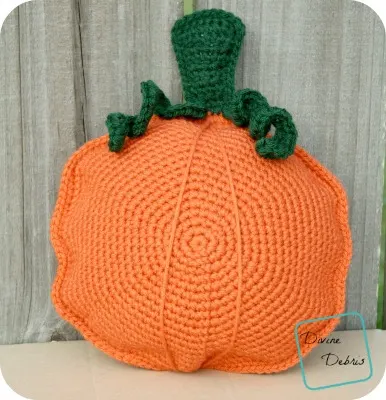
- Color A is orange and color B is green in the photos.
Finished directions
- Height: 11.25″ – 11.5″
- Width: 9.25″ – 9.5″
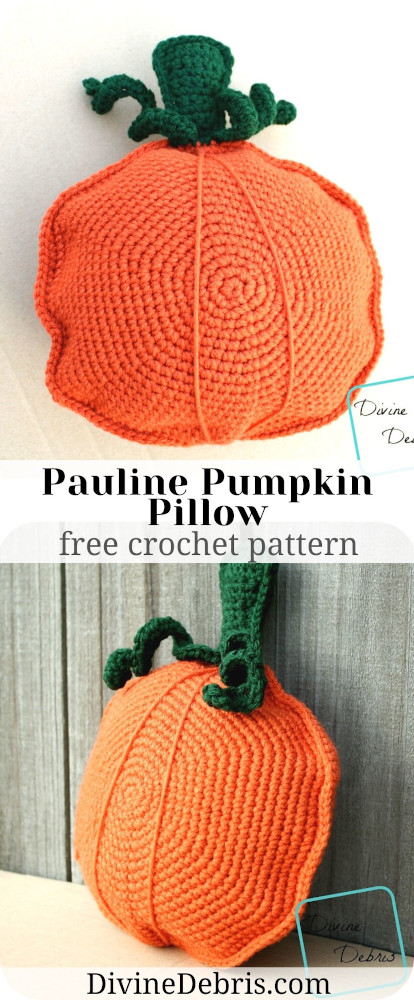
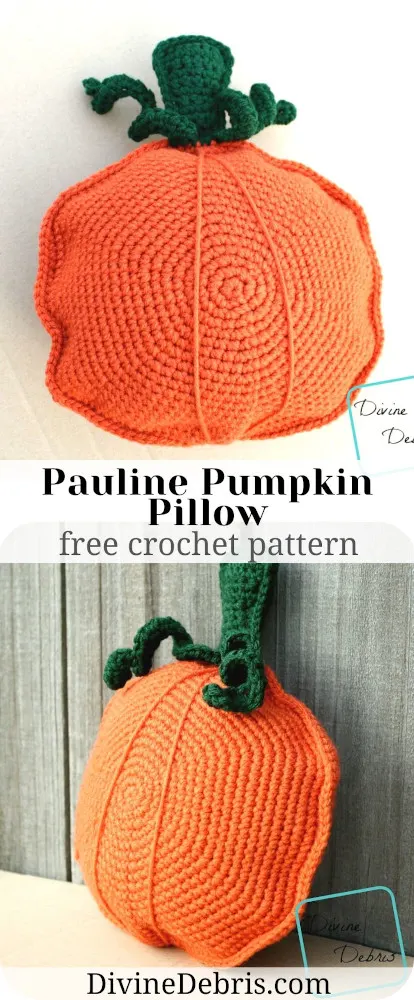
Pauline Pumpkin Pillow pattern instructions
-Pumpkin-
(make 2)
(RS) Row 1: A: Create a magic circle, ch 1, 2c six times into the circle, slip st into the first st – 6 scs
Row 2: Ch 1, sc twice into the first st, *sc twice into the next st,* repeat from * to * 4 more times, slip st into the first st – 12 scs
Row 3: Ch 1, sc twice into the first st, sc into the next st, *sc twice into the next st, sc into the next st,* repeat from * to * 4 more times, slip st into the first st – 18 scs
Row 4: Ch 1, sc twice into the first st, sc into the next 2 sts, *sc twice into the next st, sc into the next 2 sts,* repeat from * to * 4 more times, slip st into the first st – 24 scs
Row 5: Ch 1, sc twice into the first st, sc into the next 3 sts, *sc twice into the next st, sc into the next 3 sts,* repeat from * to * 4 more times, slip st into the first st – 30 scs
Row 6: Ch 1, sc twice into the first st, sc into the next 4 sts, *sc twice into the next st, sc into the next 4 sts,* repeat from * to * 4 more times, slip st into the first st – 36 scs
Row 7: Ch 1, sc twice into the first st, sc into the next 5 sts, *sc twice into the next st, sc into the next 5 sts,* repeat from * to * 4 more times, slip st into the first st – 42 scs
Row 8: Ch 1, sc twice into the first st, sc into the next 6 sts, *sc twice into the next st, sc into the next 6 sts,* repeat from * to * 4 more times, slip st into the first st – 48 scs
Row 9: Ch 1, sc twice into the first st, sc into the next 7 sts, *sc twice into the next st, sc into the next 7 sts,* repeat from * to * 4 more times, slip st into the first st – 54 scs
Row 10: Ch 1, sc twice into the first st, sc into the next 8 sts, *sc twice into the next st, sc into the next 8 sts,* repeat from * to * 4 more times, slip st into the first st – 60 scs
Row 11: Ch 1, sc twice into the first st, sc into the next 9 sts, *sc twice into the next st, sc into the next 9 sts,* repeat from * to * 4 more times, slip st into the first st – 66 scs
Row 12: Ch 1, sc twice into the first st, sc into the next 10 sts, *sc twice into the next st, sc into the next 10 sts,* repeat from * to * 4 more times, slip st into the first st – 72 scs
Row 13: Ch 1, sc twice into the first st, sc into the next 11 sts, *sc twice into the next st, sc into the next 11 sts,* repeat from * to * 4 more times, slip st into the first st – 78 scs
Row 14: Ch 1, sc twice into the first st, sc into the next 12 sts, *sc twice into the next st, sc into the next 12 sts,* repeat from * to * 4 more times, slip st into the first st – 84 scs
Row 15: Ch 1, sc twice into the first st, sc into the next 13 sts, *sc twice into the next st, sc into the next 13 sts,* repeat from * to * 4 more times, slip st into the first st – 90 scs
Row 16: Ch 1, sc twice into the first st, sc into the next 14 sts, *sc twice into the next st, sc into the next 14 sts,* repeat from * to * 4 more times, slip st into the first st – 96 scs
Row 17: Ch 1, sc twice into the first st, sc into the next 15 sts, *sc twice into the next st, sc into the next 15 sts,* repeat from * to * 4 more times, slip st into the first st – 102 scs
Row 18: Ch 1, sc twice into the first st, sc into the next 16 sts, *sc twice into the next st, sc into the next 16 sts,* repeat from * to * 4 more times, slip st into the first st – 108 scs
Row 19: Ch 1, sc into the same st as join and into the next 10 sts, sc twice into the next st, *sc into the next 7 sts, sc twice into the next st,* repeat from * to * twice more time, sc into the next 36 sts, sc twice into the next st, *sc into the next 7 sts, sc twice into the next st,* repeat from * to * twice more, sc into the next 11 sts – 116 scs
Row 20: Ch 1, sc into the same st as join and into the next 18 sts, *sc twice into the next st, sc into the next 8 sts,* repeat from * to * twice more, sc twice into the next st, sc into the next 22 sts, sc twice into the next st, *sc into the next 8 sts, sc twice into the next st,* repeat from * to * twice more, sc into the next 19 sts – 124 scs
Fasten off, weave in your ends.
Stem
(make 2)
Row 1: B: Ch 5, sc into the second ch from the hook and across – 4 scs
Rows 2 – 4: Ch 1, turn, sc across – 4 scs
Row 5: Ch 1, turn, sc twice into the first st, sc into the next 2 sts, sc twice into the last st – 6 scs
Rows 6 – 7: Ch 1, turn, sc acros – 6 scs
Row 8: Ch 1, turn, sc twic einto the first st, sc into the next 4 sts, sc twice into the last st – 8 scs
Rows 9 – 10: Ch 1, turn, sc into the next 8 sts – 8 scs
Fasten off, weave in your ends.

Tendrils:
The tendrils on this pumpkin are the same ones from the Fun Fall Pumpkins pattern. You can also use the tendril pattern I posted for my Pumpkin Wall Decoration.
Row 1: Use H (4.50 mm) hook to ch 15, switch to G (4.00 mm) hook to ch 3, create a picot with the final ch 3, and hdc 3 times into the next st, *hdc twice into the next st, hdc 3 times into the next st,* repeat from * to * the rest of the way across – 38 hds
Leave a long tail, use that to secure the tendril to the pumpkin stem. The tendrils are going to want to be all tight and close to each other, just give them a tug from the picot to add length.
Assembly
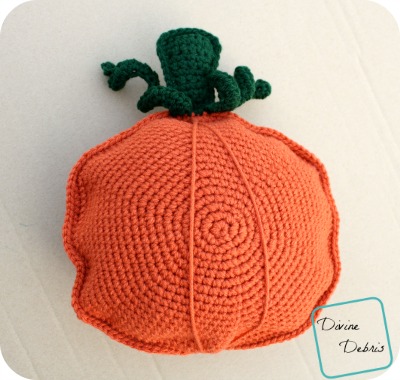
Lay the wrong sides of your two pumpkins together and line up the increases/ seam to help you make sure it all fits together. Staring at the seam (so that you only have 1 seam), sc into the BOTH pumpkin pieces all the way around both row 20s. Before you get all the way around, be sure to stuff your pumpkin with ami stuffing, and then close it up. Leave a long tail (maybe 26″) or cut a new piece of yarn about 26″ long and weave your yarn through your yarn needle and start at the center of the bottom. Pull your yarn and needle through a center stitch on the bottom (it doesn’t have to be perfect), go through one of the stitches in the center of the top (again, it doesn’t have to be perfect) and then go back through the bottom stitch you began in on the back of the pillow, pull the string a little tight around the pumpkin to make the edges pucker a bit. Repeat pulling your yarn from the bottom to the top on the front and top to bottom on the back at least once more. If you want to catch a stitch in the middle of the pumpkin to keep the string where it’s supposed to be, that’s fine. Weave and trim your ends.
Lay your two pieces of your stems together and line up the corners, sc around the edge of BOTH pieces to secure them together, pausing 75% of the way to stuff a little bit of ami stuffing into it before closing your stem. Attach the stem to the top of your pumpkin in your preferred manner, I just used a whip-stitch. Add tendrils to the outer edges where your stem meets your pumpkin.
Tada, there it is! I hope you like this pumpkin, I kinda want to make a REALLY big one now but… alas, that will have to wait.
See ya next week.
This post is linked to Hookin’ on Hump Day #148.
Emily
Wednesday 2nd of August 2017
This is such a cute idea! I love the look as just a pumpkin, but could see these making perfect jack-o-lanterns with some applique faces! Thanks for sharing.
Divine Debris
Thursday 3rd of August 2017
Thank you! :D I'm glad you like it.